Choose your server

Changelog

Clock Update (27 Apr 2026)

Improvements

  • Guests / Rooming List Import – AI Assistant. We’ve added a new experimental feature that uses AI to simplify the processing of event rooming lists. Until now, after pasting text from an email or a file from a partner, manual editing was required to meet import requirements—guest names must come first, there must be an “@” for children and their ages, rooms must be separated by a blank line, etc. Now this processing can be performed automaticallyby the new AI assistant:
    • Enter the text as usual and click the rightmost button above the field.
    • Wait for processing – The AI assistant will convert the text according to the import requirements.
    • Review the result carefully. Keep in mind that the AI may make mistakes. At the top, you will see comments and ambiguities that arose during processing.
    • You must select the field for the number of guest names (one, two, or three names).
    • Continue the process as before.

Currently, this feature is only available during import and cannot be used when updating the rooming list.

  • City Tax – varies by Room Type.If your hotel has different Room Types (rooms, apartments, villas) with different City Tax rates, you can now use the new City Tax structure. Instead of a single tax rate, the system now supports multiple rates. Each tax rate is defined in the same way as before, but now has a name for easier identification. When creating more than one tax rate:
    • Select which will be the default. It will be used:
      • if no specific tax rate has been selected for a given room type;
      • if the calculation is made without a rate (only with a manual price);
    • Selecting a default tax is mandatory. If not specified, it will not be included in the calculations. This applies mainly to newly created accounts—no action is required for existing ones.
    • For room types with different tax rates, a new field has been added to the room type edit screen where you can select the appropriate rate.

Important: The amount of the City Tax is determined by the room type specified in the rate. If there is no rate in the booking and only a manual price is used, the system will apply the default tax.

  • WBE – display of total price for the stay. We have added a new setting in WBE: “Show 'Total Price' instead of 'Average price per night” (in the WBE rates subsection). When enabled, guests will see the total price for the entire stay instead of the average price per night. This display method is preferred by guests, as it gives them a clear idea of the final cost of the booking right from the initial screens—when selecting Room Types and rates.
  • Company contracts – deletion option. We have added the ability to delete contracts. A contract can only be deleted if it is not associated with any company.
  • Guest Messaging – new Liquid parameter. A new parameter has been added: Children Ages (booking.children_ages_str).
  • Event Document Templates – new Liquid parameter. A new parameter has been added:  Event – PAX (offer.event.persons).
  • Rate Management / Rates – improvements in Channel Manager – Rates. In the “Channel Manager - Rates” tab, you now have quick access to the rates used in the mapping with Booking.com. Using the Booking.com button, you can open all linked rates to edit or change prices.

Fixes

  • Rate and Availability – we improved the creation of bookings with a selected contact person to eliminate errors such as “Attempted to update a stale object…”, which slowed down operations and required a retry.
  • Worldline / SIX Payment – we revised the logic for re-redirection from 3DS, where a payment was not reflected in Clock PMS even though it was successful.
  • Folio Print – the "Gross" and "Net" columns are now hidden in the "Packaged by Dates / Qty" and "Packaged by Qty" views.
  • Events – BEO – we fixed an issue where prices in BEO were empty if the block rate lacked prices for all days of the event.
  • Booking charge routing – the Default Company/Agent Folio field did not reflect the manually set default folio in the company/agent.
  • Occupancy Forecast – when creating bookings, the default stay set in "Booking fields" was not taken into account.
  • Arrivals/Departures Screens – the buttons to navigate to the next/previous date did not function correctly when switching to daylight saving time.

Integrations

  • Adyen – upgrade to the Drop-in version and additional improvements.
  • OTA interface – Occupancy-based pricing - Guests. We’ve added a new feature to the OTA interface for channel managers – sending prices based on the number of guests in the room (Occupancy Based pricing - Guests). Until now, the interface supported sending a single base price per product (rate). Now you can send different prices depending on occupancy. If the channel supports this feature, it allows you to significantly reduce the volume of mapping and improve synchronization speed. How to use:
    • In the rate mapping, leave the “Adults” and “Children” fields blank and use the new “Occupancy-based pricing - Guests” field.
    • In this field, enter the number of guests for whom the price should be calculated, separated by commas. For example: 1,2,3 will send three prices to the channel—for 1, 2, and 3 guests per room.
    • The price values themselves are determined by the rate —according to its terms and calculation for different occupancy levels:
      • if the rate calculates different prices based on the number of guests, different values will be sent
      • if the price is the same, the same value will be sent for all occupancy levels
    • You cannot use both “Occupancy-based pricing – Guests” and the “Adults” / “Children” fields at the same time – choose one of the two approaches.
    • Settings are at the product level – different products can use different methods (Occupancy-based pricing or base price).
  • Private Analytics: The daily synchronisation for some data/tables took longer than expected. The synchronization logic has now been optimised to ensure all data and tables are synchronized within 6 hours after the account’s end of day.
  • Lightspeed POS K Series: When a bill was transferred to more than one folio, Lightspeed POS K Series generated a “No folio found for sale” error. This issue has now been resolved, and the respective amounts are correctly transferred to each of the selected folios.
  • Gastronovi: The End of Day revenue transfer is performed in a designated Clock POS account, isolating the revenue and payments from the hotel’s data. Previously, you had to request the creation of this Clock POS account through our support centre. The process is now automated to speed up operations.

Clock Update (24 Mar 2026)

Improvements

  • Booking Search (Arrivals/In Hotel/Departures screens)
    • We've improved the main search field: we've increased the interval at which the search automatically starts; at least 3 characters are required for the search; you can now start it with Enter as well; if started, the marker remains in the field, unlike before. 
    • A new search field has been added for room number. The separate field ensures that you only find bookings in that room and not other matches, such as by booking number.
    • A quick button has been added to return to the current date
    • In the Mass Functions, under the 'Folios' section, a Multi-Folio view has been added
  • WBE (Web Booking Engine) - Price Breakdown on the last page - We often received reports that this breakdown was unclear and mostly led to confusion instead of helping guests. So, we changed the approach. Currently, the guest only sees the final amount of the booking (against each room and in total), as well as a note that the amount includes all taxes and charges. The guest can see the breakdown for each room using an icon next to the room amount. The breakdown has also been changed so that the entire amount for the rate (package) appears against the Rooms line item, and the remaining services remain in Additional services - either selected by the guest or charged by the system, but not through the rate/package - charge templates for room types or surcharges. If this approach is well-received, we will change the confirmation emails in the same way. 
  • New report - Fire list - The report has been added under 'All Reports' - 'Bookings'. The report has no filters and shows all checked-in bookings with room numbers, floors and guests. There is also a total by floor. It is intended for checking guests against a list if needed. The report has been added to the Bookmark list and can be displayed in the navigation menu;
  • Payments with Credit Cards and Voided Folios - In certain very rare situations, it could happen that while the transaction was being processed by the bank, the folio could be voided by the user. This very rare situation led to discrepancies in the log reports. We have improved the logic, and currently, if such a situation occurs, the payment will be added to a newly created folio instead of the voided one.
  • We've added categorisation of OOS types - For the moment, this categorisation is not used anywhere by the system, but it will be used in new reports we are working on. You do not need to change the settings at the moment. If you decide to change them, assign one of the three categories for each type: Out of order (unexpected problems), Out of service (intentionally stopped from sale - savings, renovation), House Use.
  • Automatic deletion of old To-Do tasks - To prevent the accumulation of unnecessary information that slows down the operational screens, we have added automatic deletion of To-Do tasks older than 1 year. More precisely: If the task has a due date, we keep it for 1 year after that date. If the task does not have a due date, we keep it for 1 year after the date of creation.
  • Rate and Availability screen and Contact Person - Bookings can now be created via the Rate and Availability screen with a contact person who does not have an email address entered. This makes it easier to work when you do not have contact information for the guest. 
  • Room Calendar - three small improvements regarding visualisation
    • We have improved the pop-up screen of the booking, which is now much more compact and takes up less space on the screen.
    • In the filter screen, we have added an option to stop showing the same pop-up screen if you are performing operations where it interferes.
    • The filter screen has also been changed, and with long room type names, the columns do not overlap.
  • Issuing key cards - The suggestions for key card validity when there is a room move have been changed. The default value is now the date of the move and the time of arrival.
  • Channel manager settings (new screens) - a new field "Guest email is masked" has been added to the Company mapping. For the direct interface with Booking.com, the field is one - in the channel settings. For SynXis - there is no such setting. The new field aims to mark in the Guest Profiles coming from a given channel whether their email is "normal" (personal) or "masked" (official, issued by the channel). This information will be used in the future, such as when merging profiles or in online check-in to request a personal email.
  • Booking.com - additional information on stopped products (user/time) is displayed in the maps. This makes it easy to find out when and by whom certain products were stopped without searching for information in the logs. This information will only be visible for those stopped from now on.
  • Links to the Company - We have replaced the links to the Company to show the new Company screens

Fixes

  • Advanced Booking Search 
    • A problem related to searching by guest name only with a large database of profiles has been fixed.
    • Copying key cards sometimes did not give a message, even though the operation was successful.
    • Manual allocation of room number - worked depending on the time zone and sometimes did not function correctly.
  • Charge quantities are now rounded to the 3rd decimal place to make the amount calculations more predictable, as well as due to the requirements of various fiscalisations.
  • Rates and Availability - When creating a reservation, the guarantee policy set at the rate level was applied, but not if one had been set at the season or day level.
  • OTA interface - In certain very rare situations, we were sending updates for yesterday's date, which in turn caused an error on the partner's side.
  • POS/PMS closures - Payments - Summary - the breakdown was not displayed if the total payments was 0.
  • In the rate editor, rates that are used as base rates but were archived were not displayed with their full name. 

Integrations

  • Private Analytics / Google BigQuery Export - A new field "person_title" has been added to the "Guests" table. It contains the title of the guest and complements the existing field "person_title_id".
  • Clock API - A new endpoint has been introduced – booking_booking_charge_template_schema. It allows you to read, create, update and delete daily charges for bookings. For more details, please see the API documentation.
  • Gastronovi POS Integration - We have updated the integration logic. Disabling the “Transfer Tips” option will now only affect the End of Day revenue transfer. Tips will always be transferred to the corresponding guest, company, or event folios.
  • PEPPOL / Billit.be Integration- To improve data accuracy and reduce rounding differences between systems, the export logic has been enhanced. Depending on the account’s tax mode, different values are exported:
  • For:
    • Tax not included in prices, rounding – per line 
    • Tax not included in prices, rounding – total

                    → NET values are exported, allowing TAX to be added on top.

  • For: 
    • No tax
    • Tax included in prices, rounding – per line
    • Tax included in prices, rounding – total

                    → GROSS values are exported, with VAT calculated from the gross amount.

We recommend using rounding – per line, as it minimises rounding differences most effectively. 

To ensure consistency between the Clock document printout and the PEPPOL document layout, we enhanced the logic when Compact mode is enabled. The transferred charges (from Clock POS, LighSpeed POS L series) are compacted based on their source (Bill number), not the print text, even if they have one

  • Private Analytics / Google BigQuery Export - A new field person_title has been added to the Guests table. This field contains the guest’s title and complements the existing person_title_id.
  • QuickBooks Online Integration - The data exchange logic has been optimised to reduce errors in export logs. If a document or payment fails to export successfully after three attempts, it will no longer be retried. This prevents unnecessary errors and delays.
  • Clock API - A new endpoint, booking_booking_charge_template_schema, has been introduced. It allows you to read, create, update, and delete booking Daily Charges. For more details, please refer to the API documentation.

Clock Update (18 Feb 2026)

New Features

Kiosk (new)

We've added new functionalities to the Kiosk: Lost card, Room change and Self Checkout. These features are especially useful for hotels without a 24-hour reception, as their purpose is to expand self-service options and allow for the resolution of more cases without the need for on-site staff.

  • Lost card. If a guest loses their access card or forgets their room number and there is no staff available, the Kiosk can assist them. Once the guest identifies themselves on the Kiosk, they will see information about the room they are staying in and, if necessary, will be able to issue a new key for it.
  • Room change. If a room change is necessary after check-in, for example due to a problem with the current room or an upgrade to a higher category, the guest can get a new key for the new room directly from the Kiosk.
  • Self Checkout. On the day of departure, the guest can use the Kiosk to perform self checkout. The functionality includes:
    • Checking for unpaid charges, accumulated during the stay;
    • Requesting payment of all outstanding charges before finalising the departure;
    • Closing the folios;
    • Sending the documents by email;
    • Marking the booking as checked out.

Marking the booking as checked out provides up-to-date information for the hotel housekeeping scheme and allows the room to be cleaned earlier, which helps to better distribute the workload.

The Self Checkoutfunction via the Kiosk depends on a setting that can be activated from the Kiosk settings screen. When activating, it is also necessary to select the type of document with which to close the guest's folios.

Booking.com

We have made several improvements to the direct integration with Booking.com.

  • Import of payments. If you work with Booking.com on a model where Booking pays you the payments received from guests by bank transfer, this functionality can greatly facilitate your work by automating the addition of payments to the folios. When the new payment import setting is activated, when importing a new booking, if the guest has prepaid a certain amount, it will automatically be added as a payment to the booking's folio. More details:
    • A new setting for payment import has been added, which is disabled by default. Settings for the type and subtype of automatically created payments are also available.
    • The import is performed only when the booking is initially created in Clock. Subsequent updates do not import payments to avoid duplication.
    • The amount of the imported payment corresponds to the amount the guest paid and which was sent in the message from Booking.com.
    • If the guest books several rooms at once, the payment will be added to the first booking in Clock.
    • When initially importing existing bookings (if the setting is enabled), the available payments for them will also be imported.

Important: In certain situations, the initial import of bookings is performed with minimal data, in which case payment information may not be available and will therefore not be imported.

Virtual cards. Can the function be used if Booking.com pays the funds via virtual cards?

Yes, it is possible, but we do not recommend it, as the folios will appear as already paid. This can make your job more difficult because:

  • automatic payment collection tasks will not be able to be used (as the folios will already be marked as paid);
  • tracking the virtual cards that need to be charged will be more difficult.
  • Improvements in the mapping of room types. We have changed the restrictions on the mapping of room types. It is now possible to duplicate the mapping of a room type if it is not exported. This allows, if you use the connection with Booking.com only for importing bookings, to map several room types from Booking.com to one room type in Clock PMS.
  • Email notification upon new booking. We have added the ability to receive an email when a new booking is imported from Booking.com. In the Booking.com settings, there is now a new option to send an email notification for each new booking.

Improvements

  • Booking – "Re-Route charges". We have added a new button to the booking screen that allows you to re-route (Re-Route charges ) the charges on the booking. The function reviews all charges (automatically or manually added), regardless of which folio they are currently in. Based on the currently active router (by Company, Agent, Event or manually selected in the booking) and the current routing rules, the system determines which folio the charges should be in and transfers them automatically. The following charges are not affected by the function:
    • Charges in closed folios;
    • Charges belonging to other bookings;
    • POS transfers.

Example: You have a rule for routing to a company, according to which all charges, except for City Tax, are transferred to the company folio. Later, you find that the City Tax should also be transferred to the company folio. You edit the router, open the booking and execute the "Re-Route charges" function. As a result, the City Tax charges will be transferred to the company folio.

  • Folio prints – merging rows with different VAT. We have added the ability for rows with different VAT rates to be merged in the printouts if they have the same print text.

    To enable this behaviour, you need to hide the tax percentage column: Settings → Documents → Folio Printing - defaults enable: "Hide Tax percentage column". Once the column is hidden, rows with the same print text will be merged.

Example: You have a "bed and breakfast" package where the services have different VAT. Until now, they were printed on separate lines. They can now appear as a single line with a total price.

  • Rate Packages  – items valid for a period. Until now, the items in the rate packages could only be limited by specific dates, which is not convenient for long periods (months or years). We have added the ability to define items through a valid period.

    The period can also be "open" – only "from" or only "to" is filled in.

Example: The package may contain:

  • Breakfast for 2026 at a price of EUR 20
  • Breakfast from 2027 at a price of EUR 25
  • Elavon – improved integration stability. We have made a change in the interface with Elavon in order to increase stability and reduce failed transactions. We removed the initial "verifying" transaction, which in certain combinations of payment means and operators could fail for no apparent reason and block the actual payment. Its removal has no negative consequences and we expect significantly more stable behaviour.
  • Arrivals/Departures screens – quick date navigation. We have added buttons for quick navigation to the previous/next date in the new Arrivals/Departures screens, without having to select a date from the calendar.
  • Booking Enquiry – personalised text in the offer email. In the new booking enquiry screen, we have restored the ability (available in the old screen) to add personalised text to the offer email. The Header and Footer fields are displayed respectively before and after the main text of the offer.
  • Availpro – booking agent. Previously, if the submitted agent did not have an IATA number, it was not imported and the booking remained without an agent. We have changed the logic so that in the absence of an IATA number, the system uses the agent specified in the company mapping.

Fixes

  • Events – Rooming list. The created bookings now inherit the marketing segments according to the standard logic (Rate→ Company→ Agent→ Event), as in the other screens (e.g. Rate and Availability).
  • Sorting of rates. We have fixed an issue where changes in the rate sorting screen could not be saved if there were archived rate plans.
  • RoomCloud – Export Log. The "RoomCloud room" and "RoomCloud rate" columns now show not only the ID, but also the name of the room/rate.
  • Search for events. We have added the PAX field in the event search screens, where it was missing.
  • Rate and Availability(new). We have fixed an issue where bookings could not be created in combination: with a company, without guest details and with reference numbers.
  • Booking enquiries – email template: We have fixed an issue where two parameters were not displayed in the email template: booking_offer_item.arrival_bookable.t_name, booking_offer_item.arrival_bookable.t_description
  • OTA / SiteMinder – Export Log. We have corrected the filter by room type, which did not work when selecting a virtual room type. In addition, the room type code is now displayed when mapping to virtual room types.
  • POS – Promotions. We have fixed an issue where after deleting a charge template used in a promotion, the promotion could no longer be edited.

Integrations

  • PEPPOL e-Invoicing (gateway: billit.eu). The rebuild feature logic has been improved.
  • Italian Invoice Export. To avoid rounding differences (especially for Tax mode Tax not included in prices, rounding – total) between the document lines and total, tax rounding difference charges have now been added to the document lines to match the sum of all changes and total amounts for the documents.
  • Mailing list. The +Add guest option has been optimised for better usability and now works faster 
  • Gastronovi POS integration. The End Of Day function is now optional and you can use hotel transfer on its own if you don't need consolidated reporting.
  • Romanian e-Factura. The bank accounts configured as Payment Means can now be configured to be added to all folios regardless of their balance. The Current behaviour is to add them only to the folios with an outstanding balance. The behaviour can be changed using ROMANIA - e-Invoicing / RO eFactura export Settings from the AppConnector menu
  • Standard Sweden Accounting Export (SIE4). A Standard SIE export option has been added to the AppConnector. More information about how it can be configured and used is available in the support article "Standard Sweden Accounting Export (SIE4)"
  • Atomize integration. We have added the ability to open a new Atomize account for those of you who already have one. The feature should be used with caution and after the advice of Atomise as it should be followed by the new Atomize onboarding process.
  • Clock API
    • We added the number of adults and children to the occupancy_forecasts endpoint. More information is available in the relevant API documentation.
    • Rooms and room_types endpoints now provide information of the components for the virtual rooms / room types. More information is available in the relevant API documentation.


Clock Update (28 Jan 2026)

Improvements

  • Instructions for routing charges to monthly folio. New routing instructions have been added to automate monthly invoicing when working with a Company or Agent, where the agreements are based on the month of arrival or departure of the bookings. Two instructions for Company and two instructions for Agent have been added to the existing instructions for creating folios. These allow charges to be automatically transferred to monthly folios based on the month of arrival or the month of departure of the booking.

    Example: All bookings for a given Company arriving in January 2026 can be automatically routed to a folio named "2026-01", those for February to folio "2026-02", and so on.

    Important: These routing instructions differ from the existing Monthly Invoicing functionality, which is designed for long-stay bookings. The difference is that the routing instructions are guided by the month of arrival or departure of the booking, while monthly invoicing is aimed at distributing charges by month for a prolonged stay.

  • "Rate and Availability" screen (new) – reference date and individual references for each booking from the cart. In the "Rate and Availability" screen (new), new possibilities related to the reference data have been added:
    • It is now possible to fill in a reference date, in addition to a reference number;

    • If there is more than one booking with different reference numbers, it is possible to enter different reference numbers and dates for each row(booking). To do this, use the button next to the reference number field at the top of the screen. This disables the common reference fields and adds the same fields to each row of the cart. By pressing the button again, you can return to the general input mode.

  • Housekeeping tasks – automatic generation. The ability to automatically generate housekeeping tasks at a pre-set time has been added. Keep in mind that automatic generation can be executed up to 15 minutes late compared to the set time. The setting is done from the menu Settings → Housekeeping → Automatically generate tasks.
    After setting a time for the next generation (for example, 06:00), the tasks will be generated automatically every day at the same time. To stop the automatic generation, the field must be cleared and saved.

Integrations

PEPPOL e-Invoicing (gateway: billit.eu)

  • The Purchase Order Number value from the closing folio is now exported as a Reference to PEPPOL. This field is often used by customers to validate the document.
  • Added the ability to send company contact person details – First name and Last name from the Contact Info section. This information helps large organisations identify the department from which the expense was made.
  • Folio remarks are now exported as Comments in the PEPPOL document. They often contain important information that needs to reach the customer.
  • In order to bring the appearance of PEPPOL documents as close as possible to those generated by Clock, print_text support has been added to charges when entered. If print_text is missing, the name of the charge is exported as before.
  • Added balance support for the sent folio. This allows the customer to easily see how much is still owed on the specific document if it has been partially paid.
  • Added the option to export the source of the charges. It is now possible to include the source of the charges in the PEPPOL document. The source most often contains details of the booking, including the period of stay and the main guest. The aim is to bring the appearance of documents exported to the PEPPOL network closer to the standard appearance of documents in Clock. The functionality must be explicitly enabled from App Connector → PEPPOL and e-Invoice connectivity with Billit.eu → Settings
  • Export of documents in compact view. Added the ability to export PEPPOL documents in a compact view. There is now a Compact modeoption in the interface settings, which works as follows:
    • Compact mode disabled – charges are sent in detail as before;
    • Compact mode enabled – charges are grouped analogously to the Compact view of folios:
      • grouping by tax % and print_text;
      • when print_text is missing, the text field is used;
      • since PEPPOL requires a quantity (qty) field, it is always submitted with a value of 1.

Localisations

Italian Invoice Export. The way VAT Payment Method information is exported (EsigibilitaIVA) has been changed. Until now, Split VAT Payment was only allowed for B2G documents (SDI number with 6 characters). As a result of regulatory changes, Split VAT Payment can now also be used by other companies with an SDI number of 7 characters, so this control has been removed. When using Split VAT Payment, the ImportoPagamento field (balance to pay) now takes into account the value excluding VAT, as the tax is paid directly by the customer to the state.

Clock Update (21 Jan 2026)

New Functionalities

Rate and Availability – Updated Screen

We've launched a new and significantly improved version of the "Rate and Availability" screen, making it easier to work with bookings and providing better visibility of prices, availability and related information.

Key improvements and new features:

  • "Cart" – room bookings, activity bookings and total price;
  • Additional services for bookings;
  • Automatic or manual mode for rate selection;
  • Manual price;
  • Selection of Profile, Company, Event or Block and transfer of information to the booking;
  • Improved block booking, including optional blocks;
  • Selection of one or more room numbers;
  • Multiple information views and interactive filters;

Booking cart (rooms, activities, and services)

The screen now works with a cart that allows you to add:

  • room bookings with different numbers of guests, room types, rates, blocks and periods;
  • activity bookings;
  • additional services to rooms and activities.

The following is visible in the cart:

  • the price of each product;
  • the total amount;
  • the total amount of the required deposit.

The calculation includes all applicable elements – Tax regime, City Tax regime, Markups, Automatic charges to bookings related to room types, as well as added Additional services.

Once the cart is complete, you can:

  • create bookings directly;
  • or save it as a Booking Enquiry.

When saving as an enquiry, activity bookings are not supported and are excluded with a warning message.

From the radio buttons to the screen title, you can choose what you are booking: Rooms, Activities or Additional Services.

Activity Bookings

Bookings are supported for activities, introduced with the previous update, as the first part of the new "Rate and Availability" screen.

Manual Price

If you have the appropriate user rights, you can enter a manual price for a selected rate.

The system offers standard calculated daily prices, which can be edited.

The manual prices entered are correctly reflected in the cart and transferred to the enquiry or booking.

Additional Services for Bookings

After adding rooms or activities to the cart, additional services (e.g. dinner, parking, cot) can be added even before the booking is created. When saving as an enquiry, the selected services are transferred to the final booking.

For services with limited daily capacity, the system shows:

  • availability by day;
  • visual indication of insufficient availability.

Additional services can be applied for:

  • the entire period;
  • the arrival date;
  • the departure date;
  • specifically selected dates.

All services are included in the total amount of the cart.

Automatic and Manual Rate Selection Mode

Automatic Mode

The system automatically selects appropriate rates according to the client type:

  • Individual / Returning guest – preferred rates;
  • Company / Event – rates from the Company agreement, if not available – preferred rates;
  • Block – the rate or manual price from the block, if not available – the Company agreement, then preferred rates.

Manual Mode

It is possible to select rates:

  • by rate plans;
  • by rate tags.

For both modes, searching is available, as well as saving the selected plans or tags for future use (locally for the station).

Selection of Profile, Company, Event or Block

The client type can be selected in advance, which helps automatic rate selection and the transfer of information to bookings.

Supported:

  • selection of contact profiles as a guest, for Company / Event / Block;
  • choosing whether the returning guest is a contact person or a guest;
  • selection of an existing profile even for an individual guest;
  • pre-entering data for new guests.

Automatically transferred:

  • Guarantee policy and meals from the rate;
  • Reference number (manually entered or automatically generated);
  • Marketing segments (priority Event → Company → Agent → Rate);
  • Colour for the calendar and Client cost centre from the Event.

Improved Block Booking

  • Blocks are selected directly by period, Company and Event (without a code);
  • Optional blocks are supported;
  • Availability is the minimum value between the block and the hotel availability;
  • Blocks without pre-set rates or manual prices are supported.

Selection of Specific Room Numbers

In addition to room types, it is now possible to check and select specific available numbers before creating the booking or enquiry.

Views and Interactive Filters

Several views are available:

  • List - each rate on a separate line;
  • Boxes - compact view;
  • Columns - suitable for unified rate names (RO, BB, HB, etc.);
  • Calendar - detailed overview by day.

The last selected view is saved for the device.

The filters for room types and "only available" work instantly, without reloading.

Additional Improvements

  • Descriptions for staff for room type, rate and guarantee policy;
  • Adding one or more room bookings with one click;
  • Visibility of activated restrictions;
  • Tracking the booking creation process and the ability to "Retry" in case of a removable error;
  • Significantly improved performance – up to 2 times for few rates and up to 4 times for many rates;
  • Support for limited capacity packages.

Detailed Instructions

For a detailed description of how to work with the new "Rate and Availability" screen, see the following articles:

"Rate and Availability" Screen: Creating Bookings

"Rate and Availability" Screen: Additional Services

"Rate and Availability" Screen: Advanced Features

Rules for Automatic booking charge routing

A new functionality has been added for automatic booking charge routing through predefined rules, which eliminates the need for manual transfers between folios.

What problems does it solve:

  • Removes manual processing of charges for corporate, group and event bookings;
  • Reduces errors in complex payment and invoicing agreements;
  • Facilitates the management of scenarios with different payers and deferred payments;

What it is:

  • Configurable set of rules for automatic charge routing;
  • Determines who pays a specific charge and in which folio it is reflected;
  • Applied automatically to all related bookings after a one-off setup.

What it allows:

  • Distribution of charges between Guest, Company, Agent or Event;
  • Routing of charges to specific folios at the time of charging;
  • Automatic split or grouping of invoices according to the agreements;

  • Support for on-site payment and deferred payment.

How it works:

  • Rules are created that determine who pays and in which folio the charges go;
  • The router is selected at the Company, Agent or Event level;
  • All related bookings use the router automatically, without the need for manual actions;


What charges are routed:

  • Automatic charges (rates, packages, daily charges, City Tax);
  • Manual charges per booking;
  • Transfers from POS to room.

Supported scenarios include:

  • The company pays for the package, the guest – for the additional services;
  • The guest pays, but the invoice is in the name of the company;
  • Separating a package and additional services into different folios;
  • The company pays for the accommodation, but not for the meals, even when they are part of a package;
  • Many other combined scenarios with Event, Company, Agent and Guest.

Important:

  • Routing is applied only at the time of charging;
  • Already made charges are not moved automatically;
  • Charges added directly to a folio are not routed.

For more details on the settings, logic and use of the new functionality, see our detailed articles:

Rules for automatic routing of booking charges

Using Charge Routers

Improvements

Booking Enquiry

We have added new screens for Booking Enquiry – search and edit. These are accessible from the navigation (the "New" button) and from the new "Rate and Availability" screen. The existing functionality has been retained and enhanced with the following improvements:

  • Ability to add additional services to the room in the enquiry;
  • Ability to link the rooms in the enquiry to a Company, Agent or Event.

Additional services added to rooms via the new "Rate and Availability" screen are now also saved in the corresponding room of the enquiry. They are visible in the enquiry screen and are automatically transferred when a booking is created – both from the WBE and directly from the enquiry screen.

Similarly, the Company, Agent or Event selected in the "Rate and Availability" screen is saved to the room in the enquiry, displayed in the screen and transferred to the created booking.

These improvements make Booking Enquiries a more complete and convenient tool for working with both individual and corporate guests.

Other Improvements

  • Booking.com – increased number of mappings. If you are using both Booking.com and another channel manager, we have increased the number of rate mappings available. 100 separate mappings have been added, reserved specifically for Booking.com, so its settings are not limited by the mappings used for other channels and vice versa.
  • Activities – deleting time slots. It is now possible to delete a time slot for activities, even if it has been used in existing bookings. Deletion does not change existing bookings, their times or associated capacities, which remain active. This provides greater flexibility in managing and changing time slots.
  • "Payments" Report – Petty Cash. A separate total for petty cash payments has been added to the report for clearer and more detailed reporting.
  • Switching to the new booking search screens. The new booking search screens are now active by default, including: Arrivals, In Hotel, Departures, Advanced Search.
  • Closings – support for longer periods.The user or day closing functionality is designed for daily reporting. In practice, however, there may be a longer period between two closings (for example, when closings have not been used for a long time or are being activated for the first time). In such cases, a large number of folios, charges and payments accumulate in the period, which may make it difficult or even block the generation of a report. The behaviour of closings has been improved so that the system can handle long periods:
    • Period from 1 to 7 days – the closing contains a full and detailed report, as before;
    • Period from 7 to 30 days – the closing contains a summary report with payment totals, without a detailed breakdown;
    • Period over 30 days – the closing contains no data and is considered the beginning of a new reporting period. The next closing will contain the full report;
    • Initial Closing – for new accounts, it is advisable to make an initial closing after setting up the system and before actual operation to start reporting correctly.
  • WBE link builder. Added the ability to create links to specific activities. This allows for better integration of WBE with your website – for example, the booking buttons on the site can lead directly to a selected activity instead of the general list of activities.
  • The starting work screen. Errors from Booking.com and SynXis are now displayed in the "Channel Managers" section of the start screen.

Fixes

  • Guest Portal – the room type in the details bar is now translated correctly;
  • Email Verification – corrected the incorrect message when there is a mismatch between the verified email and the email entered as username in custom SMTP
  • Printing Documents – printing cancelled documents no longer increases the printed number;
  • Surcharge in Folio – corrected the incorrect calculation for a specific combination of calculation method, discounts and available charges;
  • "Rate and Availability" screen: – corrected the reporting of free rooms when virtual room types are blocked;
  • Deposit Ledger – fixed an issue where a small unallocated amount remained when the advance and final folios had different currencies, due to currency differences;
  • Company Overview Screen – consumed and cancelled folios are no longer displayed in the list of deposit folios;
  • WBE – the Event Code entry screen now opens correctly in the selected language;
  • Booking Advanced Search – corrected the key card issue times, and the time zone is now correctly taken into account.

Integrations

  • Gastronovi
    • Mapping Optimisation - the process of creating and maintaining mappings between Gastronovi and Clock has been optimised;
    • Non-room booking support - support for Non-room bookings has been added. For easier recognition in the Gastronovi interface, these bookings are submitted with room "NON-ROOM booking".
  • PEPPOL e-Invoicing (gateway: billit.eu)
    • Added Client Data - the set of client data exported to PEPPOL has been expanded, and now includes: Address, City, ZIP Code, Country Code;
    • Improved Receiver ID Validation - the validation of the receiver identifier has been improved. Validation now works correctly even when using separators, for example: 123 456 789, 123.456.789;
    • Receiver ID from Company Custom Field - the ability to select the Receiver ID field from a Company Custom Field, and not just from the standard Company fields, has been added.
    • API Key Check on Activation - a check of the configured API Key has been added when saving settings with Active enabled. If the key is invalid, the system will return an error "StandardError: ApiKeyNotValid". The aim is to prevent the saving of an invalid API Key, which would prevent the sending of documents to the PEPPOL network.

Localisations

  • RO e-Factura
    • Export in Compact View - the ability to export documents in a compact view has been added. A new XML Generation option is available in the interface settings, which works as follows:
      • Compact mode disabled – charges are exported in detail, as before;
      • Compact mode enabled – charges are grouped analogously to the Compact view of the folios:
        • grouping by tax rate (tax %) and print_text;
        • if print_text is missing, the text field is used;
        • the quantity (qty) field is always submitted with a value of 1, as required by e-Factura;
    • Different InvoiceTypeCode for fiscalised documents - documents containing payments subject to fiscalisation are now exported to e-Factura with InvoiceTypeCode = 751 (instead of 380). We remind you to check the settings for fiscalised payments in Settings → All Settings → Romanian Fiscal Policy → Fiscal Payment Types.
  • Italian Invoice Export
    • Change in the content of the <RiferimentoTesto> element - the <RiferimentoTesto> field has a limit of 60 characters. With the previous method of filling in the field, it was possible for the booking reference number to exceed the allowed length. With this change, the content of the field is now exported in the following standardised format: Jul 31 - Aug 01 2025 / BOK.13456789 / APP, Daniel Wood, where:
      • BOK.13456789 is the reference number of the booking;
      • if a reference number is missing, the booking number is used (for example, Booking #362).

Clock Update (25 Nov 2025)

New Functionalities

Petty Cash

We have added a new functionality, through which you can track petty cash flows and the overall cash balance. Up until now, the system tracked cash flow related only to customer payments. Flows related to petty cash inflows and outflows were not directly tracked, and the workaround with payments in an external folio was unclear and created confusion. The new functionality is aimed at providing an explicit register for such movements. Here is a description:

  • To access the new function, from the navigation select  Other functionalities→Petty Cash;
  • Strict chronological order. Editing or deleting entries in the register is not allowed. All corrections should be registered with an opposite sign. The financial date of the operation provides clarity and comparability with all financial operations.
  • Two levels (user rights) of access.We have organised two levels of access – for users and auditors.
    • Petty Cash. With this right, you can register movement – inflow and outflow in your name.
    • Petty Cash Audit. This right allows you to register movement – inflow and outflow, both in your name and in the name of someone else. That is, if you are a cashier and hand over cash to another person, you can specify the other person as having received the funds. This way, the system will retain clear information for both users.
  • Description and note for the auditor. Each entry has a field for the operation description, which cannot be edited. To facilitate the auditing process, there is a separate field for a note to the entry, accessible only to the auditor, which can be filled in and edited if an auditor right is present. In it, the auditor can fill in notes related to issues or questions to assist them in the process.

  • Overall Balance. Entries from the cash register appear in the "Payments" report, taking into account the period and user filters. The entries are added at the end of the report, and a total sum per currency has also been added. The total sum includes cash payments on folios + the cash register.

  • Fiscal requirements. It is important to know that the cash register is not linked to fiscalisation. If your legislation requires fiscalisation of petty cash flows, then this module does not meet these requirements and we do not recommend using it.
  • POS. In addition to the PMS, you can also use the register in the POS. We have added a new button to the management screen, and the entries are included in the "Payments" report.

Improvements

Companies – new screens

We have completed work on the new Company screens, which are more compact, faster, and more convenient than the old ones, but overall, we have tried to maintain the old way of organisation and operation. Here are the changes:

  • New Company search:
    • The search is in real-time, as you type the details of the company you are searching for (name, VAT number, contact information), and there is no need to start it.
    • Quick access to recently opened Companies. Similar to recently opened Events, a separate bar displays the companies most recently opened on this device. Select a company to open it. The full list of the last 20 used companies can be opened by clicking on the triangle icon at the end of the row.

  • New Company screen:
    • In-place editing. Instead of opening a large form with all fields, we have made it possible to edit only the fields you wish to edit. Similar to the Events screen, click on the edit icon or on the data itself and edit only those.
    • Folios. Similar to the old screen, you can see all operational folios in one place – unused advances, open folios, and closed unpaid folios. Through a link to the new "Folios - Advanced Search," you can find any folio related to this company, using even more criteria than before.
    • Quick folio functions. We have made quick functions for each folio accessible so that you can charge services or add payments without leaving the Company screen.
    • Events. We have improved the presentation of Events so you can focus on operational information. The focus is on current and upcoming Events, and others can be found via the link to the Events search. The list of Events also has an even more compact view, which you can enable with the button at the top.
    • Archiving. You can find the button in the dropdown menu of the options button at the top right.

  • New screen for company folios. We have added a link to the new "Folios - Advanced Search." This way, in addition to retaining quick searches (unpaid folios, folios of in-house or expected bookings, etc.), we provide the ability to use all filters in "Advanced Folio Search," as well as its new transfer functions. This allows you to process group accounts even faster.

POS – central item and price management

If you have multiple restaurants and need central management of items and prices within them – review this new functionality. For the PMS and hotel services, we have already added a similar function, and now you can use it for the POS as well. Here's a brief overview, if you haven't already familiarised yourself with it in the PMS:

  • Items are presented in a "matrix" across all accounts (restaurants).
  • You can easily review what items are offered in all your restaurants and at what prices.
  • Using Copy/Paste, you can quickly add the same item to all restaurants.
  • You can easily compare the prices of an item, and using the quick function, set a new price for all restaurants with one click.

To open the new screen, from the Management screen, open the new settings screen. In the "Menu" section, select "Items - all POS accounts."

Check-in kiosk – use booking Number and PIN login

The change is small, but it offers two key and important capabilities:

  • You can now use any tablets or devices as a check-in kiosk.
  • Customers have a backup login method if they cannot find their QR code or if it has been removed from the email (e.g., from emails via Booking.com).
  • We have added two new settings to the check-in kiosk: "use QR login" and "use booking Number and PIN login". 

With the new settings, if you use our recommended standard tablets with a built-in QR reader, you can also choose "use booking Number and PIN login" as an alternative access method. This way, if the customer has not received or cannot find their QR code, they will be able to log in with their booking number and PIN. Make sure this information is clearly stated in the letters sent to the customer.

If you decide to use a different tablet model or device, you can disable the "login with QR code" option to avoid displaying unnecessary information on the kiosk and to make it clearer for the guest how to log in (via Booking Number and PIN).

Charge transfer – improvement

We have added a new, improved Charge Transfer functionto booking searches (arrivals, departures, In Hotel, advanced search), as well as to Folios - Advanced Search. With it, you can transfer charges from multiple folios to a single folio with a few clicks.

In the first case, this allows you to select the bookings themselves from the booking search screens, and in the second – to filter folios by various criteria and select them. The new function provides more control and quick options for selecting revenue groups and the type of charges you wish to transfer. You are already familiar with it from the folio screen, but now you will also be able to use it for mass functions – for multiple bookings or multiple selected folios.

  • From the booking search screens – select the ellipsis button (...) →Folios →Make Transfer (New). Then click "Transfer All Charges Here" for the folio you wish to transfer to. A screen will appear where you can choose whether you want all charges to be transferred or a specific type – you can use the quick options: All, Packages, No City Tax, Room only, Extras, or select specific revenue groups.

  • From the Folios - Advanced Search screen – filter folios by the desired criteria, select the folios, click the ellipsis button (...) and select "Charge transfer". Select the options on the screen and confirm. Alternatively, from the ellipsis button (...) you can select "Fast Transfer Mode". This will display a "Transfer all charges here" button, which will open the charge transfer screen.


Other improvements

  • Activity bookings are now created with the same arrival and departure date – i.e., with a stay of 0 nights. This is much clearer for this type of booking. If you use non-room bookings for other purposes, please note the following change in booking behaviour. Until now, for a non-room booking with zero nights, nothing was automatically charged. After the change, for non-room bookings with a zero period, services are automatically charged if they have a selected rate or "Daily charges" added. The charges are the same as for 1 night.
  • Activity bookings – confirmation letter. For Activity bookings, we have prepared a new confirmation letter that corresponds to the nature of these bookings. Please note that for these bookings, there is no possibility for custom templates. The standard confirmation letter has the following customisation options: logo, header, and footer. Additionally, the descriptive text of the guarantee policy is also included.
  • Booking.COM – the 'Waived cancellation fees' setting is now included in the channel setting change log.
  • SiteMinder – payment import. If the first message contains information about a payment made, the system will add it to the guest's folio. If such information arrives in subsequent XMLs, the system will not create a payment but will generate a To-Do. This functionality is disabled by default. Contact our support team if you would like it enabled.
  • Availpro – for this channel, we now import payments with the first message. We have added a To-Do if we receive a payment with an update message. The To-Do also contains the payment amount.
  • In Booking enquiry templates, we have added a new parameter (booking_offer.guest), so you can add other guest details, such as country, address, etc. Here's what data you can add to the template: , , , , , as well as all other guest fields.
  • POS – more new settings screens. To the new settings screen in the POS, we have added more new screens for the following settings: Menu groups, Items, Kitchens and Printers, Import from CSV file, Datecs operations, Folio Print Templates.
  • POS – in the new "Billing info" screen, we have also added the fields: State, City, Postcode.

Fixes

  • Rates and Availability – when a company was selected, rates that were in the company's contract but archived were shown.
  • Company contracts – we fixed an issue where the check for duplicate contract names was not working.
  • The new screen for RoomCloud export logs – we fixed two issues related to the room type filter and the sent updates screen.
  • RoomCloud – pauses in phone numbers were automatically removed by the system, which led to the conflict detection system being activated and the booking not being imported.
  • In some of the To-Dos created by the channel managers, the booking number was missing.
  • The new screen "Booking enquiry - template" – changing the editor was not working.
  • POS – "Covers" report, when the report was run with a "By days" filter, the sorting of dates was incorrect.
  • POS – daily closing delay. In certain situations, the daily closing was delayed or even failed to complete.

Localisations:

  • German FIscalisation (Fiskaly) .The configuration screen for Fiskaly has been fully redesigned. It now offers a more intuitive and user-friendly interface, making it easier to complete all required fiscalisation settings and verify the status of your Fiskaly connection.
  • Romania e-Factura. We have improved the export logic for documents already fiscalised through a cash register (bon fiscal / AMEF) to prevent double counting of VAT and revenues.

    When a folio has already been documented via a fiscal receipt, the invoice sent to RO e-Factura will now use:

    InvoiceTypeCode: 751 – “Invoice for accounting purposes”

    (Romanian: „factură informativă în scopuri contabile”)

    This ensures that the invoice is submitted to the RO e-Factura system as an informational accounting document, rather than as a new taxable invoice, aligning with Romanian e-Factura compliance requirements.

Integrations

  • Gastronovi POS. We have fixed an issue that prevented the interface configuration screen from loading when an invalid or outdated connection token had been saved.

    With this update, all tokens are now always displayed, allowing you to view, identify, and manage incorrect or expired tokens directly from the interface without blocking access to the configuration page.

  • Clock API webhooks. A new webhook event has been added: folio_void.

    This event notifies subscribed systems whenever a folio is voided. It also includes a clear indication of whether the voided folio was previously open or closed, enabling more precise downstream handling.

    More information is available in the corresponding section of the API documentation.

Clock Update (27 Oct 2025)

Activity Bookings

Clock presents a beta version of its new activity management and booking module—a modern and flexible solution that helps hotels and resorts expand their services beyond accommodation.

With it, you can easily offer, manage, and sell experiences such as yoga sessions, spa therapies, tastings, transfers, or excursions—anything your guests can experience and remember.

Hotels with all-inclusive, performance-based contracts receive the module as part of their package. For other hotels, the module can be tested and used free of charge during its beta version. 


The Activities module in Clock allows you to offer and manage additional services and experiences with fixed time slots, limited capacity, and clear organisation. 

We will look in detail at how the module works and create an example activity with several options, time slots and shared capacity. The settings are divided into the following sections: Activities, Options for each Activity, Time slots for each Option, Rates, Work schedules. 

To set up the Activities, Options and Time slots, select Settings > Activities > Activities.

Activity

This is a specific experience or service that you want to present to guests, such as Wine Tour, Yoga Class, Boat Trip, Massage, Cooking Class

Each activity has:

  • Name, Description and Photos.
  • Work schedule. It defines the periods of the year and the working days of the week within each period, as well as the start and end time. It also defines non-working public holidays. It can be shared between Activities. 
  • Min and max guests per booking;
  • Whether children are allowed or not 
  • What is the Capacity that is tracked - whether it decreases with each booking or per guest.

Option 

Each activity can have one or more options. Each option has:

  • Name 
  • Rate. The rate is responsible for pricing and can be shared between different options and Activities. 
  • Charge template. The charge data - tax, revenue group and category, custom fields. The text, quantity, price and currency are automatically generated. For this reason, you can use one charge template for different Activities, as long as the main fields - tax, revenue group and category, and custom fields are the same.
  • Time slot - the time slots are defined for each option. This is the final element that the guest selects and books.

Important: Each booking is for one time slot only and cannot occupy two or more time slots.

Each Time slot has:

  • Start time
  • Capacity counter - this is the counter by which the capacity is determined. Booking a time slot creates a charge with this counter. In turn, the charge reduces the value of the counter for the specific date. Ultimately, the charges and their counters manage the availability of time slots. The counter can be the same for different time slots and between different options and activities. In this way, the counter will manage the capacity for all time slots for which it is selected. 

Easy setup of time slots: 

For certain activities, you may have a large number of time slots. For example, in golf, the standard time slot is 10 minutes. This means that you can have about 50 time slots per day. And if you have several options for a similar activity, this can lead to hundreds of time slots. For the quick configuration of such cases, we have provided the following tools:

  • Automatic generation of time slots - specify the start time, repeat interval, and end time. Also, specify the name for the capacity counters to be created, as well as the capacity itself. The system will generate the specified number of time slots, as well as the necessary capacity counters - one counter for each time slot.
  • Copy/Paste. This feature can be useful if two or more options or activities have shared capacity - for example, you have one tourist guide, but you offer two different activities or two different options. When copying/pasting, the time slots are transferred directly, i.e., they retain the assigned capacity counter. When pasting, you have the option to choose whether old time slots should be deleted and also to exclude some of the time slots you do not wish to transfer.

Rates 

The rates you create can serve one or many options. This "sharing" allows for easier price management - if the given products (options) have identical prices and therefore the same rate, when changing the price you will only need to edit one rate.

To edit the Rates, select Settings > Activities > Rates. For each rate, you can set: a base price, a price per adult, a price per child. The price per adult/child is multiplied by the number of guests and added to the base price. For example, if your rate is: Base price 50, price per adult: 20, price per child: 10, then for an Activity booking for 2 adults and 1 child, the price will be = 50 (base) + 40 (20 multiplied by 2 adults) + 10 (1 child) = 100. If you do not have a base price or a price per guest, enter 0 in the corresponding field. 

When charging for an Activity service that has capacity per guest, there is a peculiarity related to rounding. Since the charge must have a quantity corresponding to the number of guests, the price of the charge needs to be averaged. Let's look at the example above, where the price for 2+1 is 100. In this example, if the activity has capacity per guest, a service will be charged with a quantity of 3 (total number of guests) and a price of 33.33. That is, the total final price will be 99.99, not 100. Due to this rounding peculiarity, the price that the customer will see when booking and subsequently in the folio will be 99.99.

Work schedule 

Work schedules can be shared between Activities. This means that once you create a work schedule, you can select it for many activities. Thus, when editing a specific work schedule, the changes are reflected for all activities for which that work schedule is selected. A work schedule can have multiple periods in which you can select the start and end time slot for the Activity, as well as the working days of the week. Through different periods and start and end times, you can precisely change the available time slots so that they follow the daylight hours. In this way, you can extract the maximum number of bookings from each season. 

The start and end time are treated as "inclusive", i.e., these are the earliest and latest possible slots. Here is an example:

  • Let's assume that for a specific Activity, you have defined the following time slots: 08:00, 09:00, 16:00, 17:00, 18:00 
  • You create a period (e.g., summer months) in which you enter 08:00 - 18:00 for the start and end time. This will leave the above time slots for sale.
  • You also add a period (e.g., winter months) with time slots 09:00 - 17:00. This will leave 09:00, 16:00 and 17:00 for sale.

To quickly exclude a given day, for example a holiday, entirely from sales, you can add it to the "Holidays" section for the respective work schedule.

Setup Examples 

Example 1 - Wine Tour

Your hotel offers the following Wine Tours: "5 wines" or "7 wines + premium wine", both having different prices. Groups are up to 10 people, and within these 10 people, different guests can book their spots, and each booking can be for a different option. Each tourist is served 5 or 7 wines depending on what they have chosen. The visit time slots are 11:00, 13:30, 15:30. This option is sold both at the reception and through the WBE.

Settings:

  • Create an Activity "Wine Tour". 
  • Create a work schedule and select the working days of the week, 
  • Enter minimum guests 1 and maximum 10. 
  • Leave "Allow children" blank 
  • Select "Capacity per guest"
  • Add the option "5 wines" to it 
  • Add a new rate "Wine Tour - 5 wines". Fill in the price per adult in it. 
  • Create a charge template "Wine Tour" and select it here. 
  • Add the option "7 wines + premium wine" 
  • Add a new rate "Wine Tour - 7 wines". Fill in the price per adult in it. 
  • Select the charge template "Wine Tour". 
  • Add the time slots for "5 wines". 
  • Fill in the time slot: 11:00 
  • In the Capacity Counter field - click the "+" button. The system will suggest a name for the counter, composed of the name of the Activity, Option and Time slot. Enter capacity: 10. Since you have selected "Capacity per guest" in the Activity, this means that the capacity is 10 people. This allows bookings for different numbers of guests to be accepted until the capacity is filled. Save.
  • Repeat the steps for 13:30 and 15:30
  • Copy the time slots from "5 wines" and paste them into "7 wines + premium wine". This will transfer the same capacity counters.
  • After completing the configuration, re-edit the "Wine Tour" Activity options and select the checkbox that it is sold through the WBE. 
  • Also, don't forget to set up the remaining fields and the tax for the newly created "Wine Tour" template. See more examples of Activities below.

Example 2: Tennis Court

The hotel has 4 tennis courts that guests can book. Bookings are for 1 hour each, with courts operating all days of the week from 7 AM to 6 PM. They offer 3 types of services at different prices - court rental, court + rackets rental, court + rackets + 4 balls rental. 

  • Create an Activity "Tennis Court". Work schedule - all days of the week, 7 AM - 6 PM; minimum guests 2, maximum 4; children are allowed; Capacity is NOT per guest. 
  • Add three options for the three types of services, setting a separate rate for each. In the base price, set the court rental price. In the rate for "court + rackets rental" - in the base price, set the court rental price, and in the prices per guest and child, enter the price for renting 1 racket. In the rate "court + rackets + 4 balls rental", in the base price, set the price for court rental and 4 balls and again in the prices per adult and child, set the price for renting a racket. 
  • In the first option, add the time slots. 
    • Use "Generate": Start time 07:00, End time: 18:00, 
    • Repeat interval: 60 min. 
    • Prefix for the capacity pools that will be automatically created - since the capacity pools will be the same for all options, edit the name so that it only contains "Tennis Court". 
    • Capacity: 4 - corresponds to the number of tennis courts. 
  • Copy the created time slots from the first option and paste them into the other two. This will then transfer the same capacity counters, meaning that booking one time slot for any option will also deduct from the time slots of the other options. 

Example 3: Massages/Hydromassages with fixed time slots

The module is not intended for services that are freely booked by hourly schedule, where bookings can have different durations and the aim is to maximise schedule occupancy. However, there are situations where similar services can also be sold on the principle of fixed time slots. For example, if you offer services in the SPA that have a relatively similar duration, you could set up time slots, e.g., on the hour or half-hour, and offer different services (options). The disadvantage is that if you use 1-hour time slot, even if a service is 30 or 40 minutes, the entire time slot is occupied. The greater the difference in the durations of the options provided by one specialist, the greater the loss of time in the fixed time slot model. 

Here is an example setup. For instance, if you offer manual massages and a hydro-massage bath, you can approach it as follows:

  • Create two Activities: "Massages" and "Hydromassages". Min/Max guests: 1. 
  • As different options, add the different types of massages and baths, setting different prices for each option. 
  • For massages, set the time slots to 1 hour, and as capacity, set the number of masseurs you have. Copy the time slots between the different options to share one capacity (to use the same capacity counters) 
  • For Hydro-massage baths, set the time slots to 30 minutes, and as capacity, set the number of Baths. Again, copy the time slots between the different options to share capacity.

Booking

Guests can book Activities through the WBE, and reception through the new "Activities - Availability" screen. This creates bookings without a room, which you can see on the Arrivals, Departures, and In Hotel screens. Find more details below. 

Here's how a guest's booking is reflected in the system:

  • Booking each Activity creates a new, separate booking for it with guest contact information.
  • The booking is marked as a booking without a room. 
  • The service usage date is in the Arrival field. 
  • The service usage time is in the "Arrival Time" field. 
  • The service itself is added as a daily charge to the booking with the tariff price calculated by the Activity.
  • The consumption of the time slot's capacity is carried out by the created charge, its capacity counter and its service date. 

The recommended approach when changing the date or time of a booking is by cancelling the old booking and creating a new one through the "Activities - Availability" screen. If for some reason you cannot or do not wish to cancel the old booking, you can manually change the date and time by: 

  • In the booking itself, you edit the arrival date and time.
  • In the charge, you edit the service date and the capacity counter corresponding to the new time slot.

New "Activities - Availability" screen

Open the new screen from "Availability" > "Activities - Availability".

  • Fill in the number of adults and children 
  • Select a date. 
  • Select an Activity. 
  • You will see the available and occupied time slots (coloured). In the upper corner of each time slot, you can also see the remaining capacity. 
  • Click the time slot to add it to the cart. This selects the time slot, but you do not yet have a booking. 
  • You can add more time slots for other Activities in the same way. 
  • Open the cart from the top right corner of the screen. There you will see the price of each booking, as well as the total amount. From there, you can also remove added lines. 
  • When you wish to complete and create the bookings, fill in the guest's name, email or phone and select "Create". 
  • On the next page, you can see the status and creation of the bookings. After creation, you can open all created bookings in Advanced Search. 

WBE

In the WBE, you can book Activities independently of rooms or along with them. The bookings for Activities themselves are not linked to room bookings. This provides maximum flexibility in selling Activities. 

The processes for booking a room and an Activity are different and go through different steps, with the final page being the same - where bookings for all added rooms and Activities are completed.

The WBE now also has new entry points. This means that depending on the integration or the link the guest receives, one of the following pages can be opened: 

  • Calendar (the old home page) from which room booking begins. 
  • Selection. This is a new simple and clear screen where the guest has to choose what they want to book: Rooms or Activities. 
  • Activities. The Activities screen opens directly. 

You can choose to use the universal entry point "Selection" everywhere or opt for a more specialised approach - on pages describing room types, have a link to the "Calendar", and on pages describing Activities - a link to "Activities". 

Either way, on the internal pages, the guest can switch between the rooms page and the Activities page, and thus book either one of the two or both together. The switch is made via two new buttons just above the date change button. Besides being convenient for the guest, this also provides an opportunity for an upgrade. 

Booking an Activity goes through the following steps:

  • Activity Selection. The guest sees photos and descriptions for each Activity. 
  • Date and number of guests selection 
  • Options and available Time slots. The guest sees the different options and their prices, as well as the available time slots. Selects a time slot and adds it to the cart. 
  • Final page. From here, the guest can complete their booking or add more Activities or Rooms beforehand.

Guarantee Policy 

Bookings for Activities are made with the default Guarantee Policy selected in the WBE settings. The Guarantee Policy determines the deposit amount, the method of guarantee, and the cancellation policy. 

Arrivals and Bookings - Advanced Search Screens

Bookings for Activities can be viewed on the booking search screens - Arrivals and Advanced Search. In Arrivals, Departures, and In Hotel, we have provided a new filter with which you can filter bookings by type: All, Room bookings, Non-room bookings, Activity bookings. Thus, if Activity bookings are served at a different reception, it can be chosen for each of them which bookings to see: the hotel reception - room bookings, the Activities reception - Activity bookings. The setting is remembered for the station and is automatically selected the next time the screen is opened.

Visually, you can also easily distinguish Activity bookings: In the Room column, you will see the name of the Activity for which the booking is, it also has an icon and is coloured differently. 

In the Bookings - Advanced Search, you can find similar bookings using the existing Booking Type filter: Non-room bookings.

Other Improvements

  • Activity Calendar - similar to the room calendar, you can now view and manage special days that you can colour differently. In the same way as in the room calendar - click on the date row to set or remove a colour. Keep in mind that the list of special days is common between the room calendar and activity calendars - i.e. whatever you choose in one calendar, you will see in the other. 
  • Event Reports / KPI Groups  - in the Other Revenue column, we have added the sum of charges from two more categories: 1. Charges transferred from the POS to the Event folios. 2. Charges from bookings or other sources and different from rooms and meals. 
  • Events - Activity search
    • We improved the Activity Type filter. You can now select several positions and thus get several different selected activity types in one report. 
    • New grouping - by Activity Type. Grouping in combination with filtering makes the list more readable and clearer.
    • When grouping by date, we also added the day of the week 
    • Event Code (WBE). We improved the screen for entering the event code and selecting a block to make it clearer for your guests. The selected event and block, as well as the process for changing or removing the code, are shown more clearly. 
  • For all channel managers, we added an additional check when importing bookings. Changes and cancellations are imported only if the booking has a "Expected" status. If the booking already has "Checked-in", "Checked-out" or "Cancelled" status, no changes are imported. In the Inbox, such changes appear with a 'Processed' status, and tasks are created for the bookings. 
  • Booking.com- we improved the import of existing, expected bookings (reservation summary). Upon initial launch of Booking.com, the system can import existing, expected bookings through a special procedure performed by Clock's service team. In certain situations, which are beyond our control, Booking.com may provide only partial information for expected bookings, although in other situations it provides full information. In our opinion, Booking.com does not send full information for past bookings in situations where the hotel has not used a PMS connection before. On our side, we have implemented both protocols so that you receive as much information as possible. When using the "Import" function, we try to get full information for the bookings. If full information is not received from Booking.com through this function, you can use the new "Import by summaries" function, where bookings will be imported, but with partial information. Partial information means that Booking:
    • does not send information for all guests per booking, as well as contact details. Only the names of one main guest are present. 
    • does not send additional services, their prices, or information on included taxes and fees 
    • does not send remarks, client requests, and other descriptions 
    • does not send credit card details 
    • sends information about companies and commissions 
  • We changed the list of countries and the behaviour of the custom list. Before the change, what you entered in the customised list replaced the full list. So, to add one country, you had to fill in all - i.e., fill in the entire list. After the change, in the custom list, you can add only the countries you wish to add or replace their names. The full list is "merged" with the customised list and is thus presented for selection. The customised list has priority and replaces the codes if they exist in the full list. Additionally, the selected "preferred" countries now appear at the top of the list in all places where there is a country select.
  • By default, the Guest data retention period now has a default value of 120 months. 
  • Housekeeping tasks - archive - now also shows completed tasks for common areas. 
  • Adyen - we added the payment methods Alipay and WeChat. 
  • We removed the limit on the number of components that make up the virtual room. Previously, the limit was up to 10, but there are properties that need more components for one virtual room. 

Fixes:

  • Activities Calendar. We resolved an issue where the calendar did not work if it included a day with a change in daylight saving time (summer-winter). 
  • Room features - icons whose name contained a number could not be added - for example, sticky_note_2 
  • Rooming list - bookings were not created if they were linked to an Event and a "default transfer folio" was selected in it.

Clock Update (24 Sep 2025)

New Functionalities

Event Code – reserving multiple blocks in WBE with a single code

Using the existing block codes, guests can reserve rooms from a specific block independently via the Web Booking Engine (WBE). When an event contains several blocks, until now it was necessary to use several different block codes. This led to complications and difficulties in communication with clients. We therefore made a change that simultaneously expands functionality and preserves the previous way of working.

Example of the new functionality:

We have an event in which four blocks are created:

  • DBL for 1 guest named "Single Use"
  • DBL for 2 guests named "Double Use"
  • TRPL – rooms for three guests
  • 1 DBL room for the organizer which is free of charge

Since we keep the old functionality, of course you can assign a separate code for each block and provide 4 different codes to the organizer.

Or:

With the new functionality you can add one common code to the event itself. Using this single code, guests will be able to reserve all the blocks. In our example, however, we have a block for the organizer that must not be accessible to all guests because it is free. Therefore we introduce a separate block code only for that block.

What happens in this case?

  • The event code can be used to reserve the three blocks for which no individual block code has been assigned.
  • The fourth block (for the organizer) will be accessible only via its specific code.

This way we preserve the flexibility of individual codes and add the convenience of the event-wide code.

Reservation through WBE

When the guest enters the event code on the WBE start page, a dialog will appear in which to choose which of the blocks they want to reserve. If they want to make a second reservation for another block, they again select the event code field and specify the desired block.

By default the event code field is not shown in WBE. If you want to use it, activate it from the settings: WBE settings → WBE rates → Show Event Code.

Adding the event code in documents and emails

For use in documents and emails related to the event, the new code can be added to templates via the parameter:

Folios – Advanced search

We added a new screen that allows you to find folios by multiple criteria, and also to perform transfers from multiple folios to another folio with a single click.

You can use various filters to find exactly the folios you are looking for or want to review:

  • By folio criteria: folio status and type, creation/closing/cancellation periods, users, etc.
  • By related reservation criteria: company/agent of the reservation, status, arrival and departure.

Besides being a tool for finding and viewing folios, the new search can help you significantly in situations where you need to transfer charges. For example, you can find all open folios of reservations from Company X arriving between May 1 and 4, select them and transfer them to a new company folio with a few clicks.

New quick options for transfer

We also added a new functionality – a quick selection of what you want to transfer. The available options are:

  • All – all charges in the selected folios;
  • Packages – only charges generated by rate posting;
  • No City Tax – rate charges excluding city taxes;
  • Room Only – rate charges limited to revenue groups "Rooms" and "Packages";
  • Extras – manually added charges as well as POS transfers;
  • Custom – option to select which revenue groups will be transferred.

Multi-column view of folios from different reservations

Another new feature is the ability to open multiple folios in multi-column view even if they are from different reservations. Until now this view was available only for folios from the same reservation.

You can now select up to 10 folios from different reservations and open them simultaneously. There you will have access to all tools such as Split, Edit, Transfer, etc. – which greatly facilitates the distribution of charges between different folios or reservations.

To find the folios you want, use filters such as reservation status (for example "Checked-in") and arrival/departure dates.

The new advanced folio search is added to the navigation menu – in the "Other functionalities" section.

Centralized management of charge templates

We added a new tool that will help hotel chains manage the prices of additional services much more easily across all hotels in the group. On one screen you can see a combination of all your hotels and all services. In a convenient cross-tab you will quickly notice which services are available in which hotel and at what price – and also where they are missing. This screen is extremely useful both during initial configuration of hotels and during subsequent operational price changes.

Here are details about the new functionality:

  • To open the screen, select Settings → Charge Templates – All PMS Accounts from the Charges & Taxes section. You can also open it from the Charge Templates screen using the button More… → All Accounts.
  • Displayed as a cross-tab: vertically – charge templates; horizontally – hotels. In the top-left corner there is a quick search field for the template name.
  • Each cell shows whether a template with that name exists in the hotel (you see its price) or does not exist – in that case an "X" is shown.
  • You have the option for quick price editing directly in the cell.
  • You can edit or create a template with all its data via the Edit button, which opens a full editor with all fields.
  • You can also use Copy/Paste to create the same template in all hotels.
  • If the template does not exist at all in the table, you can add a new row with the "+" button. Then you create the template in one of the hotels and then copy and quickly spread it across all the others.

Attention for templates with Capacity Counter, Meal Plan or Housekeeping template

For more complex configured templates that use a Capacity Counter, Meal Plan or Housekeeping template, you must be more careful when copying. The reason is that these elements are defined separately for each account, and when pasting the system attempts to find a matching element by name in the target account.

Example: If you copy a template with a meal called "Breakfast" and paste it into another hotel, the system will look for a meal plan with the same name in that account. If it does not find it, you will see a red message under the respective field that no match was found.

Tip: Keep uniform names of these elements between hotels – this will make the copy process much easier and smoother.

Improvements

  • Reservation notes in the Room Calendar: In the reservation details pop-up that appears automatically when you hover over a reservation, you can now see all notes added to the reservation. This includes: Guest Requests, Housekeeping Notes, Meal Notes and Notes.
  • Folio screen – easy transfer of nights excluding tourist tax and other common cases:We added the ability to transfer charges much more easily in a number of common situations. With one click you can choose ready (preset) options or use your own filters. To use the new functionality:
    1. Open the folio you want to transfer from;
    2. Select All → Transfer to;
    3. At the top of the screen you will see a new section with selection options. By default "All" is selected, which corresponds to the previous behavior. Hover over the other options to see their descriptions. The options are the same as described above for transfer via Folios – Advanced Search.
  • Events Activity Calendar – capacity services: You can now visualize services with limited capacity (i.e. those with a selected Capacity Counter) and their availability for each day in the Activities Calendar. For example, if you offer parking spaces and have defined a counter for that service, you will be able to see directly in the calendar how many free spaces you have for each day. We remind you that the same functionality had already been added to the Room Calendar. How to enable this visualization:
    1. Open the Activity Calendar;
    2. Select the settings icon (gear) in the top-right corner;
    3. Choose "Capacity Services";
    4. Select which services you want to be visible and confirm the selection.
  • Daily availability information will appear at the bottom of the calendar.

  • Capacity Counters – types & grouping:When using multiple Capacity Counters for different purposes, there was a need to group them. You can now assign a group to each counter. This is done in the edit screen where you can choose from predefined groups or enter your own name. After you assign groups, in the screens for changing daily capacity or during a bulk update you will be able to:
    • filter by groups;
    • see a clearer grouping of counters according to their functionality.
  • Booking.com – commission import: If you use the direct interface with Booking.com, you can now take advantage of a new functionality – importing the commission calculated by Booking and sent with each reservation. This facilitates tracking and analysis of commissions. To enable it, go to the Booking.com interface settings screen and enable the option "Process received commission data".
  • Booking.com: A new column has been added to the rate map: Waived cancellation fees, for easier viewing and tracking.
  • Issuing keys (codes) for access via Online check-in: The purpose of this functionality is to simplify the work of hotels without a reception or with limited reception hours that use electronic locks with codes.
  • Why code locks?

    If the hotel uses code locks, there is no need to issue a physical card to the guest. That is, if the guest receives the access code in advance, they do not need to be met by an employee. In this case the hotel does not need a kiosk, whose primary function is issuing cards. Issuing a key code can be initiated directly from online check-in.

    You can use this functionality if:

    • Codes can be sent automatically by email through the integrated access control system.
    • It is not necessary to explicitly send the code if the Guest Portal PIN has already been sent (or can be resent by a separate email on the day of arrival). This applies to systems that use the PIN as an access code.
    • The access control system must support issuing codes for future dates.
  • For additional information and activation of the functionality, please contact our support team.

  • Event Meeting room utilization Report: For multi-room reservations, the PAX value is now distributed evenly among the halls to avoid inaccuracies in average values. This method provides a more balanced calculation. For maximum accuracy, create separate reservations for each room with the exact number of guests.
  • POS receipt printing: Publisher company data has been added at the bottom of the printout and a copy number for better traceability.
  • Company data – third identifier: In connection with specific legal requirements (e.g., France), a third field for company identifier has been added. We recommend using it instead of adding the data in the "Additional Billing Info" field.
  • Interface update:The replacement of the old user interface continues. The following screens have been updated:
    • PMS: key card settings, door codes for standalone PIN keypads, and telephone calls (including reports in the Control section).
    • POS: new settings screens and report screens (now with search capability). The old screens remain active. The new ones are accessible via Settings → New and Reports → New.

Fixes

  • Reservations – Advanced Search – Excel export: a row with the total amount (Total) that had been missing has been added. Column names have been changed – full names are now used instead of abbreviations.
  • Rounding of quantities in folios: previously, quantities with up to 4 decimal places were allowed, which had no practical value but created difficulties in rounding, fiscalization, and exports. From now on a maximum of 3 decimal places is allowed.
  • SmartHotel – "Sync" tab: a problem where downloading files did not work and an error occurred has been fixed.
  • WBE – Out of season: for out-of-season periods, the first date of the period was disabled for selection even though departure was allowed on that date. The problem has been fixed.
  • SiteMinder and OTA channels: in cases where a cancellation was sent immediately after the reservation was created, channels sometimes sent both messages (create and cancel) simultaneously and in reverse order. This caused wrong import of the reservation as valid even though it had been canceled. Additional checks have been added – if a reservation is once canceled, subsequent messages will not be accepted, so the problematic situation can no longer occur.
  • Company, Guest and Deposit ledgers: a problem was fixed where reports did not show data for the first date from the beginning of operations if there was no opening balance on that date.

Integrations

New functionalities

  • API – notification on guest data change: A new notification has been added which is triggered automatically every time guest data is edited for a reservation with active status (expected or checked-in). More information can be found in the Message Channels (Webhooks) section of the API documentation.
  • AppConnector – upcoming integrations: AppConnector now provides information about new integrations that are in development. With this functionality you can not only see what is coming, but also apply to be a pilot client and be among the first to try it. The list of upcoming integrations will be gradually supplemented over the coming days.

Improvements

  • Salto KS – RFID key issuing: When an RFID tag is not read during key issuance, the system now displays a clear error message.
  • Salto KS – access to common areas: Guests now receive access not only to the doors configured for their reservation but also to all "common doors" defined in the room settings.

Fixes

  • Google BigQuery Export / Private Analytics: synchronization issues when exporting data to Google locations outside the USA have been fixed.
  • German Fiscalization (DSFinV-K): the statuses of daily closure exports were not updating correctly. The problem has been fixed.
  • Romania eFactura: an incorrect calculation of discounts in sums by tax groups that resulted in invalid documents has been fixed. Correct values are now applied for successful invoice submissions.

Clock Update (29 Jul 2025)

New Functionalities

Currency Conversion of Rates

We have added a new function, "Change Currency and Prices", which allows for easy currency conversion of existing rates. The system automatically recalculates the values at all levels within the rate based on the specified exchange rates. The function is accessible via the "Rates Management" screen, by clicking the "..." button located in the top right corner.

Here's how the new functionality works:

  • Selected rates are reviewed, and for each rate whose currency differs from the submitted one, the values are converted at the following levels:
    • Guest offsets in the Rate - only those that are for a fixed value (percentage-based ones are retained);
    • Guest levels in the Rate - the "Price" field is updated if it is populated;
    • Seasons - both fields, "Price" and "Weekend Price", are updated if they have values. Percentage-based derived rates are skipped.
    • Guest offsets in the Season - same as in the rate;
    • Guest levels in the Season same as in the rate; 
    • Days - if a price exists, it is converted. Percentage-based derived rates are skipped.
  • The currency of the rate itself is changed.

How to use the new function:

  • In the "Rates Management" screen, load the rates you wish to convert;
  • Select the rates in the list and choose the "..." button, then "Change Currency and Prices";
  • Select the new currency and confirm;

Wait for the system to complete the rate conversion, then check the resulting prices.

Improvements

Room Calendar

Capacity Services

Quickly check the availability of parking spaces, rental bicycles, extra beds, and any capacity services. If you have services set up that are limited by a specific daily capacity (Capacity Counters), you can now choose to view them directly in the Room Calendar. Previously, this information was available in a separate report, "Charge Template Availability Report," but by adding it to the Room Calendar, it is now much more accessible and user-friendly. 

To select which capacity services to view in the Room Calendar:

  • Open the filters and select "Capacity Services";
  • Select the services and confirm.

You can save your selected filters on the screen by clicking the "Save as default" button, so you won't have to select them every time. 

The list of selected capacity services will appear at the bottom of the calendar, after all rooms. For each service and day, you will see the availability, and if you hover your mouse over it, you will also see the base capacity and quantities sold. Furthermore, the day will be coloured red if there are no availabilities, making it easy to spot. 

If you are not yet using Capacity Services, we would like to remind you that by setting daily capacities, you can regulate the sale of certain services and rate packages. You can easily manage scenarios such as the sale of parking spaces, bicycles or other rental equipment, folding beds, cots, or even snacks if they have a limited capacity for each day. Please contact our customer service department if you need assistance with the setup.

Quick Guest Info

We have also added very important guest information to the Room Calendar. The following "quick" information has been added to bookings:

  • Returning guest icon. If a guest has one or more valid and checked-out bookings, we display a returning guest icon - a star for them. You can also see the number of their previous visits in the quick booking information. For hotel chains, we would like to point out that visits to all hotels in the chain are taken into account.
  • Group/Family Booking Icon. If a booking has associated bookings, there is now an icon in the Room Calendar to help you easily identify it. 
  • Upgraded Bookings Icon. You will easily recognise which bookings are upgraded through the indicator with an upward arrow icon. We remind you that an upgraded booking is one whose rate is not for the room type the guest is staying in. Easy access to this information will help you with both quick audits and potential room reallocations.

More Useful Improvements:

  • Two-Day View for Arrivals/Departures. The Room Calendar is a great tool, but sometimes the 31-day view is not optimal. When using the calendar for arrivals or departures, you need to see the guest's full name. Therefore, we have added a new, two-day view, which provides enough space to see departures and arrivals with guests' full names.
  • Search Bookings by Guest Names. To make it even easier to serve guests from the Room Calendar, we have also added the ability to search for bookings by Guest Name, phone number, or email. Enter the details in the field at the top of the screen, and the found bookings will be highlighted for quick and easy identification among all others.

Booking.com 

We have added two new features to our direct interface with Booking.com:

  • Download Future Bookings. When transferring your Booking.com account to Clock, it is now possible to download all expected bookings into Clock. Downloaded bookings are displayed in the standard way – in the inbox. Unfortunately, with this download method, Booking.com does not provide the ability to download credit card details. Credit card details are transmitted only once – during the initial download, and are not accessible thereafter. To download future bookings, please contact customer service.
  • Report Invalid Cards and Failed Payments. We have expanded the automatic reporting of invalid credit cards to Booking.com. Currently, when a card is imported, it undergoes a verification process (). If tokenisation fails, the card is reported as invalid. Even if the card is valid, this does not mean it has sufficient funds. Therefore, we have added another automatic function – if, during automatic advance payments (Payment Autopilot) or manually initiated payments, it is found that payment on a customer card received from Booking.com cannot be processed, we send a report for an invalid card again.

Events

Event Activities

We have added several interesting improvements that make the report even more useful:

  • Group by Dates. Previously, activities were grouped into two categories – Meeting Room bookings and Catering. However, this did not provide a clear view for the day. With the new parameter "Group results by dates," activities are in a single list, grouped by days and sorted by start time. This view is very convenient for seeing the hotel's overall workload chronologically.

  • New Column - Assigned to User. You can now easily see which employee is responsible for a specific activity in the report and quickly contact them.
  • New Column - Sales Stage. You can quickly see if an activity is optional, confirmed, paid, etc.

The above changes apply to both the Compact and Detailed views of the report.

Events – Block Pricing With/Without City Tax

If your market practice is to provide prices for rooms without including the City Tax in BEOs, this setting may be of interest to you. The new setting is located in the Event – Blocks section. If you enable it, the block price in the BEO will not include the City Tax, even if the rate has one defined. At the same time, if you make a booking based on this Block, the bookings' charges will include the City Tax, thus ensuring you do not miss collecting it. The option to exclude City Tax from the BEO works for rates defined with the City Tax mode "Extra, Separate charge".

Lost Business

To the block reports: KPI Reports, Event Room Occupancy and Top Companies by Revenue, we have added a new option "Lost Business". If selected, the report will analyse only cancelled Events and their cancelled charges. This way, for example, you can see which companies have the most cancellations, explore lost revenue by different marketing segments, or even by rooms.

Event Room Occupancy and Composite Event Rooms

If you have composite event rooms, this change may be of interest to you. The reporting of composite rooms and their components in statistics is a significant challenge. What should be reported in the statistics – the component areas or the composite room sold? How should revenue be allocated among the rooms? To address these questions, we have added two operating modes for the report. That is, you can view the data from two perspectives:

  • Real Areas - the report shows only the base areas, without the composite rooms. This means a booking for a composite room is counted as a booking for individual base areas. The booking's revenue is allocated proportionally to each of the base rooms, depending on their area. This view provides the most accurate analysis regarding the area as real estate and, consequently, the return on investment for a given area.
  • As Booked/Sold - the report shows the rooms that have been sold/booked – whether they are base or composite rooms. This means if you sold/booked a composite room, you will see a composite room in the report; if it's a base room, you will see a base room. This view will help you understand how and in what combinations you sell your spaces – in other words, what your clients are looking for most.
  • There is also a change in the analysis of bookings for multiple rooms (a single booking where multiple event rooms are selected). Previously, if a booking was for two rooms, the revenue was divided equally, but with this change, the revenue allocation to each room is proportional to its area.

To receive accurate report results, please ensure that all rooms have their areas filled in.

Other

  • Guest Profiles - clear information for Returning Guests. To quickly identify returning guests, we have added a new icon (a star) to bookings in the most important lists: Arrivals, Departures, In Hotel, as well as in the Room Calendar. A returning guest is considered a profile that already has valid and checked-out bookings.
  • Credit Card Payments in Guest Portal and Online Check-in - you can now disable the use of tokenised cards. What is the new setting for? Although payments with tokenised cards are very convenient and popular with guests, in certain situations, they can carry a higher financial risk. The higher risk comes from the fact that these payments do not go through 3DS confirmation. Therefore, what makes them convenient also makes them riskier. The risk arises in case of potential refund claims from guests. Such claims are more easily satisfied if the payment did not go through 3DS. If you have encountered such cases and believe the risk outweighs the benefits, you can disable tokenised card payments in both locations. In this case, the system will always require the full card details to be entered, followed by 3DS verification if required by the bank. Find the new setting "Request a new credit card upon payment", in the settings for Online Check-in and Guest Portal.
  • Charges – Additional Field Check - the report is now also available for Clock POS, through the new report screen. We have added the ability to search for charges with empty fields, without a filled-in value.
  • The log of fiscal operations now includes the Username of the user who performed the operation.
  • Via the Departures screen, as well as the mass function "Client Folios Print Preview", the new print view of folios will now open.

Fixes

  • Synxis - in certain situations during the import of group bookings where the same profile is used as the main guest, conflicts arose and not all bookings from the group were created.
  • We have improved the logic for processing monthly invoicing to avoid the possibility of duplication with credit card payments.
  • Company Contracts - when editing and potentially duplicating a contract name, there was a possibility that rate tags and discount codes would not be saved.

Localizations

Romania

  • RO e-Factura - The issued documents to customers outside Romania are not processed by ANAF; thus, they are now excluded from e-Factura export to prevent errors and unnecessary document volume.

Clock Update (03 Jul 2025)

Booking.com - Direct Interface

We are pleased to inform you that we have successfully completed the certification and testing of our new two-way direct interface with Booking.com – our most key partner in the OTA space. The new interface offers more functionalities, faster synchronisation and easier setup. Here are some of its most distinguishing advantages:

Support for all pricing models

The new interface supports all pricing models offered by Booking.com. This means that for one rate on Booking.com, you can send various pricing options – the pricing model configuration:

  • Standard Rate;
  • Single Occupancy Rate;
  • Occupancy-based pricing;

This flexibility can effectively lead to a reduction of two or more times in the number of supported and mapped rates.

Support for all restrictions

You can take advantage of all the rate management options that Booking.com offers, including:

  • STOP, Closed for Arrival, Closed for Departure;
  • Min stay, Min Stay on Arrival;
  • Max stay, Max Stay on Departure;
  • Min days before arrival, Max days before arrival .

Automatic Marking of No-Show Bookings

The new interface automates the process of notifying Booking.com of no-show bookings. It is sufficient to mark the booking as No-Show or Cancelled in Clock PMS, and the system will automatically send the corresponding update to Booking.com. You save time and eliminate the risk of commission charges for missed actions.

Important: According to Booking.com's policies, the booking must be marked as No-Show on the day after arrival, but no later than two days after the departure date.

Automatic Credit Card Validity Check

If you use the integrated payment service in Clock PMS, the system automatically checks the card when it is created. The card is tokenised and validated automatically. If an invalid card is detected, Clock PMS sends this information directly to Booking.com. Booking.com will, in turn, notify the guest and request a new credit card.

Significantly Faster Synchronisation

Thanks to the direct integration with Booking.com's servers, the new interface eliminates intermediaries that could slow down communication.

A synchronisation cycle for availability and rates every 5 minutes is supported, meaning that most updates will reach Booking.com within an average of 2.5 minutes.

Bookings are downloaded at 2-minute intervals, ensuring almost immediate updating of occupancy information.

Faster and Simpler Configuration

With direct integration, the process of connecting with Booking.com is significantly easier and faster. Without using a channel manager, no prior creation and mapping of products in a third-party system is required.

The entire configuration and connection process can be completed within 5 minutes.

Support for Booking.com's City Tax Model

The new interface fully supports Booking.com's City Tax calculation model.

In Clock PMS, the City Tax, which is a percentage of the overnight stay, is calculated per day (daily rate), while on Booking.com it is based on the total value of the overnight stays. This is a prerequisite for discrepancies in the tax amounts calculated by both systems. With the direct connection, you can now choose whether to import the City Tax as calculated by Booking.com and ensure full compliance between both parties. This guarantees that the total booking amount in Clock PMS matches exactly with that on Booking.com. It further facilitates automatic payment processing by preventing errors in virtual card transactions, where a difference of a few cents can lead to a failed payment.

KPI and Analyses for Events and Groups

In order to analyse the performance of this aspect of your business, we have added 12 new reports.

  • Events / Groups KPI Reports. The new KPI reports examine numerous important and specific key performance indicators for business activity and allow for various data slicing and analysis. In addition to Net or Gross Revenue, the reports also calculate indicators such as Total Area of Rented Rooms and Average Revenue per Unit Area, Total Guests Using the Rooms and Average Revenue per Guest, Average Booking Duration for a Room, etc. These indicators can be viewed in various segments: By Day, by Month, by Company, by Event, by Marketing Indicators (Source, Segment, Channel), by Pipeline Statuses, by Agent or Summarised.
  • You can select the columns to be displayed, making the report more compact and convenient for printing or exporting to PDF format. Changing visible/hidden columns happens in real-time without regenerating the report.
  • You can add or remove any of the key indicators as a chart to the report (select Charts), as well as change the type of charts to be most user-friendly for information perception. You can also choose to visualise the indicators in one chart to compare trends. Changes to the chart view are made from the "Chart Types" button after loading the report data. Changes to the chart view are in real-time and do not reload the data. You can safely experiment with different visual options to find the most suitable form for analysis.

  • Meeting Room Utilisation - provides information on how much each room has been used, the revenue generated from it, the total sold area, and the average indicators. Charts have been added to the report, which you can hide if desired.

  • Events / Groups - Top Performing Companies - through this report, you will easily find out which companies are the largest revenue generators in the field of Events and Groups, as well as average indicators for each company.

The new reports, along with some of the older ones, have been organised into a new section in the report list – "Events / Groups".

Improvements

Discounts (Discount Codes)

We have added more options to Discounts so that you can fully implement them in your pricing policy and get another pricing tool.

We remind you that with the previous update, we introduced the ability for discount codes to be set up within Companies (Corporate Contracts) and applied automatically to their folios. With this update, we are adding the following capabilities:

  • Discount Codes in Bookings - they are transferred to the booking folios upon their creation and will activate the corresponding discounts.

  • Discount Codes can now also be entered in Guest / Rooming Lists – this allows an entire group of bookings to easily receive a discount upon creation.

  • Discount Codes in Events/Groups - they apply discounts to the Event/Group folios.

  • New option for Discounts – to be calculated by days. You can now choose how discounts are calculated per folio:
    • Overall for the entire folio – a simpler option with fewer lines;
    • By days – this way, they do not distort the average revenue per night for each of the days.

  • Screen Multi-Hotel Management of Discounts and Copying Options. To effectively manage discounts across your entire chain of hotels (and now restaurants), we have added a new screen to provide a clear overview of all accounts simultaneously. Through it, you can easily identify setup issues, as well as easily distribute a discount by copying it to all hotels. To open the new screen, in the Discount setup screen, select "All Accounts", next to the screen title.

Important: Please note that if you set up a discount in a POS account, it will be activated with the same logic as in PMS accounts. That is, if you set up the discount in a Company and it covers the revenue groups from the POS system, the discount will be automatically activated for the accounts of that Company in the POS account. Subsequently, we plan to further expand the functionality of discounts in the POS system.

  • Discounts no longer require a charge template. If none is specified, the general discount template set in Charges & Taxes -> Discount - Template will be used. This significantly simplifies multi-hotel setup because when copying Discounts between hotels, you will not need to select anything extra.
  • Changing the configuration of an existing discount no longer automatically leads to a recalculation of all open folios where this discount has been used. The previous behaviour often led to mass, unexpected changes in folio values, causing confusion. Now, the discount percentage in a folio is locked at the moment of its creation. If you change the configuration of a discount code, existing folios will not be automatically affected. If you wish to apply the new discount code settings to existing folios, you must remove it from the folio itself and then add it again.
  • You can now delete Discounts that you do not use.

Rate Plan / Room Type Restrictions - Mass Update and Removal of Restrictions

If you do not yet use Rate Plan or Room Type Restrictions, here is a brief reminder of the functionality they offer – they allow the application of Min Stay or Stop, quickly for entire groups of Rates or Room Types. They take precedence over restrictions set in the Rates, with the highest priority being those at the Room Type level.

  • Through Mass Update, you can set Rate Plan / Room Type Restrictions for a long period, without needing to click day by day.
  • General Removal of Minimum Stay. If at lower levels – Rate, Seasons, Days – you have set a Minimum Stay, but decide that a specific date no longer requires this restriction, you can generally remove it by setting Minimum Stay: 1 at a higher level. Since higher levels, such as Room Type, have the highest priority, this will override any other Minimum Stay restrictions without you having to search where they are set. Using the above functionality, you can do this easily and quickly for a longer period.

Other

  • WBE - "alt" text for images. In order to fully comply with accessibility requirements, you can now add text descriptions ("alt" text) to images in the Web (room types and additional services). "Alt" text is an alternative description of the image. It is used by screen readers to convey the content of the visual element to visually impaired users. You can now fill in these texts below the corresponding image of a room type or additional service in the respective settings.
  • WBE - Alternate Currency. We have added a new setting for alternate currency. If you select an alternate currency, you will see prices in WBE in parallel in two currencies. Prices in both currencies will be visible in the following places in WBE – Room Types Page, Rates, Additional Services, and the final step values. Please note that the currency of the rate remains the leading one. The alternate currency is informative, for the convenience of users.
  • New Company Contract Management Screens. In the navigation, in the Companies section, we have added a new link to the new screens for viewing, editing, and creating Company Contracts. There you can see all contracts, find expiring ones, create new ones, and edit existing ones. Creating and editing company contracts, as before, can also be done from the Company's screen itself.
  • Upgrade Rates (Special Offers) - now takes into account "Disable Room Change". If "Disable Room Change" is marked for a booking, either manually or when using the Room Characteristics selection/sale function, then for Upgrade Rate offers, only products for the current room type (if any) are offered.
  • Monthly Invoicing - when invoicing, charges without a date will also be included. This way, charges transferred from POS, for example, will be included in the next invoice, regardless of the period for which it is issued.
  • Guest Portal - we have improved the mobile view of the "Booking Details" page.
  • Rate Editing - Favourite Rates. The Favourite Rates list is used in the "Rate and Availability" screen for quick access to specific rates. You can now include or exclude certain rates from the list from the rate editing screen - "Marketing & Tags" tab. Additionally, we have added a quick button for access to them on the main "Rate Management" screen, a new filter when searching, and a new column in the rate list.

  • Folios - Creation of Advance Payment based on Received Payment and accounting for advance charges. The change concerns more complex cases related to issuing a second or subsequent advance invoice for a base folio. Until now, the logic calculated and created advance charges, without taking into account already deducted advances in the base folio. We have changed the logic to account for them as well, so the second and subsequent advance documents will include only the remaining amount due;
  • Bookings - Rate Re-Post - we have further improved the logic for rate re-posting in closed folios, so as to reduce cases of "full plus/minus" for affected charges. The system performs a "full plus/minus" in situations where it does not find links between new and old charges. The improved logic examines charges more accurately and resorts to "full plus/minus" less often.
  • Bookings - Advanced Search (new) - we have added new filters for Early Arrivals and Late Departures. In the other two screens - Arrivals and Departures, you can now also see whether a booking has an early arrival (Arrivals) and late departure (Departures). The information is in the arrival/departure time column.
  • Arrivals/Departures/In Hotel (new) - the options for Sorting, displaying Notes, and displaying Additional Guests, are now remembered so you don't have to select them every time.
  • OTA Interfaces - D-edge and the open OTA interface can now import payments. Payment import is necessary when you use WBE, connected via these interfaces, and accept payments directly into your merchant account. As there is no settlement with a third party and the funds are finally received, the bookings must be marked as paid. With our new automation, there is no need to manually add payments to bookings – they will be added automatically. Please note that only payments arriving with the first XML message (at the time of booking creation) are imported. To import payments, you need to enable this option in the interface. Contact our customer service department for more information.

Fixes

  • Company Contracts when displaying associated companies, in certain situations, the same company was duplicated several times. Furthermore, removing Rate Tags or Discount Codes did not work in certain situations.
  • Housekeeping Schemes related to OOS type, this type could not be removed.
  • In the new booking search screens (Arrivals, In Hotel, Departures), errors related to key cards were not displayed.

Localisations:

  • Greece – New AADE/myDATA Connection and e-Invoice Integration with Epsilon Digital. We are pleased to announce the newly developed integration with Epsilon Digital, which covers the myDATA and eInvoicing mandates in Greece. Read more in our support article GREECE - AADE/myDATA connection and e-Invoice with Epsilon Digital.
  • Germany:
    • DSFinV-K export – In some rare cases, the export was incorrectly including future revenue dates. Additional checks have been added to prevent this behaviour. 
    • A TSS deactivation issue has been fixed.
  • Slovenia– The document printout now includes an "Original" / "Copy" label: 
    • "Original" will appear until the first print. 
    • All subsequent prints will show "Copy". 
  • Albania – The fiscal code of the user who closed the folio is now used for fiscalisation with S-connect, replacing the code of the user who opened it. 
  • Romania – RO e-Factura: 
    • The initial authorisation process has been enhanced for improved reliability. 
    • The default setting for exporting folios without a document type ("Close as Folio") is now disabled (previously enabled). This ensures consistent activation across all document types, requiring explicit enablement for each type—including those without a document type—for e-Invoicing.

Integrations

  • Salto KS Door Lock Interface – The integration URLs have been updated. The activation of the interface now proceeds without errors. 
  • Atomize – The activation/deactivation process has been enhanced, allowing for seamless re-activation of the integration when needed. 


Clock Update (20 May 2025)

New Features

Room Calendar - Best Available Rate (BAR) and Minimum Stay

 We've added another feature to the Room Calendar, making this popular tool even fmore useful for you. In the calendar, you can now see the Rates and Minimum Stay for each date and room. This way, you can quickly respond to guest enquiries about availability, prices and restrictions. We plan further improvements in this direction in the future, by linking the calendar more closely with the "Rate and Availability" screen.

  • The calendar can display a price for each day, this is the "Best Available Rate" (BAR) for the room type. To determine which are "BAR", we have added a new setting in the rates. Open the rates that are "BAR" for each room type for editing, select the "Marketing and Tags" tab, in the "Rate Category" field select "Best Available Rate (BAR)", and Save. For one room type, only one rate can be "BAR".

  • As well as being able to see the prices in the calendar, this categorisation can help you find these rates quickly - there is a button for quickly opening them on the home page of the rate editor. In the future, we will also use them in the new "Rate and Availability" screen.

  • Once you have set up the "BAR" rates, open the Calendar, select the filter button and click "Best Available Rate (BAR)". You will see the prices from the selected rates in the calendar. If you want the calendar to always open with prices, you can save the filters as default.

  • In addition to the prices, the calendar visualises the minimum stay by colour, as well as the days that are stopped or have no availability. Hover the mouse over a price to see details about it - the two restrictions: Min Stay and Min Stay on Arrival. You will also see the legend for colouring the price depending on the minimum stay: black if there is no minimum stay restriction, green for 2 days, blue for 3 days, orange for 4 days and red for more than 4 days (1). If the date/room type cannot be sold, due to lack of availability or STOP, the price is on a red background (2).

Multi-Folio View

To make splitting bills easier, we've added a new view in which you can see several folios side by side.

You can open the new view in two ways:

  • From the booking - with the new "Multi-Folio View" button in the "Rates and Folios" section. The open folios of the booking will be loaded.

  • From the folio itself - select the "..." button (top-right) and select "Multi-Folio view". The open folios of the Payer of the current folio will be loaded. That is, if this is a booking folio - all the folios of the booking will be loaded. If it is a Company/Event folio, the folios of the company/event payer will be opened respectively.

Here are the features in the new "Multi-Folio View":

  • Quick Transfer - Simply select the charges from one or more folios and click the "Transfer here" button (1) in the folio you want to transfer them to.
  • Fast Split - Select the "Split" (4) function from the "Selected" drop-down menu (if you only want to split selected charges). The split screen will directly open to its second page, where you can fill in the split percentages and method. If you want to exclude a folio from the split - you can remove it with the red button after it.
  • Create a new folio (5) - Add a new folio for the same payer to split bills or charge something to a separate folio.
  • All other charge manipulation functions are also available here: Addition, Editing, Discount, Void, Split and Transfer to other folios, Discount codes.
  • If you need other folio functions - open the specific folio with the "Open" button (3) in a new tab.

Discount Codes

A new, promising feature that could change the way you price in the future. Currently, it can cover specific cases related to company folios, but we will soon support it much more broadly and it will be able to solve many more cases.

What is the difference between existing Discounts and the new Discount Codes? 

  • Existing Discounts are applied manually. The value of the discount is calculated at the time of application and does not change if the value of the charges in the folio changes (adding new ones, transfer or cancellation)
  • Discount Codes are added to the folio, and this can be done automatically. When the value of the charges changes, the discount value is automatically recalculated. You can add several Discount Codes to the folio, each of which will be calculated and make a separate negative charge for the discount. The fact that you can add them to the folio from the start makes them suitable for automatic transfer.

Where can Discount Codes be set at the moment?

  • The Folio - codes are added to the folio and calculate the value of the discounts in the folio automatically.
  • The Company -  In the Company Contract, you can add one or more codes. They will automatically be transferred to the folio when a new company folio is created. The transfer is only when a new folio is created, after that they can be edited in the folio.
  • The use of codes (setting them in the Company or Folio) is linked to a new right ("Apply Discount Codes"), which you must grant to users.

Where do we plan to add them next?

Our plans are to add them to the Booking, Events and Guest Profile as well, so that they can be fully used as part of your pricing policy and customer loyalty system. 

What is the behaviour of Discount Codes in a multi-hotel environment?

If you have a chain of hotels, then through Discount Codes, you can flexibly manage the size of the discount for each of the hotels. This means that if a Company has a discount code, for example "LEVEL_1", which you have entered in the Company Contract, then for each hotel, this code may carry a different size and nature of discount - that is, in some hotels it may be 10% only on the nights, and in others it may be 12% on the nights and meals.

Why have we added them to the Company Contract and not to the Company itself? 

The Company Contract that is selected in the Company is a feature that allows you to manage the special rates agreed with that company. The Company's discounts are part of that same pricing policy and agreement. In addition, the Company Contract is very convenient when you have a Company with many branches. Similar to rate tags, you can manage discount codes in one, single place, and they will apply to all branches of the same company.

Settings

To set up discount codes for each hotel:

  • Select Settings -> All Settings -> Charges & Taxes -> Discount codes. 
  • Add a new code and fill in the fields:
    • Code - the code cannot be repeated in the same account. Once saved, the code cannot be changed. You will use this code in the Company to link the Company to the discount.
    • Name - As well as for description, the name is used for the text of the discount charge.
    • Charge template - The template will be used for: the revenue group and category, additional fields and the text when printing. You can use one template for all codes or create several, depending on your needs.
  • Revenue Groups - select on which revenue groups the discount itself will be calculated. You can also select groups from the POS. In this case, the discount calculation will also take into account the transferred charges from the POS. 
  • Code Editing - If you change the revenue groups or the size of the discount for an existing code, all open folios in which this code is involved will be recalculated with the new discount size.
  • To add, edit and remove codes, you must have "Settings" access.

To add discount codes to a folio:

  • To add and remove codes to the folio, you need to have the new right "Apply Discount Codes".
  • Open the folio. In the Charges - Discount Codes section - select the edit button.
  • Select the codes, which you can search for by name. Save.
  • One or more discount charges will appear for each of the Codes, depending on the available tax rates. The discount charges per Code may be more than one for the following reason: The charges that are subject to discount are grouped by tax rates and a separate charge is made for each tax rate. This mechanism guarantees that there is no possibility of negative tax bases appearing on the invoice.
  • If the folio has a large number of charges, you may not see the discount immediately. Reload the folio after some time.
  • When adding or removing Codes, the discounts are recalculated automatically. The same applies when charges are changed.

To set Discount Codes for a Company:

  • To add and remove codes to the Company, you need to have the new right "Apply Discount Codes". 
  • The codes are set in the Company Contract. You can read more about Company Contracts HERE.
  • Open the Company.
  • In the "Company Contract" section select "Edit"
  • If there is already a contract select "Edit", and if there is not select "New". You can also choose from existing contracts.
  • Fill in the Discount Codes, after each code press "Add" to add it to the list. Save.
  • The codes are transferred to the company's folios only and only at the time of creating a new folio.

Expect small changes to the navigation.

Soon, we will be making small changes to the navigation bar:

  • Menu Web will become WBE (web booking engine). The access and settings to the legacy booking engine along with the settings for the Gift voucher webshop will be moved to Prevoius Versons sub-menu
  •  Settings for the Guest portal and Online check-in will be moved to a new menu - Guest Interaction.
  •  Mailing list will be moved from Other to Guest Interaction.

Improvements

  • Booking Engine - manual prices. In the Booking Engine we have added a new option, through which, all created bookings can be made with "manual prices". In this way, the price of the guest is fixed and even if it is recalculated in the booking, it will be saved. On the other hand, the disadvantages of manual prices are that because they do not change automatically, more attention is required from your side when changing the period or extending it. The new option is located in: WBE -> WBE Settings -> WBE Rates -> "Create bookings with manual price" (or WBE -> Previous versions -> Settings - Web reservation system -> "Create bookings with manual price" if you use the legacy booking engine).
  • Rates - quick display of "Best Available Rate (BAR)" and the rates published on the booking engine. In the first screen of the rate setting, we added two buttons, through which you can load your BAR rates or those published on the booking engine with one click.
  • Room Calendar - in the information for each booking that is displayed in the pop-up, we also added the Arrival Time and Departure Time of the booking (if available)
  • Reports"Meals" and "Meals - Summary" - the new reports have been reworked to work in the background, so they work seamlessly with larger volumes of data. Restrictions have also been added for both reports - 10 days for the operational "Meals" and 3 months for the summary "Meals - Summary".
  • In the Housekeeper App, you can now see the departure time of the booking for each task. As a reminder, the arrival time is already visible, as well as information about early arrival/late departure.

Fixes

  • In the Rate and Availability screen - in the "Favourite rates" menu, we've hidden archived rates. Previously, the list was becoming too long.
  • Deleting meals was not working if there was a lot of accumulated data.
  • Arrivals/Departures/In Hotel/Advanced Search
    • The last used encoder for issuing key cards was not being remembered.
    • The button to delete a key card was not being displayed.
    • In Hotel / Departures - the Room column was not showing the room change.
    • Searching was slow when searching by free text.
    • Advanced search - searching by guest name and booking status simultaneously was causing an error.
  • Room Calendar
    • Room moves were not being displayed correctly.
    • Depending on the local time zone of the browser, today's date was not being marked correctly, nor were the weekend days.
  • Rooming/Guest Lists - a problem has been fixed whereby a user without "Settings" permission could not create bookings with meals.
  • The "Event Activities" search screen - Depending on the local time zone of the browser, it was not filtering Activities correctly.
  • Trial balance - we added the account name to the print form.
  • Guest Profiles  -> Advanced Search - the In Period Filter showed profiles with voided bookings.

Localizations

  • Italian police form- Italian police require specific information to be collected for every guest. Some of the data is related to data already selected in another field, and with this feature, the data is narrowed down based on a selection of a previous field. For example:
    • If you select Italy in the new field  "Document issue place italian police", two new fields appear: "Document issue province" and "Document issue municipality code". When a specific Document issue province is selected, the Document issue municipality code will offer only the municipalities from the province. 
    • The same goes for the new fields  "Country of birth - italian police", "Birth place province" and "Birth place comuni".

Configurations:

  • Enable the form from Settings > All Settings > Guest profile fields. There, you can enable the Italian police form fields. Once enabled, the necessary fields will be created and automatically added to the guest registration card (back office, self-service and online check-in).
  • Set the form as visible from Settings -> All Settings -> Guest profile fields visibility. Set the Italian police form as visible for the various points.

Important: Make sure that the rest of the field - document_type_italian_police, guest_type_italian_police, document_issue_place_italian_police, country_of_citizenship_italian_police, country_of_birth_italian_police, birth_place_italian_police are HIDDEN. You will otherwise experience issues with saving information due to conflits.


Clock Update (23 Apr 2025)

New Functionalities

Room Calendar

Lots of customisations and new amenities - that's how the new Room Calendar can be characterised in a nutshell. We have added many new customisation options to the calendar so that everyone can use it as conveniently as possible according to their tasks. We've also added new features to help you get your tasks done and service your guests faster and more efficiently.

Here's a list of improvements:

  • Colour customisation;
  • View customisation;
  • Many new filters;
  • Grouping and sorting;
  • Showing bookings WITHOUT room;
  • Room feature icons and quick visualisation of room information;
  • The housekeeping status is updated in real time and can provide notifications;
  • New method for allocating and moving bookings;
  • Quick change of the booking period;
  • Quickly lock/unlock the room change in the booking;
  • Booking moving management
  • Early Arrivals and Late Departures - preview and quick edit;
  • More improvements;

A full description of all improvements can be found in Room Calendar screen - version 2

Guests / Rooming List Import to existing bookings

The Guests/Rooming List Import was very well received by you. We have decided to extend its functionality so that in addition to creating bookings, it can also be used to update guests in already created bookings. In this way we hope it will become your indispensable assistant when processing groups. There are two main scenarios you can use.

  1. Use the original rooming list you received and link the rooms on the rooming list to the bookings.
  2. Prepare a "Template" of the rooming list in which the booking numbers are present. The template can be filled in with guest names by you or you can send it to your partner to fill in. When working with such a template, the linking will be done automatically because the rooming list will contain the numbers of your bookings.

The system synchronises data automatically - updates existing guests, adds missing guests and removes redundant guests. More details on how to use this new functionality can be found at Guests / Rooming List Import to existing bookings

Monthly invoicing

We've added a new tool to automate the monthly invoicing process and dramatically reduce manual operations. The goal of the module is to automatically find a month's charges in the guest/company folios, transfer them to a newly created folio, close the folio and possibly pay it with a credit card. The main cases we solve are the following:

  • Long-term stays: if you invoice long-term guests with a price per night, you can use the new functionality. In this case, the booking is for a long period, and in the guest's main folio you have charges for each day according to their rate. You can easily and quickly invoice all such bookings for a given month.
  • Companies with monthly invoicing contracts: If you have contracts with companies that are frequent guests and invoice for nights and services used in the past month, the new functionality can help you automate the process.

Details on how to use this new tool can be found in Monthly invoicing

Meal reports can now account for additional charged services. 

Previously, meal reports only included meals as selected in the bookings. In cases where meals weren't consistent throughout the entire booking period, and the guest chose which dates to pay for them and which not to, this created processing problems. Not only did this require manual charging, but the booking also had to be marked as "non-standard meal" for the meal reports to account for it.

We've changed this. Meal reports now account for both possible sources - meals specified in the bookings and meal charges.

  • For meals specified in bookings, there's no change from before. They are accounted for as usual.
  • Meal charges are accounted for based on their service date and quantity. For a charge to be recognised as a meal charge, the following is required:
  • In charge templates, as well as in the charges themselves, we've added two new fields: 'meal' and 'child meal'. In the first, select which meal the template/charge relates to, and in the second, whether this is a meal for a child or not. Depending on this, the quantity of the charges will be added to the other meals in the meal reports for the date corresponding to the charge's service date.

Note: Only charges posted to booking folios are accounted for in the Meal report.

This change provides greater flexibility in selling meals. For example, meals offered as optional, additional services in the Booking Engine and Guest Portal will be automatically included in both planning and operational reports. And it will be even more convenient for guests, as they can choose the days and quantity of these services (meals) themselves. Maximum flexibility, with no manual post-processing required!

POS - Re-Open Feature

We've added a new feature to make it easier for you in cases where, after finalising a customer's bill, you discover there are incorrect items, quantities or amounts. Previously, you had to void the bill and re-enter everything into a new bill. Besides being laborious and creating opportunities for errors, this would issue new receipts in the kitchen, which also led to confusion. Here's how the new feature works:

  • You've closed the bill, but there's an error in the charges.
  • Find the bill from "Closed Bills" and access it.
  • Select the "Re-Open" function and fill in a reason.

  • The selected bill will be voided; if there is an active fiscalisation, a reversed fiscal receipt will be issued for the old bill. Receipts for the kitchen will NOT be printed.
  • Charges (menu items) will be copied to a new bill;
  • The payment from the old one will be transferred to the new one.
  • A new bill will open on the charges (menu items) edit screen . You can make the adjustments you wish to the new bill - add menu items or remove lines. A receipt will be printed in the kitchen for the added/removed menu items.
  • If there is a change to the payment amount, you can:
    • Add a payment
    • To void the old and add a new one
    • Refund a credit card payment and make a new payment.
    • If there is no change to the payments and you wish to close the folio with the current payment, you can select "Billing To / Invoice" -> document type -> Issue.
    • If there is active fiscalization, a new fiscal receipt will be issued for the new bill.
Important: Use of the new feature is controlled by the existing void rights:
  • "Charges: Void items (charges) before closure ",
  • Charges: Void items (charges) after closure ", 

as well as:

  • "Work with Other Users' Bills "

Improvements

  • Folios - a small change related to automatically emailing the folio upon closing. Previously, there was a setting that controlled the automatic sending process - the automatic sending template. However, this caused problems for customers who wanted automatic emails to be sent, but only from certain points - the check-in kiosk and the guest's personal portal. There are now two settings: one is to determine whether automatic emails are sent ALWAYS, and the other is for the template to be sent. If you select only a template, emails will not always be sent, but only from places that explicitly require it - Check-in Kiosks, the Guest Portal, the Booking Engine and Monthly Invoicing.
  • Change to the maximum period for which statistical reports can be generated. We have changed the limit so that reports can now be run for a period of 366 days, covering one calendar year.
  • We've added a new filter to Advanced Search - Monthly Invoicing. This allows you to get a list of bookings marked for monthly invoicing.
  • New option - "Lock payments in closed balanced folios" - The new option can be enabled from All Settings -> Documents -> Document behaviour. If enabled, the system will not allow you to add, transfer or void payments if the folio is already balanced. The exception is card payment refunds, which are still permitted. You can use this option for better compatibility with your accounting system or for better control over payment operations. 
  • New Event Screen - "Assigned to User" is now automatically populated with the current user, as it was in the old screen.
  • Advanced Search - Filter by Rate - The field now allows filtering of rates, which makes it easier if you have many rates. 
  • "Charge Summary D-M-Y" Report - is now also available in the POS through the new reports screen.
  • Google Ads Enhanced Conversion for the Booking Engine - To enable the "Enhanced Conversion" function, we've added another parameter for tracking purposes - a hash of the email address. "Hash" means that the email address is converted into an encoded string and can be used by other systems for analysis without revealing the actual email address. The name of the new field is 'hashedGuestEmail' and its value is populated on the last step of the booking engine, with the encoded value corresponding to the email of the main guest or contact person.
  • We've added the bulk function "Open Folios in New Tab" to the new booking searches (Arrivals, Departures, In Hotel, Advanced Search). You can select up to 10 bookings and open their folios in separate tabs in the browser.

Fixes

  • Pauses in the name of the rate plan caused unnecessary recalculation of charges.
  • We fixed the mobile view of some of the new reports, whose filters were in two columns.
  • In the folio screen, the closing date reflected regional settings and was sometimes incorrect. There is no such problem with printouts.
  • The Booking Engine and Central Booking Engine now show the translated name of the hotel. The field is the old one: t_account_name. It can be found in All Settings -> Common Translations -> "Advanced labels/translations: Account".
  • In the new "Charge Custom Field Check " report, the Revenue Category filter was not working.
  • Searching by guest name in Arrivals/Departures/In Hotel (new) was very slow.
  • The new advanced search - we fixed the sorting when grouping by date of arrival, departure, creation and editing. 
  • The booking searches (new) - we fixed a problem that prevented the Key Card screen from opening.
  • The booking searches (new) - we fixed a problem that caused sending to fail in certain situations.
  • Arrivals and Departures screens (new) - corrected an issue where certain local settings were not filtering the booking lists correctly based on the selected date.
  • Tour Operator Contracts - The screen allowed blank base prices, and then the rate plan could not calculate the price. You must now enter 0 if this is the case.
  • Discount template - Numeric type fields were not displayed if there was no list of values entered for them.
  • Room Cloud - Rate plan mapping - for longer product names, the table did not fit on the screen.

Clock Update (24 Mar 2025)

New features

Event Sales Pipeline

Many of you wanted us to find a solution to the case study related to the management of Event Sales Pipelines. Events have a more complex sales process that goes through different steps. Tracking the progress of each deal requires more than the currently available statuses. Additionally, each hotel has its own habits and its own deal management procedure. To solve the case studies related to sales organization, we added “Sale Stages as well as new Pipeline screen to focus on the clear management of all transactions.

What are Sale Stages?

Sale Stages" is a new field on the Event screen to manage its status. What's different from the previous statuses is that the Sales Stage values are fully customizable - that is, you can set the values to what best suits your needs.

It's important to note that we're keeping the old way of working as well. If you do not add any stages, the screens do not change and  will show the old status fields. This important feature will enable you, when you are ready, to smoothly transition to a new work organization - more flexible and responsive to your needs.

Our plans are to add the same Sales Stages for bookings and accordingly, they will also enter into Piреline. Stay tuned for our updates!

The new Sales Stage settings are located in Settings -> MICE -> Sale Stages.

  • Add the Sales Stages you want;
  • The short name is visible in tables and locations where space is limited;
  • The colour helps you navigate and identify the different stages more easily. The same can be used in the Activities Calendar (see below).
  • The sort order is important. It determines the order of the milestones in the Pipeline, and also the function to quickly move to the next status.
  • Guarantee status and Check-in status - These are the "base" or existing statuses. Select the values to which the sales stage corresponds to the base statuses. When you select a Sale Stage in the event, its base statuses will change to those set in the stage.
  • Include in Pipeline view - Whether this stage is selected by default to display in the Pipeline screen.
  • You can delete a stage if it is not selected in any Event.

Important: If you add Sale Stages, the event screen and event search will change to primarily use Sale Stages. If you wish to test the new functionality and then revert back to the old functionality, you will need to remove the Sales Stage from the Events if you used them and then delete the Sale Stages themselves.

Event 

On the new event screen and on the edit screen, you will now be able to choose from the new Sale Stages. By default, the first stage is available, depending on the sort order you have set.

On the edit screen, the next status is offered for quick selection. For more options, select  "More...",  where you will see all the stages.

The new Sale Stages allow "exceptions" for a specific Event. We have mentioned that the base Event statuses change from those set in the Sale Stage, however you may need exceptions. For example, if the Event is in the "BEO Waiting" stage, which you have set to have the "Optional" guarantee status. But if you have a reason to make the given Event have a guarantee status of "Guaranteed", you have two options:

  1. Have individual sale stages for all situations - for example, "BEO Waiting" and "BEO Waiting/Guaranteed", but such an approach would increase the number of stages

    or

  2. To make an exception for the Event itself and make it "Guaranteed" without changing its Sale Stage. This can be done from the "More.." screen of the status change. There, select "Custom status" and choose what the Guaranteed or Check-in status should be for that Event. Note that the next  Sale Stage change, will bring its own status and the exception will drop. From the same screen, you can remove the Sale Stage of the Arrangement if for any reason you want to do so.

We have added two new fields to the Arrangement that will help you manage sales - Expected Value of the deal and Expected Close Date of the deal. Both fields can be found on the new Event screen, and on the edit they are under the deposit - "Expected".

Pipeline

Pipeline is a special new screen that focuses on sales management and shows events in the perspective of their sale stages. You can open it from the Event -> Pipeline navigation menu. If you are in search of events, you will find it as a new quick access tab.

What options does the screen have:

  • By default, the stages you have marked as "Include in Pipeline view" are selected
  • You can choose any combination of stages you wish to include in the screen.
  • The screen has three views:  Traditional "Pipeline" view, Compact view and Print-friendly Table view. You can change them quickly through a button in the upper right corner.
  • On the screen, you can see the estimated revenue amounts for each stage and the events with that milestone.
  • Directly you can edit the expected value and end date of each event.
  • You have multiple options to filter the events:  
    • Depending on the expected value - more or less than a specified value;
    • Expected close date - before or after a specified date.
    • PAX of the event - more or less than the specified guest count.
    • Arrival period of the event;
    • Assigned to - user or department;
    • Marketing Metrics - Source, Channel, Segment;
    • Amount currency is (if using more than one currency).
  • You can also  change how events are sorted: ascending or descending by creation date, arrival date, company, expected deal value, and expected deal close date.
    • Quick buttons to change the status of the Event. One quick button to move the event to the adjacent right status and one button to select any status from the list. If you select a status that cancels the event, the cancel screen will open for you to select the necessary options.

Activity Calendar

In the Activity Calendar you can select the new option to colour the activities in the colour of the Sale Stage. In the calendar, select the settings icon, top right and enable "Use Sale Stage colours". This new option gives you full control over the colours in the calendar, as you can always change the colours of the Sale Stages to suit your needs.

One more change is that in this colour mode ("Use Sale Stage colours") the colour selected in the Event is also taken into account. The Event colour takes priority over the Sale Stage colour and the activities will be coloured in the colour selected in the Event.

"Use Sale Stage colours" is remembered for the current device and you do not need to select it again the next time you open the calendar.

Search - Event

In the Events search, if Sales Stages are set, they are displayed as the main option to select. Searching by base statuses is kept- to view them select "Show All". A new column for Sale Stage has also been added.

Incoming emails for the Event

So far in the Event, you've seen the emails you've sent that you've created from the Event screen itself - whether they're BEOs, other templates, or newly created emails. However, this is far from all correspondence with the customer. Neither the emails you received from the client, nor your replies if they were sent directly from your inbox were visible. We decided to improve this. You will now be able to see the related correspondence with the customer. To do this, you need to give the system access to your general mailbox (IMAP server) from which you send and receive mail (for example sales@myhotel.com). Clock will regularly scan the emails in the mailbox, detect sent and received emails related to previous correspondence in the Event and add them to the email list in the Event.

Here's a possible scenario:

  1. Send a BEO to a client from the Event screen.
  2. They respond to you with an enquiry about it.
  3. You answer the enquiry from the email from your phone. 

On the Event emails screen, you'll see all the emails - both the templates you sent and the emails that are found as linked in the Sent folder and the Inbox folder.

The system currently detects links when they are a follow-up correspondence to a letter sent from the Event screen. We also plan to add the ability for initial emails that have no information about what they refer to to be subsequently linked to an Event. When we add this feature as well, you will have the full archive of correspondence available directly in the Event itself.

You can link a single mailbox (box) to the system, if you use different addresses to communicate with your customers, then you can do the following: form a summary mailbox - a new dedicated, summary address - for example all_emails@myhotel.com. Then add rules to each of the addresses you use to copy the received and sent emails to the general box. This will form a summary mailbox for the system to keep track of and you will have the complete correspondence.

To configure the connection,navigate to menu All Settings -> System -> IMAP Settings.

Improvements

New screens - Arrivals, Departures, In Hotel and Bookings - Advanced Search

We have completely redesigned the main booking search screens - Arrivals, Departures, In Hotel and Booking Advanced Search. They are now significantly more interactive, functional and fast, and we've increased their performance by an impressive 400%. So you can serve your guests faster and more efficiently. You can access the new screens by selecting Bookings from the navigation menu and then clicking on the "NEW" button in the appropriate row.

Here's what's new on the screens:

  • All guests from the booking - Searching by guest details - name, email, phone number, now searches not only the details of the main guest but also additional guests and the contact person. Also, the names of all guests and the contact person are visible in the results table. We've added an option for whether to display all guests or just the primary guest. This way you can choose between a more compact or detailed view. Especially for the operational screens (Arrivals, Departures, In Hotel) changing this option does not cause a screen reload and changes the view instantly.
  • Interactively display and hide notes - Similar to the above option, for Arrivals, Departures and In Hotel, changing this option does not cause the screen to reload.
  • We have added the colour of the booking in the numbers column - This will make this field even more useful.
  • Room Upgrade - In all searches, you can now distinguish the bookings that have a Room Upgrade. We have added an icon (up arrow) in front of the room type/room number to indicate the availability of an upgrade. And there is now a filter in the Advanced Search that can be used to find all bookings with a Room Upgrade.

  • The mass functions are now accessible from the button with the dots - top right.
  • New mass function: Assign room from number - In this allocation model, the system sorts rooms by name and selects rooms sequentially from a certain number up or down. You can use the function to assign rooms to groups so that they are close together. If you do not fill in a number, the allocation will be done according to the allocation model set in the settings: Ordered, Random, Equal usage, Dense or Occupancy dependent. 
  • New mass feature - Add Charges - With the new feature you can select multiple bookings from the list and charge all of them for one or more services. Especially useful for hotels handling multiple groups, this feature will minimise some routine tasks to a few clicks. From the mass functions, select Folios->Add Charges.
  • New mass feature - Notes - You can now add notes for an entire group. You can add notes of different types at once: Notes, Meal Notes, Housekeeping Notes and Client Requests. Select the mass functions ->Notes button.

  • Bookings Advanced Search - in the Block column, we have added room type information

Bookings Advanced Search 

We've made a major upgrade to the search personalisation capabilities, and with the new powerful mechanism, you can easily and quickly build your own reports regarding your booking lists. This greatly expands the way you use the screen and its usefulness.

Customisation options:

  • Open the customisation screen - in the "Custom views" field, select the Edit button.

  • Select the options whether to see the Booking Notes and All Guests (including the contact person)
  • Columns - Select which columns to see in the report. You have a choice of 44 columns to show or hide.
  • Columns order - Arrange the columns so that they are most convenient for you. Choose whether the booking number should be the first or last column. Arrange the information according to your needs.
  • Group by - Choose what to group the bookings by. Grouping will be done by the value of the selected field, it can be Status, Room Type, Date or any of the 44 fields. For each of the groups you will get the totals - number of bookings in the group, number of Adults, Children and total number of guests.
  • Sort order - Select by which field the data in the report should be sorted.
  • Click Apply - You will see the result, and the changes made will be remembered for the current device and you open the Advanced search.

Custom view

Use the Apply button (described above) to change the main view of the Advanced Search. However, what if you want to have several different views to choose from? We've added that option as well. You can create many personalised views, and for each you choose the columns, arrangement, sorting, and grouping. Save each view so you can reuse it. What's more, saved views are available to all users in the account. This enables you to create standardised reports for different purposes that can be used by all users and on all jobs. Here's how to create a personalised view:

  • Open the customisation screen;
  • You can change the columns, arrangement, sorting and grouping;
  • From the Apply button, select the drop-down menu and “Save as”;
  • Enter a name for the report and save;
  • If you want to change the saved personal view, the easiest way is to select it from the list on the left, change the settings and select “Save as”. If you keep the same view name, it will update. If you change the name, it will be saved as a new view.
  • You can delete a personal view with the delete button at the end of its row.

  • In the parameters and filters screen, you can select the view to apply. In the “Custom views” field, you will  see a list of all views, just select the one you want to use.
  • After generating the report, you can also quickly change its view. Click the customise button in the top right corner. A list of all saved personal views will open – select the one that best suits your needs.

Other improvements

  • Guests / Rooming List Import - two new improvements to our new functionality:  
    • Guest email recognition - If emails are present in the rooming list, they will be automatically recognized and associated with the guest.
    • Group reference number - When using the old "Create Multiple" booking functionality, all bookings get a common reference number starting with # and thus a group of bookings is formed, even if they do not have an Event. We have added the same functionality in Guests / Rooming List Import. If in the data source (first page), there are no reference numbers set (numbers starting with #), then in the second step a common number is offered (it is automatically filled in and corresponds to the date and time). You can remove or change it if you wish. This number will be carried over to the bookings and they will form a group of bookings.
  • ID Processor - we have switched to a new version of the software to recognise and extract data from guest passports and documents. In the new version, more documents are recognised and recognition has been improved. If you don't use the ID Processor yet, you can read more about it in The ID Processor
  • Deposit Ledger (v2) - in the Beginning Balance sections, I now have only one value - the balance itself. We removed the other amounts because they were confusing users.
  • Import bookings from CSV - we added an option to disable the occupancy check. This way, we make it possible to import shared bookings. We advise you not to use this option unless you have a good reason to turn off occupancy checking.
  • We have added a new currency - the Caribbean guilder (XCG).

Fixes

  • Booking Segmentation Report and Charge Segmentation Report - we fixed an issue where the label of the selected segments and the ordering of the segments in it did not match the generated data.
  • Adyen payout reconcile - we fixed an issue where amounts of certain currencies were treated in cents and divided by 100. Also system users were shown with an ID (code) instead of a name.
  • Activity Calendar - we fixed a problem with shading of derivative usage of meeting rooms when the usage refers to more than one day.
  • In charges, we corrected an issue where, in certain situations, the charge text was also recorded as print text. As a consequence, errors could occur related to the rights to edit the print text or increase the number of charges when recalculating.

Localisations

  • Later this week: Bulgaria - Fiscalisation - We've added a new setting for how discounts and used advances are fiscalised. Currently, negative rows are fiscalised as "adjustments". This is because the adjustments function of the fiscal device can accept a tax group and is therefore the most convenient for this operation. The law on the other hand requires that the "Discount" function be used. However, the discount does not work with a tax group and there are many more limitations in using it. You can now choose which way to fiscalise discounts and deducted advances - by Adjustment or Discount. Consult our support team for the advantages and disadvantages of both methods.
  • Bulgaria - ESTI- We have improved data export in several aspects:
    • Guest deletion. The export detects situations where a guest has been exported to ESTI and then deleted from the system. In such cases, the ESTI export issues a delete command. This feature is also useful when using the new functionality to separate guests into a new booking, where the guest will be deleted from one booking and added as a new guest to another booking.
    • For each export, you can now check the details it contains. This way you can audit the exports that have been made and their contents.
    • To make the consistency of the exports clear, we added the following organisation: to create a new export, you must first specify the status of the previous export - whether it was successfully sent to ESTI or had errors and was rejected. Otherwise, when you try to create a new export file, the system will return an error message.
    • When generating the data, if there is missing guest information that is required by the ESTI but missing in the system, you will see a warning icon for the corresponding box in the table. This will help you find the problems much faster and correct them. Full information on exporting to ESTI can be found at HERE.
  • Romania -  eFactura
    • When a document is billed to a person the CNP is used as an identifier for eFactura. If the CNP is not provided by the customer, it is defaulted to '0000000000000';
    • New sending URLs were added for documents issued to companies;

Integrations

  • Private Analytics / Google BigQuery:  
    • A new field report_segment_id has been added to the Charges table. The change allows the charge segmentation information to be accessed easily.;
    • A new field self_pre_checked_in has been added to the Bookings table. The field contains the date and time when the guests performed a self check-in and can be used for the self check-in usage analysis;
  • API
    • When a planned booking room change is confirmed, it is considered as a booking update and hence included in booking_update notifications;
    • The following new parameters have been added to bookings endpoint to allow easier interpretation of the booking_room_changes information:
      • current_room_id - The parameter shows the current room_id of the booking in case the booking was moved to another one and it is different from the arrival_room_id;
      • room_change_confirmed_at -When the current_room_id change was confirmed.
  • Lightspeed POS L Series - Fixed visualisation issue for charges transfered from deleted Lightspeed POS L Series. Those charges were generating errors in the folio screen and this error is now fixed.
  • QuickBooks Online - Update to the latest QuickBooks Online API microversion to future- the integration.

Clock Update (19 Feb 2025)

New Features

Composite Meeting Rooms

Meeting spaces that can be divided with movable partitions are a common case in the MICE industry, as they offer flexibility in selling the same area in different configurations. That’s why we have decided to improve the way such spaces are booked, reducing errors and giving you a clear overview of availability.

Here’s more information about the new Composite Meeting Rooms functionality, explained through an example:

Let’s assume that one of your large halls can be divided into three separate rooms - Conf 1, Conf 2, and Conf 3. In addition to being sold individually, these rooms can also be sold in specific combinations, such as Conf 1+2, Conf 2+3, and Conf 1+2+3. These combinations are what we call Composite Meeting Rooms.

To set up composite meeting rooms:

  • Create the smallest spaces as standard meeting rooms.
  • Define their combinations as composite meeting rooms.

If you are already using virtual hotel rooms, you may notice some similarities. However, unlike virtual hotel rooms, a standard meeting room can be part of multiple composite meeting rooms.

How are composite rooms used?

When used in the calendar, reservations, or templates, there is no difference between standard and composite rooms.

How does the system manage availability?

  • Booking an individual room: Automatically blocks all composite rooms that include it.

Example: If Conf 1 is booked, the system will block Conf 1+2 and Conf 1+2+3. Available rooms will be Conf 2, Conf 3, and Conf 2+3.

  • Booking a composite room: More complex, as it blocks both the individual rooms it comprises and other composite rooms that include those individual rooms.

Example: Booking Conf 1+2 will block Conf 1 and Conf 2, but also Conf 2+3 and Conf 1+2+3. The only available room will be Conf 3.

Visual indicators in the calendar

  • Direct bookings appear in solid colors.
  • Indirectly blocked rooms appear shaded.
  • Clicking any of these will show the related reservation.

How to add a new Composite Meeting Room

  • Go to All Settings -> MICE -> Meeting Room.
  • Click the ‘+’ button and select Composite Meeting Room.
  • The settings are the same as standard rooms, except for the “Composed of” field, where you must select the individual rooms that make up the composite.

Important: Once created, the “Composed of” field cannot be edited. If a mistake is made, you will need to archive the composite room (via the Active To field) and create a new one.

  • Use the Sort Order field to arrange rooms in a logical order—for example, listing composite rooms first, followed by their individual components.

Improvements

Events & Rooming Lists

  • City Tax Mode in Rooming List - Now, you can set the City Tax Mode for reservations within the Rooming List, allowing full use of manual prices without rates.
  • Rooming List reservations for companies - Previously, Rooming Lists could only create reservations linked to an Event or Block. Now, they can also be used for reservations linked only to a Company.
  • Default Transfer Folio in Events - Deposit folios are no longer suggested as default transfer folios, reducing errors.
  • Custom Event Templates - Added a new Liquid parameter for event blocks: description. This allows event block descriptions to be included in your BEOs and other documents.

Other Improvements

  • Invoices with bilingual company details- You can now store and use your company details in two languages - local and international. Local guests will see company names and addresses in the local language, while foreign guests will see them in an international language (e.g., English). Supported only for standard folio print templates. To configure:
    • Go to All Settings -> Documents -> Billing Info.
    • Fill in the international fields and save.
    • International fields will appear on folios if the print language differs from the billing country.

Example: If the billing country is France, international details will be used when printing a folio in any language other than French.

  • Online Check-in formatting fix - Hotel policies now support custom text formatting. If you notice formatting issues, we recommend reformatting your text in the new editor.
  • Charges By Rooms report improvements - Added date range filtering for reservations. Improved layout to clearly show which charges belong to which reservation, especially when different guests check in and out at different times.
  • Folio ‘By Bookings’ view update - Prepaid advances now appear in a separate section, ensuring the subtotal reflects the total service amount before advance deductions.

Fixes

  • Pre-authorization release timing corrected - The system used to release pre-authorizations 24 hours too early. Now, releases occur exactly after the configured period (e.g., if set to 5 days, it will release after 5 days, not 4).
  • Self-Service upgrade issue - Fixed an issue where custom badges were not translated during a rate upgrade.
  • Credit card transactions issue - In rare cases, simultaneous credit card transactions (a capture and a release on the same pre-authorization) were processed together. Now, only the first transaction will be executed.

Clock Update (14 Jan 2025)

New Functionalities

Import of Guests/Rooming Lists

For this new module, we used an innovative and unique approach to provide a powerful tool that helps the hotel easily process groups of any size. This isn't just an "import" from a structured file. It's an interactive assistant covering the process from handling data received from the group organizer to creating bookings.

The biggest challenge was how to devise an assistant that would work with all kinds of files with different types and structures.

Here's a summary of the functions:

  • Works with all input formats: pdf, doc, txt, xls, email, etc. - anything from which you can copy text;
  • In real time the system shows how it "understands" the distribution of guests by rooms, even while you are editing the input data;
  • Saves the original descriptions from the guest list as notes, so you can use them in the following steps;
  • Works with a different number of guest names, depending on the input data;
  • Can recognize guest titles;
  • You can specify whether guests are adults or children, as well as the age of the children;
  • Can understand the reference number and date of each booking;
  • Automatically transfers information from the Company, Event and Block, so you don't have to fill it in manually;
  • Provides real-time information about the remaining blocked rooms, as you distribute rooms across the blocks.
  • Allows you to edit all fields before importing;
  • Allows for intermediate saving and reading to/from an attached file to the event before the final import.

Processing a Guest/Rooming List happens in three steps:

  1. Preparation of the text of the Guest/Rooming list, so that it is divided by Rooms.
  2. Distribution of Rooms by Blocks (if any).
  3. Completing the remaining booking fields, Reviewing and Saving the bookings.

Preparation of the text of the Guest/Rooming list.

Open the new import screen. If you are in the Event, click the Guests/Rooming list - import button in the Block section or from the main navigation - the Bookings section.

Getting started is simple. Open the file containing the Guest/Rooming list you received from your partner, copy its contents, and paste them into the field on the left (1).

In real-time, you will see in the right part (2) how the system has "understood" the file. Follow a few simple rules to distribute guests by rooms, and to allow the system to extract as much information as possible, without the need for manual entry.

  • Copy and paste the desired text from your Rooming list. All formats are supported (email, pdf, xls, doc, jpg, txt, others).
  • Select the name format, and whether the entered list includes titles.
  • Place the guest names at the beginning of the line.
  • Complex names, made up of many parts, should be connected with "_", which will be removed automatically after import. Example: "Adria van der Berg" > "Adria van_der_Berg".
  • The text entered after the guest names is used as a note.
  • To separate guests by rooms, use a blank line.
  • '@' at the beginning of the line marks the guest as a child, and the number specifies the children's age (@, @2, @10). To make a quick change and mark the guest as an adult, click the red 'Adult' button.
  • '-' at the beginning of the line marks the text as a note and carries it over to the next steps.
  • To extract the Reference number and Date, place '#' before the booking number and '/' before the date. (#BO23-12345/01.01.2024)

For additional ease in preparing the rooms, we have added some quick functions - the buttons above the editor on the left.

  • Choose what guest data you have - titles and the number and order of the names (3);
  • Button for quickly removing blank lines (4) in the entire text;
  • Button for quickly splitting the selected lines into one guest per room (5);
  • Button for quickly distributing the selected lines into two guests per room (6);
  • Button for quickly merging selected names (7), if they are from several words "von der Leyen" -> "von_der_Leyen".

All specified or missed data here can be filled in at the last step.

Distribution of Rooms by Blocks (if any)

At this step, you will define the Company, Agent, Event (8) and Blocks (9) to which the bookings are related. If you started the process from a specific Event, this data is already filled in. If the event has blocks, you can choose which rooms belong to which block.

As you distribute the blocks, you will see for each block - the number of blocked remaining rooms, which will decrease as you link the rooms to the blocks. These numbers are aggregated and show the minimum number of rooms in the block for the entire period. In certain situations, these aggregated numbers may not be accurate enough - for example, if you book several consecutive periods where the rooms do not overlap. In such situations, you can use the detailed view of the Block Pickup Report, to which we have added a quick link.

The system automatically fills in the following fields for future bookings, based on what you have selected.

  • Period - from the Event;
  • Room Type - from the Block;
  • Rate and Manual price - from the Block;
  • Guarantee Policy and Meals - from the Rate of the Block;
  • Colour, Customer cost center and Marketing Segmentations - from the Event.

And here's something interesting! In the Event, we've added a new field: "Default Transfer Folio". If you fill in an Event folio in this field, the bookings will be created with this folio selected for transfer. In this case, the charges from the rates will be automatically formed and maintained in the Event folio, including upon extension, change of stay or recalculation.

Keep in mind, however, that the Company, Agent, and Event are not mandatory - you can import bookings without them. In such cases, the booking data will not be filled in automatically, and you will fill them in at the next step.

Completing the remaining booking fields and Preview

At this last step, you have the opportunity to review all the bookings that will be created. You can also change all automatically filled data or add new ones.

In the booking table, in the header, you will notice that for certain columns there is an edit button (10). If you select it, you will be able to fill in the data for the guests or booking directly in the table.

You can also use the mass еdit screen (11). Select the bookings and click the edit button (11) in the upper left. Fill in the fields you want to update and save. To delete the content of already filled fields - select the delete icon button to the right of the field.

Here are some interesting functions you can use:

  • In addition to bookings for rooms, you can also create bookings for guests without stays at the hotel - from the edit form, select the checkbox "Require Room Resource" (12) to 'No'.
  • You can prevent the import of certain rooms if you decide that bookings should not be created for them - select the field "Hold the import" (14) to 'Yes'
  • And finally, another interesting feature - "Split on check-in" (13). We know that in many situations you need to use the "sharing" function of a room, where two bookings are accommodated in one room. We've added a new functionality that allows you to mark the rooms that will have "shared" bookings in advance. See more about this below.

Automatic closing of folios for fully paid bookings in BookDirect and Check-in Kiosk

For countries whose legislation requires the issuance of a document to the customer, upon full prepayment for services, we have added a new functionality for BookDirect and the Kiosk. For both products, after activating the respective new setting, the system will close the folio if it is fully paid. In turn, the closing can send the closed document to the customer's email (existing functionality). Here are a few details:

  • To activate the function, select the settings "Issue document for fully paid bookings " (for BookDirect) and "Close folio after payment" (for Check-in Kiosk). Additionally, there are also settings for the type of document to be used when closing.

  • Closing the folio will trigger automatically if, after payment, the folio balance is 0, i.e., the folio is fully paid.
  • In BookDirect, if several bookings are created and the payment is for their full amounts, all charges will be transferred to the first folio, which will be closed automatically if its balance is 0.
  • If the settings require fiscalisation, it will be activated and the folio will be fiscalised.
Important: Please note that in rare situations and when using different currencies for charges, folios, or payments, it is possible that the folio balance may not be exactly 0, but may have a negligible discrepancy - for example, 0.01. This is due to differences in rounding when converting currencies. If such a difference occurs and the folio balance is not exactly 0, the folio will NOT be closed automatically. In this case, if the system detects a difference within 0.05, it will create a Task so that the situation can be handled by an employee.

Automation of Tax Changes

We know that legislation and tax rates, albeit rarely, change. This change creates numerous difficulties associated with manually updating the tax rates in open folios and charge templates. Therefore, we have created a special module to help you automate this process. In it, you can set rules for the system to change taxes. The change can happen automatically on a given date, or you can activate the change manually. Here are more details:

  • To configure the new module, open Settings -> All Settings -> Charges & Taxes -> Tax change policy
  • Add a new policy - fill in a description to guide you on what the change will be.
  • Choose whether you want the tax change to affect charge templates (15) and/or charges in open folios (16).
  • If it concerns the charges in open folios, the system will filter the charges whose revenue date is AFTER the date filled in the "After revenue date" field (17) and will update only them. If you want to change all charges in open folios, fill in some past date in this field.
  • If you want the change policy to be executed automatically, fill in the "Schedule date" field (18). In that case, the policy will activate automatically, shortly after the change of date.
  • Add the rules (19) to be executed. For each rule, fill in - which revenue group it relates to and possibly which category. Also fill in the current tax rate and the new tax rate.
  • When adding rules, you can use their order to save a lot of rules in more complex cases.

Example: If so far all overnight stays have had one tax (for example, 19%), and the change requires two things - overnight stays to become 20%, and overnight stays from the 'OWNERS' category to be 15%, you can use the order of the rules as follows. First, put the rule for the ROOMS group, without a category for 20% - this will update ALL overnight stays to 20%. In the second place, put the rule for 15% with the ROOMS group and the 'OWNERS' category - this rule will be executed after the first one and will update only this group/category to 15%.

  • If you use tax codes and want to change them, fill them in as well - the old code and the new tax code with which you want to replace it.
  • You can also execute the policy manually - open the "STATUS" screen and click the "Execute" button.
  • In the Status screen, you can check the execution status of the policy. It is executed regardless of whether the screen is open or not.

Improvements

Folios

  • Discounts on transfers from POS - When applying a discount, you can now also select the revenue groups from the POS, which will also discount and transfer the charges from the POS.
  • Maximum % Discount in PMS and POS - setting for each user. We have added a new setting to each user "Max discount percentage". It is located in the user's edit section, under the User tab. By default, the field is empty, which means there is no limit. If you fill in the field with the desired percentage:
    • When using the discount functions in the PMS and POS, the system will control the entered percentage to not exceed the one set for the user.
    • If a discount  has already been added in the folio, the system will not allow a second one to be added, regardless of the percentage. In such situations, you first need to cancel the old discount before adding a new one.
  • Quick function to create an advance folio based only on the accommodation charges - If you issue advance folios for partial payments received for the booking, the new function can help you. The existing functionality allowed you to create an advance folio based on all charges or based on selected charges. The new function allows you to quickly issue an advance folio, taking into account only the accommodation charges, without having to select them one by one. Find the new function in the folio screen, the charges section -> the All button -> "Create Advance Invoice - Rooms/Packages".
  • "Single row folio" separates the used Advance - So far, the printout grouped all charges solely by tax groups. Advance consumption is a negative operation that reduces the amount. If it is not separated on a separate line, the nature of the folio changes and the amount of services provided is not clear, because the group comes out with a reduced value or directly with zero. Therefore, we have added another criterion for separating the rows - if there are charges from Advance consumption in the folio, they also appear on separate lines.
  • Printing the folio - a new option to hide the texts "For Payment" and "Paid". For hotels that do not use deferred payments, organised in Clock, and these labels on the folio confuse the counterparties, you can now hide them rom the standard printouts in the folios. The settings for showing/hiding different elements from the standard folio printouts are located in Settings -> All Settings -> Documents -> Folio Printing - defaults. The new option added there is "Hide  'For payment' and 'Paid'  labels".
  • When editing company or profile data, we have added a button to open the company/profile itself. This way, you can edit all fields, including custom fields.
  • Folio - the loading of charges is optimised and much faster, for situations when the charges are relatively few, but the number of bookings is larger. 

Events

  • Archiving Meeting Rooms and Restaurants - By archiving, you can hide from the lists and calendar the rooms that no longer exist due to renovation or other reasons. Because they have been used in old bookings, they cannot be deleted, but must be archived. Archiving will hide them for future use and exclude them as a unit from the licensing. The new functionality is related to two new fields in the Meeting Rooms and Restaurants:
    • Active from date - This field is mandatory. When creating a Meeting Room/Restaurant, fill in the date from which the room or restaurant is operational. For existing rooms and restaurants, the field is automatically populated. 
    • Active to date - When you decide to archive a Meeting Room or Restaurant, fill in the date from which the room is out of operation in this field.
  • Size of the Meeting Rooms/Restaurants - We have added a new field for the size of the room to each Meeting Room/Restaurant. In addition to serving as information in the Calendar, the field is intended for future statistical/KPI reports. To clarify the unit of measure of the values filled in each Meeting Room/Restaurant, we have added another field where you can fill in text for the unit of measure itself (e.g. 'm2', 'ft2', ...). By default, it is 'm2'. The setting is located in  Settings -> All Settings -> MICE -> General.
  • Default Transfer Folio - In the Event screen, we have added a new field in the Folios section - Default Transfer Folio. The field is intended to transfer information to Bookings when you create bookings for the Event through the new "Guests / Rooming List Import" screen. The folio, selected in "Default Transfer Folio" will be transferred to the booking - in the "Transfer to Company/Agent folio" option. This is the easiest way for all charges from the rates to be directed to one, summarising folio for the Event. Regarding the Booking and the "Transfer to Company/Agent folio" option, we remind you that the charges from the rate, the rate package and the city tax are transferred to the folio of the Event/Company. The charges selected in the booking (Daily charges), the manually made charges, as well as the automatic ones related to the room type, are directed to the booking's folio. At the moment, the new field in the event "Default Transfer Folio" is only used via "Guests / Rooming List - import", but soon it will also be possible to use it when manually creating bookings for an Event.
  • Charge transfers - This option determines whether charges can be transferred to the Event or Company's folio. The option is set in the company itself and concerns the company's folios and the folios of the company's events. We have moved the Charge transfers field from the Company to the Event screen. This makes it easy and quick to access. We have added the information in the Folios section, as well as the ability to quickly open the Company and change the setting.
  • We have added a new BEO template for the visual editor, which contains both gross and net amounts for all elements. This will give your counterparties clearer information about the value of the Event.

Splitting bookings for easier room sharing.

In different situations, two bookings need to share the same room. Cases requiring this may be a combination of individual bookings or bookings from different companies, etc. Sharing a room by two bookings required that a room number be pre-allocated to both bookings. This pre-allocation creates inconveniences in the management of the rooms. We have added new functionality to facilitate room sharing. Here are details about it:

  • There is no need to create two bookings in advance. Create one booking for two or more guests and check the option "Split additional guests on check-in", available under the "Adults / Children" fields.
  • Upon check-in, the system will automatically split the booking into two, with the main guest remaining in the first booking and the other guests being transferred to the new booking. The two bookings will share the same room.
  • The second booking created by the splitting, is a copy of the first one, with all the main data being transferred. There is a peculiarity in the number of the second booking. Instead of receiving a new number, as is usual when copying, the number of the second booking is like the number of the first one with ".2" added at the end. That is, if the original number was "L12002", the number of the split booking will be "L12002.2". 
  • When splitting the bookings, the price will also be split. The split is proportional to the guests. This means that if there are 2 guests, the price will be split in two, and if there are three guests - the first booking (with the main guest) will receive 1/3 of the price, and the second (with 2 guests) 2/3 of the price. The split price is recorded as a manual price in the two bookings.
  • The split function can also be invoked manually. This can be done both before check-in and after check-in. The requirement is that the booking has an allocated room and that there are more than one guest (profiles) added. You can access the new function from the booking preview screen using the "Functions" button.

Other improvements

  • Setup of the colour of the navigation bar - When you use multiple hotels and each hotel is on a separate tab in the browser, you have to check the name of the hotel to know which hotel you are working in at the moment. To make this task easier, you can now choose a colour for the navigation bar for each individual hotel. In this way, you will find it much easier to orient yourself in which of the hotels you are at a given moment. The new setting is located in Settings -> All Settings -> Hotel -> User Interface. There are two settings - for the background colour and the font colour. Save after changing them to see the effect. 
  • All OOS statuses for a given room - You can easily see a list of all entered OOS statuses for a specific room. Open Settings -> All Settings -> Rooms -> Rooms Find the room and open the edit screen. At the bottom of the screen, select the "Room statuses" button. From there, you can delete incorrectly entered statuses, as well as see a log of the changes to the OOS statuses. 
  • Meals - summary report - we have added a filter by restaurant. This will allow properties with more restaurants to get a clearer forecast for dining. 
  • In BookDirect - we have added explanatory texts to the prices as to whether the prices include or exclude taxes. With this, in addition to making it clearer for guests, we also satisfy the requirements of the meta-search providers.
  • In the "Housekeeping Tasks" screen - we have added a filter by sector. 
  • Arrivals/Departures Summary report - we have added another column for the occupied rooms from the blocks. The residual block is displayed. Through the new data, you can make much more accurate planning of the expected occupancy. The column has been added only in the new report, which you can find in "All Reports (new)".

Fixes

  • Datecs fiscalisation - an issue with fiscalisation of fractional quantities smaller than 1 (for example 0.25) has been eliminated. In such fractional quantities, in rare situations, the receipt was not fiscalised due to differences in rounding. 
  • An issue has been resolved where, if a quantity greater than 1 is specified in a charge template associated with the rate, that quantity is charged, instead of charging the correct quantity - 1.
  • Event templates - the automatic allocation of Meeting Rooms and Restaurants was not correct if Layout was selected. The automatic logic did not correctly account for either the selected Layout or the capacity of the rooms for it.
  • D-edge - we have changed the algorithm for extracting information about the Agent, by looking at the two possible places where it can be provided.
  • When using the e-menu from the POS for room service from the guest's Self Service Portal, in rare situations, when there is no open folio in the booking, an error occurred during the transfer from the POS to the hotel account.
  • Occupancy/Revenue Forecast and Pace report - reported revenue from expired or consumed blocks. Revenue is now reported on the remaining number of rooms in the block.
  • Housekeeping Tasks screen - in older versions of Chrome, an error occurred when editing tasks or automatic allocation. Also, an error occurred when trying to edit a task and set 0 credits. 

Integrations

  • AppConnector - In some cases, the Atomize integration appeared to be enabled, even though it wasn't;
  • SALTO KS - Salto's newest access control solution, SALTO KS, has been integrated and your guests can now easily access their rooms and other restricted areas of the hotel conveniently from their Self Service Portal. More information about the integration and how it can be configured can be found HERE;
  • Gastronovi POS - The charges coming from the hotel and end-of-day transfer were missing the charge custom fields data. This is now fixed and the custom fields are properly filled in;
  • ROMANIAN eFactura integration - To comply with the requirement for the electronic sending of documents in Romania, we have integrated an automated interface with eFactura. An article with a description and configuration information will follow!
  • GERMAN fiscalisation - The statuses of the Daily Closures and Dsfinvk Reports were not always properly received form Fiskaly, causing the Daily Closures to appear as PENDING or displaying error. Now it is fixed.
  • BELGIUM Federal Statistics - The export contained data of all guests, as now this is fixed , and only the data of the main booker is sent;

Clock Update (19 Nov 2024)

New features 

Online check-in 

Attribute Based Sales (ABS)

One of our main goals is to provide you with tools to increase your sales and discover new revenue streams. We are happy to introduce our new development in this area Attribute Based Sales (ABS).

This method of selling hotel services is based on the understanding that your hotel rooms are not exactly the same. Some have a better view, others are a bit bigger, others have a desk, others are far from the elevator, others are on a low floor and so on. On the flip side, stand the guest preferences. Each guest has different preferences in terms of room, and some are willing to pay an extra price to get a room that more closely matches their preferences. It is in this direction that we have developed our new tool  Attribute Based Sales. 

Here's how it works:

  • It's based on Room Features. If you already use them to manage guest room requirements, you can specify which ones to sell and at what price.
  • In each feature, you can select a charge template, and specify the price in it. You can also enter a price of 0 if you decide to provide a free choice of features. In the feature itself, you can specify whether the price from the charge template is a one-time price or is per night. Once you select a charge template for a feature, it is already included in the list that will be offered to the customer. Room features without the charge template are not displayed to the guest.
  • Shape the commercial presentation of the room feature- add a description and a photo.
  • Attribute Based Sales are currently included in the Online Check-In application. To enable the step, select in the application settings - Attribute Based Sales (ABS).
  • The guest will see the room features you set up with their prices, descriptions and a photo. The system reports the Room Type in the guest's booking and offers the features associated with the room numbers of that type.
  • Follows the guest's selection of features. Here we have tried to make everything clear to the guest, in terms of what they can choose.
  • To begin with, in the list of room features he sees only those for which there are available room numbers, i.e. if the feature is selected, it is guaranteed that the guest will be provided with the corresponding room.

  • The guest can select multiple room features. In this process, after each selection the system updates in real time the remaining room features, disabling those that are not compatible and available. This means that for that particular combination of features, you either do not have a similar room, or you do but it is no longer available.

For example: If a guest selects the feature "Quiet Room" (a room that faces the patio for example), and those rooms do not have a balcony, the feature "Room with Balcony" will be disabled for selection because for that combination, there is nothing to offer the guest. The same applies if there is no such room number available. 

  • The guest can turn the different features on and off, thus being able to choose the combination that suits him best in terms of choice and price.

After confirming his choice, the following happens:

  • The charge templates from the room features will be added to the booking, such as "Daily Charges”;
  • The booking will be assigned a room number, which matches the selected features;
  • On the booking, the option "Disable Room Change” is included;

This way, the guest will get what he/she has selected and the hotel staff will see that the guest has paid for the selected room. The "Disable Room Change" option will prevent staff from making mistakes when trying to allocate another room.

Note: Please note that this functionality may work fine in case you do not allocate room numbers before guests arrive. This way, the system will have more available room numbers to use for Attribute Based Sales. If you use the "Automatic Room Allocation" option, which allocates room numbers at the time of booking and if your hotel is full, there will be no available room numbers for the Attribute Based Sales module to sell their features.

Upsell rates (Special Offers)

This functionality has long existed in the system, but can now be taken advantage of by those using the  Online check-in app. Through it, you can upgrade the room type and package of guests by offering them higher and more expensive product levels.

Functionality is organised so that you can use both your standard rates and specially designed ones. This means you can choose from two strategies - offer the guest to book a more expensive room type or package by paying the difference in the standard rates, or by paying a lower ("promotional") rate for the higher package. In the latter case, by managing a separate (promotional) rate plan, you can use rate restrictions to manage when those rates are available or not, including building a dynamic promotional strategy based on Occupancy Adaptable Rates.

The Special Offers step comes before the Attribute Based Sales step. This way, the two steps can work together, i.e. if a guest has booked a Double Room and chooses to pay extra for a Suite, then on the Attribute Based Sales step, the Suites features will be offered.

To include the Special Offers step in the Online check-in, in the app settings, select Upsell rates (Special Offers). 

For more on the behaviours and settings of the new features, please see Attribute Based Sales (ABS) and Special Offers through Online Check-in.

Tour Operator Contracts

Packages

With the recent changes, we want to resolve the following package cases:

  • New Year's Eve Dinner, which is mandatory for all guests;
  • Christmas dinner, which guests can choose whether they want it or not;
  • X-day golf/spa/ski package, for guests who have purchased them;
  • Additionally, through the packages, you can now also opt for  flat-rate discounts such as “full seats” - we've removed the restriction on negative pricing in the packages for this purpose.
  • For the packages that are on fixed dates (holidays), we have made a new table with conditions “Holiday Packages”.

    • For these,  a date must be specified. If the booking has an overnight stay on that date, one condition for charging the package is met. The package itself is charged  on the date in question.
    • Holiday Packages can be activated with an Activation Code or with a “Multiplier (Per)”- this is also the second condition for charging.
      •  with Activation Code (case study: “Christmas Dinner Optional") - as many times as the code is in the booking, the package service will be charged (on the date in question), 1 code = 1 dinner. If adults and children have different prices, two lines should be configured with different activation codes and different prices.
      • with Multiplier (Per) ( case study: “Mandatory New Year's Eve Dinner”). The service is always charged with a certain amount (multiplier), in this case, you do not have to fill in codes in the bookings. per Booking; per Guest; per Adult; per Child.

Examples:

  • If the multiplier "per Child" is selected and there are no children in the booking, the service will not be charged.
  • If there are 2 rows configured - one “per Guest” and a second “per Adult” both will run and duplicate the services for adults. 
  • If Adults and Children have different prices, two lines should be configured with different multipliers (Per Adult/Per Child) and different prices.

For X day packages, we have made changes to the “Package Services” section:

  • Added charging scheme: On Arrival, On Departure, Every day, First N days.
  • Current packages recorded in the contracts were migrated to “On Arrival”, to keep the current behavior. 
  • First N days - means the first N days of the booking stay. Feature: if N (say 7) is greater than the stay (say 3), 3 packages will be charged (as many as the stay, but no more). 
  • The activation code still works as before. As many codes are added to the booking, as many times a package will be added, according to the chosen charging scheme. 

Example: 

  • Configured package for first 3 days;
  • 1 code in the booking = 3 charges ( 1 for each of the days). 

Detailed information on setting up package services can be found in TO Contracts - Packages.

Discounts

We have also made changes to Discounts and Free nights to work alongside the new packages.

In both places (Discounts and Free nights) you can specify which accruals affect which conditions. For each Discount or Free night, depending on your contract, you can specify whether to apply to: Accommodation, Extra board, Package. checkbox "Package" applies to both types of packages: Holiday Packages or Pa. 

Note: Note also the following feature: the behaviour is identical if you do not select any checkbox or select all of them. In both cases, the discount will be applied to all items.

In addition, to make it easier to view your contract details, we've made it so that the contract lines retain their original order. The system now sorts them according to the order in which they were added by the user.

Improvements

  • Information on Room Upgrades. We want to clarify that the term "Room Upgrade" does not refer to the Upsell Rates (Special Offers) features listed above. It refers to cases where the guest has booked a Double Room but the hotel has decided to provide a higher room type, such as a Double Deluxe or Suite, either because there are no available Double Rooms or because they want to increase guest loyalty in this way. In these situations, the originally booked room type was lost until now. We have taken a broader approach to solving this problem. We don't keep track of what the original booked room type was because that would prevent us from distinguishing between booking edits or upsell rates and room upgrades. What the system does track is whether there is a difference in the Room Type that the rate is for and the Room Type that the guest is using (the room of arrival and the rooms of their moves). In other words, whether the guest is using what they are paying for. If the system detects a difference between usage and rate, it marks the booking as a "Room Upgrade". An indication of this is visible in the booking screen, below the room itself. Also both (or more) room types are visible - the rate and the accommodation. Currently this information is only visible in the booking screen, but will be included in new versions of the Arrivals, In Hotel, Departures screens, and as a filter in the Advanced Search.

  • In Hotel / Expected Events - we've added more periods. In addition to the existing 14-day report, we've added two more choices - a quick 31-day period button and a random period button. The report was also optimised for printing.
  • BookDirect extra services - for the extra services for which you selected the "Allow date selection" setting, there are now two more options: "Allow on Arrival” and “Allow on Departure”. Thus, depending on the nature of the service, you can set the system to allow or not allow the selection of this service on the corresponding date of the guest's stay. For existing services, the "Allow on Arrival" field is automatically filled in as was the previous behaviour of the system.
  • BookDirect - Waiting list URL - We have added the ability to integrate an external Waiting list management system. If you wish to integrate such a system you need to set up a link to it. Once you set the link, a link to it will appear in BookDirect  Notify me when available". The link is always present after the list of room types on the second page. Additionally, if the hotel has no rooms available, it also appears at the top of the screen to get the guest's attention. To set up the link for integration with a waiting list system, select BookDirect - Settings -> Website Integration -> Waiting list URL. The text "Notify me when available", can be changed from the BookDirect translation screen.
  • BookDirect - Card Verification - For users who do not have the option to use the direct integration with a payment provider, we have added a basic credit card number verification against the industry standard. Basic verification is only about whether the number itself meets the standard, but in no way guarantees that the card is valid and can be used.
  • In all screens of Channel Managers regarding Company mapping, we have changed the company selection field to allow searching for the company by name.
  • When archiving a room number, we now check for OOS statuses added to it for future periods. It also checks for future bookings that this room has been assigned to. Before archiving the room, it is necessary to remove its future uses and blocks.

Fixes

  • Events -  corrected the error text that appeared when recording a Catering or Room Reservation for the wrong period, so it is now clear what the issue stems from;
  • BookDirect- fixed an issue where after creating a booking for multiple rooms, the confirmation for all rooms was not being received. The issue was occurring when the last step required the user to fill in a “Language” field and different languages were selected for the guests.
  • Payments Report - corrected an issue where GL codes were not outputting correctly in cases where the report was running for a different account than the one the user was logged into;
  • Charges By Rooms Report - corrected data presentation so that services were not displayed for both virtual and component rooms at the same time.

Localisations

  • Norway: KID Number Added to the System. In Norway, the Invoice KID number is used to streamline payment and document reconciliation. The KID number serves as a unique identifier for each sale. It is automatically generated during the folio closing process and is included in the folio printout. Please Note: To activate the automatic generation of KID numbers for your Clock account, please contact the Clock PMS+ Support team.

Clock Update (16 Oct 2024)

Events Update

Activity Calendar

  • We changed the leading view of the calendar. Your feedback determined the old view to be more comfortable, readable, and printable. Therefore, we made the main view to be for a period, not for a day, visually matching the compact view of the old calendar. We also combined new features to it.

  • The period views work with 7, 14 or 31 days, allowing you to access the information you need with one click on the period or start date button.
  • To all period views (Activities, Half-Day, Day) you can now quickly get information about all Activities just by hovering over them, without even having to click. Also, again from all the views you can edit activities or create new ones. 
  • The direct link to the Calendar (from the navigation) is no longer tied to the New Event screen. We've adapted this calendar to be print-friendly, and improved the print view as well.
  • We have changed the way we create activities through the calendar. Previously, slots were selected first and "blue" boxes appeared, then everything was saved. Creating the activity is now more traditional and linear - after selecting a time, you save the activity immediately, and this allows you to add charges to it at the same time.
  • When creating a new calendar activity, if there is no event selected, you can create a new one, similar to the old organization.

  • To the filters, we have added the ability to exclude sections with Meeting room bookings or Catering. This way you can focus on what you are interested in or print only one section or the other.
  • To the Activities in the calendar, we added information about the Company and Activity Type.
  • In the Catering section, we have improved the label for the total number of guests for the hour. When there were a lot of bookings, the value was not reading well.

Calendar - Hotel Occupancy

  • Hotel occupancy is now shown at the top, not at the bottom.
  • We added a new quick button to show/hide Hotel Occupancy (the icon with the bed). 
  • In Hotel Occupancy, by default it NO longer displays the occupancy percentage. This made the table twice as compact. If you want, you can show the % occupancy from the settings icon in the top right corner.
  • We added the TOTAL of available roomto the table.

Event screen

  • We changed the event details section to be more readable, including the note which is wider and keeps the entries.
  • New Event screen - we show all the Event fields on the create form so you don't have to edit it afterwards.

  • Event Contact Person - the contact creation and editing forms now contain all the contact fields. The search has also been changed. Screens have been redesigned to be clearer and make better use of screen space. The suggestion of related contacts has been improved, and they are retrieved from both the Company and the Event. When selecting or creating a Contact, it is also added to the Company, to make it easier to use in future Events.
  • In dialogs (e.g. editing Catering, Charges, Templates, etc.) you can quickly close screens with the "Esc" key instead of pressing the "x" key.
  • We have added the number of related bookings.
  • ToDos - we've split them into Active and Completed, with Completed hidden by default.
  • We've expanded the edit form for Activities to make better use of the available space. We've also changed the Start, Duration, and End fields so you can see both dates and easily create multi-day activities.
  • In the list of Activities, we added information about Activity Type. 
  • Adding Activities - You can now add activities directly from the Event screen without using the calendar.

  • We also fixed two issues - the screen was not always refreshing after recording. The data was being saved, but it wasn't showing on the screen, which led to confusion. Also, the ToDos were being created with the wrong "Channel". They were visible in the Event, but not visible in the general ToDo search because of the channel.
  • To the full screen of the block (which is full screen), we added all the details for the block - rate, manual price, adults and children, and code.

Event templates

  • We added the Activity Type field to the screen that lists all Activities part of the Event Template.
  • You can also now add a Template directly from the Event screen without going through the Calendar. 

Other Improvements

  • Folios - added a filter for charges by revenue group.
  • Folios - voided folios - additional information - time and the user who voided - is now displayed in the main view.
  • Folios - a limit of 15 000 charges in a folio is applied. So far we have only generated ToDo's when a certain number of charges is reached. However, many folios remained unprocessed and this caused problems in subsequent operations with them.
  • Folios - added the option to redeem gift vouchers purchased through the Gift Voucher webshop.
  • Folios - (hotel) billing info - we added City to the folio printouts in the Issued by section
  • Adyen - when paying with an S3 card (e.g. virtual cards received from the channel manager) a second card is no longer created.
  • Payment Report (new) - has been optimized and works on backend.
  • Added the 'Urgent' checkbox in the ToDo Action Plan configuration
  • Charges By Rooms Report - added the option to see the booking guest details - names and number of guests. To view this information select the 'show Guest data' checkbox after generating the report. In addition, we have redesigned the report so that by default only rooms for which there are charges are displayed. If you want to see all rooms, regardless of whether they have charges on the given date, select the 'show Rooms without charges' checkbox. Printing is optimised.

Fixes

  • Self Service Portal - the button for adding additional services has been changed to prevent double clicks.
  • Virtual Rooms - with certain configurations of virtual rooms, there was a discrepancy in the number of available rooms in Rate and Availability and Occupancy Forecast.
  • Events - archived rates are no longer available for selection in the Blocks.
  • Events - changed 'related bookings' to reflect only the number of active bookings.

Clock Update (03 Sep 2024)

Discover Our New Time-Saving Features

We’re excited to introduce several powerful new features in our software that are designed to streamline your workflow and enhance productivity.

Charge Packages

Say goodbye to repetitive clicks with our Charge Packages feature. Imagine you're managing an event and need to apply a preset menu to the occasion. With Charge Packages, you can select the preset menu, and all the associated menu items will be automatically charged to the event with a single click. This feature is perfect for efficiently processing bundled services or items, saving you time and reducing the chance of errors.

To set up Charge Packages:

  • Navigate to Settings -> Charges & Taxes -> Charge Packages.
  • Add a new package and give it a name. You can also add a longer description.
  • Add the items to the package, for each item select: 
    • Charge Template
    • Quantity: If you fill in a quantity, the charge will be with that fixed quantity. However, it is more interesting if you leave the field blank. Then the quantity of the charge will be whatever quantity you fill in for the package when you use it. On the other hand, the system will suggest for the quantity of the package - the PAX in the Event, Meeting Room Bookings or Catering - so the Quantity will be as many as there are PAX.

Example:

Let's say you have an Event package where the Audio/Video fee is quantity 1 and costs 100 EUR, and the room rental is 10 EUR per person. In this case, the charge template for the Audio/Video must be a quantity of 1, and the charging rate for the room must be an empty quantity. 

Let's say the meeting room booking is for 23 guests. When you charge this package to the Meeting Room Bookings, it will automatically suggest for the package quantity - 23. The resulting chargers though are - Audio/Video 1 * 100 EUR, Room Rental 23 * 10 EUR.

  • Price: You may enter a price per charge. If you don't fill anything in, the price set in the chargemaster itself will be used. This feature allows you to use a single Charge Template with different prices in different packages.
  • Print text: Using the print text you can control the presentation of the charge in the folio. If you don't fill in anything, the print text from the charge template will be used.

To-Do Action Plans

Planning complex projects just got a lot easier with the To-Do Action Plans feature. Let’s say you’re organizing a wedding. You can create a comprehensive action plan that includes all the To-Dos involved, such as booking the venue, sending invitations, arranging catering, and more. Each task can be scheduled for a relative date—like sending invitations two months before the wedding or confirming the menu one month out—ensuring nothing slips through the cracks.

To set up To-Do action plans: 

  • Navigate to Settings -> MICE -> To-Dos - Action plans and add a new plan.
  • Fill in the fields of the To-Do you want to create.
  • If you fill in the Assigned User field then this To-Do will always be assigned to the selected user. If you leave the field blank, it can be allocated to the user you select when using the plan. This way, certain tasks can have specific assignees, while other tasks will be assigned to a user you select.
  • The date of the To-Do is relative and can be rendered against two dates - "Date Created" and "Date Arrived"
  • In Offset Days - fill in how many days before or after the relative date should the To-Do be created. For example for "7 days after the creation of the Event" - fill in "7". For "30 days before the Event Arrives" fill in "-30" (i.e. a negative number to be before arrival).

Usage

To add a To-Do Action Plan to an Event:

  • Open the Event and in the To-Do section, select the Action Plan button.
  • Find and select the Plan.
  • The creation and arrival dates of the Event will automatically populate. If you wish you can change them, thus the To-Dos will be created according to the newly entered dates.
  • You can also fill in a user, as they will be assigned to tasks for which no user has been selected.
  • Save. The To-Do will be added to the Event with the appropriate fields, dates and users. You can add as many plans as needed to each Event.

Event Breadcrumbs

Navigating through your recent activities has never been easier. Our new Event Breadcrumbs feature provides shortcuts to the last accessed events, allowing you to quickly pick up where you left off without the hassle of searching through your event history. Whether you're managing multiple events or need to revisit specific details, this feature ensures you can effortlessly retrace your steps.

On the Event screen and in the Event search, you will see a toolbar showing the last 20 Events open in the current browser. If they don't add up on your screen, or you can't navigate by the brief description, you can open the list with the toolbar button on the right. The list displays the last 20 Events with more information about each one. Click the event to open it or select it with the right button to open it in a new tab.

BookDirect Service Groups Merchandising

We’re thrilled to introduce a new feature in Book Direct designed to help hotels maximize their revenue while improving the guest experience: Service Groups Merchandising.

Offering extra services to your guests is a great way to enhance their stay and boost your revenue. However, when the list of available services becomes too long, it can overwhelm guests and reduce the likelihood of them selecting additional options. That’s where Service Groups come in.

With Service Groups, you can now categorize and group related services—such as spa treatments, dining options, or room upgrades—into compact, easy-to-navigate sections. Each group is presented with a gallery and description, making it visually appealing and simple for guests to explore all the available options.

For example, instead of displaying a long list of individual spa services, you can create a “Spa & Wellness” group that includes massages, facials, and other treatments. Guests can easily browse this group, making it more likely they’ll add multiple services to their booking.

By organizing your offerings into Service Groups, you not only make the selection process more user-friendly but also increase the chances of upselling more services. It's a win-win for both your hotel and your guests.

To organize additional services in Book Direct in Service Groups:

  • Navigate to Settings -> Charge Templates. From the 'More' menu, select WRS Service Groups. There is a link to the same settings in Book Direct Settings -> WRS Extra Services -> WRS Service Groups.
  • Add a new Group by filling in the name.
  • Once added, you can add pictures for it to display as a gallery in Book Direct. Pictures are added from the Groups list - with the button opposite each group.
  • For each group you can add translations and descriptions for the supported languages - Settings - Content - Common Translations - WRS Service Group.
  • Finally, you need to set a Service Group for the Services you sell through the WRS. Navigate to -> Settings - Charge Templates -> WRS Charge templates -> column 'Group'. Set the group to only those services you wish to group. Save! 
  • Services without a group will appear in Book Direct as before - alone in the list.
  • In the list in Book Direct, all Groups are presented first, then the services without groups.
  • If you wish to change the order of the Groups, you can do so from Setting -> Charge Templates -> More -> WRS Service Groups Sorting.

Online Check-In: More flexibility

Our latest update to the  Online Check-In App enhances flexibility, making the check-in process even smoother and more convenient for your guests.

  • Payment can be skipped. 

We've made a small but useful update to our check-in app. Previously, you could either require guests to make payments in advance or opt not to collect payments during the online check-in process. With this new feature, you can now prompt guests for payment during check-in while giving them the option to choose whether to pay online or at the hotel. This update provides a bit more flexibility, allowing guests to decide on the payment method that works best for them, whether that's taking care of it online or handling it in person upon arrival. Check the new setting "Payment can be skipped" in On-line checkin app.

  • Registration of adults and children

To increase the utility of the app in countries where registration cards are required, including for children, we have modified the related setting. Previously, it was possible to choose whether to register one guest or all adults. The "Registration Guests" setting now includes three values: "Main guest only," "All adults," and "All adults and children."

  • Skip the splash screen

If you don't like the first splash page in Online Check-in, which is intended for your logo, you now have the option to remove the image. This way, the splash screen will be skipped, and the user will proceed to the next page without delay.

In-Platform Payments: New Reconciliation Reports

We’re pleased to introduce two new reconciliation reports for In-platform Payments users: Payments Reconcile and Payout Reconcile. These tools are designed to simplify your financial oversight and ensure accuracy in your transactions.

  • Payments Reconcile: Track Every Transaction

The Payments Reconcile report helps you track payments in Clock within a specified period. It answers the question, "Where is my money?" by showing whether each payment has been paid out, when it occurred, and which payout batch it belongs to, or if it’s still pending. The report summarizes payments by payout batches but allows you to drill down for detailed insights on each group.

  • Payout Reconcile: Verify Your Payouts

The Payout Reconcile report provides clarity on each payout made to your bank account. It details the transactions included in each payout—such as payments, refunds, and chargebacks—along with the collected fees and commissions, and the net amount transferred. This comprehensive view helps ensure that all payouts are accurate and complete.

  • Why These Reports Matter

These reports enhance financial management by offering detailed visibility into transactions and payouts, making it easier to reconcile accounts and verify accuracy.

Improvements

Event Confirmation App - Signature

We’ve enhanced our document signing app to improve transparency and usability. Previously, the signature was collected but not visible within the document. Now, the signature, along with the signer’s name and date is visibly placed inside the document, and the complete, signed document is automatically sent to the customer. Additionally, if the document is printed later, the printout will also include the signature and the signer’s name.In the back office, we've made it easier to identify signed documents by adding a dedicated icon within the app. This allows staff to quickly recognize which documents have been signed, streamlining document management. 

Contract (TourOperator) Rates - Special Activation Codes for Discounts or Additional Charges

With the new functionality, you can trigger Discounts or Extra Charges only for selected bookings that, for example, participate in a promotion. This is done by filling in Activation Codes in the Booking and setting the conditions for Discounts or Additional Charges (bundled charges) corresponding to these codes in the Contract. Here is more information:

  • In the Contract, add the Discount or Additional Package (Accrual) Codes in the Activation Codes section.

  • For a given discount, you can fill in the "Activation Code" field. It will only be applied if the same code is filled in the booking.
  • In the discount, we have added one more field - "Exclusive". This field means that if this discount qualifies and is applied, no other discount will be applied along with it. This field is particularly useful for the following situation. If you have a booking with a code, then both discounts WITHOUT a code (they apply to everyone) and those with a code (for the specific booking) can be applied to it. However, it's all too likely that you don't want the NO code discounts to apply. So mark the discount with a code for "Exclusive". Then only that will apply, and the others will be ignored even if they qualify.

  • We have added a new section for Package Items. For now, this functionality can only charge services on the day of arrival. For this, the booking must have the same activation codes as you have set in the package item. The special thing here is that the more times the code is present in the booking, the more charges the booking will receive. If the code is added once in the booking - you will have one charge, if the code is added three times in the booking, you will have three charges.

  • One more improvement in the booking screen - activation codes are offered to choose according to the selected rate, instead of being handwritten. This ensures that you won't get the code wrong and will always choose from those codes that are defined for the specific contract. 

Additionally, we've added another small improvement - we're making more optimal use of the screen. By default, the Tour Contract is displayed in two columns and takes up more optimal space on your monitor. If there are lines of the contract that are very long and their content doesn't add up, using the new button on the top-right of the screen, you can "expand" the contract across the full width and so see the long lines more easily.

POS - room transfer - all guests in the room

We have changed the screen in the POS for room transfer to show the names of all guests in the room. The booking/room search by guest name also now searches by all guest names. This change makes room transfers much more convenient, whether the guests are families, colleagues from a corporate event, or delegates from a conference. The deep integration between the POS and PMS makes the combination of the two products unique.

Occupancy/Revenue Forecast and Pace Report - only Room revenue

We have added a new parameter to the report, allowing you to choose whether to view the total revenue (as before) or only the room revenue (revenue groups: rooms and packages). We would like to remind you that the report provides important information about expected revenue, including potential revenue from blocks, which is further divided into revenue from guaranteed and optional blocks.

Other Improvements

  • Disabled OTA Virtual card tokenization: To optimize your expenses related to credit card transactions, we have changed the card tokenization logic so that virtual credit cards from channel managers are not automatically tokenized. This way, you will avoid the costs associated with these transactions.
  • WorldLine/SixPayments: We have added an option in the settings for alternative payment methods for BANCONTACT.
  • The new Event screens now open by default from the navigation and other links. We hope that the effort we have put into the new screens and features has improved your experience and productivity. We value your feedback! 
  • Event Creation Screen: When adding a new company, we have also added the field "Accept charge transfers" so that you can reflect this important feature right at the time of its creation.
  • BookDirect - Cart Expiration: We have improved the logic regarding when the cart expires to make the screen clearer for guests when they encounter such a situation. The cart "expiration" occurs when a guest selects rooms and adds them to their cart but does not complete the booking process. In such cases, the system keeps the cart for 6 hours from the time the first room is added. If the user does not complete the cart within 6 hours, the system marks the cart as expired and notifies the user upon their next action with it. We would like to remind you that rooms added to the cart are not reserved, are not held for the current user, and may become unavailable in the meantime. If this happens, the system performs an additional check and prevents the payment and booking of the rooms. 
  • We have added a new option to the Housekeeping Tasks screen: "Show Housekeeping Sector". This option shows or hides a column with the housekeeping sector, which is useful if you use it. Housekeeping sectors allow you to group rooms and common areas in a way that is convenient for the Housekeeping department. Additionally, it is part of the algorithm for automatic task assignment. You can also obtain summarized information in the Housekeeping Forecast Report using it. If you are not using this field yet, you might want to consider exploring it. 
  • Folios (new): the search for charge templates in the charging screen now works on all words, not just the first as before.
  • Folios (new):  for the closed folios we have added the date and time, as well as username
  • For customers from Zimbabwe, we have added the code for their new national currency - ZWG.

Fixes

  • For documents imported from a CSV file, quick search by number was not working. The search will now work for them, but only for those imported after the fix.
  • When printing multiple selected registration cards at once, there was no "page break." Due to differences in the support of "page break" instructions across different browsers, it is now possible that additional blank pages may appear in some browsers. Unfortunately, a consistent solution that works across all browsers and operating systems cannot be found.

Integrations

  • PUSH / Webhook Notification Activation via API

No more back-and-forth emails with Clock support for activation! To simplify and automate the subscription process, activation is now available directly through the API with a single API call. All partners using this feature have been notified via an email campaign. For more details, please refer to the relevant section in the API documentation.

  • Private Analytics and Google BigQuery Export

With the updates to Clock, we have introduced the ability to add a contact person to a booking, allowing flexibility to differentiate between the booker and the guest. Previously, the contact person field was not available in the Google BigQuery bookings table and could not be included in private analytics reports and dashboards. This issue has been resolved, and the new field contact_person_id now references the table containing guest information.

  • LightSpeed POS L Series Hotel Transfer – Prevention of Duplicate Charge Transfers

In rare instances, finalizing a LightSpeed POS L Series bill hours after it had been transferred to the hotel could result in duplicate charges, particularly if the folio containing the original charges was already closed. The interface behavior has been optimized: now, before new charges sent by LightSpeed POS L Series upon bill finalization are processed, they are foreshadowed by negative charges. This replaces the previous behavior, which involved voiding the old charges.

  • Door key issue process - Card ID added to Door key issue process

More RFID-based door lock systems are now functioning online, where information is not stored directly on the RFID physical bearer (such as a card or bracelet). Instead, the system reads the RFID ID and sends it to the door lock system to communicate with the lock and grant access. By default, the Card ID is not required but can be easily enabled in the Room Key Settings. Once enabled, the Card ID becomes mandatory and is stored in the door key request to ensure proper communication with the door lock system.

Clock PMS+ Update (31 Jul 2024)

Housekeeping Assistant

Cleaning guest rooms is a primary task of housekeeping, but it is far from the only one. In addition to the rooms, housekeeping must also take care of the corridors, stairs, landings, lobbies, restaurants, meeting rooms, service areas, outdoor spaces, etc. All these activities can now be managed in the improved version of the Housekeeping module. Housekeepers can now be "connected" to their assigned tasks. Through the new application "Housekeeper App", they can use mobile devices to track and complete their tasks, charge for the minibar, and report any issues found. This leads to real-time communication, better team interaction, and consequently, more satisfied customers. Here are the details of our improved version:

Tasks for Everything

We have changed the structure of housekeeping tasks so that they not only pertain to hotel rooms but also to meeting rooms, restaurants, or other common areas. Meeting rooms and Restaurants are part of the configurations of the "Events" module, and all other areas you want to manage housekeeping tasks for can be defined in the new setting Housekeeping Assistant->Common Areas.

Create a housekeeping task and choose whether it pertains to a Hotel Room, Meeting Room, Restaurant, or Common Area.

Note: Please note that currently, tasks for meeting rooms, restaurants, and common areas are not generated automatically, but you can create new tasks for these areas through the "Housekeeping tasks" screen.

Housekeepers

To more effectively manage your employees, we have created a new list. In this list, you can enter all housekeepers and indicate whether they are currently on shift or not. This will help you optimise the task assignment process. Besides making it easier to assign tasks to housekeepers, the system will also help by filtering employees on shift. You can also use the new functionality for automatic task assignment. If you prefer, you can continue using the feature the old way, i.e., without having to predefine the housekeeper list, using a housekeeper number, or manually entering a name each time.

Information on how to configure the list can be found in the article "Housekeepers".

Housekeeper App

With the new app, each housekeeper receives and completes their tasks on a mobile device. No prior installation is needed; it is extremely convenient as the only thing the housekeeper needs to do is scan a QR code. They can use their personal smartphone, a company smartphone, or a tablet. There is no limit to the number of devices and housekeepers you wish to use the system. Get acquainted with the capabilities of the new app Housekeeper App - functional capabilities and activation.

Housekeeping Live Monitor

  • We added the possibility for the monitor to be started for a specific sector (2). This way, the Sector Manager can monitor changes only for the rooms they are responsible for. Accordingly, the sound indication will be only for the monitored rooms.
  • The Housekeeping Manager, on the other hand, can use another new feature - "grouping by sectors" (1), thus clearly seeing all rooms in the hotel and their respective housekeeping sector.
  • List of changes (3). With a new button in the upper right corner, you can review all changes since the monitor was last started, seeing information on the time, room, and its new status. This way, even if you miss the sound signal, you can later review everything that has happened during the time you missed (up to 24 hours back).

Other Improvements

  • Mass creation of tasks. We have added the ability to create tasks for many rooms/meeting rooms/areas at once. Thus, instead of adding tasks one by one, you can much more quickly create tasks for selected common areas, for example. You use the same screen as before, but instead of one room/meeting room/area, you can now select multiple ones from the list. You can use the new option when creating tasks through the updated screen "Housekeeping tasks".

Clock PMS+ Update (22 Jul 2024)

New features

Room Allocation - Cutting-Edge Allocation Intelligence

Take advantage of our new room allocation algorithm to maximize your occupancy or reduce peak hotel housekeeping workload. Here's what options you can choose to intelligently allocate room numbers to bookings:

  • To take advantage of the new algorithms, change the setting "Allocation algorithm" by navigating to Settings->All Settings->Rooms->Rooms, and switch to the page "Other".

 Here are all the algorithms, including the old ones:

  • Ordered. An old algorithm. Allocates rooms to bookings in a sequential manner, depending on the set room sequence (sorting);
  • Random. An old algorithm. Allocates rooms to bookings randomly;
  • Dense. A new algorithm that allocates rooms to bookings to maximize occupancy by finding free rooms with the minimum number of free nights before arrival. This maximizes occupancy.
  • Equal usage. A new algorithm that allocates rooms to bookings to evenly distribute the workload among all hotel rooms and avoid crowding where possible. This facilitates the work of Housekeeping and ensures that all rooms are cleaned upon guest arrival. 
  • Occupancy dependent. A new dynamic algorithm that combines the previous two and changes its behaviour depending on the hotel's occupancy. You set the hotel's occupancy percentage threshold at which the algorithm switches from "Equal usage" to “Dense”.

    Example: For instance, if you set 70%, it means that if the hotel's occupancy for the booking period is 65%, the "Equal usage" allocation will be used, and if it is 75%, the “Dense” allocation will be used.

    • When allocating a room for each booking, its period and the maximum occupancy of the hotel during that period are considered.
    • If you allocate many bookings at once, the algorithm is determined for each booking and its period. This allows behaviour to adapt to the different occupancy, for example, on weekends and weekdays.

Important: Please note that for this model to function, your hotel's occupancy needs to be known in advance. This means the algorithm will work best if you book room types (not numbers) and allocate rooms to bookings a few days in advance or for each following day, for example.

Events - New Rights

We have added new permissions to finely regulate your employees' access to information and functions of the "Events" module. We have added two permissions for two categories of users:

  • View Right (Event: Access). This right can be granted to employees who use event information. They will be able to use searches, Banquet Event Order, Function Sheet, and other printouts without being able to edit event data.
  • Create and Edit Right (Event: Create or Edit). This right grants access to create new events and edit activities within them. Additionally, it covers sending emails related to the event.
  • Users without any of the above rights will not have access to operational information related to events.

Important: The two new rights are automatically granted to all users who have company-related permissions. If necessary, review your employees' permissions and grant or revoke permissions for specific users.

Improvements

  • Occupancy Forecast - When using the segmentation function, virtual rooms were included in the summary data for occupied rooms by segments. We determined that such information in totals is more confusing than helpful, so now only data for real rooms is displayed in the totals. There is no change in the sections of the room types themselves - data for the occupancy of the type, whether real or virtual, continues to be displayed as before.
  • Meal Report (new) - Compact view - Print optimisation - In cases where a specific room number is allocated for a booking, the room type name will no longer be displayed.

Fixes

  • Events - The link to the Event Confirmation App was incorrect when sending an email that was first generated and then saved as a document. The link is now correct, regardless of the sequence in which the document was created.
  • Events - If the event had the status “Optional”, templates could not be used. When creating activities from a template, the activities are now created with the status of the event.
  • Payment Autopilot - settings - In certain situations, the "Additional Amount" field required a value on the edit screen, even when it was not necessary.
  • Printing the standard registration card form no longer adds an extra page.
  • Closed Folios Report (new) - did not produce results when the "Include open/voided folios" option was enabled.
  • Charges By Rooms Report (new) - The revenue category filter did not function correctly.
  •  Credit Card Transaction Report - In certain situations, the report could not be generated and would produce an error of the type 'Error: Request failed with status code 422 ActiveRecord::RecordNotFound...'.

Integrations

  • LightSpeed POS L-Series - The End-of-day transfer in some cases processed periods not matching the financial day 24 hours period. The behaviour is enhanced to ensure matching of the reports between LightSpeed POS L-Series and Clock POS.

Clock PMS+ Update (18 Jun 2024)

New Features

New version of the MICE module

Based on the thorough feedback from leading event professionals, we’ve improved Clock’s new MICE functionality to make your event planning smoother and more efficient than ever before.

Tracking every detail, from availability to guest communications, often feels overwhelming – especially when juggling other hotel responsibilities.

With Clock’s upgraded MICE upgraded functionality, the hosting of winning events is incredibly easy.

What’s new:

  • Enhanced Flexibility and Speed: Quickly create and edit events with a compact, single-glance interface, reducing your time on administrative tasks.
  • Integrated Venue Control: Manage meeting rooms, hotel rooms, and restaurant seats from one unified view, providing a seamless experience for you and your team.
  • Advanced Automation: Adapt to changes effortlessly with automated systems for guest count adjustments and event rescheduling to handle any last-minute modifications smoothly.
  • Modern user interface: Navigate our system effortlessly with enhancements that eliminate the need for multiple screens.

Enjoy improved guest communications, efficient billing, faster event creation and modification, automated adjustments, centralised venue management, and better staff collaboration. 

Explore Clock’s new MICE features.

Occupancy Forecast 

We have added more data and features to the "Occupancy Forecast" screen, allowing you to analyze your occupancy structure more quickly.

  • Segmentation by Company and Agent - In addition to the existing options for occupancy segmentation - marketing source, channel, segment, and booking status, we have added two more segments: Company and Agent. If you select them, you will get a breakdown of occupancy from bookings and blocks by the associated Company or Agent. This will enable you to compare the performance of each of your partners.

  • Arrival, Departure, Stayover, In Hotel - Rooms and Guests - If you have chosen the "Details" option, you can find data on the dynamics of bookings in the summary section. Until now, this information was available only in a separate report. By adding it to the Occupancy Forecast, you will now have access to this data in one place. Additionally, we have optimized the view of the summary section to make the report easier to read.

Booking - Automatic Child Age Verification

For hotels where the age of children is crucial for pricing or rates based on tour operator agreements, we have added a new feature that can help enforce automatic control. Here’s how the new control feature works:

  • By default, the feature is turned off. To activate it, fill in the maximum age up to which guests are considered children in your hotel. Go to All Settings -> Bookings -> Child Age Verification. Fill in the "Child age verification - Max age" field and save. 
  • When checking in a booking, if there are fields filled in for the number of children, the following checks will be performed:
    • Are the ages of each of the children filled in - If there are 2 children filled in, then two ages must be specified; 
    • Do the ages of the children match the birthdates in the registration cards - If there are two children and two ages filled in, do the registration cards and the birthdates provided in them match for guests of these ages;
    • If the above checks find discrepancies between the number of children, their ages, and their birthdates in the registration cards, a To-Do will be created in the "Bookings" channel with the text "Children age discrepancy detected!" Review the To-Do in the channel to see the discrepancies and take the necessary actions. 
  • Strict child age verification - If you want to apply a stricter approach to these data, we have provided an additional setting "Strict child age verification (prevents check-in)." If you enable it and the system finds discrepancies during check-in, instead of generating a To-Do, the system will display an error and will not allow the booking to be checked in. In this case, to check in the booking, you must first edit the number of children and their ages to match the registration cards. Choose the level of control that you deem necessary.

Improvements

  • BookDirect for Groups - We have added a new setting "Ask for guests at the first step". If individual hotels prefer this mode of operation, you can now apply it to your hotel chain’s booking system. The setting is located in "BookDirect for Groups - Settings," under the "Guests" group. It works similarly to "BookDirect" - when enabled, the guest must enter the number of adults and children, as well as their ages, at the first step. The benefit of this behaviour is that the prices shown in the following steps are accurately calculated for this combination of guests and child ages. On the other hand, the drawback is that the process of booking multiple rooms with different numbers of adults and children is not as intuitive. Choose the approach that best suits your needs.  
  • Folio Printing - Total Base and Total Tax -We added two more options for customizing the folio printout, allowing you to display the total taxable amount and tax amount just above the total. The settings for the folio view are located in All Settings -> Documents -> Folio Printing - defaults. Note that this concerns the standard folio printout. If you use a custom folio print format, we have provided the placeholders and .

  • Housekeeping Forecast report - By Sectors - In the new version of the report, we added the ability to group information by housekeeping sectors. You can choose whether to group by dates (as before) or by housekeeping sectors. There are also two additional improvements - you can freely select the report period instead of the previously fixed 10 and 30 days from today. We also added totals for each column. With the new sector grouping, you can see the workload of each sector for a given period and plan both the staff and inventory for that sector - linens, detergents, consumables, etc. 
  • Meal Report (new) - We added new filters for Restaurant and Meals.
  • Payments Report (new) - We added a new filter "Payment service provider". If you are switching from one payment operator to another, you can get detailed information about the payments associated with each.
  • The following reports have been moved to our new platform, with no functional changes: Booking Pace, Booking Segmentation, Bookings day-by-day, Bookings Awaiting Guarantee, Charge Modifier, Charge Template Availabilities, Guest Feedback, Meal, Meal Summary, Rate Control, Charges by Rooms, Transfers. 
  • Booking Import from CSV - For the purposes of the import, we added the "Branch" field of the Company.

    Important: Note that for the import to function, you must correctly fill in the Company/Branch combination in the import file. For example, if you have one company with several branches, and the Company is present in the import file without a branch, it will not be found. In this case, you need to correct the import file and specify exactly which branch of the company the bookings refer to.

    • Due to this change and the increasing reports of duplicate companies resulting from imports, we have removed the option for automatic Company creation. Generally, this option is more of a hindrance than a help during imports. 
  • There is now a link in the navigation to the new Settings screen only. We remind you that it includes a search function for settings by name or group, which can save you a lot of time. If you wish to access the old settings screen, you can do so from the button in the top right corner labeled "Old Version."
  • We added a new quick completion feature in the To-Do search. After you select the filters, the To-Dos that meet these criteria are displayed, divided into pages of 50. With the new feature, you can quickly complete the To-Dos you see on the current page. If you intend to complete many To-Dos, it is advisable to use the "Not completed" filter. 
  • We added the newest currency "ZIG"
  • Clock POS - we have added a new link to the "My User" screen where any user can easily activate their MFA and change their password.

Fixes

  • SixPayments / Saferpay - we have made changes so that a refund operation no longer returns an error of type "Transaction already captured", even though it was successfully executed;
  • cCredit - corrected system operation so that offline terminal payments do not generate errors due to missing specific data in the received response;
  • Booking QR code - changed the way the QR code renders because certain email clients were not handling the old format well;
  • Direct links from system emails (e.g., for a new reservation created through WRS) always required a login from users.

Clock PMS+ Update (13 May 2024)

New Features

SynXis - use of restrictions at Room Type and Rate Plan level

The restrictions at the Room Type and Rate Plan levels are now certified and ready for use. Previously, these restrictions directly affected every connected product, meaning that restricting one room type would lead to changes in 20 rates, for example. This resulted in sending 20 times more messages and slower communication. With the new certified feature, these restrictions are sent separately, not as part of each product. This means that a single message concerning the room type will close all associated rates in SynXis, speeding up communication and reaching the desired changes across all channels more quickly.

Additionally, this functionality allows for a reduction in the number of mapped rates. That is, you can transfer some of your rates as arbitrary and have them exist only in SynXis. Such rates will not be mapped, and no updates will be sent for them, but they will still adhere to the restrictions at the room type and rate category levels.

We would like to remind you that the restrictions at the Room Type and Rate Plan levels can be found in the rate management screen under the "More..." tab. We encourage you to use these levels when your goal is to limit room types, rate plans, or the entire hotel, rather than individual rates. This will reduce errors, speed up your work, and give you a clearer view of the higher-level restrictions.

To send separate messages to SynXis for these restrictions, rather than as part of the messages for each individual rate, you need to enable a setting concerning the activation of each one (1). Before doing this, it is advisable to contact SynXis support to check if this functionality is set up for use on their side. Additionally, you must add mapping between the rate plans in SynXis and the rate plans in Clock PMS+ (Rate Plans/Categories section in the SynXis settings). Regarding Room Types, the existing mapping for rates is used (Room Type/Rate section in the SynXis settings).

SynXis - Round Prices

Sometimes, if two systems or connected channels operate, one with tax-exclusive prices and the other with tax-inclusive prices, discrepancies may occur. For example, if Clock PMS+ sends a price of $200 including a 20% tax, and the channel operates with tax-exclusive prices, it might return a price of $166.66 without tax. In this situation, Clock PMS+ will add the tax and get $199.992, which rounds to $199.99. To address such discrepancies, we have added another setting to SynXis - "Round Prices" (2). If enabled, Clock PMS+ will perform an additional rounding to a whole number. Thus, amounts that, after tax is added, are $199.99 or $200.01, will be rounded to a whole number - $200.00. This applies to both room prices and the prices of additional services.

Improvements

Rate Plans - Archiving

We have added archiving for rate plans and those originating from tour operator contracts. If there are rate plans and rates from contracts that you no longer use, you can archive them to keep them from appearing on the lists. To archive :

  • Open Rate Plans -> More... -> Rate Plans.
  • Select the desired Plan
  • In the edit screen, select "Archive" and Save.
  • A screen will open showing the linked rates that will be archived. Confirm the archiving of the Plan and the associated rates.

Archived plans can be viewed in the list by selecting the second icon at the top and the "Show Archived" option. You can unarchive them if you open the edit screen and remove the check mark. Please note that the linked rates will not be unarchived automatically. Find them and unarchive those you wish. 

BookDirect

If you use BookDirect, you can benefit from the following update: Icons for popular payment methods.

This will facilitate guests in navigating to their preferred payment method. To ensure the correct icons appear, make sure the following settings are configured:  

  • For Cards - go to Menu Settings -> All Settings -> Credit Cards - select the credit cards you support. These icons will appear regardless of the payment operator you use.
  • Alternative Payment Methods - icons for popular methods are taken from the payment operator settings in Clock PMS+. This works for Adyen, WorldLine, and Stripe.
  • Payment methods without a set icon will display with their commercial name.

New versions of reports

  • New versions have been made for the following reports: "Accounts Receivable", "Charge Summary D-M-Y Report", "Closed Folios", "Closed Folios Summary Report", "Taxes", with a link to the old version for each.
  • Additionally, the reports "Closed Folios", "Closed Folios Summary Report", and "Taxes" have been redesigned to operate asynchronously (in the background) and can handle larger data volumes..
  • A new section "Voided folios, closed previously" in the new versions of the reports "Taxes" and "Closed Folios". In the new section, you will see the folios whose cancellation date falls within the report period, but their closing date is prior to the report period. This allows for the use of the reports in an "incremental" manner, without needing to review past periods and audit cancellations.

Clock POS

We have added a new version of the Closure screens, similar to those in the PMS. The new screens are optimised for handling larger volumes of data. There is a link to the old version in the new version.

Fixes

  • On the booking screen, when a Block is selected for which no number of guests and rate are defined, the corresponding fields in the booking were cleared. Now the existing data will be preserved, if any..
  • Automatic Payments (autopilot) + Adyen - we have made optimisations to the processing so that post-processing conflicts caused by asynchronous responses from the payment gateway are resolved or reduced.

Integrations

  • Mailchimp - The integration has a new modernised look. It can be accessed by going to Settings > AppConnector > Mailchimp > Settings, once the integration is activated.
  • INSEE - The export file has been optimised to fully comply with the latest INSEE requirements.
  • Quickbooks - In some cases (mostly with credit notes), the quantity of the created charges was considered empty which was causing calculation difficulties and export errors. The behaviour of the export has been enhanced and it now successfully handles such charges.
  • Hesta - To ensure statistics accuracy, the occupancy data of virtual rooms, being the alternative commercial representations of existing physical rooms, is not exported, if the property has such rooms.
  • AJPES - A new document type mapping feature has been added to the interface settings screen (Reports > All reports > Localizations > Slovenian Ajpes Report > Settings). This enhancement allows you to easily 'translate' the document types configured in Clock PMS+ to those required by AJPES. It is especially useful if you use Clock's built-in ID Processor service. If no mappings are configured, the document types will be exported as originally entered.
  • LightSpeed POS K series - The end-of-day revenue transfer procedure has been enhanced to prevent errors when the item quantity is zero. 
  • LightSpeed POS K series - The interface configuration has been optimised for better usability. The end-of-day activation and configuration process is now easier and more intuitive. You can activate the end-of-day transfer and create a Clock POS account to which revenue will be transferred for consolidated reports. During this process, you can configure the first revenue date (past or future) for the transfer. Note that the payment type mapping option will only be available if the payment transfer is enabled.
  • IDeaS - The block data provisioning to IDeaS has been redesigned and now it exports not only the rate-calculated price, but also the manual price, if any.
  • API:
    • products endpoint - The behaviour has been streamlined to match the BookDirect functionality when a block code is used in combination with a manual price.
    • charges_bulkendpoint -  The new feature allows you to pass the 'charge_template_id' parameter, utilizing the details of the charge template for the charges to be created. You only need to include the parameters overriding the configured values in the charge template like price, text, print_text, etc. This way the process of charge creation is made a lot easier and more reliable.

Clock PMS+ Update (27 Mar 2024)

New Features

BookDirect - No Guarantee Required

To the existing Guarantee policy settings, we have added one more - "No Guarantee Required".

Up till now, to create such a Guarantee policy, you had to guarantee through a "Bank Transfer" and a zero-amount deposit. However, it was a bit ambiguous. Here is why we have introduced a new option to the Guarantee Policy - "No Guarantee Required". You can use such Guarantee Policies for individual bookings and for ones under Corporate contracts (with a Company/Agent/Block code). Here are more details:

  • As with the other Guarantee Policies, you have the option to enter a description and set a cancellation behaviour.
  • When booking through BookDirect at a rate with such a Guarantee Policy, the user does not see the Guarantee method section and can directly create their booking
  • The booking created with such a policy is marked as Guaranteed, as the guest is not required to do anything else.
  • If the user books several rooms - some of them requiring guaranteeing through a credit card, and others not requiring guaranteeing, the guest is required to provide credit card details or the respective payment only for the rooms requiring guaranteeing.
  • The changes do not apply to the old WRS version.

Folio Screen - All-in-one design and improvements

We have taken into consideration your preferences for the screen arrangement in its old version. We have made the necessary changes to let you see both the summary info, and the charges and payments. We believe that through layout, the new screen will provide the same info as the old one, while having clearer and more neat functionalities.

In addition to the new arrangement, we have also added the following new features:

  • QR code on the Customer Display. If you use the Customer Display, now you can show a QR code on it to be scanned by the guest, so that they can see the folio on their smartphone. To do so, click the QR icon button in the upper right part of the screen. If there is no such button, it is an indication that you have no Customer Display set.

  • Amount of the selected charges. Select the charges you are interested in and see their amount in the folio currency by opening the Selected menu.
  • In the addition of several charges one after another, the last selected date(s) or period is kept.
  • We have added the active pre-authorizations to the payment list, so that they can be visible on the main screen.

  • We have improved the screen for previewing the changes to one charge or the whole folio. It opens in a dialogue window and you don't need to leave the current screen of the folio to preview the changes.

Improvements

  • A new user right - Company: Create and Edit name. Only users having been granted this right can create new companies, as well as edit the name or the branch of already existing ones. This right builds on the existing one - Company: View and Edit, while giving you greater control and reducing the duplication of company profiles. The right has been granted to all users who have the 'Company: View and Edit' right.
  • Worldline (SixPayments) cCredit. A new setting has been added to allow you to change the cCredit endpoint. You can find it on the new Settings screen.
  • Housekeeping Task Archive - a new version. We have also added a column called 'Updated at' that gives you more info of the last changes to the task - when and by whom the change has been performed.
  • New BETA versions are also available for RoomCloud, SmartHotel and Common Translations (Languages and Texts). We have added a Search feature to ease further your work with translations in the new and improved version of Common Translations (Languages and Texts).

Fixes

  • Online Check-In - visualisation of the custom list of countries defined in the Guest Profile Fields is available
  • POS - users not having granted the Company: View and Edit right can no longer access the company list.

Integrations

  • AppConnector - The convenient way to manage your integrations has now been extended to Clock POS. You can find it in the System's section of the settings screen (Management > Settings > System). Your Clock PMS+ User should have the "AppConnector: Enable / Disable integrations" right in order to access it!
  • LightSpeed POS K Series - The activation procedure of the end of day revenue transfer is now optimised to minimise the delay of the first data import!
  • MarketMan - The configuration screen of the interface has entirely been redesigned to match the new and fresher look of the system.

Clock PMS+ Update (27 Feb 2024)

New Features

Customer Display

One of our main goals has always been to ease your communication to guests, enhance the quality of their experience and offer more digital channels of communication to them. Here is why we have been working in a new direction - Customer Display. The purpose of the Customer Display is for the guest to also get access to digital services at the reception desk.

First, let's remind you what “Customer Display” is. Through this feature, you have the option to turn every tablet  into a “Customer Display” by mounting it at the reception desk to face guests or leaving it freely at the reception desk. The first feature that can be performed by the Customer Display is to be a “Signature Pad”. Using it, the guest can digitally sign their registration card.

What has been added?

We have made it possible relying on your assistance for a guest to quickly open the  Online Check-In app on their smartphone. This is done through a QR code that can be shown on the Customer Display. In addition, there is another case scenario. If, for example, their phone is out of battery and the guest cannot access the Online Check-In, you can use a work tablet to be provided to the guest.

What is coming soon?

We will add one more feature to the Customer Display - an option for guests to quickly get access to the content of their folio and review it on their smartphone. This will also be possible through a QR code on the Customer Display that can be scanned by the guest through their phone.

How to use the new feature?

  • For the setup of the Customer Display, you can see Use of a Tablet as a Customer Display
  • To show the QR code on the Customer Display to be used by the guest to directly open the Online Check-in app, follow these steps:
    • Find the guest's booking and open it.
    • Click the “Online Check-In QR“ button in the “Guests" section.

    • You will see the QR code. Select the Display where the code is to appear. In the field, the last used Display will be suggested.
    • Click the “Show QR Code” button to show the display.
    • The QR code will no longer appear on the Display, if you click the Back button.Also, it will automatically disappear in 40 seconds, if you leave it open by accident.

As you also see the QR code, you can use the other case scenario, too - open the Online Check-In app on a work tablet by scanning the QR code. It is not necessary for a work tablet to be registered as a "Customer Display". This can be any device.

Verification of Hotel Email Domain

Upon the last changes by the large email providers like Google, Yahoo, etc., the sending of emails in someone else's name is becoming way more difficult. On one hand, it is a key step in the fight against spam, but on the other hand, it imposes additional requirements and tasks.

The changes in question have directly affected all users sending emails through our service, but in their name, i.e. the ‘from’ address is the hotel email. The users of Custom SMTP servers have not been affected in terms of our service.

At the moment, all users not relying on Custom SMTP, send emails, as the From address is noreply@clock-software.com, and the hotel email is the Reply To one.

We have added an option to once again be able to send emails in your name (i.e. the From address is the hotel email), but to be in compliance with the requirements, you will need to "verify" your domain.

Who can perform this task?

The email verification requires adding a few records to the records of your domain. This can be done by someone having access to records of your domain  - a system administrator, web developer or you if having the necessary expertise.

Please note that it is only possible if you own the domain of the hotel email. In other words, the part after @ is a domain of yours. If you use an email under gmail.com, yahoo.com or any other service provider, you don't own this domain and it is not possible to verify it.

What has to be added?

To your domain, three CNAME records have to be added, as they are to be generated by the system regarding the DKIM authentication, required by the Amazon SES services that we use. To obtain these records:

  • From the Navigation menu, select Settings->All Settings (new) and find the ‘Hotel email’ setting in the ‘Hotel’ section;
  • You will see the current status of the emails sent by you.
  • Select 'Use own email as 'From' after domain verification’
  • Enter your whole hotel email and then click ’Start Verification

  • You will see the records that are to be added to your domain.
  • Upon the addition, return to this screen again and click Finish Verification;
  • If everything is successful, the status of your email will change.

Improvements

  • Bookings and folios - quick access to the list of all charges in a folio directly from the Booking screen. To quickly review the charges of a given folio and skip unnecessary clicks, click the button in the respective row.

  • Folios (new)- we have made improvements to the new folio screen:
    • Similar to the Charges screen, we have added info of the amount of folio's charges, payments and balance to the Payments and Pre-Authorizations details.  This way, it is easier for you to get an idea of the current state of operations without it being necessary to switch screens.
    • On the main Folio screen, we have added info of taxes, as you can use the button in the respective row for a detailed breakdown.

    • For your convenience, when working with a large number of terminals in one PMS+ account, we have improved the visualisation of the devices for the Payment and Pre-Authorization operations. The last used terminal is suggested by default to users, and the rest of the account-related ones are accessible through the 'Show all' button.
    • To the Print Preview of each folio,  we have added a button for sending Folio Emails.
    • Folio print:
      • The links hidden under text used not to visualise in printouts. 
      • The text font when printing via the new folio version used to be larger compared to the printing through the old folio version. We have made the necessary changes and they are corrected.
      •  In the grouped by Dates / Qty and grouped by Qty printouts, we have improved the grouping of charges transferred from the POS.
  • Payment-based advance - if your selected charge template has a set print text, it will be transferred to the advance charges by default. If you wish to change this text  with another one for the issue of the advance document, you need to enter the new print text in the Additional text field.
  • Company Booking Charges by Reference Report- now you can create a new company folio straight from the screen for selection of a Transfer folio in the report. In the events when you don't yet have an open folio or you need a new one, follow these steps:
    •  Click the bulk edit button;
    •  click the add button in the dialogue window and then enter the desired name for the new folio and confirm.

In addition, we have added a quick link to the transfer folios. To this end, from the Transfer folio column, select the folio that you would like to review.

  • POS - in the discount field, it was possible to enter a value greater than 100%. This is now not allowed.
  • Adyen v2 - To the ToDo task created as a result of subsequent failure of a transaction once marked as successful and speculatively closed (e.g. pre-authorization release/capture), we have added additional info - PSP reference of the "parent" transaction. This way it is easier for you to find these transactions in the system of your partner.
  • New settings screen (BETA) - OTA (SiteMinder), D-Edge (Availpro)

Fixes

  • Liquid parameters related to the account location now show info when a folio email is generated through the new folio screens.
  • Payment Autopilot (new) - in the Bookings tab, all guarantee statuses are available for selection.
  • Now the emails regarding locked users are sent

Integrations

  • LightSpeed POS K-Series- Charge Print Text Configuration Update:
    • Feature Enhancement - A new setting has been introduced to let you configure how the hotel transfer charges' print text is displayed. The aim of this addition is to align the integration with your specific needs more closely.
    • Configuration Options - Located under Settings -> AppConnector-> LightSpeed POS K-Series- > Settings, users can now use them to edit the business location settings and choose their preferred option for "Print text in imported charges":
    • Bill Number (Default) -Charges' print text will include the configured Business Location Name followed by the bill number (e.g., "Italian restaurant/#A123"). This option helps you group items by bill number for a compact print view, leading to a shorter customer invoice.
    • Empty - Leaves the print text blank, resulting in each item being listed separately on the invoice, applicable even with the Compact print option.
  • Private Analytics- Enhancements:
    • New Data Table - We have introduced a table to let you monitor the last data sync status for each data source, indicating whether it has been completed and if there are records pending synchronization. This feature ensures report users are informed about the data's currency.
    • Data Quality Improvement -  Corrected an issue where deleted room blocks in Clock PMS+ were still being counted in data analyses, potentially affecting data integrity. This fix ensures only current data is represented

Localisations

  • German Fiscalization -  Addressed a communication error that used to occur under certain conditions. We have implemented changes to prevent future occurrences.

Clock PMS+ Update (06 Feb 2024)

Improvements

Following a period of being a secondary option, the latest version of the Folio screen has now been established as the primary default. For those who wish to continue using the previous version, it remains accessible via a dedicated button located in the top right corner upon opening a folio in the new interface. We have updated the navigation across various sections, including Bookings, Events, and Company profiles, ensuring that all folio-related links now direct users to this updated version. Additionally, improvements have been made to the Non-Resident Folios and the Folio Fast Search features, enhancing usability and efficiency.

We encourage you to explore our extensive collection of support articles, designed to provide comprehensive guidance and facilitate a seamless transition to these updates. Leverage these resources to fully benefit from the new enhancements and optimize your experience.

Fixes

  • Tour Operator Contracts - fractional values were not being saved.
  • Signature Pad - in certain situations an error like 'add on not enabled' was generated, as a result signature requests could not be sent to the registered device
  • Payment Autopilot (new) - corrected guarantee statuses in tabs On Success & On Fail

Other

  • In light of the transition to the new user interface, the following settings screens have been added in All Settings (new): Event Document Templates, Folio Print Template, Folio Email Template, Auto send folio email with folio closure, Booking Enquiry Template, Registration Card Template.

Integrations

  • LightSpeed L-Series - You can now use all open booking's folios for transferring charges. The feature is extremely helpful in case you are having bookings with multiple folios or ones coming from an OTA with a virtual credit card. By default the configuration is disable and has to be enabled at Settings > AppConnector > Lightspeed Pos L series > Settings > Edit and toggle "Show all booking folios" at PMS Settings;
  • LightSpeed K-Series - You can now use all open booking's folios for transferring charges. The feature is extremely helpful in case you are having bookings with multiple folios or ones coming from an OTA with a virtual credit card. By default the configuration is disable and has to be enabled at Settings > All Settings > Lightspeed Pos K series settings > Edit and toggle "Show all booking folios" button at "Connection settings"
  • LightSpeed K-Series - The business location name and bill number is now added as charge print text for the hotel transfer so the charges may be easily grouped together in the document Compact view so customer's Bills / Invoices may be shorter and easier to read. At the same time you still have the individual items for reporting purposes if necessary;
  • IDeaS - The new redesigned configuration screen is only available in AppConnector

Localisations

  • Italian Invoice Export - Quantity rounding could cause export document rejection in some edge cases. The rounding was optimised to avoid problems.

Clock PMS+ Update (16 Jan 2024)

New Features

Tablets/Signature Pads 

Switch to paperless registration cards! With the new feature, you can use each tablet to replace the paper registration cards with electronic ones. You can fix the tablet on a stand at the reception, opposite the guest or leave it free - it is up to you. You can use one or several tablets, if you have more receptionists. Each tablet is suitable, provided it has a modern browser and internet. The Signature Pad feature comes at no extra cost. Here is how you can use it:

  • You need to register the tablet(s) as a Signature Pad. See more info about the steps below.
  • In Clock PMS+, find the guest's booking and open it.
  • If necessary, create a new registration card. Click the "Signature" button in the registration card row.

  • The first time, you will need to select which of the registered tablets to be used for requesting the guest's signature. Select the tablet from the "Tablet" field and click the "Request Signature" button;

  • Your guest will see the following info on the tablet:
    • Hotel Policy description;
    • "I agree with the policies." checkbox;
    • A field for the guest to sign.
  • After the guest signs and clicks ОK, you will see his signature on your screen. That's all. Exit the screen and proceed with the next registration card.

We have taken a minimalist approach to the information we show the guest. We only show the description of the HOTEL policy, so that the card can be signed prior to the entry of the personal details in it. This way you can complete it later on. We look forward to your feedback on this matter. If you think that the hotel policy only is not enough, but it is necessary for the whole registration card to be shown the way it will be printed out, please contact our Support Team and register an improvement suggestion. Thank you!

Registration of a new tablet as Signature Pad

  • On the tablet, open Clock PMS+ and log in. Please do not forget that you need your subscription serial number as the tablet is a new device.
  • From the navigation menu, select Settings→All Settings(new), and from the 'Guest Engagement' group, click 'Tablets / Signature Pads' setting;
  • Click the '+' button to register the tablet.
  • Enter the Name field to be able to recognise the tablet, if using more than one tablet.
  • You can select a background image to be shown when the tablet is not used. The background image can also be added later on from the tablet edit screen.
  • On the tablet, a grey, empty screen or the background image will open. The app is configured and started.
  •  Complete process with the next step:

Important:Create a shortcut or add the current address to your browser favourites. This way you will be able to re-open the  'Signature Pads' app. If you miss to create the shortcut, please delete the tablet and add it again to reach this step.

  • For your security, you are automatically logged out of Clock PMS+. When using the 'Signature Pads' app, it does not require a logged-in user,and, respectively, there is no risk of unauthorised use of Clock PMS+ by other persons.
  • In case the tablet is stolen or lost, it is necessary to do the following: Go to the 'Tablets / Signature Pads' settings again and delete the tablet from there. This way you will remove its access to Clock PMS+ and forbid the use of 'Signature Pads' from it.
  • For your convenience, we have also added a direct link to the Signature Pad translations located under the list of tablets.

 Improvements

  • Events - in connection with the forthcoming release of the new improved Event screens, we have introduced some novelties that will also be part of the new logic. When changing the period of the event period or the related meeting room and catering bookings, the service date of the charges in the open folios will automatically change in accordance with the new period. To the event charges, a date offset in accordance with the period will apply. With the meeting room and catering bookings, the service date of all the charges in the open folios will be changed in accordance with the new start date.

Example:

  • Event with the following period 10.02 - 12.02
    • Charges for the dates 11.02, 12.02
    • After the change of the start date to 15.02
    • The charge dates will respectively change to 16.02, 17.02
  • Catering/Meeting Room for the date 11.02
    • Meeting room and catering charges with dates 11.02, 12.02
    • After the change of the start date of the activities to 16.02
    • The charge dates related to the activities respectively change to 16.02, 16.02.
  • Booking Import from CSV file - if a guarantee option is selected in the rate, it will automatically be transferred to the newly created ones as a result of the booking import. The Guarantee policy is only taken from the Rate level, the ones selected at the Season and Day levels are not used.
  • Booking Enquiry  - transfer of Marketing segments. We have also unified the behaviour of the bookings created from the system back end to be similar to the ones created through the WRS on the basis of Booking Enquiry, so that the marketing segments, set in the rate are transferred.
  • Bookings - we have added the booking number as well as the current status to the Edit screen.

Fixes

  • Quantities - a fixed bug causing the value corrections to the charges in the correction documents to add a wrong quantity  to the reports, e.g. to the Inventory Items Report.
  • Tour Operator contracts - it was possible to add room types with intervals at the beginning or the end of their names to the contracts which led to incorrect price calculations.
  • Folios (new version) - the search by payer (an Expected or Checked-in booking) has been corrected when transferring charges, so that all possible results are found;
  • Fast Folio Search (old version) - a corrected view so that all results from the search are visible on the screen.
  • Guarantee options - a fixed bug where a negative quantity charge, which is used to calculate the required deposit, was causing a problem with the booking visualisation.

Integrations

  • booking_guests endpoint of pms_api now supports guests deletion and is fully consistent with the capabilities of the user interface. For more information and examples, please refer to the API documentation.
  • LightSpeed L Series Integration - The payment type list has been updated for LightSpeed L Series. Please review the configurations and adjust the mapping, if necessary, according to the payment types you use. Please note all payment types used in LightSpeed that are not mapped will be transferred as cash with the end of the day transfer.
  • Lightspeed POS K series - In some cases the end-of-day transfer failed due to zero amount payments. The import process is optimised and it now handles those cases.
  • Private Analytics export schedule has been updated. The synchronization of the data will be done as soon as possible after the financial date completion (regardless if it is completed manually or automatically). The new schedule guarantees the data will arrive earlier and all changes for the previous days will be included!
  • QuickBooks Online export - In some rare cases the rounding discrepancies occurred and the Unit Price multiplied by Qty did not match the Amount. Now the export mechanism has been improved and such situations are avoided.

Localisation

  • HESTA export - Hesta accepts additional statistical information such as additional guest details and turnover calculations. The additional information is optional and it is up to each property to decide whether they wish to share it or not. However, the change required a HESTA export to be designed. It may be found by going to Reports-> All Reports-> Localizations-> Swiss Hotel Statistics Report – HESTA-> Settings:


  • BFS Identifier (BUR) - Fill in the property code you have received by Hesta;
  • Include additional guest details - Enable if you wish to share additional information about guests with Hesta such as ZIP-code of the guests, purpose of the trip and the booking channel;
  • Include turnover calculations - Enable if you wish to share the segmented generated NET revenue from revenue groups ROOMS, F&B and EXTRA with Hesta;
  • Marketing segments map - Select the supported Hesta value (Personal, Professional, Unknown) for each Marketing segment from your account. If a Marketing segment is not mapped, it will be exported as Unknown;
  • Marketing source map - Select the supported Hesta value (Personal, Professional, Unknown) for each Marketing source from your account. If a Marketing source is not mapped, it will be exported as Unknown.

Once configured, you can use the Export option (NOT Export (old)) to export the data with or without the optional data.


Clock PMS+ Update (20 Nov 2023)

New Features

BookDirect - extra services when a number of guests is selected.

For extra services you sell on BookDirect, there is an option to specify that they apply to Room, Guest, Adult or Child. If a guest selects a service set up with any of the last three options ( Guest, Adult or Child), up till now the service used to be charged for the full number of guests. For example, if the "Rent a bike" service is set on the "Per Guest" basis, and there are 3 guests in the booking, the service was always charged with a quantity of 3. What we have changed is that now the guest has the option to choose how many guests will use the extra service. In the example with the bike, the guest can choose whether 1, 2 or 3 guests wish to use bikes which determines the quantity and therefore the final price of the service.

Additionally, this option works even better in combination with the Capacity Counters. For example, before, if there were 2 bikes available, the service would not be offered to the guest at all because 3 available ones were required. With the new change, the guest will be able to choose the 2 remaining bikes even though their booking is for 3 guests. This way, you will sell the optimal amount of additional services.

The new functionality doesn't require any setup. For all services configured "Per Guest", "Per Adult" and "Per Child", on BookDirect the guest will be able to choose the number of guests for whom they wish to purchase them.

Clock PMS+ Update (15 Nov 2023)

New Features

BookDirect

To our new Web Reservation System, we have added several features related to the improvement of the sales process:

Extra Services - control depending on the rate

Control over which extra services to be offered to the guest. The new feature allows you to set which extra services NOT to be offered to the guest depending on the rate selected at the previous step. The aim is to prevent the confusion when the guest is being offered services included in the package that are not compatible with the guest's room or such that cannot be offered along with the rate for another reason

Example: If you offer "dinner" as a service that can be added by the guest to their booking, but if it is already included in certain rates, it will be clearer for the guest not to be also offered dinner as an extra services when it is already part of the selected rate.

To set up the control over the extra services:

  • From the navigation menu, select Web->BookDirect Settings->WRS Extra Services;
  • Click 'Select Charge Templates for WRS' - next to each service, select the rates for which this service is NOT to be offered ('Excluded rates (BookDirect only)');
  • Save the changes.

Number of guests on the first screen

For the hotels preferring that guests enter the number of adults and children as early as the first step, we have also added the children's age, as well as we have facilitated the entry of adults and children

If you have enabled the "Ask for guests at the first step" setting, we have made the following two changes:

  • We have added the option to select children's ages to the fields on the first screen. This way, the calculated prices at the next steps precisely correspond to the guest's enquiry. Even if your pricing doesn't depend on children's ages, this change is useful because it keeps the entry of related data in one and the same place.

Note: We would like to remind you that the "Ask for guests at the first step" setting is suitable for hotels whose pricing is heavily influenced by the number of adults and children. The advantage of using this setting is that guests immediately see products and prices corresponding to their specific enquiry, the disadvantage is that they do not see all your rooms and products.

  • The fields for the number of adults and children on the first screen are now selectable instead of input ones, i.e. the value is selected from a list instead of being filled in. To have the selectable fields appear instead of the input ones, enter these two settings: "Max Guests per unit" and "Max Adults per unit" in the Guests section. In the fields, enter the number of guests that can be accommodated in the biggest room you offer.

Note: Please note that Max Guests per unit has to include both adults and children, and Max Adults per unit refers ONLY to the number of adults

We recommend you to complete this setting, if you use "Ask for guests at the first step".

Improvements

  • We have added info of the meals to the 'Company Booking Charges by Folios' and 'Company Booking Charges by Reference' reports.

    The reports intended for your work with Companies, Agents or Tour Operators. The meals data is retrieved the following way:

    • If the booking rate is of the "Tour Operator Contract" type, then the meals are retrieved from the very contract, this way complying with the terminology of the tour operator.
    • If the rate is not of the Contract type the meals are retrieved from the rate itself.
    • Finally, if the booking has no rate, the meals are retrieved from the booking itself.

We have also applied the same logic to the Room Type for best compliance with the tour operator's terminology.

  • We have addressed one very common question of yours: "Have all charges that need invoicing been invoiced?". We have changed the "Company Booking Charges by Folios" report to give you a clear answer to this question. Here are the changes: The report can now be run for all companies, and the data is grouped by company. This way, when using the arrival, departure and folio status filters, you can easily find all still open booking folios for a certain period.
  • Following the transition to the new user interface, the new versions of the following reports have been added: Bed Nights, Open Folios, Open Folio Charge Age, Payments in Open Folios, Payments Report.
  • To Clock POS,  we have added the new screen versions for 'Users' and 'User Groups'.

FIXES

  • Deposit Ledger - the fully used deposits under the Deduct Charges method with no changes as of the selected date are not included in the report.
  • Events - when copying the events, the advance charges are omitted.
  • Guarantee policy - the guarantee options requiring a zero deposit can be used in combination with the Bank Guarantee method for the WRS needs.
  • Guarantee policy - in rare cases, when a deposit scheme based on the Average Daily price and a charge quantity other than 1 are used in combination, the deposit was not correctly calculated.
  • Room Plan (the new screen) - the OOS status period reduction feature didn't work.

Integrations

  • Gastronovi POS - In some cases, the payments were not imported for the full revenue push options which has now  been fixed.

Clock PMS+ Update (11 Oct 2023)

New Features

BookDirect

Two new options added:

Sale of extra services on specific dates

Up until now, you had the option to offer the extra services in two ways - either as one-time services (on the day of check-in) or as services that were charged for the entire booking period. Now you can offer your customers a much more flexible approach to choosing additional services. With the new functionality, guests can choose exactly on which dates they wish to use a particular extra service. For example, the guest can select the exact date on which they wish to use an additional spa package or several dates on which they wish to add a rent-a-bike.

The new date selection functionality takes into account the Counters. Through the Counters you can manage the sale of extra services that have a limited availability. When suggesting possible dates for each service, the Counter associated with the service is taken into account so that the guest can buy the service on a date in which there is still availability

Example: if you have 5 rental bikes that are already booked for a given date, that date will be stopped from selling, but the guest will be able to book a bike for a previous or subsequent date.

To enable a given service to be offered for dates selected by the customer:

  • Open the new charge template setup screen: Settings->All Settings->Charges & Taxes-> Charge template.
  • Select the "WRS extra services" tab
  • Tick the "Allow date selection" checkbox for the services for which you would like to allow guests to select the dates.
  • Save the changes.

Note: The services with a ticked "Allow date selection" checkbox will no longer be affected by the existing "Per Day" checkbox .

Adults and children at the first step

We've added a new setting through which you can show fields for children and adults at the first step. The aim is to let you reduce room types and rates at the next steps. If your hotel has many room types and products making it difficult for guests to make their choice, you can take advantage of the new setting. This way, the guest will only see the rooms and rates whose restrictions match the number of adults and children entered. The downside of this approach is that the guest will not be familiar with all your products as well as it makes the process less clear when booking more than one room. Choose the option that best matches your product mix.

To activate the new setting:

  • Open the settings of BookDirect (Web - BookDirect Settings).
  • Select "Ask for guests at the first step" and save.

Here is how the behaviour of BookDirect will change when using new setting:

  • At the first step, the entry of number of adults and children will be required;
  • In the text, showing the selected dates (the second and the third step), the selected number of adults and children will also be visible.
  • The room types will be filtered to match the number of adults and children entered at the first step;
  • The rates will also be filtered.
  • The fields for adults and children next to each rate will be forbidden for editing.
  • The fields for the children's age will remain active for selection and when these ages are entered, the price will be recalculated as before.
  • To change the number of adults and children, the guest has to return to the first step by using the steps at the top of the screen or clicking the text with the selected dates and adults and children beneath it.

The field for children can be hidden through the existing 'Hide inputs for children' setting.

Channel Managers

Channel's Max Rooms as a percentage

The functionality refers to the following channel managers: RoomCloud, D-Edge and the channels using the OTA interface. The Max Rooms aims at controlling the possibility for overbooking when you sell simultaneously through multiple agents. The shortcoming of the existing max rooms functionality is that if you set a small number, you may hinder sales, and if it is too great, you risk overbooking. Through the new functionality you can set a percentage of the free rooms of a type instead of a fixed number of rooms for the value of the max rooms of the channel. The percentage is calculated for each day and room type, as the percentage of free rooms. 

Example: If you have 30 free rooms for a given date and you have set the value of the max rooms of the channel to be 50%, 15 free rooms will be sent to the channels. In case of decrease in the free double rooms, the max rooms value will also decrease, i.e. if there are 4 free rooms left, the max rooms will reduce the number of the sent free rooms to 2.

Please note that when the free rooms are calculated, the number is rounded to the bigger value, i.e. if you have 2 free rooms and the max rooms value of the channel is 10%, mathematically speaking that is equal to 0.2 rooms which will be rounded to the greater value of 1 room.

The new setting can be found on each of the channel manager setup screens and is called "Max rooms %". Click "Yes", if you wish the new approach to be applied. The percentage itself for each room type is also visible in the same place as the old Max rooms data.

RoomCloud - Hotel level occupancy effect

For RoomCloud, we added a new setting regarding the number of sent free rooms for each product. Previously, the number of sent free rooms was determined by the free rooms of the room type and max rooms setting. If you enable the new setting, the number of sent free rooms will depend on three factors: free rooms of the room type, free rooms of the hotel and max rooms. In other words, with the new setting, the total number of available rooms can be taken into account and the smaller of the two numbers can be determined. 

Example:

  • For a given date, you have overbooking for double room with 5 rooms (5 rooms overbooking)
  • For the same date, you have 7 triple rooms available.
  • With the old behaviour, sales of the double rooms will be stopped, but you will submit 7 triple rooms for sale, which will not solve the issue with the overbooking for double rooms.
  • If you enable the new setting, you will have the behaviour. The double rooms will be stopped again, but only 2 will be submitted as available for the triple ones, because you only have 2 rooms at the hotel level. This way, you can possibly solve the overbooking problem by moving it to the triple rooms.
  • Max rooms. The max rooms setting has the same role as before, but this time having impact on the new quantity of free rooms. In other words, the max rooms  for the triple rooms will be calculated on the basis of 2 free rooms instead of 7.

To enable the new behaviour, open the RoomCloud settings and select ”Yes” for the "Hotel level occupancy effect" settings. Save

City Tax - Price Ranges

We have added new options to the City Tax calculation to solve even more cases.

Example: In Hanover and Hamburg, the the City Tax amount is determined based on a tiered approach based on the price per bed or room:

  • if the price per bed is up to EUR 10, there is no City Tax
  • if it is between EUR 10 and 25, the price is 0.50 per person;
  • if it is between EUR 25 and 50, the price is 1.00 per person, etc.

So if the City Tax amount is also determined based on a tiered approach in your region, you may be interested in this new option.

Here are more details:

  • Up till now, for each of the seasons, there was a price for an adult and a price for a child. These two fields continue working as before.
  • To the season, we have added "Price Ranges". Through them, you can add multiple prices. For each level, there are "Price from" and "Price up to" fields. Based on these fields, it is determined which ranges will be activated.
  • For each range, there are also Price per adult and Price per child fields. The range to be activated determines the prices for adults and children (applied even with an empty price).
  • If the price does not fall in any of the defined ranges, the prices for adults and children set in the season itself will be used.
  • When defining the ranges, specify which price exactly to be taken into account. In other words, the range (the price from - to) may refer to the price for the room or the price per guest. The latter is determined as the price for the room is divided by the number of adults in it (adults + children).

Improvements

  • Documents - required attributes. We have added a new setting to let you specify the required Billing to attributes when closing folios. The settings apply to each type of document. You can specify for each type which Company or Guest fields are required. You can access this setting  on the new setup screen for documents: Settings->All Settings (new)->Documents->Document Type(s).
  • A new booking always from the Rate and Availability screen. We have made a small change, so that the new booking link opens the Rate and Availability screen instead of an empty new booking screen. If you prefer this mode of work, you can set it for all employees at the hotel using the new setting ”New Booking - go through Rate and Availability screen”. You can access it from Settings->All Settings (new)->Hotel->User Interface. After saving it, do not forget to save the screen again.
  • Payment Autopilot - the value determined based on the number of nights up till now depended on the average price per night. Now it can also be determined based on the actual prices for selected X nights. It depends on the new "Average Price" setting. Such a mode of work and setup is similar to one for determining the deposit amount.
  • Inventory Items Report- it now filters the results by the revenue date of the charge. Up till now, it worked based on the closing date of the folio containing the charges.
  • Folios (new version)- for your convenience, we have added the 'OTA' label and the expiry dates of the credit cards used for payments/pre-authorisations to the new folio screens.
  • The change of the master user is now also accessible through the new user settings screen.
  • RoomCloud - we have added an option to map extra services by 'supplement ID'. In case, there is no match between the received from the partner and any of the IDs entered in the mapping, a search by text is performed as before.
  • Extra services screen in the booking has been redesigned.

Fixes

  • The preview of the transferred POS bills through the PMS folio no longer requires access to the POS account, from which the transfer is made
  • POS - Hourly Sales Report - includes the charges arising from Split or Remove/Subtract taxes from prices
  • Events - BEO - in the Other section, the advance charges were visualised
  • Adyen - part of the terminal transactions remained with a pending status and an 'Initialised: IDLE' message.
  • SixPayments - a fixed bug that didn't allow refunds of payments made through iDeal
  • Folios (new) - if field for the the CSV code of the credit card was hidden, the transaction (payment) was not possible
  • RoomCloud - extra services with a long description generated errors during booking import

Integrations

  • [API]  - The POST request to block_rooms endpoints are more flexible now allowing multiple "date" elements in the payload.
  • [API]  -  You can now archive companies via the API. For more details, please check the API documentation.
  • [API] - Endpoint booking_find_in_hotel now supports bookings without an assigned room type or room.
  • A new user right for accessing the AppConnector has been added. The users with access to AppConnector may enable / disable integrations which is authorising 3rd parties to access your data as well as may affect your monthly fee. To have a better control over that you can decide which users should do it.
  • The bookings information now contains RateName instead of RatePlanName as IDeaS finds RateName as more useful..
  • The data collect mechanism from Gastronovi was optimised and now data for longer periods may be collected without problems which is very helpful in case of new activations when you want to have some historical data or when you reactivate the connection.

Localisations

  • The virtual rooms are excluded from the AJPES monthly report as they were not properly accepted.
  • Swedish Central Bureau of Statistics Report - When a rate tag is selected for the report, the information is filtered in all columns where the filtering is applicable.


Clock PMS+ Update (21 Aug 2023)

New Features

  • On-line Check-In- full folio payment required.

    To the On-line Check-In application, we have added the option to require the full payment of the bills  of a guest prior to their arrival. The bill payment can be made through an already tokenized credit card or alternative payment methods such as iDeal, Bancontact, ApplePay, GooglePay, etc. To give you greater control for which bookings specifically to require the payment of the related folios, we have added one more setting. It will let you specify which guarantee options are not to fall under the requirement for advance payment. This way, using the guarantee options, you can define for which booking groups an advance payment is required or not.

    Here are more details about the new functionality:

    • To activate the new feature - select '' by selecting  Web->Online Check-In Settings from the navigation bar;
    • To exclude a certain booking group from this requirement, fill in the guarantee options in the 'Guarantee options excluded from payment' field on the same screen.

    • When a booking requiring payment goes through the Online Check-In process, the payment of the booking folio will be required at the new step, if not paid already.
    • If for some reason the booking has several unpaid folios, the payment of each of them will be required.
    • Folios, marked as 'Hidden on the Self Service Portal' will not be shown and no payment will be required for them.
    • The payment can be made through tokenized credit cards.
    • The credit cards marked as “OTA” cards will not be suggested for use.
    • If the guest wishes, they can enter separate new cards for each payment.
    • The guest can also use alternative payment methods. These methods are to be set for use in the very payment processor and are also to be marked as allowed for the respective payment processor in the Clock PMS+ settings.
  • New Inventory Items Report

We have added a new report to Clock PMS+ to assist you with the reporting of the sold minibar articles or other similar goods. The report only includes charges with a completed 'Inventory code' field. Fill in the field in the respective charge templates. The charges posted under these templates will then be included in the report. Included are charges from valid closed folios, as they are filtered by the folio closing date. Charges from open folios are not included in the report. In addition, if a given closed folio is voided, it will no longer be included in the report. Please note that the voiding of folios for past dates will lead to a change of the report for the respective past period.

  • Early Checkout

We have made several changes to reduce the errors and enhance the process automation in this case. Here are more details of the changes:

  • When checking out a booking whose departure is on a future date, the system will require you to shorten the booking period. In contrast to the situation up till now, the system no longer allows  you to check out the booking before changing the departure date. This way, the early checkout always releases the room for new check-ins and respectively creates a housekeeping task.
  • In relation to the early checkout charges, the system gives you two options: 
    • To keep the charges for the shortened days - select “Check out (1), if the guest is to pay the remaining number of nights;
    • To remove the charges for the remainder of the stay -  select “Reduce stay and charges(2), if the guest is not to pay the remaining number of nights .

  • For the purposes of greater control, we have also changed the Early Checkout right. If the user does not have this right granted, the same cannot use the early checkout feature  or shorten the stay in terms of already checked-in bookings.

Improvements

  • Stopping the automatic recalculation of rates when editing checked-out and voided bookings. You know that the system automatically recalculates the services related to the rate and the booking charge templates when the booking period is changed. As a result of your comments, we have decided that if this occurs with checked-out and voided bookings, such behaviour leads to more issues. Here is why we have stopped the automatic recalculation for checked-out and voided bookings.
  • Clearer description of the alternative payment methods. In BookDirect and the new Online Check-in, we have improved the description of the button for alternative payment methods. It now shows the names of the supported methods letting the guest immediately choose the desired payment method, e.g.  credit card, Apple Pay. The payment methods visualised  on the button correspond to the ones set for the payment processor in Clock PMS+.
Important for Adyen users. For the button description to correspond to the payment  methods used by you, it is necessary to only choose the payment methods you actually use and have set in Adyen. The system cannot do it automatically. To this end, go to the navigation bar and select Settings->All settings new-> Payment processing-> Adyen v2 and choose the methods you use.
  • Capacity counters - we have made improvements to the Daily view;
  • Folios (new) - 'Billing to' data is transferred from the main folio to the Advance documents. Through the transfer of this information from the source folio to the Advance document, you can easily issue Advance invoices to companies regarding charges from the folios of the booking.
  • Folios (new) - the charge source in the Advance documents based on Payment is now the payer of the source folio.
  • POS - 'Credit Card Transaction Report' added. Through the new report, you can receive information of the details and status of the credit card transactions for a certain period.
  • POS - we have added the new version of the Charge Control Report.

Fixed

  • The direct link from the emails to Online check-in (Kiosk) used to load the home page and require login in some cases.
  • Meeting Room Calendar - in the ultra compact view, the booking visualisation has been corrected.

Integrations

  • The folio_ledger endpoints have been optimised and have a faster response now.
  • Clock PMS API now allows you to manage the blocked rooms for an event. For more details please refer to the API documentation. 

Localizations

Belgian Federal Statistics export

The export has been redesigned and has a new fresh look. The export is accessible from Reports > Localizations > Federal Statistics. Some configurations of the new export should be done before using the export:

  • Guest visit purpose field - Select the purpose of visit for every guest from this field. Please note the field should be preconfigured from Settings > All settings > Guest Profile Fields. The field should have the following Value List set:

        1: Leisure

        2: Business

        3: Groups

  • Default visit purpose - fill in the default value for purpose of visit that to be exported if no purpose of visit is selected for a guest. Select 1 for Leisure, 2 for Business, 3 for Groups;
  • Default country - Select which country should be exported if one is not selected for a guest;

Clock PMS+ Update (24 Jul 2023)

New Features

  • Package elements for a specific date. Through the new feature, you can better solve cases like Christmas or New Year's Eve Dinner or other similar packages. As you know, the package elements are used to let you break down the sales price by individually priced elements and have clearer and more accurate invoicing and reports. Previously, it was not possible to separate an element for a specific date, e.g.only on December 31 to separate an element for the New Year's Eve dinner. Here is why, we have added a new field to the package element allowing you to specify multiple specific dates on which the element is to be separated.

Please note that the package elements are always excluded from the package price. In other words, the price in the package is to be increased by the price of the respective package through the rate instruments. Here is an example on how you can do it through the rate instruments:

Example: Increasing the price on December 31 by the price of the New Year's Eve dinner:

  • Create a derived rate for the New Year's Eve package based on the overnight stay rate;
  • In the derived rate, create a new season starting from December 31, for which the price will be increased, and another one starting January 1, for which your normal prices will be restored;
  • Use the Guest offsets in the season starting from December 31 to set an additional price for the New Year's Eve dinner. Through the offsets for Adults and Children, you can set different prices for the two groups. This way you will form the package price (overnight stay and New Year's Eve dinner).
  • To the rate package, selected in the derived rate, add an element to be used for separating the value you wish for December 31. Once again you can use different values for adults and children.

The new settings can be accessed from All Settings (new)->Rates->Rate packages.

  • A new 'Deduct Advance on issue' setting - related to the behaviour of the features for issuing Advances based on another folio. When you use the features for the creation of an Advance folio based on a percentage from another folio or based on an already accepted payment, apart from the issue of an Advance folio, the Advance was automatically used to reduce the manual operations. However this automatic operation is not convenient for the users using the Deposit Ledger due to the fact that when an Advance is used, it disappears from the Deposit Ledger, as in this case it occurs on the very date of the Advance issue. Use the new setting to exclude or include the automatic Advance use depending on your needs. You access this new setting from All Settings (new) ->Payments->Deposit Models.

Improvements

  • Capacity counters - new screens:
    •  new screen for the setup of Capacity Counters - adding, editing and deleting. It is accessible through the new settings screen in the 'Charges & Taxes' group.
    • A new screen for editing and setting the capacity day by day.The screen has two visualisation modes being switched from the small button in the upper right corner: 
      • The detailed view shows all counters and all data for the selected period (capacity, sold, availability).

      • The compact view only shows only the days (capacity) on which there is an exception set.

    • A new Mass Update feature. Use it to select multiple counters, periods, as well as to set or remove an already set capacity.

The last two screens are already accessible from the Availability section of the navigation bar.

  • New settings screen - more screens are accessible on 'All Settings' screen where the functionalities of their previous screens are preserved. Here you can find the settings for: Marketing, Rate packages, Meals & Restaurants, Logos / Image Library, Self Service Portal, Kiosk, MICE (3 screens), Payment Processing (5 screens), Document Type(s), Document Number Generator, Custom SMTP config, Clock IoT connector, BRP.

Integrations

  • QuickBooks online export has been redesigned and now has a new fresh and clean look.

Localisations

  • Slovenian fiscalisation: The communication to the fiscal authorities is now made available and the exchanged data is visible along with any errors if returned by the fiscal authorities.

Other

  • The new improved version of the file import is now also available for Clock POS.

Clock PMS+ Update (21 Jun 2023)

New Features

Blocks

We have improved block handling overall so that you can more easily work with blocks for long periods and thus solve cases like allotments for Tour Operators or Tour-series.

Allotments and series cover long periods and the old screens were not adapted to serve such cases. So we introduced a new type of block - Period Blocks. Unlike the existing blocks by day, Period Blocks specify multiple periods, and for each, you enter a start and end date, and the number of rooms blocked. This way, you can have multiple periods within a block with different numbers of blocked rooms. This makes it easy to set allotments or tour series for a much longer period of time. 

Additionally, we have added another functionality to the period blocks - you can specify a different Cut-off day setting for each period. This is useful, for example, for Allotments where periods outside the active season have a longer Release Period (Cut off days), compared to periods in the active tourist season where the Release Period is shorter. Using this setting, you can also easily release rooms for only one specific period without changing the number of blocked rooms, simply by setting a large enough release period, for example, 999 days.

We've also added a number of improvements to blocks by day: fast-forwarding to a specific date, bulk filling of values, ability to convert between the two block types.

Note: Keep in mind that the old edit blocks screen generated a lot of empty edit table blocks. You will see these blank blocks in a separate section on the new screen. If you only use the new screen, you won't see these blank blocks unless you explicitly create them.

To open and view the new screen for the blocks, open the screen for an event. In the "Block" section, select the "New"button. On the same screen, opposite each of the blocks, there is also a" New" button that takes you directly to the edit screen for that particular block.

Note: There is no way to preview or edit the new type of period blocks through the old screen.

Information about all the features of the new blocks can be found HERE.

Block Pick-up report

We have redesigned the report to make it more user-friendly and more interactive:

  • We've added an option to show and hide details so you can now, in a much more compact screen form, view the availability or usage percentage of many more blocks at once.
  • We've grouped the data by room type. With the new "Show Occupancy" option, you can for each room type see the percentage occupancy as well as the remaining rooms available. The vacancy data is colored-graded according to occupancy.
  • We have also added a larger font option for better readability.

Password Policy

New functionality that allows you to enforce a comprehensive, corporate policy on user passwords. With the new feature, you can set what the minimum password complexity is, how often it should be changed by users, and whether the new password can be like any of the passwords already in use.

You can create different policies for different types of users. For example, you can create a separate policy with lower password requirements for users who use the POS system. Correspondingly, a more complex password policy for users with access to sensitive information.

By default, there is one policy, "default", which is associated with all existing users. Edit it if you wish to apply password rules to all current users.

Important: Editing the default policy will not change anything on existing passwords already in place. The policy is only considered when a new password is entered, then the complexity of the new password is evaluated and a time limit is set for it to expire.

See how to configure a Password Policy.

Advance invoices based on the amount paid

We've added another functionality to the new folio screen regarding advance payments. The new feature will help you issue an advance invoice if you have already received payment and the invoice value should match the amount paid. The special thing in this situation is that in the document, you have to mention the charges with their taxes to which this amount refers. The new functionality automates the process of creating and issuing the advance invoice. See more details in Advance invoice based on the amount paid.

Improvements

  • BookDirect - Included Discount % - New functionality to BookDirect that is aimed at promoting and encouraging sales. Using the new field in each rate, you can specify what the included discount amount is from your standard rates. The field is called "Included Discount %". It is important to know that this field does not concern the calculation of the rate price. That is, if your rate price is 90 EUR and you fill 10% in the new field, the price will not change and will remain 90 EUR. The new field only has to do with displaying the "Old" price, which will be displayed as a "Strikethrough" amount. Customers will see the "old", strikethrough price of 100 EUR, the current price of 90 EUR, and the discount percentage of 10%. The new field can be filled in for each rate through the 'WRS' tab when editing rates in the Rate Plans.

  • Change log for the Room type / Rate plan restrictions - we have added a change log for the new restrictions by room type and rate plan. You can use it to find out what all the changes have been to these restrictions for given dates. To access the log, from the edit restrictions screen, select the "eye" button -> "Change Log" option.
  • ID Processor - We have made a change regarding the data for the document_type field in the guest profile. We now fill in more detailed information about the scanned document type. Note that the reliability of this recognition as well as the data can vary a lot, depending on the country of issue and the ID variant.
  • Online Check-In & ID Processor - we have made a small change so that when scanning a document through the Online Check-In application, the default language of the account is used. This means that if the default language of the account is French, then when scanning a document of a French citizen, the data will be filled in French. For all other citizens, the data will populate in English. This is also the behavior of the ID Processor when used within the PMS. The default language for the account is set from the "Languages and Texts" screen with the "Default" button.
  • Improvements to the new folio screen. Two changes regarding screen usage:
    • Changed the ToDo view and added a quick close for each task without having to open it for editing;
    • The process of sending a new email has been simplified, and the list of sent emails itself has been added to the screen.
  • We have updated the look and feel of the following screens: Commissions, Hotel Registry, Lost Property, Change and Recover Password screens.
  • In very rare situations, for technical reasons, the creation of reservations through the BookDirect may be unsuccessful. In these cases, the customer does not reach the final confirmation screen. However, if the customer has made a successful payment, the system will detect the anomaly and a refund will be initiated automatically. When such a situation occurs, a ToDo is generated with the PSP reference of the corresponding payment. Details of the transaction itself could also be found in the "Credit Card Transactions" report.

Fixes

  • Folio printing through the new folio screens - When using the custom templates, the Recipient section did not display all the details.
  • Applying Discount through the new folio screens - If there was no Discount charge template set up, it was not possible to apply a discount.

Integrations

  • Private Analytics - The booking data (BigQuery table) has been improved by adding room_id and room_name. The value for room_type_id has also been populated correctly. 

Localizations

  •  AJPES export - In the sake of usability we enhanced the export process and now you can see why the guests couldn't be exported with a previous export attempt. The error produced by AJPES is stored and available for review. The assigned zst number is stored for the guests which failed to be exported to prevent zst numbering gaps. However, the zst number as well as other information for the guest may be updated before being exported again.

Clock PMS+ Update (23 May 2023)

New features

BookDirect for Groups

A new module to BookDirect that targets groups of hotels. The new module allows your guests to search and review your hotels from a selected destination. Guests will easily and quickly get information on which hotels have rooms available and what the starting rates are at each. For hotels for which there are no rooms available, they will be able to check the Availability Calendar and find available days.

By offering all your hotels together instead of one by one, you give the guest the opportunity to choose the right price, and location, as well as choose an available hotel if another is booked. Enable BookDirect for Groups to improve conversion rates on your website.

Complete information about BookDirect for Groups.

New folios look and features

We've made significant changes to folios in order to improve operations with them. In the development of the folio screens, we have taken a new approach by separating the information to simplify the screens. Apart from the new screens being very easy to navigate, they also work faster than the old ones. Even opening a folio with a vast number of charges is as easy as a breeze. We have added many new features that significantly facilitate the processing of folios minimizing errors.

  • Correctional folios - an entirely new approach
    • We have implemented a new and easy mechanism for issuing partial correction folios - With the new approach, it is not necessary to calculate the value of the correction and manually post charges. What you need to do is fill in the amount of the correct price or the charge quantity, i.e. directly correct the document you have issued. The system itself will calculate the difference and create the respective correctional charges.
    • It is not possible to credit more than the invoiced amount. The system tracks all issued corrections to the folio and accumulates the changes. This way you cannot credit more than what has been invoiced.
  • New feature Folio re-opening - It is a new feature to ease your work if you find an error in a closed folio. The folio re-opening feature does not violate the reporting principles. It combines several operations to facilitate the process: Creates a new open folio, Copies all charges, Moves the payments, and Voids the old folio.
  • New option for 'moving' a payment when voiding a folio - Up till now, with the folio voiding, everything, including the payments was voided. In certain situations, however, the payment is correct and it should not be voided along with folio. This is why, similar to the new folio re-opening feature, we have added an option to specify if you wish to move the payment to another folio when voiding a folio.
  • New Approach to Working with Deposit Folios - we have implemented many changes to the work with deposits. We have applied a completely new concept separating them into two groups - Deposits and Advance Payments.
  • Customization of folio printouts - We have added multiple new settings to let you easily customize the layout of folio printouts. To change the settings, from the navigation menu, go to Settings->All Settings (new) and select "Folio Printing - defaults" in the "Documents" section.

For the moment, the old folio screens are opened by default. Please familiarize yourself with their organization and features so you can seamlessly transition to the new functionality. To open the new folio screens:

  • From a folio, click the button 'New' on the top right.
  • In a Booking - in the list with folio there is a 'New' button for each folio which will open it in the new screens.
  • Companies and Events - in the list with folio there is a 'New' button for each folio which will open it in the new screens.

Full information about the New Version of Folio Screens.

Other features

  • City Tax- reduced price for children - For more flexible pricing of the city tax for children we have added a new item 'reduced price per child'. This makes it easy to cover certain conditions - for example, children up to a certain age pay one city tax amount or are exempt from it, while all other children above that age pay another amount. The new item can be found in the new settings screen from Navigation - Settings menu -> All settings 'new' -> Charges and taxes -> Tourist tax. In the 'Age for Reduced Child Price' field - enter the maximum age to which this price will apply. For the seasons in the column 'Reduced price per child' enter the desired amount. If the field is blank then all children falling into this age group will be exempt from the tourist fee.

  • Verify hotel email - we now offer a new simplified procedure for replacing your hotel email. To do this, you need to enter the desired new hotel email in the 'Set hotel email' field from Navigation - Settings -> All settings 'new' -> Hotel -> Confirm hotel email. After entering the new email and selecting 'Send verification email' you will receive a confirmation email. In case you do not receive such an email you can request a new one from the 'Resend verification email' button. As soon as you have followed the instructions in the email you received, return to the application and click the 'Complete the change' button on the screen to fully complete the process. After completion, it is recommended to send a test email.
  • Guest List in Folios - We have added a new printout to the folios that gives a list of guests pertaining to a given folio. For each guest, their name, stay and the room they are staying in are present. The Guest List includes all guests from the reservation - both the primary guest and others. The booking contact person is not included. Guests are included for all reservations that have at least one charge on the folio. The new Guest List is accessible through the new folio screen - from the Print screen, select the top-right options button and select Guest List.

Improvements and New screens

  • New Settings screen - we've added a new and improved settings screen with better organization and search capabilities. You can find the new screen in Navigation - Settings -> All settings 'new' menu.
  • We have updated a large number of screens while maintaining their principle of operation.
  • Rooms Plan - new design and new filtering. In addition to the improved look, we've added filtering alternative grouping of rooms on the screen. In addition to the current grouping by room type, grouping by assigned Floor is now supported. If you wish to see all rooms of a particular type or floor filter the results from the Filter button in the top right corner.
  • New field in Room settings - 'Floor' - you can now separate the rooms according to the floors they are on. To assign a floor to a room, go to Navigation - Settings -> All settings 'new' -> Rooms -> Rooms. You could set a floor for each room individually from Edit or use the new Mass Edit functionality to set floors for many rooms at once. The floor information is used in the new improved version of 'Room Plan'.
  • My User - new and easier management of the current user accessible from the menu Settings -> All Settings 'new' -> Users -> My User.
  • Charge Control Report - new design and optimized mechanism.
  • Cashier closure - we've added quick links to Daisy fiscal printers and Dx fiscal printers.
  • Occupancy forecast - now reflects Cut-off days and Expiry Date of optional blocks.
  • RoomCloud, Availpro, and Siteminder channel manager - now support the options Split by Company and Split by Agent.

Fixes

  • When duplicating a folio, the city tax information did not reflect correctly when using the 'city tax included in prices' mode.

Other

  • For easier email monitoring - when the system fails to send emails related to a problematic Custom SMTP or Template (e.g. broken liquid parameters) you will now receive a notification on your hotel email with the subject 'CLOCK PMS EMAIL DELIVERY ERROR'

Integrations

  • PMS_API - A new price_boundaries endpoint was added to the PMS_API. The endpoint exposes the Minimum/Maximum allowed rate prices (if)defined for the account (Settings -> All Settings -> Tax Settings -> Rate section)
  • PMS_API - the caterings endpoint now supports the creation of new catering entries as well as updating and deleting the existing ones.
  • Revenue Management powered by Atomize has a redesigned screen with a fresher new look!

Localisations

  • INSEE export has now the virtual room properly excluded from all calculations to avoid any duplications.

Clock PMS+ Update (26 Apr 2023)

New features

Restrictions by Room Type and Rate Plan (Min Stay and STOP).

We have added new daily restrictions at the level of Room Type and Rate Plan in addition to the already existing rate restrictions. Thanks to these levels, you could easily and quickly manage the Min Stay and STOP restrictions for multiple rates. They will be reflected both in bookings via the system and in the sales - WRS, BookDirect, and channel managers. The restrictions can be accessed by going to Rates Management->More-> Room Type Restrictions and Rate Plan Restrictions. The Room Type restrictions have the highest priority, followed by the Rate Plan ones.

  • Room Type Restrictions  - on the new screen, you have a daily view, as here, similar to the "Days" section, you can see info on the Hotel Occupancy and Room Type Occupancy (1). For your convenience, you can filter the view for a specific period and restriction (e.g. 5 days and only STOP).

Through the new view, you could stop the sales of all rates connected to one or multiple room types. Through the controls in the “Hotel”(2)  the restrictions are applied to absolutely all active room types of the hotel. This way you can quickly stop the sale of all hotel rooms for a specific date.

  • 'Min Stay'Restriction by Room Type will overwrite the ones set at the previous levels.
Example: If you have set the following Min Stay restrictions: 3 at the Day level, 2 at the Rate Plan level; 4 at the Room Type level. For this date, the required minimum stay will be 4.
  • STOPRestriction - at any level, it will lead to the product sale stop.
  • Rate Plan Restrictions - a daily view of rate plans with the possibility for filtering by period and restriction. Additionally, info on hotel occupancy can be shown.

To set or remove a given restriction, click in the respective field. With 'Min Stay', the allowed values are equal to 2 or greater. Select the 'Min Stay' value from the upper right corner.

Housekeeping

Checkout and Room Change discrepancy tracking.

As the housekeeping management model is based on housekeeping tasks, in certain situations, the rooms remained clean despite the fact they should be indicated as dirty. Such situations were related to early departures or room changes occurring after the generation of the housekeeping tasks for the day. To avoid the issues with guests, we have added additional logic addressing such discrepancies:

  • Room Change - with each room change (also in the cases of marking a room change as 'Done') a task is created for the old room. The old room is marked as dirty, and the task description will specify the room to which the guest is moved (Room changed to: ...). This way, if necessary, you can move the specific room stocking as per the booking.
  • Checkout - with the booking checkout, an early or normal one, if, for some reason, the room is clean, a housekeeping task is created for the room with the "Dirty" status and the following description: "Checkout discrepancy".

Improvements

Import from a CSV file

A New improved import of CSV files is already available through the navigation bar: Other functionalities->Import from CSV file. Apart from the new looks, we have also made changes to the data processing to further optimize it. For each imported file, you can see:

  • Lines - total number of lines to be processed;
  • Pending- lines still being processed;
  • Failed- lines for which there are errors. For each line here you will see the respective details;
  • Imported- a number of imported lines.

For each file run in a test mode, now you can easily make an import through the "Import" button, i.e. you don't need to re-upload the file to the system. If a certain import takes more time than expected, you can terminate the process through the "Drop". The operation will be terminated at the reached point of progress.

SynXis

We have added additional import codes. For import purposes, we have added a new mapping model - multiple SynXis codes for one PMS+. This way you can easily map all derived rates from SynXis, for example, to the respective  PMS+ rate. It will significantly simplify the mapping, reduce the number of products to be maintained and eliminate the necessity for multiple PMS+ rates. In the import of a booking, the code coming from the XML is searched in the mapping and if a match is found, the respective PMS+ rate is mapped. This way you won't lose details of marketing segments, packages, and City Tax coming from the rate.

To set additional import codes, open the Room type/Rate tab, edit the rate mapping, and add the codes to the 'Additional SynXis codes' field.

BookDirect 

We have made changes to the duration of the order life of the cart. In other words, this is the allowed time from the point the booking process starts and the addition of rooms to the cart to the moment of the booking finalization. Up till now, there were no restrictions in terms of this time period leading to unpleasant situations, in which guests were able to book rooms at promotional rates despite the fact that the promotion itself had expired days before that. This is why we have made the following change - we keep the rooms (and the respective prices) in the cart for a maximum period of 6 hours. Please note that this restriction is only applicable if the customer has started the checkout process.

Deposit Use

Now you have the option to use deposit amounts from a document whose currency is different from the one in the document where you use this amount.

Kiosk

The KIOSK login through the booking number is no longer case-sensitive. This way the system login is significantly easier if the hotel has configured a text for the prefix or suffix of the booking number.

Fixes

  • Phone calls - fixed the conflict leading to a wrong duration of phone calls.

Other

  • We have changed the method of the booking balance calculation - as a first step of adding a new model of working with deposits, now deposit folios are added with their balance to the booking balance. In case the deposit folio balance is 0 (charges = payments), it will not change the booking balance. Coming soon: the rest of the changes related to deposit folios.  

Integrations

  • LightSpeed K series - In some edge cases the users of Clock PMS+ could force import the end-of-day sales from LightSpeed K series POS twice (from two sequential dates). Additional checks are added to prevent that from happening.

Localisations

  • Greek fiscalization - The fiscal response QR code is now smaller to better fit the document printouts.
  • TourX - The email validation now skips the blank email address fields as the email is not required.
  • INSEE - To control exactly which data should be exported to INSEE, you can now define room types to be excluded from the number of nights and arriving guests. This setting aims at covering the cases where fictitious room types are configured to serve various purposes like daily use, etc. but do not physically exist and hence should not be exported to INSEE. Additionally, to let you perfectly match the INSEE requirements, the virtual rooms are excluded from the export to prevent duplications.

Clock PMS+ Update (15 Mar 2023)

New Features

  • Company Booking Charges by ReferenceReportnew 'Mass update'option. Now you can set the 'Transfer to Company/Agent folio' option and the respective Transfer folio for multiple bookings directly through the Company Booking Charges by Reference Report. This way you can easily and quickly update your already existing bookings. After generating the results in the report  through the 'Mass update' (2) button, specify the Transfer folio that will be added to all selected bookings of the list (1). Rate charges (overnight stays and packages) that are in open folios will automatically be transferred to  the selected folio. If necessary, you can stop the process through the 'STOP' (3) button. This way you stop the changes to all bookings that haven't been updated yet.

Improvements

  • Company Booking Charges by FoliosReport - we have added a filter by reference date and amount total.
  • Cashier Closure - a new optimised version that is accessible through the Navigation bar (Other functionalities->Cashier Closures):
    • NEW - in the Payment Total table, we have added a breakdown by payment subtype;
    • The screen also has a new layout:
      • User Closure tab - view by user with the option to preview the report prior to the actual closure;
      • Pending/Current tab - overview of all pending / current closures. You could preview them and then close the selected ones;
      • Past Closures tab - a list of all closures so far.
  • SynXis settings - for your convenience, in the Room type/Rate tab, we have added a search by rate's name and ID for rate mappings.

Localisations

  • TourX export screen has been redesigned and now it loads faster and is more convenient to use.

Clock PMS+ Update (09 Mar 2023)

New Features

  • SynXis - Improved two-way integration

We are delighted to announce the new SynXis interface. The two-way integration is now certified and the pilot tests in real environment have been completed.

In addition to the standard features - booking import, export of restrictions, prices and inventories, the new interface allows you to sync bookings, profiles and export blocks.

  • Export from Clock PMS+ to SynXis:
    • Export for a period of 365 days is supported, including prices, restrictions and inventories;
    • When exporting rates, the restrictions belonging to the following types: Min Stay, Max Stay, Min stay (arrival) , Max stay (arrival), STOP, Closed for Arrival/Departure, are taken into account.
    • The prices being sent to the partner can have a flat Room structure or have a more complex one based on the Number of guests (depending on the occupancy). To use the Occupancy adaptable model, it is necessary to use rates containing a Guest offset. Through this model, you could optimise the mappings and considerably decrease the number of products.
    • The new interface offers two-way exchange of bookings between Clock PMS+ and SynXis. If working simultaneously in both systems, you could enable this feature to keep the data as synced as possible. 
    • In addition, the synchronisation of the data of guest and Company/Agent is also achieved through the export of bookings from Clock PMS+ to SynXis. Info of the edited and newly created profiles will be transferred to the partner when exporting the respective booking. To avoid duplicated profiles as a result of the data exchange, we have developed a special profile recognition mechanism.
    • We have created another innovation for channel managers - export of blocks. Blocks having a set code and prices can be sent to the partner. We also provide an option for syncing already existing blocks, i.e. those created prior to the connection activation. Bookings received for such a block  are linked to the respective Company/Agent, as well as block. This alone decreases the number of blocks available for sale.

The Blocks Feature is still in a BETA version. If you are interested, please contact the Support Team for more details.

More info of the data export through the new interface, as well as about how it works can be found here.

  • Transfer to Company/Agent folio- we have added a new tool for better management of booking charges related to companies/agents. Through the new option, you can easily transfer all charges coming from the rate to a folio of your choosing belonging to a Company/Agent specified in the booking. In contrast to the rest of the transfer options, here the transfer can be made in case of an already existing  booking.
    • Changes related to the transferred charges, e.g. a stay period change, rate, etc., are directly reflected in the transfer folio. All newly arising charges will be created in the transfer folio.
    • At any time you could change the folio, and the existing charges, if in an open folio, will automatically be transferred to the newly chosen one.
    • If new charges arise or you need to change the existing ones, but the transfer folio is already closed, you receive an error message, as the operation cannot be completed. In this situation, you could select a new transfer folio for the booking where the changes to be reflected or you can remove the transfer option. In this case, the corrections will take place in the booking folio.
    • To charge booking services directly in a folio of an Agent/Company, select the position and indicate the specific transfer folio. On the list, all open folios of the Company and/or Agent selected in the booking will be visualised.  For each booking, you  can select one transfer folio. Folios related specific arrivals or early bookings can be created in advance. Please note that the Company/Agent you would like to work with should be enabled to receive charges.

Coming soon: The charge transfer feature is the first step to the optimisation of the process of invoicing tour operator bookings. The next step will be the feature for the easy setting of the new transfer to multiple bookings and company folio linking.

  • The new report - Company Booking Charges by Reference
    • The report gives you info of charges arising from the booking rate, related to a given Company or Agent. The charges are shown regardless of the folio in which they are. Only the charges related to the rate selected in the booking are included, all other charges like automatic charges for room types, manual charges or POS transfers are not taken into consideration.
    • You can filter the results by date of arrival or departure, as well as to combine with the Reference date. This way you can easily find the specific group of bookings and retrieve the info of the amounts due for early bookings of a specific tour operator .
    • The results are grouped by date of arrival/departure (depending on the selected filter), Reference (number and date) and Booking. As for each level, there is a total amount added, as well as the grand total for the whole group.
    • In the ideal case, where the booking rate charges for a given company are already transferred to folios of the same company (closed or not), the amounts of both reports (Company Booking Charges by Folios & Company Booking Charges by Reference) with similar filters should be equal. The exception to this rule would only be the amounts of the charges not coming from the rates of the booking - fees, services, etc..

Improvements

  • Accounts Receivable Report & Closed Folio Report  - optimised company search mechanism.
  • Custom Payment Provider - now you can clearly specify which operations to be supported. Depending on the URLs entered in the settings, you now control which options to be visible to customers - credit card payments, alternative payment methods and/or terminals (when working with a Kiosk). Please note that the Credit card position is selected in the guarantee policy, even if your payment provider doesn't support credit card operations, in certain situations, the standard credit card form will be visible in BookDirect. The credit card details will be recorded for the respective booking and can be used for subsequent payment operations.
  • Block Pickup Report-  export to Excel added.

Fixes

  • Booking guaranteeing through adding a credit card is now reflected in the Change Log.

Localisations

  • Swedish fiscalization - The tax value was sent instead of the tax percentage to the fiscal service and that is now fixed.
  • Swedish fiscalization - The bill receipt is generated strictly according to the Swedish regulations (SKVFS 2021:17).
  • AJPES - The export screen used to show the time for certain columns in the wrong time zone and it is now fixed.
  • HESTA -   You can now configure the BFS identifier (BUR) code you received from the authorities. Fill it in the BFS field identifier (BUR)(next to the period of the export) so it will be exported in the respective field (EstBurNr) in the XML file.
  • INSEE - The export has been adjusted to export values matching the ones of Bednight Report.


Clock PMS+ Update (24 Jan 2023)

New Features

  • New improved 'All accounts'screen:
    • Added convenient search by property's name and address;
    • Better visualisation of properties through the Hotel icon;
    • Division by property type - Hotels and Restaurants. The two types of properties are separated into individual tabs, as each user having access only to POS accounts will be redirected straight to this tab.
  • Document types - we have added new 'disabled for Unbalanced folios' and 'disabled for Balanced folios' settings. Now for each document type, you can specify what folios it will apply to - balanced and/or unbalanced. This way you could diminish user errors in the issue of various types of documents depending on your business model. If the user selects a document type that cannot be used, an error message will appear. By default, the two settings are inactive. To apply them, please go to the navigation bar and select Settings->All Settings-> Document Type(s) to edit the respective document type. 

If you apply the new options, please take into consideration the respective settings (pertaining to the issue of documents) of the MyBooking Portal and Kiosk.

  • Rates Management - we have added a new 'Channel Manager rates'section. Now you can see all rates related to the channel manager through the new settings screen. To do so, open Settings->Rate Plan-> tab More->Channel Manager rates. Here you have a list of all channel managers related to the account. After selecting a specific channel manager, the related rates will load and you can review and edit them.

The new feature is also already available straight through the navigation bar: Channels ->Edit Rates / Restrictions.

  • We have added a new screen to create and delete (only if possible) To-Do channels. You can access it by going to the navigation bar and selecting Other functionalities -> To-Do -> cogwheel icon -> To-Do channels.

Improvements

  • RatesScreen - the archived room types are excluded from lists;
  • Meal Report - the date format has been changed;

Fixes

  • 'Registration card auto-numbering - On booking check-in' setting - it only applied  to registration cards added upon the booking check-in, but not to the ones preceding it.
  • In certain cases, when there is extension of the period of a booking containing a closed folio, incorrect positive/negative charges were generated for already invoiced overnight stays.
  • Stripe payment processor - improvements related to the webhook API version and the sales in BookDirect.
  • OTA interface - in certain situations, the To-Dos used to generate errors during import that were related to credit card details.
  • WorldLine / SixPayments - with BookDirect integrated into the hotel website, part of the payments through the Payment Page couldn't be completed successfully.

Integrations

  • The Lightspeed (L-Series) configuration screen has been redesigned. The company ID is now retrieved automatically for easier activation.

Localisations

  • STR configuration enhancement. The configuration of the interface is now even more flexible. Considering the revenue from some revenue groups is not considered as revenue for STR analysis, we have added an option to select which revenue groups to be excluded from the total revenue figures.
  • Swedish Fiscalization (Reports > All Reports > Localizations) The Reports Screen has been redesigned and has a new modern look that matches the new design line of Clock PMS+
  • German KassenSichV(Fiscalization) the export of DSFinv-K daily closures has been adapted to match the new technical requirements of the TSS vendor Fiskaly.

Clock PMS+ Updates (12 Dec 2022)

Improvements

  • Channel managers - some channel managers send remarks that resemble credit card details. As a result, bookings are not imported and errors are generated. Upon the changes made with the current update, bookings will be imported, and the data in question will be masked.
  • The Company search has been changed, this way a greater number of companies are supported in the reports (e.g. Charge Control Report, Charge Summary Report, etc).
  • Printing through Google Chrome - with the introduced changes in the last versions of the browser, blank pages were added when printing. We have made the necessary changes to avoid such situations.

Integrations

  • LightSpeed POS K-Series fixes:
    • The end of day transfer now precisely includes all revenue date by date.
    • Tips with negative amounts were not expected by the interface causing the voided bills containing tips to not be properly transferred during the end of day process.
    • Force Sync function used to fail under some circumstances.
    • The end of day revenue transfer is now optimised. As a result the end of day transfer should occur within a couple of hours after the financial day is fully completed at LightSpeed POS K-Series.

Localisations

  • Ajpes - After the optimised data exchange with Ajpes, the checkout information is exported at check-in and you can now configure the casOdhoda (Departure time) time for the interface. To do so, open Reports > All Reports > Localizations > Slovenian Ajpes Report > Settings > Departure time.
  • Fiscal interface for Romania BETA is now available. The fiscalizsation service requires a Clock IoT device as well as DxPrint (purchased separately from DxPrint.ro) to be installed and configured in the local network for every fiscal device of the hotel / restaurant. The supported devices are Datecs, models: DP25, DP50, DP150, FP650, FP700, FP800, WP50, WP500.
  • Austria RKSV (Fiscalization) interface to SIGN.AT. Now you can use RKSV via SIGN.AT and have one subscription less to worry about like when using the Obono interface. The SIGN.AT is configured directly by the Clock PMS+ Support Team.

Clock PMS+ Update (15 Nov 2022)

New Features

  • Rates - a field added to Guest Offsets - Single Adult. The new offset is taken into account in situations when only one adult is accommodated into the room. In contrast, the existing Adult 1 offset is also activated in case that in the room there is 1 adult in combination with children. Both fields (Adult 1 and Single Adult) work together as Single Adult has a priority. 

Example:  If you fill in both offsets, and in the room there is only 1 adult, the Single Adult field is taken. If Single Adult is not filled in, Adult 1 will be used as before.

  • New “Company Booking Charges” report. The report is to be used for audit of charges of the bookings of companies or Agents. It has been designed for events when booking charges are transferred to common (group) folios of the company. Thus you can use this report for an arrival (departure) period to see the amounts in folios of the company for each booking. For booking charges to be included in the Company Booking Charges, two conditions are to be fulfilled: the booking is to be linked to the respective Agent or Company and its charges to have been transferred to a folio of the agent or the company.

Improvements

  • Block Pickup Report - now you can access the latest version of the report. An optimization has been made to speed up data loading when working with a large number of companies.
  • Adyen v2 Drop-in:
    • Version upgrade to 5.27.0
    • Changes to the list of supported payment methods. The supported methods: iDEAL,  Apple Pay, Google Pay, Bancontact mobile, Bancontact card, Vipps, TWINT, Trustly, Swish, MobilePay, giropay, PayPal. 
    • To address the issue with users paying twice in certain situations, we have added additional instructions for such users in case the same has started a payment, but has not yet been confirmed or rejected.
  • Room Cloud - to the export of restrictions, we have added a new restriction - Max Stay. Please note that the support for this restriction depends on each portal.
  • BookDirect - the countries entered in the “Favourite Country Codes” field appear at the top of the list.

Fixes

  • We have restored the possibility for adding or editing existing Event Document Templates, created through Visual builder.

Integrations

  • LightSpeed K-series End of day transfer enhancements. Before processing the End of day data, the integration first checks if the date to be processed has been marked as completed by LightSpeed K-series. In some cases like device deletion, connection/power issues and others, the date in LightSpeed K-series remains open and the data exchange is interrupted. To overcome this issue, we added the Force sync ability and if the date is not identified as completed by LightSpeed K-series, the Clock PMS+ user may use the force sync feature for the data, so the data exchange may proceed. Additionally, we added a log of the processed End of Day dates and their status.

Localizations

  • INSEE (French Statistics) integration (Beta version)  - To help you save time for the more important tasks, we have developed an interface allowing you to easily export your monthly data to INSEE in just a few clicks. More information about the interface (requirements, activation and use).
  • TourX is now integrated and can help hoteliers from Luzern (Switzerland) to automate the issue of Digital Guest Cards . Tour X Digital Guest Card provides hotel guests with a number of benefits such as free public transportation, WiFi as well as discounts for many tourist locations and services. Find out how to configure and use the interface.
  • The German Fiscalization Reports screen has been redesigned and now it has a fresh new look!
  • German fiscalization. Daily closure re-export used to generate errors in some cases.
  • The Swiss Hotel Statistics Report – HESTA screen has been redesigned and now has a fresher look!
  • AJPES Interface enhancements - Now you have a greater control over the data sent to Ajpes, as we have introduced the following changes to the integration behaviour:
    •  Guest data will be sent only once with the first data export;
    •  Resend guest's data function. You can decide which information should be resent to Ajpes;
    •  We have added identification for the updated guests. Guests whose info has been updated will be marked  as such and you can easily check what has been updated to easily decide if the data of these guests is to be resent;
  • STR export enhancements. You can now select which Clock POS account revenue is to be added and then exported along with the Clock PMS+ account data. The revenue groups Food, Beverage and F&B are grouped together as required by STR.

Clock PMS+ Update (7 Oct 2022)

New Features

Room Cloud - Occupancy based prices

We have expanded the possibilities of the application of our occupancy based rates. We would like to remind you that you can use our rate features for price calculation depending on the number of adults and children. If you haven't checked them out, take a look at 'Guest Offsets' and 'Guest levels' or get in touch with our Support  Department.

To be able to more effectively apply such rates, we have added new options to the RoomCloud interface. What's new is that it is now possible for one product to receive prices for a different number of occupied beds.

Example: For the 'Triple/Standard' product, you can send prices for 1, 2, 3 guests and so on. Up till now, you could achieve this by creating individual products for each combination. In other words, if you had three products up till now: 'Triple/Standard/SGL', 'Triple/Standard/DBL' and 'Triple/Standard/TRPL', with the change you can have only one rate and respectively one product - 'Triple/Standard'.

With the new feature you can successfully decrease the number of rates in Clock PMS+, as well as to reduce the products you send to RoomCloud. Apart from simplifying the rate management, it will also speed up the synchronisation through the channel managerand will reduce overbooking situations.

Please note that the new feature can cover cases related to the pricing depending on the number of occupied beds (1, 2, 3 and more beds). Cases related to different age groups (adults and children) CANNOT be covered and continue to be solved with various rates and products. Still we recommend you to use the new approach where it is possible to reduce your rates and products.

Here is what you need to do to use the new feature:

  1. If you haven't yet done it, create rates in Clock PMS+ that will use the 'Guest Offsets' and/or 'Guest levels' features.
  2. Set up room types in RoomCloud, so that occupancy based prices can be supported.

In your RoomCloud account from the Navigation bar, select the Property menu, Room-Type position, this way you will have the room list shown. To improve the necessary settings, click the button in the first column, immediately next to the type name.

In the room settings (tab - Room Type: Detail), enter the MAXIMUM number of guests into the 'Standard Occupancy' field that can be checked in this room.

In our 'Triple/Standard' example, you fill in complete 3, as the room can be offered to three guests at most.

3. Set up the rates in RoomCloud, so that they can support occupancy based prices.

Back to the main list of rooms in RoomCloud, we work  with the Product (Room-Type|Rate-Plans) column. Here you can see the rates associated with each room type. To define that a specific rate will work with a price by guest, you need to fill in default prices for all different occupancy levels for which you would like to offer/have a price. For each specific rate, select the edit icon.

Fill in default prices in the Occupancy prices  row- under Price For Occupancy. You can work with default values of RoomCloud (9999.0). Upon exporting prices and availability through the channel manager to the respective products, these values will be updated with the prices defined in your rates.

Important: Please complete the default price only for the number of beds you would like to offer.

Example:

  • If our TRIPLE room will only be offered for triple and double check-in, then the configuration should look like this:

  • If you wish to also sell this room for single check-in, then we need to complete all rows:

4. Allow occupancy based prices in Clock PMS+ mappings for the specific product.

If the above settings are already done, open the product mappings and click the 'Re-sync maps' button. After the synchronisation is completed, the new configurations will be downloaded and reflected in the mappings in each row (for each row). Under the RoomCloud product, you will see the different levels of occupancy, for which prices are sent.

Example: If you have filled in 3 for 'Standard Occupancy', in the mappings next to the name of the product, you will see: 3; 1+0; 2+0. For all these combinations, prices will be calculated depending on the conditions set the PMS rate (Guest levels and/or Guest Offsets) and they will be sent to RoomCloud.

After all the settings are ready, you can proceed with the new working mode. Select the 'Yes' position in the 'Rate guest occupancy enabled' column for each row of the mappings, for which the new 'Occupancy base price' model is applicable.

In case of a change to the 'Rate guest occupancy enabled' setting, we recommend you to make a synchronisation.

Clock PMS+ Update (21 Sep 2022)

New features

BookDirect (WRS v2)

The long-awaited new version of the Web Reservation System is now available. We are happy to introduce BookDirect (WRS v2). In the development of BookDirect, we have taken a 'mobile first' approach, where the design of the app has been created with the idea that the main mass of users are mobile users. Research and statistics clearly show that online channels are starting to dominate booking creation and we strongly believe that BookDirect will be primarily used via mobile. However, we haven't forgotten PC users either, with the engine adapting precisely to all screen sizes, regardless of device type.

Full details of all supported features and settings can be found HERE.

New tool for static text translation

We have added a new tool for translating labels and other static texts in the app. Translations made are per subscription, i.e. affect all accounts in it. This way you can translate BookDirect labels, for example, only once instead of for each account separately. To access it:

  • From the navigation select Settings-> App Translations
  • Choose from which language (e.g. 'English') and to which language you will translate (the languages added in your subscription accounts).
  • choose which app you want to translate, for example 'BookDirect'.
  • Click on 'Show Translations'.
  • You can search by:
    • Translation status (1) - all, Translated or Untranslated texts.;
    • Modification period (2) - searches by date of last change;
    • Search by key (3) - searches by a specific, unique key of the translation.;
    • Search by translation (4)- searches by text of the translation for both selected languages.;
  • The table of texts is paginated. You can navigate between pages using the navigation buttons (6) in the bottom right corner.
  • Fill in the translations in the right column. The translations will not be lost when navigating between pages and when searching.
  • When you are done with all the translations, press the save button (5) in the upper right corner.

Translations are currently supported for the Book Direct, Online Check In and Event Confirmation Apps.

Improvements

  • Payments Autopilot - we added a tool to automate the release process of pre-authorizations. Pre-authorizations associated with reservations can be released automatically from the system, a few days after the departure of the reservation. To determine the number of these days, from the navigation menu select Settings->All Settings->Payment Autopilot Tasks, fill in the appropriate number of days in the 'Booking preauth release days offset' field.
Example: If you fill in 0, the pre-authorisations will be released immediately after check-out the reservation. If you fill in 1 or more, they will be released after the appropriate number of days from the date and time the reservation was checked-out.

If you leave the field blank, you will turn off the automatic release.

Important: The automatic release is triggered only in cases that the reservation has no obligations (all folios are paid). If any error occurs during automatic release, a ToDo task will be created for the booking in the 'Payments' channel.
  • SixPayments - added new mode - 'Client present transactions force sca'. When enabled, 'Force 3D' is initiated for all transactions performed by the client. 
  • Bookings - Advanced Search - we have added a new feature to change the stay of multiple reservations at once. The function is invoked via the 'Change Stay' button. It is recommended not to process more than 50 reservations at once.

Fixes

  • The search for a new company by VAT number has been restored.
  • Eliminated a conflict that in some cases caused an error when changing the view or language of folios.   
  • Overbook was incorrectly reported if a reservation was created to a block and at the same time there was zero availability for the corresponding room type.
  • In some cases, notification letters to guests that their room had been cleaned were not sent. 
  • Siteminder/OTA - Removed a conflict when importing reservations, which was caused by the presence of additional services with long names.
  • ID Processor - The guest language field is no longer populated. 

Integrations

  • Lightspeed (L-Series) - Improved how Clock POS accounts are selected for accrual transfer at daily close.
  • LightSpeed (K-series) - Improved how Clock POS accounts are selected for accrual transfer at daily close.
  • API  (pms_api) - we added a endpoint allowing extraction of data for blocks.

Localizations

  • STR export - Added new setting 'Marketing segment for complimentary and house use bookings'. The occupancy associated with the configured marketing segments will be deducted from the rooms sold data sent to STR. You can configure it by selecting Reports->All Reports->Data Export->STR Export->Settings.

Clock PMS+ Update (26 Jul 2022)

New Features

Housekeeping and ОOS type

To be able to more effectively manage the housekeeping operations at your hotel, we have added an option for the room OOS statuses to be taken into consideration when creating housekeeping tasks.

This feature requires the use of a Housekeeping Activity Scheme. If you still use the old organisation of tasks, under which rooms are marked as dirty with the booking departure, you will not be able to use the new feature.

Here are the options for the new housekeeping schemes:

Create one or more new schemes and select which room types they will apply to. What's new here is that each scheme can be connected to one or more OOS statuses. This way you can define various tasks of a different frequency for each OOS status.

Application examples:

  • If you have a "Mould Remediation" OOS status, you can create a scheme for it which will have daily room mould remediation tasks over the course of several days.
  • For the Smoke Smell Elimination ОOS status, you can have a special scheme of tasks to be performed only on the first day of the block.
  • For all rooms, stopped for sale you can have a task requiring a simple check of the room prior to the last day of the OOS status.

For detailed planning of each OOS type, define all OOS statuses, schemes and related tasks that you need. The housekeeping schemes and the related tasks operate the same way as with the bookings. The only difference to which you need to pay more attention is the departure date.

  • On Departure -  in contrast to bookings, for OOS statuses, it is the date following the last date of the OOS status. If the period of the OOS status  01 January - 03 January, then the task marked "On Departure" will be generated on 04 January. In this case, the room will become free/dirty on 4 January. In the rest of the cases, the feature behaviour is similar to the ones related to bookings.
  • On Arrival - the task will be generated for the start date of the OOS status.
  • Repeat every N days - the task will be generated depending on the OOS status period for the specific room and the set number of days.

The new housekeeping schemes are also taken into account in forecasting (Housekeeping Forecast report) to better plan the number of housekeepers you will need.  

Improvements

Tour Operator Contracts

We have made some improvements to the management module of Tour Operator Contracts. Here are the details:

  • Discounts - a new "In Hotel" filter. The discount is applied only to bookings having at least one night in the selected periods.
  • Discounts - a new “Apply to” filter. This option works in a different way compared to the rest of the period filters. Through “Arrivals” and “In Hotel” filters you can specify for which bookings the discount to be activated. Through the "Apply to" option you can specify to which nights of the stay of these bookings the discount to be applied. Only the nights falling in the period are subject to price reduction.
  •  Free nights - a new "In Hotel" filter. It operates similarly to the discount filter showing the bookings having at least one night in the period.
  • Specific Accommodations - multiple room types for one row. Before each row referred to only one room type. Now you can specify that the row is valid for multiple different room types. This way the number of single type rows entered will be reduced.
  • Specific Accommodations - a new “Text”field. You can use it to make the texts of charges clearer. What you enter in the field will be included in the charge descriptions.
  • We have simplified charge texts to make them clearer and easier to read. 
  • We have changed the folio print layout - "By Bookings". The information is better arranged and easier to read. 

Fixes

  • Adyen v2 - improvements related to the iFrame integration of DropIN.
  • On the generation of cancellation policy charges under the "Tax included in prices" tax mode,  taxes were accumulated (one coming from the gross prices and another - from the tax on the charge itself).
  • Events - if there were voided folios present in an event, it was not possible to change the event's company.

Integrations

Gastranovi POS - a default payment has been added to the settings of Gastronovi. The default payment lets you successfully process payments not yet set up in the interface and avoid disruptions in its work.

Clock PMS+ Update (28 Jun 2022)

New Features

New Rate Management Screen

As part of our new and more powerful Sales Pilot, we have redesigned the Rate management screen to ensure user-friendly experience.

We have created new more intuitive and compact screens to work with rates, allowing you to bulk update and test them. A different approach to the processes of their creation and edit has been introduced. For the development of the screens, we have used a new technology allowing a way faster and easier work with multiple rates. The process of creating new rates is significantly easier. It’s not necessary to add rates one by one, we have created a functionality allowing you to enter several rates at once. This way you can easily add all the rates from one rate plan in a single step. If a given rate attribute  (e.g. the charge template) is the same for all new rates, it is not necessary to complete it for each individual rate. In a click, the system can fill it in for you for all new rates.

We have split the main screen in several sections. You can move among the sections while creating, editing or testing the calculation of your rates.

A new rate search added with the following options:

  • Super quick opening of the most used rates for edit straight from the home screen based on the use of hashtags, e.g. "#BAR"
  • Quickly select one or multiple rate plan. 
  • Quickly select one or multiple rate tags.
  • Search by multiple rate parameters.

New navigation bar:

  • Seasons - The Seasons feature allows you to define prices, restrictions, guest offsets and guest levels which to be applied to a certain period of time..
  • Days - The calendar of daily prices is very compact and handy with its multiple options to quickly edit prices, restrictions and other parameters for each individual day.
  • Mass Update -  Using this feature you can update all rates having identical parameters in only a few clicks.

NEW: Testing - Here you can test the calculation of end prices for multiple rates and different combinations of adults and children. The system will list the prices for all selected rates and guest combinations, so you can quickly and easily check if you have configured them correctly.

You can find more info on the new rate management screens HERE

  • Tour Operator ContractsSearch -  we have added tour operator contracts search being quickly accessible through the navigation: Company->Tour Operator Contracts. You can find a specific contract by name, as well as filter results by company. From the search screen, you can directly open and edit the contract. 
  • Housekeeping - Clean room notification email - we have added a new functionality to let you boost the communication with your guests and provide them with better services. Your guests will automatically be notified by the system when the room they will stay in is clean and ready for them. The notification will come by email. To this end, you can use the Guest Mailer feature to prepare an email template and select it from Settings->All Settings->Housekeeping->Clean room notification email. Selecting the email template, you also activate the feature. These emails will be sent to the bookings not checked-in yet, but expected to arrive on the current date and having an allocated room. This will happen when the rooms is marked as cleaned.

Improvements

  • Booking Balance - the booking balance include the payments reflected in the deposit folios. We have also added a notification when checking out the booking to remind you of not used deposits, if any. The aim is to minimise the number of forgotten and unused booking deposits.
  • RoomCloud - more reliable recognition of virtual cards coming from the channel manager in terms of of the 'vcc' parameter.
  • Purchase Order Number and Purchase Order Date - new document fields, into which you can enter the necessary info related to the specific order. To enter the necessary details, use the “Currency/Name/Notes” button in the folio. The number and date will be shown in the folio printout. For those of you using custom folio templates, we have provided the respective parameters to add them to the these templates.
  • Import from CSV file - new 'Children age' and 'Rate Charges Transfer' columns. In connection with the new tour operator contracts, we have added the option to import bookings containing info of the children's age and a specific mode of Transfer/Split of the charges from the rate. More info can be found HERE.
  • Meal Report  - new compact layout. If you have many rooms and the standard layout is too long, you can use the new more concise view, including only the basic info -  room number and count of guests for each meal.
  • Siteminder - Arrival Time retrieval when such one is set for the first guest at reception.

Fixes

  • Adyen v2:
    • Part of the transactions via the back end initiated a 3D authentication which could not be completed by users. As a result, a small portion of the transactions failed;
    • Due to the DropIN specifics, alternative payment methods were not visible when the page is integrated in iFrame. We have made the necessary changes on our part;
  • SmartHotel - the mapping download in the new endpoint didn't work due to incompatibility.
  • D-Edge - due to wrong arrangement, during import there were errors in the XML like "Manual price can be one (for entire stay) or for each day of the stay".
  • WRS v.1 - at the last step of the booking process, when entering an email preceded or followed by an interval, an invalid email error was displayed. The issue has already been dealt with.
  • Payment/Adding a card to the WRS - in very rare cases when paying or adding a card, an error like 'family_head' occurred at the last step. As a result, the client used to see a screen showing errors like 'We are sorry something went wrong', despite the fact that the booking was successful.

Integrations

  • Gastronovi POS - The actual checkout time of the guest is now sent to Gastronovi.
  • LightspeedPosKSeries - Added support for all Clock PMS+ servers. Please note US and Canada are not yet supported by the interface due to the LightSpeed K Series specifics.

Localisations

  •  ServerForPOS Swedish Fiscalisation - The X and Z reports contain the Petty Cash value and it may now be configured as a separate value for each account. Please open a service ticket in case you want to change the currently used Petty Cash default value of SEK 2000.

Clock PMS+ Update (26 May 2022)

New Features

  • New folio print view -'By Bookings'  -it shows the charges arranged by arrivals and booking groups based on the booking reference numbers and their stay. If there are several bookings having one and the same reference number, they will appear as one group instead of each booking being a separate group. If the reference number is missing, the booking number is used for grouping. For each group, there is a total amount of the charges. If not related to a booking, these charges are shown separately.

  • National currency - a new setting in the Tax Settings->Taxation. It can be used in the cases when the folio is in one currency, however, you wish to see the folio amount in another currency, (the national one), too. Apart from the total amount of the folio, you will also see the tax base of each tax. The feature refers to closed folios only (closed upon the selection of this setting).

Improvements

  • Adyen v2 - Ask gratuity - we have added a new option to the settings of each terminal to let you execute/stop a tip request for each payment, submitted to this device.
  • Booking - Edit multipleScreen - added a new 'Reference Date' column.
  • Bookings - Advanced Search - added a new 'Reference Date' booking search filter.

Fixes

  • WRS -  a fixed conflict leading to an error message in some situations upon a successful payment while the info of the successfully created booking didn't visualise.
  • Payments - a fixed conflict leading to a change to the payment date in closed folio after editing the payment description.
  • Channel Managers - corrections made to the processing of booking changes, so that it doesn't affect the available extra services when not received from the channel.

Integrations

  • Hotek - Virtual door keys (GuestKey) - we have added a new virtual door key integration. Virtual keys are an innovative keyless and contactless solution allowing guests to have access to their rooms (and common areas). It only takes a click using the MyBooking Portal on their own mobile device.
  • Lightspeed L series - communication improvement
  • Companies endpoint - custom_fields added (API) - the user fields of the company can now be corrected through the API. For more details, please refer to the API documentation.

Clock PMS+ Update (27 Apr 2022)

New features

Tour Operator Contracts 

The specialised module "Tour Operator Contracts" is aimed at solving specific cases of price calculation in contracts with tour operators. Each contract is entered to the profile of the Company it refers to.

The contract has two main settings - 'Conditions' and 'Rates'. The first part covers the setup of the price conditions as they appear in the contract. The second part involves configuring how these terms can be used in bookings as selectable rates. 

For more information, please read HERE.

Transfer charges to Company/Agent folios on checkout

New functionality designed to better organise the folios of Tour Operators, Agents and Companies. The previous functionality for transferring charges to Company/Agent folios had one drawback - charges from many bookings were collected in one huge folio. This created difficulties for both auditing the charges and subsequent invoicing.

With the new feature, you have more control over where to transfer the charges. In addition, the transfer is done automatically with the booking sending. The transfer on checkout works in combination with the recently added 'Split by Agent' or 'Split by Company' folio split functionality. 

For more information, please read HERE.

To make the booking process easier with the new functionality, we have added new features to the Bookings - Advanced Search screen: 

  • New Bulk Update feature allowing you to set a Transfer Folio on checkout for selected bookings. The option is available through the Folios->Checkout transfer folio button.
  • A new bulk update functionality through which for selected bookings you can initiate a transfer to the Company's checkout folio before the bookings are checked-out, button Folios->Transfer to checkout folio now.
  • A 'Without checkout transfer folio' new filter - allows you to find all bookings for which a checkout transfer folio is not set.
  • We have added a 'Reference Date' column. For the needs of Tour Operator contracts, we have added voucher date information to the advanced search. To bring up the column, select the 'Columns' button and highlight 'Reference Date'.

Improvements

  • Adyen v2 - due to increased number of reports about slow Capture and payment processing, we have added a new setting. The delay is due to the fact that we are waiting for final confirmation from Adyen's system to confirm payment. To reduce the delay, we have added a new Quick capture auth age option to the interface settings. It allows for faster processing of Capture type transactions of pre-authorized amounts. All transactions falling within the set window of days will be marked as successful after the confirmation of an accepted request from the partner, even before we have received the final confirmation. If a transaction fails at any later stage, for example it is rejected by the bank, you will receive a To-Do notification.

Please note that the new setting refers to the behavior for both ecommerce and terminal transactions. For more information, please read HERE

In the addition, we have aligned the Release behaviour of pre-authorized amounts with that of Refunds. As a result, this operation will take significantly less time.

  • Trial Balance - For clearer visualization and tracking of deposits drawn down via the Deduct charges model, we have added two new Used advance payment items to Opening and Closing balance.
  • Deposit Adjustment - we have added a new option to the closed deposit folios that automatically issues an adjustment document with the corresponding charge. It is only applicable to unbalanced deposit folios, i.e. those to which payments (positive or negative) are added after the document issue. For example, you need to return part of the deposit to the payer, in which case you can add a negative payment for the amount to be returned. When the Issue-> Deposit Adjustment button is selected, the system generates an adjustment document containing a charge equal to the amount returned (the negative payment), thus rebalancing the deposit folio. This operation minimises the possibility of user error as the process is automatic.
  • Deposits - For clarity when using deposit payments, we have added information about the tax rate at which the deposit is billed. It will only be visible when using payments from closed deposit folios.

Fixes

  • Rates - Guest levels -  the 'Rates: Create or Edit' user right is now taken into account.
  • Occupancy/Revenue Forecast and Pace Report- resolved inconsistencies in the ADR calculation.
  • Adyen v2 - Fixed a conflict where payments could not be registered in non-reservation folios (Non Resident, Company, Event, etc).
  • Ledgers (Company, Guest) - corrected the reporting of the Accounts Receivable metric in cases with cancellations on folios that were closed on prior dates.
  • Charge Custom Field Check Report - fixed a conflict where in some cases data could not be updated for certain charges.

API 

  • Added Constraint to occupancy_forecast endpoint(PMS_API) - displays the number of virtual rooms that are unavailable due to their components being booked.

Clock PMS+ Update (29 Mar 2022)

Adyen v2

We have developed a new and improved integration with the Adyen Payment Provider. The new implementation offers the following new features:

  • Ability to use Adyen in the Payment Autopilot.
  • Ability to use Adyen in the new Self Check-In App.
  • A new implementation of the Alternative Payment Methods through the "Drop-in" interface replacing the discontinued "HPP".
  • The management of POS terminals does not require a Clock IoT device
  • Omnichannel transactions - terminal tokenization and further operations with this token: payment, refund, pre-authorization, release.
  • Handling of tips entered at the POS terminal itself.

Important: All customers already using Adyen Version 1 will be migrated to Version 2. Please contact our Support Team for more information and scheduling a migration date and time. Unfortunately, it will not be possible for the migration of the old credit card data to the new implementation. For this reason, you may need to also use the old interface for the time being. In such cases, exclude the old one from the guarantee options, so that it is not used for new payments.

Here is a full feature list:

Related to the POS terminal:

  • Payment. Specifics: it doesn't add tokens to the booking.
  • Pre-authorization. Specifics: it doesn't add tokens to the booking.
  • Card tokenization. It uses a zero-value pre-authorization.
  • Pre-authorization capture. Omnichannel operation.
  • Pre-authorization release. Omnichannel operation. 
  • Refund. Omnichannel operation. 
  • Terminal token payment. Omnichannel operation. 
  • Terminal token pre-authorization. Omnichannel operation. 
  • Terminal token pre-authorization capture. Omnichannel operation. 
  • Terminal token pre-authorization release. Omnichannel operation. 
  • Refund of omnichannel payment made through terminal token. Omnichannel operation. 
  • Processing of tips entered at the POS terminal during payment
  • Processing of various currencies

eCommerce/MIT:

  • Payment (a direct one or through a token). It automatically tokenizes the card.
  • Card tokenization
  • Pre-authorization - a direct one or through a token . It automatically tokenizes the card.
  • Pre-authorization capture (a direct one or through a token )
  • Pre-authorization release (a direct one or through a token )
  • Refund of a direct or token payment
  • Operations with various currencies
  • 3D Secure during payment - with client present transactions (WRS, MyBooking Portal, Kiosk)
  • 3D Secure during tokenization - with client present transactions (WRS, MyBooking Portal, Kiosk, Online Check-In)

Detailed information of the Adyen settings can be found in our support articles.

Split by Company & Split by Agent

We have added new positions in bookings through which automatic booking charges can be split into two booking folios - folio of the company/agent and folio of the guest.

The rate charges (rate, rate package, city tax) are posted to the company/agent folio, while the rest of the charges related to the rate (e.g. 'Daily Charges') remain in the guest folio.

In contrast to the other two options (charge transfer), here the separation of charges takes place within the booking by automatically adding 'Billing to' each folio  - Company/Agent and Guest.

If you change this option for already created bookings, the charges will not be transferred automatically and a message of the sort: "The existing charges will NOT be transferred automatically" will appear. Still the option will be taken into consideration with new charges, e.g. change to the booking stay or the addition of 'Daily Charges'.

Other Improvements

  • Save card without check - for those of you using the services of payment providers, but not being able to manually save virtual cards (generated by various OTAs - e.g. Booking.com) in the booking due to their specifics, and their expiry date in particular, we have added the Save card without check button. Use it to save such cards as our CC vault cards, so that they can be used later on for various payment operations - payment, pre-authorization.

  • Screen 'In Hotel / Expected Events' - for a greater volume of events, the report used to be slow, therefore we have changed its behaviour. In this report, now you would be able to see events whose arrival date is in the next 14 days, as well as the ones whose departure is after the current date. For events with a more distant arrival, and for your greater convenience, you can use multifunctional event search.
  • City Tax- a new 'Append tax calculation description to Text' option - We have added a new button in the city tax setup related to the charge text visualisation in documents

Use it to show a precise breakdown of the city tax and a detailed description of the calculation in printouts. This way the quantity and the price of the city tax in invoices will be clearer. Please note that upon the activation of this setting, it will not affect the existing open documents. To update the text you use the Rate Re-Post option. 

Example: a charge of EUR 5.00  x 1.0 = EUR 5.00, instead of the standard text, you will see: city tax EUR 2,00 per night + 2 adults * EUR 1,00 + 2 children * EUR 0,50 = EUR 5.00

Important: For the detailed breakdown to be visible, you should not have set 'Print text' for the city tax.
  • Folio audit To-Dos in terms of age and size - To avoid the accumulation of a great number of similar  To-Do for a given folio, we have changed the behaviour of the Folio audit. The automatic daily check aimed at showing you problematic folios will create new tasks as before, but will also delete similar tasks related to a given folio.
  • POS - 'Custom Modifier Posting' user right - similarly to the Custom Charge Posting right, we have made a new right for the needs of the POS restricting the addition of custom modifiers. Users for whom this right has not been granted would not be able to add custom modifiers in bills. 

Note: The right has been granted automatically to all the users having the Charges – Custom Charge or Modifier Posting right.

Fixes

  • POS - Menu Groups: We have fixed the issue with the menu groups whose icons, colours, sorting, etc., not working properly in a multi-account environment .
  • It was not possible to issue Full Correction for documents, in which there was a used deposit under the new model (Deduct charges)
  • Occupancy/Revenue Forecast and Pace Report - the report used to duplicate the revenue from blocks.
  • Transfer To - the option for payment transfer among various folios did not suggest the closed documents
  • Get Deposit From - the option for using a deposit through the transfer of payments didn't suggest overpaid folios
  • RoomCloud - supplements weren't reflected properly upon receiving a booking modification. Sometimes this led to unnecessary duplication of charges.

API

  • New parameters for adults and children (API) - new parameters in the rates_availability endpoint so Per guest rates and guest offsets can be calculated correctly.
  • A new endpoint for block prices (API)
  • Companies (API) - now you can enter 'branch'; 'iata'; 'channel_manager_search_code'

Integrations

  • Lightspeed L-series - in some cases the behavior of the L-series lead to a disconnect from Clock PMS+. This entailed having to re-do the full configuration including mapping to resolve the issue. To ease the process, we have separated the 'Authorization' section so that if the issue occurs again, you will only need to re-authorize by entering your L-series username and password, without needing to re-do all settings and mapping.

Localizations

  • Italian Invoice Export improvements
  • Germany - DSFinV-K export capability - export needed for tax auditing purposes by local authorities.
  • Belgium - STR data export - STR data export for Belgium now available. The feature compiles and sends historical data to: data_daily@str.com and future data to: auto_data@forwardstar.str.com. The data is sent daily.

Clock PMS+ Update (23 Feb 2022)

Deposits - New Model

If you use Deposit Folios, this new model might be of interest to you. Please note that the model only applies to working with Deposit Folios, and, in particular, the cases where you need to issue an invoice for a prepaid amount.

Here is a comparison of the two models:

The current model

  1. You create a deposit folio, in which you add payment. You close it and issue an invoice for the amount accepted.
  2. When the paid amount is used, which is done through the ‘Get Deposit from…’ function, the following happens:
    • A payment with a positive value in the receiving folio;
    • A payment with a negative value in the Deposit folio;
    • A credit note in the Deposit folio;

The new model

  1. There is no difference in recording the payment and issuing the invoice.
  2. The use of the amount is done through a new ‘Deduct advance payment’ button in the charges section.
    The result is:
    A negative value charge is created in the receiving folio. Unlike the old model, instead of creating two payments and a credit note, the new model creates one negative charge. For the charge in the receiving folio, there is information about exactly which deposit folio it is related to. In the printout, as well as on the screen, you can easily tell exactly which deposit folio it originated from.

  • In the deposit folio, we have added a new ‘Deducted advance payments’ section, which shows all the use of the deposit and exactly which receiving folio it occurred in.

The new model also offers a much easier way to cancel a deposit use operation, in case of an error for example. All you need to do is cancel the deposit use charge in the receiving folio.

The two models of operation are fully compatible. This means that they can also be used together, including in cases where, for a given deposit folio, you have already used part of it through the old method.

For the sake of clarity, we have added a ‘Used advanced payment’ new column reflecting this in several reports:

  • Trial balance
  • Guest Ledger
  • Deposit Ledger
  • Company Ledger

To help you manage which of the two methods to use (or both), we've added two new settings to the Tax Settings menu

  • Transfer payment: The setting manages the previous model. By default it is on.
  • Deduct charges: The setting controls the new model. By default it is off.

Improvements

  • SixPayments - added a new virtual terminal setting: 3DS transactions terminal.
  • Online Check-in - we have added the ability to easily track each pre-checked-in booking.

    For bookings having a successfully completed pre-check-in cycle (the guest has gone through the required steps and signed), an indication will be added to both the Arrival and In Hotel lists, as well as the booking screen itself.

    If you decide that the customer needs to go through the Online Check-In steps again, you can now do a so-called reset of the status. This way your customers can review the information they originally entered, add missing information or make any corrections if needed.

    To finalize the process they need to sign.

    Resetting the status is only applicable for bookings marked as Checked-in online. The feature can be used from the booking screen through the Functions menu -> Reset Online Checked-in 

    In addition, thanks to these changes, you could also prepare a mailing campaign with our Guest Mailer, where there is a filter set to account for this type of bookings (Pre-checked-in). 

  • Company Contracts  - change to the behavior regarding their Validity for the easier management of sales.

    The expiry date that can be set for each company contract, is now treated as the end date for bookings. No stay is allowed after this date.

  • Example:

    A company with a contract that is valid until 01.04.2022;

    Any stay with departure on or before 01.04.2022 is allowed and can be booked;

    Any stay with departure after 01.04.2022 or arrival after this date is NOT allowed and therefore cannot be booked;

    When searching in the Online Booking System with the relevant Company Code, an unavailability message will be displayed if the search includes dates after the specified end date..

    Please note: If you have selected individual rates in the Rate section of your company and at the same time you have a contract with an expiry date, the  individual rates offered will also be limited by the contract condition.

  • Elavon - new setting for tipping via the terminal. If you wish to stop asking for a tip on the corresponding device, you can now do so from the terminal settings in Clock PMS+.

Integrations

  • AJPES - corrected the address to which requests are sent.

Clock PMS+ Update (20 Jan 2022)

Improvements

  • Payments Autopilot- we have added a new "After booking arrival" mode. A task with such a mode is related to the actual time of guest arrival.

    Example: If the booking arrival is at 16:30 and the task is set with a 1-hour offset, it will be executed no earlier than 17:30 (the time of execution is not exact and is approximate). 

    Use case: This new mode can be extremely helpful with certain virtual cards to be activated from the day after arrival.

  • We have added a new Accounts Receivable notes field to the folio. The field is only visible for closed folios via the "Currency/Name/Notes" button.
  • Accounts Receivable report:
    • We have added information about correction folios related to each master folio. In this way, it can be clearly seen how the balance of the master folio has been formed. 
    • We have added the option to include in the folio the notes entered in the "Accounts Receivable notes" field.

  • Advanced search for guest profiles- we have added search by birthday. With this feature, you can find profiles with birthdays in a certain period and prepare an email campaign for them. 

    Please note that the search by birthday uses only the system Birth date field.
  • Automatic "Tax rounding difference" charges are now split according to the tax rate of the services they are calculated on.

Integrations and Localizations

  • BRP - when opening a BRP Order through the booking, the calendar now opens with the arrival date of the booking.
  • IDeaS - blocks where arrival_date=departure_date are sent with status "cancelled".
  • API - added Pickup parameter for the API endpoint block_pickups. Added a new mode for the API endpoint block_pickups to be consistent with the Block Pickup report. By default, the point returns data similar to the report with a Report type=Availability. If the Pickup parameter is added when the point is called, the returned data can be compared to the that of the Report having Report type=Pickup%.
  • AJPES integration- the new requirements have been covered by the incorporation of the following changes:
    • We have added a numbering feature - the NUMBERING button starts the numbering functionality by specifying an initial number for the functionality (the value entered will be the first number). For your convenience, the system automatically suggests a number that is a continuation of the largest number used within the calendar year.
    • We have added the option to edit the zst serial number and casPrihoda (time of arrival) prior to an initial export of guest data. Once exported, the data cannot be changed and the modified casPrihoda will be submitted on the next export.
  • LightspeedPos - an existing company profile can now be selected in the billing_to field settings.

Fixes

  • Fixed an issue with the display of some icons that was occurring in certain browsers. 
  • In Per-Guest Rates, the "Percentage" field now accepts fractional numbers as well.
  • Kiosk - a corrected message text when entering a wrong VAT number.
  • Bulgarian fiscalisation:
    • Fixed an issue with folio fiscalisation involving payments with negative amounts.
    • Fixed an issue where, in very rare situations, fiscalization of a cancelled document was not successful and returned a "Folio void has already been fiscalized!" error.
  • POS - payments with longer texts are now displayed in full on printouts.

Clock PMS+ Update (23 Nov 2021)

Rates - New Guest Offsets

We have added a new feature to the rates and their seasons - "Guest Offsets". The new functionality will let you solve cases related to room pricing with different number of adults and children. You can view Guest Offsets like a discount/surcharge to the base price for a different number of adults and children. The purpose of the new feature is to provide you with a simple and understandable solution through which to reduce the number of your rates.

Adults and Children Offsets

The offsets are 12. 10 of them are Adults 1 to Adults 5 and Child 1 to Child 5. Each of the offsets can be an absolute value or percentage of the base price.

  • Adults 1 to Adults 5. 5 offsets, as each one defines an amount of the discount or the surcharge which to be added to the base price for the respective number of adults in the booking. For example, if the booking has 2 adults, the Adult 2 field is chosen. The value of the Adult 2 is added to the base price or respectively deducted, as the value in the latter case is a negative one (e.g. -10).
  • Child 1 to Child 5. To the offsets made by the Adult fields, the children offsets are added. Depending on the number of children, a field 1 to 5 is chosen (for example, if the children are 2, the Child 2 field is chosen).

Extra Adult and Extra Children Offsets

These two offsets apply to the cases when the field for the respective number of adults and children from the above paragraph is empty. In contrast to the above fields, the values here are multiplied by the number of guests

  • Extra Adult. If for the number of adults in the booking (example 2) no value is entered in the offset (Adult 2 in this case), the value of the Extra Adult field is taken and multiplied by the number of adults (in this case, it is 2).
  • Extra Child. If for the number of children in the booking (e.g. 2) the related offset field is empty (Child 2 in this case is empty), then the value of the Extra Child field will be multiplied by the number of children.

Calculation examples:

Rate 1: 

  • Base price = 100. 
  • Adults 1 = -20; 
  • Adults 2 = 0; 
  • Adults 3 = 40; 
  • Child 1 = 25

Results for Rate 1:

  • 1A = 100 - 20 = 80
  • 2A = 100 + 0 = 100
  • 3A = 100 + 40 = 140
  • 1A + 1C = 100 - 20 + 25 = 105
  • 2A + 1C = 100 + 0 + 25 = 125

Please note the following cases:

  • 4A = 100 + 0 = 100. The Adult 4 field is empty - no surcharge to the base price for 4 adults.
  • 1A + 2C = 100 - 20 + 0 = 80. The Child 2 field is empty - no surcharge to the base price for 2 children.
  • 4A + 2C = 100 + 0 + 0 = 100. Neither Adult 4, nor Child 2 is filled in.

Rate 2. As above, but the following are added:

  • Extra Adult = 12
  • Extra Child = 5.

Results for Rate 2:

  • For 1A, 2A, 3A, 1A + 1C and 2A + 1C, the results are the same, as above. But::
  • 4A = 100 + 4*12 = 148
  • 1A + 2C = 100 - 20 + 2*5 = 90
  • 4A + 2C = 100 + 4*12 + 2*5 = 158

In case you use a percentage instead of an absolute value, the behaviour is absolutely the same, with the only difference that the value to be added/subtracted is a percentage of the base price. You can freely combine absolute and percentage values. For example, A1 can be an absolute value, and A2 - percentage and so on.

Rate, Seasons and Days

Guest offsets can be added to the rate itself, as well as each season. If for a given season you don't add offsets, then the offsets defined in the rate will be used. It is important to remember that transfer of offsets from the rate to the season is done field by field, as the season offsets have a priority. Here are examples for offset transfer:

  • Offsets in the rate: А1 = -20; А2 = 0
  • The season has no defined offsets. The rate offsets will be used for the season: А1 = -20; А2 = 0
  • The season has a defined А1 offset = -10. For the season, it will be used, as follows: А1 = -10 (from the season); А2 = 0 (from the rate)
  • The season has a defined А1 offset = -10, А2 = 10. For the season, the season offsets will be used: А1 = -10, А2 = 10
  • The season has a defined C1 offset = 30. For the season, it will be used, as follows: А1 = -20 (from the rate); А2 = 0 (from the rate) and C1 = 30 (from the season)

To set up the offsets, you need to go to the Rate Table screen. For the offsets of the rate, select the "Guest Offsets" link in the line of the rate. For the Season - select the season from the table, click the "Season" dropdown menu (in the upper left corner), and then - "Guest Offsets".

For each day, it is not possible to define an offset to be valid for the specific day only. The day uses the season offset, to which it belongs to in accordance with the example above.

Derived Rates

Offsets can be added to each rate - base, derived or occupancy adaptable one. Please note that offsets are applied last in the calculation of the rate price. In other words, the derived rate first calculates its base value and then the respective offset is applied to it.  

Here is an example of how through offsets you can make a derived rate add the breakfast price, as the breakfast price is EUR 10 for each adult, and EUR 5 - children. 

  • Base price: 10
  • Offset А1 = 0
  • Offset А2 = 10
  • Offset А3 = 20
  • Offset C1 = 5
  • Offset C2 = 10

WRS and Channel Managers

  • WRS. Offsets are fully compatible with the web reservation system. Depending on the entered adults and children, the proper value will be calculated.
  • Channel managers. For the time being, only the SiteMinder interface supports the option for the full use of offsets, as in its product mapping, you can enter the respective number of adults and children. In the calculation, the price will be calculated for the entered adults and children for the product. We are planning such support for other channel managers, too.

Events - New Fields and Search Options

We have added several new fields to the Events to let you solve various cases we have come across:

  • Agent. A new field on the Event screen to let you specify that an Agent is related to the given event. Respectively, there is a new search filter to find the events related to an Agent.
  • Assigned to department. A new field on the Event screen, as well as an event search filter. You can use this field, if you have several teams managing different event types, or if you have several reception desks, for example. The new field can be used by the different teams or reception desks to easily filter events assigned to them. The departments are not separately set up. Simply type the department name in the Event. Once filled in, it will be suggested on the dropdown menu for the next event.
  • Client requirements collected. A new checkbox on the Event screen and an event search filter. You can use this field to specify that everything is ready in relation to the clarification of the client requirements for the event. When searching, you can easily find the events still having details to be clarified.
  • Contact Person in the Event. Now you can add a Contact person specific for the given event. For the Event Search, we have added a new field to let you search for contact information - name, phone and email. In addition, the Contact person added to the event can be transferred from two more places - when sending a document by email.
  • Meeting Room Sorting. If you have more meeting rooms and wish for them to be displayed in a certain order on the Calendar and other screens, you can use the new sorting field. On the Edit screen of each meeting room, you can fill a value in the Sort order field matching the ascending order, i.e. 1, 2, 3, and so on. 
  • On the Search screen, we have a new option - "Show event note". If selected when start searching, you will also see the Notes field of the Event.
  • On the "Bulk Update" screen of the Event, we have added an option for quick access and edit of the notes of Meeting Room Bookings and Catering. Tick the checkboxes in the upper right part of the screen and edit the fields: Description, Staff Description and Notes.

Fixes

  • Credit Card Transaction Report - the transaction time didn't match the time zone of the account, but UTC.
  • The guest profile screen didn't open, if the guest had bookings without resources with a zero stay.

Clock PMS+ Update (4 Nov 2021)

Online Check-In - Registration Card Completion by Guests Themselves

The only option the new Online Check-In available for guests to register was to provide a photo ID to be scanned and recognised. However, this might reduce the conversion rate with guests not willing to provide their photo IDs for scanning. To ensure the app's higher conversion rate, we have added another option - guests can now manually enter their personal details for the registration cards. Besides, if you do not wish to use the ID Processor in the Online Check-In functionality at all - now you can disable it. Here is how the combination of the two settings works:

  • Only ID Processor used: As up till now, the system requires the scanning and recognition of a photo ID to create a registration card and let you proceed to the next step.
  • Only manual registration card completion used. The system will not offer the option for scanning and recognition of photo IDs. Guests will proceed to a screen where they can complete the fields of their registration cards manually. Which fields will appear on this screen depends on the setting in Settings - All Settings - Guest Profile Fields - Set Visibility - Self Service Portal column. There you can specify which fields to be visible and which of them to be required or not.
  • Combined use of the ID Processor and manual completion. If you choose both options, then guests will offer the option for scanning and recognition of their photo ID. At the same time, there is also a button for guests to reject the operation. In both cases, guests will be redirected to the screen for manual completion, as in the former case, guests will have to review and eventually correct the data retrieved from the document, and, in the latter case, guests will have to manually complete the fields.

To use the above settings, from the navigation go to Web - Online Check-In Settings. Please remember to save the changes to them.

Other:

  • All Channel Managers. Improved Country Field handling. We have revamped the support for country details we receive with the booking data. If we do not receive a two-letter ISO code, but the name of the country, now we try to find the code by the name. If this operation does not succeed, we do not add details of the country.
  • Event Self Service App. Now you can use the app, even if you don't have a new generation payment provider. In this case, the deposit payment functionality will be skipped, and the event will be signed and guaranteed.

Interfaces and Localisations:

  • API - folio/charges. We added a new charge field - discount_rate. The field contains the discount percentage, the way it is entered by the user on the Discount screen. We would like to remind you that if the charge amount is manually edited, then charge will not correspond to the amount.
  • Bulgaria - Datecs fiscalization. In the payment type mapping, a new option has been added for the selection of all protocols.
  • An option to issue mobile keys which can be sent by email. For the time being, it is only a back office option. It can be used by interfaces having such a functionality.
  • Six Payments. We have changed the payment type used for the creation of payments in the system. Up till now, the customer preset payments (WRS, Self Service, Kiosk) were online ones, and the rest - Card ones. Upon the change, the payment types are determined as with the other providers, namely, if the payment is made by credit card, regardless of where it comes from, the type is 'Card', and when the payment is through an alternative payment methods (hosted payment page), the payment type is "online".
  • Feratel interface. A detailed log added regarding the movement of guest registration cards.
  • Saudi Arabia fiscalization. QR codes added to the invoices according to e-invoicing law regulations.

Fixes:

  • In some situations with event folios and absolutely identical activities, the charges related to the one of the activities didn't show.
  • Slovenian fiscalization - minor operational changes.
  • We have removed the option for the multiple pressing of the Generate button on Housekeeping tasks screen creating a greater number of tasks than needed
  • Issues fixed with the Bulgarian fiscalization related to folios containing partial correctional folios or charges with negative quantities.

Clock PMS+ Update (6 Oct 2021)

Online Event Confirmation

We have expanded our portfolio of apps you can use for online communication to your clients adding a new app - Online Event Confirmation. It simplifies and speeds up the event confirmation process, making the paper-based communication a thing of the past while letting you entirely switch to the electronic form of confirmation. 

Here is the process itself:

  • In the BEO (or any other Event document) you send to your client, you can add a link to the new app.
  • Upon reviewing the message, the client can click the link and be redirected to the new Online Event Confirmation app.
  • Similarly to the booking online check-in app, the new app will welcome your client with a branded page of yours containing the main info of the event.
  • At the next step, your client will have the chance to once again review the content of the received document (e.g. BEO) and sign it electronically.
  • If a deposit amount is set for this Event, upon signing the document, the client will be redirected to the credit card payment screen to pay the deposit amount. When paying, the client can use the cards already added to the Event or to the Company, or enter the details of a new credit card. You can find more info about the deposit below.
  • To keep informed of the process, upon the successful completion of each step (signature and/or payment), To-Dos will be created.
  • The Event status is automatically changed to Confirmed.
  • The signature itself can be seen in the Signature section on the screen of the document in the PMS.

You can freely test the Online Event Confirmation app. If you wish to continue using it upon the expiration of the trial period, please contact our Sales Department.

Deposit

We have added a new field to the Event - Deposit. Use it to fill in the value of the required deposit related to this Event confirmation.

If a value is entered into the Deposit field, the new Online Event Confirmation will require the payment of this deposit by credit card. If some amount is already paid, but it is less than the required deposit, only the remaining amount to the full deposit value will be required.

The Deposit field can be added to the BEO, too, for a clearer communication to your clients. You can find more info below.

Event Document Templates

When creating a new event document (BEO) template from our gallery, the link to the new app is added by default. You can remove it, if you don't wish to use this functionality. We have also added two new amounts: Deposit Amount and Deposit to Pay (the deposit amount minus the already received payments under the Event folios). They will appear in the document only if you have filled in the deposit amount.

If you wish to edit the already existing templates

  • To quickly and easily add a link to the new app, in the template editor, select Models (to the right), find the Event section and add the Online Confirmation module to the template. If you wish, you can change the colours. Save.
  • If you wish to make your own button, you can use the following parameter for a link. We would like to remind you that you need to select "Other" for protocol.
  • To add the amounts for Deposit Amount and Deposit to Pay (the deposit amount minus the already received payments under the Event folios), use the respective liquid parameters: and  .

App's Look

For the look of the new app, we have decided to use the same settings as with Online Check-in. This way, you will have full visual consistency between the two apps. You can set up this app by selecting "Web" - "Online Check-In Settings" from the navigation sidebar.

Other improvements

  • Folio - To-Do-s. Now you can also add To-Dos to folios. This way, you will be able to manage the tasks related to each folio in much greater detail. We have also added a new "Folio" channel. Still when creating a To-Do, you can choose any channel..
  • Folio audit in terms of age and size. We have added a new automatic daily check aimed at showing you problematic folios. The check creates To-Dos in the new "Folio" channel. The following folio parameters are checked:
  • Forgotten old open folios. Old folios are considered to be the ones whose charges are only for already past dates. If such folios have charges that are already two or more days old, a To-Do will be created for each such folio. From now on, To-Do reminders about such folios will be created every 10 days.
  • Folios with too many charges or payments. In certain situations, mostly related to charges/payments created by the API, a given folio may contain too many charges or payments. Sometimes this leads to certain difficulties and even impossibility to work with such a folio. Therefore we have introduced an automatic check and a respective To-Do for any open folios containing more than 5000 charges or payments. Such folios must be closed and you should continue your work in a new folio.
  • New housekeeping settings screens. We have replaced these screens with new ones as part of the overall reimagining of the graphical interface of the system. Their functionality remains the same as before.
  • POS - a new report about the sales by hours/hourly intervals. The new report allows you to closely check the sales by hours/hourly intervals (hour filter) or the quantity of sales for each of the hours (grouped by hours). The name of the report is "Hourly Sales Report".

Integrations:

  • IDeaS MinLOS mapping issue fix. Now you can map the given rate code for every room type.
  • The Feratel integration is updated to support Feratel Deskline. Here you can find out how it works and how the connection can be configured and activated.
  • The AJPES integration now allows you to export both daily and monthly reports for your guests to the AJPES platform in a click. Find out how it is working and can be configured here.

Fixes:

  • RoomCloud - processing of supplements. With bookings for more than one room, the supplement amount is divided by the number of rooms.
  • Charge template settings - V2 - localization money format is fixed
  • Payments on the Self Service Portal and the Kiosk - Credit cards marked as OTA are no longer offered for use.

Clock PMS+ Update (15 Sep 2021)

ID Processor at the Reception Desk

We have added an option to let you use our new ID Processor functionality for optical recognition of ID documents at the reception desk or in the back office. Our latest feature was presented along with the Self Check-In application. After its addition to the back office, now you can use it to speed up the processing of arrivals. The ID Processor is a paid functionality. Still you can try it for free for a certain period of time. Contact our Sales Department, if you wish to continue using it upon the trial period expiration.

The ID Processor service is aimed at facilitating the processing of guest documents. It retrieves the necessary info from them and completes the respective fields of registration cards in Clock PMS+. All of that is done automatically within 20 seconds. We have used an advanced OCR technology that recognises documents from over 200 countries, extracting the necessary info and checking the document validity. In contrast to the well-known scanners that only recognise the MRZ lines of documents, our technology recognises all info found in the document. Furthermore, the ID Processor retrieves the picture of the guest from the document, as well as their signature in case you would like to compare it to the signature from the registration card or see how the guest looks.

For us, security is of utmost importance! Images of the document, guest and signature are kept in a secure storage in compliance with our very strict policy of safekeeping photo IDs. The images are destroyed within 3 months of the booking checkout. Clock guarantees that no other copies of these images are kept across the system.

For those of you, whose local legislation does not allow the storage of photo IDs, we have added a new "Store ID processor images" setting. If disabled, the fields in the registration card will be completed with the data retrieved from the document, but the images (of the document, the signature or the person) will not be stored in the registration card of the guest or anywhere else in the system for that matter. You can find the setting in Settings - Guest Profile Fields.

Our latest feature has been added to the new user interface for guests. You learn more about it below.

You can use the ID Processor in two main ways - through the camera of your mobile device (tablet or smartphone) or through a web camera connected to your PC. To get the best out of this service, you need clear and focused images of the ID documents. Here is an idea on how to set up the web camera that you might find useful. We have used a Razer Kiyo web camera for the tests. The web camera has turned out very convenient for the task due to its resolution (2688 x 1520), the well-performing autofocus even at close distances and most surely for its built-in lighting. We placed the camera on a small tripod (20 - 30 cm) on a desk directing it downwards while making sure the angle is not 90 degrees to avoid camera glares on the document images. Here is why the camera was tilted at a small angle being enough to light the document without camera glares. To ease our work, we marked the spot on the desk where a document had to be placed to obtain precise images without needing to adjust it each time. Even with a very low lighting on the premises, this setup produced excellent results. We hope our tips will be of help to you.

New User Interface

  • Guests. We have added a new user interface for the processing of guests in the booking. For some time, the old interface will also be active allowing you to get to know the new interface and make a smooth transition to it. From a functional point of view, there are no novelties except for the features related to the ID Processor. To open the new interface, select "ID Processor - new" from the Guests section of the booking.

  • The main actions are in the upper right corner:
  • Create a new guest. It gives you the option to search for a guest in the existing guest profiles. If not found, click the add button once again to create a blank guest profile.
  • Create a new guest through ID scan. Using your mobile device camera, scan the ID document and the data will be filled in the newly created guest profile. Depending on the Store ID processor images setting we have already mentioned in the previous section, the ID document images will be stored or not.
  • If, for some reason, you have a file containing an image of the ID document, you can use the file for the recognition of the data through our latest feature. On mobile devices, the feature is only one and it uses the native choice of the device for snapping or uploading files.
  • If the guest profile exists, you can add info to it from the document. For each guest, there is an option to add data from a document through camera scan or from an existing file.
  • If you wish to view the ID document images, open the edit screen of the guest.
  • On the Guest edit screen, you can also use buttons for the upload of ID document images without their processing in the ID Processor, in other words. the old functionality.
  • Charge Templates. We have redesigned the charge template setup screens and the other related settings - sorting, WRS charge templates, Booking charge templates and the ones linked to the room type. Once again, we have added a link to the old screens (in the upper right corner) to ensure a smooth transition to the new user interface.
  • To-Dos. You have most probably also noticed the change to this screen that was released some time ago. The functionality has been preserved and again there is a link to the old screen.

Self Check-In

  • We have added a new setting related to the credit card screen - "Require Credit Card". If disabled, the credit card step is skipped.
  • We have further developed the credit card screen and it can now be used, even if you are not connected to the new payment providers. In this case, a credit card will be added to the booking that can be used for manual charging through a POS terminal, for example.
  • The new "Store ID processor images" setting of the ID Processor is also applicable to the Self Check-In feature, it determines whether the ID document images are stored or not.

Other

  • We have added a new right - checkout of a booking with opened folios. The new right is part of the new features aimed at controlling and preventing the forgotten open folios. It has been granted automatically to all users already having the "Folio - Close" right. In addition, the right is the "Control Event" type. In other words, when a given user takes advantage of this right and leaves open folios at the booking checkout, a record will be added to the Control Event Report.
  • New Report - Credit Card Transaction Report. Through the report you can see all initiated successful or unsuccessful transactions related to the new payment providers:: Elavon, Six Payments, Stripe, Adyen v2.
  • Stripe. To let you perform tokenization with a real card check, we have added a setting for Stripe - "Tokenize with amount". If you enter a value into field (e.g. 0.5 ), during tokenization instead of a standard Stripe operation that does not check a card, a pre-authorization will be made for the already mentioned amount. If the operation succeeds, the card will be tokenized. This way the issue with the missing functionality in Stripe will be solved. Please note that this method will block the amount from the card of the customer, as they might receive a message about this operation. For the time being, it is the only possible solution.
  • Cancellation policy - if you have the Close folio option enabled, you can now select a specific type of document. Up till now, in these cases the default option was Folio that was not always the best choice.
  • Bookings - with a change to the number of adults and children, the system now  runs automatic recalculation of the booking prices. This change is intended to improve the use of guest level rates and decrease the total number of rates to be managed. It is also useful in other cases - city taxes that depend on the number of adults and children, as well as for package elements related to adults and children. Please note that it is only applicable to  the number of adults and children. In case of a change to the ages of children (years), no automatic recalculation is run.
  • WRS - hotel location map. If the map of your hotel location is set to be shown in your WRS, it will be shown in the following way. If in the found results there are Apartments at different locations, the map will be dynamic. If there is only one location, then the map will be static with a link below to open it.
  • API users - now these users can be added or edited only by users of Clock. Through the app, users can be deactivated only. Please contact our Support Centre for more info.

Integrations:

  • API: New endpoint for the creation of bulk charges. More info available in our API documentation.
  • BRP: We added a configuration for how the order number to be created. Select Booking human in Numbering type to create the order with a leading Booking# (Booking#123 for example). Select the Booking number in Numbering type to create the order without leading Booking# (123 for example)
  • IDeaS: There was an issue with the MinLOS overriding the other restrictions for the day.
  • We have launched a data security updatethat will transform the way we deal with third-party/custom integrationsand API users. We are aiming to minimize the data security risks related with such integrations by granting the connected apps access only to the data needed for their normal work, as well as to facilitate the activation of such integrations. To achieve that we are in the process of creating preset certified connectors for third parties and custom hotel tech applications ("App connectors"). The new App connectors will replace the current API users. The App connectors will be created by our team and the required credentials will be delivered directly to the app developer, so you don’t have to coordinate this process further beyond requesting the connection to our support team.
  • Additionally to the QR code for downloading the Salto mobile app, we have added a link to the self check-in process, so the guests can conveniently access GooglePlay / AppStore when using their own devices.

Fixes

  • Six Payments - the submittal of a blank CVC/CSV used to cause an error. Now if the field is empty, it is not sent to Six Payments.
  • WBE - Availability Calendar. If the link to it contained a Bonus Code, it was lost when proceeding to a new search.
  • A fixed bug with the manual prices in the booking and the stay change with an overlap of days.
  • Adyen. The tokenization of the credit cards  in the Events returned an error.

Clock PMS+ Update (13 Jul 2021)

Online Check-In - New Version

We have developed a completely new app for Self Check-In of guests. Our main goal has been to create an app that will significantly increase the conversion rate of this operation and will become the main method of guest check-in. Our new app is very straightforward and the check-in process itself - very quick.

We believe that this way more and more guests will self check in saving both your and their time at the reception, while your reputation of a modern and guest-oriented hotel will only grow. It goes without saying that such a decision is in unison with the safe distance policy brought about by the Covid crisis.

Our new ‘ID Processor’ service plays the main role for the quick guest registration. It enables the system to automatically retrieve the necessary registration information from a passport image using state-of-the-art specialised OCR technology. You can find more info about our new servicebelow.

The new app is based on the ‘Mobile first’ approach providing the greatest extent of smooth operation on the smartphone or tablet of the guest.  Statistics show this will be the main way guests will use the new feature. Of course, it can also be used on every PC.

Last but not least, the new app follows our new visual concept. We believe that the clear design will both impress users and help them focus on the process.

How it works

The online check-in can takes a few steps:

  • Welcome. The welcome screen greets the guest and shows brief info of the booking.
  • Registration. The user is prompted to take a shot of their identity document  using their smartphone. Depending on the document, one or two images (front and back) of the document.
  • Credit card. The system requires the entry of credit card details or offers a possibility to change them, if already entered. If the booking is confirmed through a virtual credit card and the channel manager has identified as such, it will not appear at this step. In this case, the entry of the details of a credit card belonging to the guest will explicitly be required.
  • Consent to the terms and signature. At this step, the guest is shown the hotel’s policy, as well as the guarantee policy. The guest needs to consent to the terms and sign.
  • Done!

The system may be set to require the registration of the main guest only or all adults. If the system is set to require the registration of all adults, there will be two additional buttons at the last step:

  • Register on this device. The steps will be repeated for the second and each next guest, as the credit card step will be omitted.
  • How to register on a different device. It shows instructions on how to forward the original link, as well as provides a possibility for copying the check-in link and its forwarding to another guest.

The system will require you to have a Payment Autopilot plug-in and connection to the new providers: Elavon, SIX Payment or Stripe.

How will guests get the online check-in link?

We have added a new 'Online Check-In' liquid parameter. You can use it to add a link to the guest mailer templates. To the template visual builder, we have also added a new module - a ready-to-use button that can be dragged and dropped to your template.

Appearance

You can set the system to reflect your own marketing style. You can choose between light and dark theme, set a brand colour for the important buttons and elements, as well as to make the controls and buttons rounded. To make your brand stand out, we have added a special ‘Splash’ page to welcome users. It appears for a short time, as you can set its background colour, logo or another image.

Each good design needs visually attractive elements. We provided an option for header pictures for each page, so that they can be both branded and visually attractive. For the Welcome page, the image is used as a background for the whole screen, and for the rest of the pages - as a header. 

Use the settings screen to play with the new options. The live preview (in the right part of the screen) will help you choose the best style that best matches your needs and see how it will look like in the system. To set the system, go to the navigation and select 'Web' - 'Online Check-In Settings'

ID Processor

Our new "ID Processor" service processes guest documents, retrieves the necessary info from them and completes the respective fields in registration cards. All of that is done automatically within 20 seconds. We have used an advanced OCR technology recognising documents from over 200 countries, retrieving the necessary info and checking the document validity. In contrast to the well-known scanners only recognising the MRZ lines of documents, our technology recognises all info found in the document. Furthermore, the "ID Processor" retrieves the picture of the guest from the document, as well as their signature in case you would like to compare it to the signature from the registration card or see how the guest looks.

For us, security is of utmost importance! Images of the document, guest and signature are kept in a secure storage in compliance with our strict policy of safekeeping of photo IDs. The images are destroyed within 3 months of the booking checkout. Clock guarantees that no other copies of these images are kept anywhere in the system. For those of you, whose local legislation does not allow the storage of photo IDs, we will very soon add a new option for processing documents without saving images.

Please contact the Sales Department, if you wish to participate in the free trial of our new system. The number of demo accounts is limited.

Guest Level Rates - Improvements

To be able to fully take advantage of the new guest level rates, we have made two changes to enable their wider application.

Package elements accounting for children age

To package elements, we have added a new setting to let you determine the children age the given element apply to. If the element is for children, you can fill in the following fields:

  • Children age from - to. The element will be charged, only if the children age matches the set range.
  • Default children age. In this field, set the default value for the children age, if it is not explicitly entered in the booking.

Here is an example of set meals in a package:

  • Breakfast EUR 5.0, for an adult.
  • Breakfast EUR 2.5, for children aged from 6 to 12, default children age 12.
  • Breakfast EUR 0, for children aged from 0 to 5, default children age 12.

If you have a booking for 1 adult and 2 children at the age of 3 and 10, there will be breakfast charged for EUR 5.0, 2.5 and 0. If for the same booking, there are no children ages entered, 2 x Breakfast EUR 2.5  will be charged for the two children. The Breakfast EUR 0 charge won’t be applied in this case, with a missing children age, the system will use the default children age of 12 which is beyond the 0-5 age range  for Breakfast EUR 0..

Guest Level Rates and the Redesigned Connection to SiteMider and Integrations Based on OTA Standard API

We have redesigned the connection to SiteMider and integrations, based on OTA Standard API, so that the guest level rates can be used. This way, you can map all levels (e.g. Single, Double, 2 adults and a child, etc.) of one guest level rate in Clock PMS+ to several rates in the respective connected distribution system and decrease the number of rates. As a result, the management of rates and revenue in Clock PMS+ will significantly be streamlined and eased, as you will need much fewer rates to efficiently manage prices and encompass all possible combinations in Clock PMS+ regarding one, two or more guests in a given room type, for example.

To map one Clock PMS+ rate to several rates in SiteMinder, you need to enter in the rate mapping with how many adults and children the guest level rate is to be calculated.

Stripe - New Payment Service Provider

Stripe is the new service provider added to the Payments Autopilot service. Through Stripe, we support the already standard services like payment, tokenization, pre-authorization, release, capture and refund. Apart from the credit card operations, you can use Stripe for alternative payment methods. See the Stripe website for more info about the supported alternative payment methods.

Here are a few peculiarities:

  • With the standard tokenization, Stripe doesn’t check the card validity through a request to the issuing bank. If this functionality is not enough for you, we are working on an option for setting the system to make a pre-authorization for a certain small amount (e.g. 0.5 USD)  with each tokenization. This operation will actually check the card validity. This setting is coming very soon. 
  • We don’t support connection to the POS terminals of Stripe. Of course, you can still use them as standalone devices without a connection to the system.
  • With refunds, the following case scenario is possible. Initially, Stripes confirms the refund and a negative payment is posted to the folio. Later, however, in rare cases, it is possible to find out that the refund is not possible. Immediately upon the receipt of the notification of the failed transaction, a To-Do in the booking will be generated to this end to let you decide how to proceed.

MailChimp Integration

Clock PMS+ guest data can now be synchronized with your MailChimp audiences, so you can use its capabilities to their full extent and maximize the results of your marketing campaigns and promotions.

Configuration 

  • Go to Settings > All settings > MailChimp Settings and click Authorize to log in to your existing MailChimp account or create a new one and authorize Clock PMS+ to access it. Click Continue once ready;
  • Once your MailChimp account is connected, you need to configure each MailChimp audience you wish you to use by selecting 'Create config';
  • Map the respective Clock PMS+ field to each field of the MailChimp audience you wish to update and Click 'Create' when ready.

Export contacts to MailChimp 

Once the interface is configured, you can start synchronizing your mailing lists* with the configured MailChimp audiences.

  • Go to Other Functionalities > Mailing lists option and open the Mailing list you wish to synchronize;
  • Select one of the configured audiences from the MailChimp dropdown menu (in the right upper corner of the screen);
  • After the process is completed, you will see the MailChimp Export statistics (added, updated, duplicated, invalid, etc.);

Specifics 

The below specifics will help you to understand better how the integration works, so that you can get the most out of it.

  • Please note that due to the fact the city, state and zip parts of the address are required by MailChimp, the address will not be exported / updated to MailChimp, if the mapped Clock PMS + guest fields are empty during the synchronization of the contacts ;
  • An email address is required for every contact in MailChimp, as the contacts from the mailing list without an email address will not be synchronized with MailChimp. They will be shown as invalid guests on the export statistics screen;
  • The email address is used for contact identification in MailChimp, so if a given email address exists more than once in the mailing list, only the first guest profile with the given email address will be exported to MailChimp. You will see the profiles which have been skipped due to email duplication on the export statistics screen, so you can edit the list and remove the duplications and export it again;
  • To enhance the usability of the interface and bring more flexibility, Clock PMS+ mailing list is added as a tag to the contact in the audience. By having that tag, you can easily use a single MailChimp audience to accommodate all mailing lists and quickly target them separately by using the tags in the campaigns.
  • If a guest profile is removed from the mailing list, with the next MailChimp export the tag along with the mailing list name will be removed from the contact in MailChimp, however the contact will not be deleted from MailChimp;
  • If the contact gets unsubscribed in MailChimp, it will still get updated with the export of the data except for its tag, as it is prohibited by MailChimp. You will be notified through a message like the one bellow: "Some of the emails provided were not tagged. Check the MailChimp marketing subscription statuses."

Other Improvements

  • In the tax section of the folio printout, we have removed the currency to make the table more compact.
  • Transfer Report - we have added time of arrival and departure.
  • Now with the transfer of charges from the POS, the quantities and unit prices of the charges are also transferred. This way, the information in the client’s folio is much clearer and more precise.
  • City Tax - its base may also include revenue categories selected by the user. If you wish, you can set the City Tax to be calculated based on the breakfasts or other parts of the package. The City Tax used to be calculated based on the Rooms and Packages revenue groups. Now apart from these groups, you can add other revenue categories to be used for the City Tax calculation. In practice, this change applies to percent-based city tax. Please note that the already posted charges will preserve the revenue categories with which they were created. If you wish for this change to impact the already created bookings, you will need to recalculate them.

Integrations

  • API - A new endpoint for convenient search for bookings in the hotel. 
  • IDeaS - The booking and block export mechanism has been updated in order to export the updated booking or block in case of marketing channel / segment / source change. 
  • MarketMan - The sales export functionality is improved and optimised and the sale interval is based on the time of the first and last charge for the given date. Unfortunately, this is recognized as a separate summary sale report by MarketMan and you should revise the summary sales reports for the system update date and two days prior to the update date and contact your MarketMan customer service manager with the request to delete the older of the duplicated Sales Summary report for each date when a duplication exists.

Fixes

  • For the old photo ID upload feature, we have restored the option to upload photos from a file, too. 
  • The City Tax settings screen didn’t save, if there was no revenue category set.
  • We have removed the option for duplicating payments during a transfer due to the multiple pressing of the Transfer button.
  • The changes to the guest’s first name didn’t save.

Clock PMS+ Update (25 May 2021)

New Navigation

We have updated our navigation. Apart from the new and modern vision, we have also added a few interesting features:

  • Shortcuts (Bookmarks!).We have added an option for personalisation of the most frequently used links from the navigation. We can easily  select quick access links accessible in a click. The selected shortcuts are specific for each user and device.
    • To open the navigation, select the hamburger icon in the upper leftmost corner.
    • Quick addition of a shortcut. From the navigation itself, slide the link to be added to the right.
    • Rearrangement and edit of shortcuts. You can change the order of shortcuts, remove some of them or add new ones using the shortcut editor. To open the shortcut editor, click the icon of the shortcut panel at the bottom or go to Settings - Bookmarks. In the edit panel, you can use the up and down arrows to rearrange and the green / red icons - to show or hide the link.
  • Quick search and selection of bookings. To open the booking quick search and selection panel, click the magnifier icon in the upper right corner.
    • Search by room number, booking number and reference number.
    • Search by guest name, email and telephone number.
    • Selection of several bookings. To open several bookings, go to the Advanced Search list and click the Select button next to each of them. You can repeat the search using other parameters and adding more bookings to the already selected ones. When you select all the necessary bookings, click the blue * Selected… button.

The selected bookings will open in the Advanced Search, where you can use the already existing edit or batch update features.

New Home Screen

The new home screen combines key info of your hotel and tasks. This personalisation allows you to select the info  you are most interested in. The home screen can be personalised for each user and device to show a selection of widgets matching the device size at hand.

Widgets

To edit the arrangement of the widgets and which of them to be visible or not, click the cog icon in the lower right corner. You can change the order of widgets using the arrows or show/hide them through the green/red widgets. Here are the available widgets:

  • User Panel. General info of the user and the hotel to which the same is logged in. To be able to see better to which hotel you are logged in you can also add:
    • A picture of the hotel by going to Settings - All Settings - Logos / Image Library - Icon image.
  • To-Dos. Representation of summarised info of your To-Dos, as well as unassigned To-Dos. Click any of them to open the To-Dos screen.
  • Feedback. It shows info of the feedback received for the day.
  • Notifications. Important messages about the functioning of the system or other statistics.
  • Updates. Info of the latest system updates. Click the respective link to learn more about each update.
  • Arrivals. Info of the number arrivals for the day and how many of them are already checked-in.
  • Departures. Info of the number of departures for the day and how many of them are already checked-out.
  • Housekeeping. Info of the number of rooms by housekeeping statuses - Dirty, OOS, Inspected, Progress, Clean.
  • Occupancy. Info of the number of the occupied rooms for the day and the next seven days, as well as a comparison for the same period from last year.
  • Revenue Today. Revenue info for the current date by revenue groups (rooms, fb, extra, other, cancelled), as well as a comparison for the same day from last year.
  • Custom screen top help/Custom screen bottom help. By default, the widgets are hidden. Through the theme, you can show custom texts or instructions related to your hotel. Due to the new home screen format, we recommend you to use a smaller font size and avoid headings of the  H1,H2 type and so on.
  • Section. Depending on the size of the display of your device, you can distribute the widgets in different columns. Arrange the widgets to be conveniently situated in different sections of the columns.

Appearance.

You can change the appearance of the home screen. The personalisation is for each user and device. You can choose between a light or dark theme as well as to enable or disable the background image.

  • Click the cog icon to customise the screen.
  • The background is the existing one and can be set by going to Settings - All Settings - Logos / Image Library - Custom Background Image. Please note that this background image is one and the same for all users in the account.

News and Messages

We have added a new option to receive system notifications and info of updates  When there is a new message or info of a new update, it will be reflected in the email icon in the lower right corner. There you can see the number of unread messages. Click the icon and select the message to specify that it is read using the blue button to the right of the message.

If you wish, you can hide the Notifications and Updates notifications and receive messages this way only.  This will free up more space for the other widgets.

Other Improvements:

  • Six Payments Non-Credit Card Payment Methods. To Six Payments, we have added an option for the use of various regional or global alternative payment methods like Online bank payments, Wallet payment services, etc. Here are some of the supported Six Payments alternative payment methods  - Directdebit, Eps, Giropay, Ideal, Paypal, Sofort, Klarna, etc. To activate an alternative payment method, please contact Six Payments. The alternative payment methods can be used for the payment of a deposit or the whole bill in the WRS or the Self Service Portal, where the end user themselves makes the payment. The service you need to activate in Six Payments is Payment Page. In Clock PMS+, make the following settings:
    • Go to Settings / All Settings - Six Payments (CCredit, Saferpay, Payment Page)
    • Select Payment page enabled, as well as the desired payment methods.
    • In the Hpp terminal field, enter the ID of the Payment Mean / Terminal set in Six Payments. You can find Payment Means / Terminals in the back office of Saferpay by going to Settings - Payment Means / Terminals. If you have more than one Payment Mean / Terminal, please contact Six Payments to consult them about which of them is suitable for use with the Payment Page service and the alternative payment methods.
  • Deposit folios - charge templates. For those of you using deposit folios, we have made a change that will facilitate their issue. Up until now, to close a deposit folio, you had to select the respective data of the contained charge template - tax, revenue category and text, very often resulting in errors by the operators. Besides, not all charge fields could be filled in. Here is why we have changed the method of issue of deposit folios. On closure, you can now select from predefined charge templates, and all field data is automatically transferred from the charge template. To set the new functionality, you can make one or more charge templates of the PRE-INVOICED DEPOSIT (deposit) revenue group.
  • Number of printed copies of each folio. For the countries where the legislation requires the tracking of the number of copies of each folio, we have added this option. Depending on the country, you can now see the Copy/Original label. We have also added the name of the user having issued the document.
  • Smarthotel - An option added for the interface to work with the new endpoints. Please contact our Support Team, if you wish to switch to the new endpoints.
  • RoomCloud - In the export log, you can now find the identifier (Echo Token) of each request facilitating your communication with the Support Team of RoomCloud.
  • On the booking screen for each pre-authorization, you can now see the PSP reference (new operators).
  • To the Tax settings screen, we have added the current revenue date.

Integrations

A Fiscal Operations Log has been added for the German fictionalization (in cooperation with Fiskaly Gmbh), so all bills to be fiscalized according to the configurations can appear there, as well as all outages and unsuccessful signatures will also be visible along with the successful ones.

Fixes

  • Trial Balance - a few issues fixed that caused discrepancies in the checksums.
  • Occupancy and Charges - the grouping by room type didn’t show certain charges, if the account didn’t contain any virtual rooms

Clock PMS+ Update (31 Mar 2021)

Open Correction Folios Replaced with Drafts

We have made a change to our financial system to reduce the number of errors related to forgotten open correction folios.

Up till now, the open correction folio and the charges in it used to be treated as valid ones. In other words, the charges were part of the revenue, and the amount of the open correction folio was deducted from the balance of the main folio. This behaviour often contributed to such folios being forgotten and left open, as their result was visible without being necessary to close them. So this change has been made to reduce such errors.

The new behaviour is, as follows:  now there are no more open correction folios. They are replaced with drafts (not yet closed documents). While being draft documents, their amounts will not be included in the balance of the main folio, and their charges will not be reflected in the revenue. As early as their closing, such documents will be saved and accounted for by the system.

The above behaviour will apply to all newly created correction folios upon the update. The old correction folios will continue to be accounted for by the system as before, i.e. this change will not have any impact on the financial reports for past dates.

If using Deposit folios, you should be aware of one more change introduced. We have removed the option for the manual creation of correction folios to Deposit folios, a complex operation often leading to errors due to the manual nature of the operation. The automatic Full correction feature has been preserved.

WRS and Blocks

To the WRS, we have added an option for guests to make bookings for rooms from a preset block. To do so, they need to enter the block code given by you.

To allow WRS bookings for rooms from a certain block, you need to enter a code. You can use the “Generate” button to have a 6-digit code generated. To enable  WRS bookings for a block, this block has to have a rate or manual price set, and its status is not to be Optional or Cancelled.

We have added the Block codes to the standard BEO printout, as well as to the sample email template. You can also create your own template that contains codes only for a clearer communication with the customer.

To activate this option in the WRS, change the Show setting of the WRS. When a guest enters the Block code in the WRS, they will see the available rooms from the respective block (remaining pickup), as well as the rate/manual price of the block. The guarantee policy to be used for the creation of the booking is the one selected in the rate. If the block is with a manual price and no rate, the default guarantee policy for the WRS.

Such bookings will be associated with the Block and will draw on its availability. For a session, a customer can book rooms from different blocks as long as their guarantee policy is the same.

Other

  • POS - We have added info of credit card payments to the bill printouts. The info is similar to what is contained in receipts printed by the Credit Card terminal. This feature is only supported by the new integrated payment service providers - Elavon and SIX Payments for the time being.
  • In Ledgers (Guest Ledger, Company Ledger and Deposit Ledger), the amount currency is now in a separate column. This way, exports to Excel are more useful.
  • SIX Payment - we have changed the tokenization method, so that it no longer  uses pre-authorization for 1.01 EUR, but a special command: Alias Insert.

Interfaces

  • Sweden. Added the date pertaining to the report data in the fiscal Z Report for Sweden.
  • IDeaS. Added a new Export Statistics Window setting to the provision settings. The setting determines the number of days for which statistical data will be sent to IDeaS. It can accept values ranging from 365 to 730 (365 by default) and is particularly useful for ensuring right price suggestions for hotels with a long booking lead time. Please consult IDeaS about the change of the setting, if needed. The bug with the booking export has also been fixed.
  • Slovenian fiscalization. Added support for the city tax treated as a VAT free sale and fiscalized as Other Tax Amount. For the proper functioning of the new feature, you need to set the Tax code for the City Tax in the settings. The respective Tax code is to be also set in the City Tax - tax code field in the fiscalization settings(Other > Settings > Fiscalization > Edit fiscalization). Please note that thus set, Tax code will also be visible in the printout for the customer.
  • API. Added a new document types in the base_api endpoint:
    • WRS. An improved visualisation of the period of booked SPA procedures.
    • API. Added a new wbe_config endpoint giving info of the set Arrival and fixed stay restrictions.
    • API. Added a payment reference to the external system in the credit_items and credit_item_log endpoints.
    • API. New endpoints for easier access to company folios and creation of a new company folio.
    • API. Added parameters for including the optionally blocked rooms and segmenting the data of blocked and occupied rooms in the  occupancy_forecast endpoint.
    • Fiskaly TSS (Technical Safety System) integration. According to § 146a AO and the KassenSichV the business transaction must be secured with TSE / TSS. To comply with this registration, we have integrated the Cloud TSS provider Fiskaly and now when a balanced folio is closed, it is automatically secured with the cloud TSS, as the necessary details are added to the folio printout. The TSS tar export is also available for archiving and auditing purposes. Please contact the support team upon contracting the feature with our sales representative.
    • MarketMan. The integration has been migrated to the new improved version of MarketMan API V3. Added an option for the selection of a currency into which the data to be exported to MarketMan, as well as an option for including the Revenue category when specifying the item category for the export.

For the activation of the new interface, you need to request the association of your MarketMan account with Clock PMS+, as well as to request your Buyer GUID which then to be added to the settings in Clock POS.

The list of items with a configured  inventory code in Clock POS is regularly sent to MarketMan. The Revenue Group, or a combination of Revenue Group and Category configured for the idem is sent as a POS category. If you want to see the mentioned POS category in the Menu Items menu of MarketMan you need to ask your MarketMan account manager to map the Sale Category to the POS category

Fixes

  • Elavon. We have changed the credit card tokenization for OTA bookings. Now you can go through the check and tokenization even without a CSV code, if such one is not provided by the OTA channel.
  • Six Payments - now PED devices with a built-in printer are also supported.
  • A fixed bug preventing the addition of a rate tag to derived and occupancy adaptable rates.
  • A fixed bug that led to an incorrect calculation of the block, if there was a package rate involved which contained an element with offset days, as for the last date the value of the element with offset days was missing.
  • Inactive Room Types - we have hidden them from the filter lists in two more places - Rate & Availability и  Room Calendar
  • Occupancy/Revenue Forecast and Pace Report - a fixed bug that caused the incorrect accounting for charges in terms of the revenue date.
  • Charges Balanced Split - a fixed bug that led to a calculation error if a value was entered for the source folio.
  • A fixed bug that prevented the edit of a task from the Payment Autopilot, if the Folio charge calculation scheme was selected for the task
  • A fixed bug with the links to Archived companies in the Charges Summary Report & Charge Summary DMY Report.

Clock PMS+ Update (23 Feb 2021)

Rate and Availability for a Block

For easier and quicker responding to customers’ enquiries and block bookings, we have added an option for the Rate and Availability screen to work with a selected confirmed block.

To choose a block on the Rate and Availability screen, you will first need to fill in the period and the company. Only the confirmed blocks referring to the selected period and company will be available for selection. Optional blocks are not included in this list, as they have no actual rooms assigned.

The result will show the room type of the block as well as the remaining rooms from the block and the respective price for the selected rate or manual price in the block. Additionally, the system also shows the rate restrictions similarly to the Rate and Availability screen without a block. You can also choose the 'Calendar' option to review the data on a daily basis. It is also possible to make a booking in the well-known way as the related info of the block and the Rate will be transferred to this booking. The block products cannot be used for Booking Enquiries.

To facilitate the communication between clients and the hotel, we have added a new Code field to the Block. It is unique for each block and can be filled in by you for greater clarity (e.g. 'BOSH-01') or automatically generated as a 6-digit code. This code, identifying the block, can be given to the client. We have also added it to the BEO and Example Templates and as a Liquid parameter. If your custom provides this code, you can enter it into a special field on the Rate and Availability screen and save time searching for a company and block from the lists. 

Company Contracts

We have added a new functionality to let you better handle issues related to the management of company contracts, and, in particular, the agreed prices and expiry dates. Up till now, you could manage rate tags for each company individually, and the tags from a company were used to establish the connection to the rates for each of your hotels. Still this workflow was not  very convenient for companies with many branches. The hotel would sign one agreement with clients being valid for all branches of the respective company, but, in Clock PMS+, you had to manage tags and expiry dates for each branch individually. As a result, all changes to the agreement had to be reflected separately for each branch.

Here is why we have changed the whole workflow and introduced a new feature - Company Contract. The rate tags and the expiry date are now in the Contract (instead of the Company), and the Contract itself can be related to multiple companies. This way a change to tags and an expiry date is done in one place only, but it is now valid for all companies related to this contract.

We have migrated all existing data. A contract has automatically been created for each company reflecting the related already existing rate tags and an expiry date. You can change and reorganise the automatically created contracts to simplify your settings.

Additionally, there is a new report in the Control section - Company contracts. Using it, you can easily find which contracts expire soon or have already expired, so that you can contact the respective clients to extend or renegotiate the contract terms and conditions.

We would like to remind you of what can be accomplished by binding rates to companies:

  • In the WRS, by entering a Company Code, a Company can book at rates specified in the respective contract;
  • On the Rate and Availability screen, with the selection of a Company, the rates from the related Contract are automatically shown.

The old functionality to directly add a rate to a company without using a Contract and Rate tags is also preserved.

Revenue Date - automatic change at a certain time

Many of you have asked for such a functionality and we have decided to add it to the system. Up till now, the financial date in the POS and the PMS was automatically changed at 0:00 Now you can set at what time after midnight (1 to 6) the financial date is to change. The new setting can be found by going to ‘Tax Settings’ - ‘Revenue Date Mode’ - ‘Auto revenue date offset’. By default, 0 is selected corresponding to the old behaviour. You can select by how many hours after midnight the financial date change to be delayed.

For the use of this setting, we have added a new right, as well as a control event. In other words, this setting can be tracked in the Control Report Event.

If you intend to take advantage of this new setting, please note that it is highly recommended to make changes before 00:00 to avoid the effect of returning to an already past financial date.

Mailing lists

New Mailing list CSV export feature is now available.

  • Create as many mail lists as you need ('Other' - 'Mailing List').
  • Use the guest Advanced Search (Booking - Guest Profiles - Advanced Search ) to filter the guests you wish to add to a specific mail list through the 'Add to List' option. If you skip the show button, all guests matching the search criteria will be added to the selected list. Alternatively, you can add the selected guests only to the list.
  • By going to 'Other' - 'Mailing List', you can change the name of the mailing list as well as to remove guests from it. Also you can export the list to use it in an external mailing system.

Other

  • A new option in the Booking Segmentation Report - 'In Hotel (cut-off stay)'. If selected in the 'Period Type' filter, you will get clearer report data that is easier to compare. The old filter (In Hotel) worked the following way: if the period is set to 01.01 - 01.02, the report will include all bookings being in the hotel for this period, but with their full number of nights and revenue, i.e. for the whole length of the booking. With the new 'In Hotel (cut-off stay)' filter, the report will include the same bookings, but it will only reflect the number of nights and revenue referring to the selected period. The nights and revenue related to dates outside the selected period will not be summed up.
  • Payment Autopilot. Now it can also process   old credit card details containing plain data.
  • The data related to a credit card transaction  (the receipt usually printed out by the credit card terminal), is now also printed out in the folio with each such payment.
  • To the Advanced Search, we have added a new column - City (of the Main Guest).

Interfaces

  • Slovenian fiscalization improvements: 'Issued by' label translation; Proper time zone use.
  • Hotek interface now supports the QR keys issue. Please consult Hotek that your installation and hardware supports QR keys. If a QR encoder is configured for the Hotek interface, Clock PMS+ will automatically issue a QR copy of each door keycard you create. The QR key is available on the Self Service Portal with the booking issue. If you select the encoder configured as QR encoder for the key issue, only a QR key will be issued.
  • BRP interface now supports the activation of SPA entries. If you have Bookings - Identity Tags, you can also use them to access the SPA. Once the identity tags are added for the booking you can click the Update Spa Access button to activate the SPA access for them. Please note that you need to Update Spa Access with each change to the booking period or identity tags.

Fixes:

  • A fixed bug on the Booking screen that was related to the showing of the prices per night. Up till now, the amounts used to only include  charges of the Rooms and Packages revenue group. Now all charges resulting from the rate and the rate package are included.
  • Split by percent for charges didn’t accept values decimal value being less than 1 like  0,5%, for example
  • A fixed bug with the Elavon preventing the processing of transactions, if the guest name contained special characters like ‘
  • Stripo - the edit button for photos didn’t work.
  • Housekeeping Report - for virtual rooms, the number of guests wasn’t correct.
  • A fixed bug with the print spooler for the POS that used to result in an error when printing special characters like “&” and other similar ones.
  • On the event bulk update screen, the cancelled catering and meeting room bookings are now now marked as cancelled. 

Clock PMS+ Update (25 Jan 2021)

Guest and Company Ledgers v.2

We have preserved the old versions while also adding new report versions: Trial Balance, Guest Ledger, Company Ledger, Deposit Ledger. To use the report versions (v.2), select  Settings - Tax settings - Ledgers version in the Revenue Date Mode section. You can freely and at any time switch between the versions 1 and 2 depending on your needs. Reports are run from the Reports page as before.

Here is how the new report versions work:

Up till now, there was a difference between the Accounts Receivable Report and the data in the Guest and Company Ledgers. This difference was determined by the different principles under which these two reports used to work, namely:

  • The Accounts Receivable Report works based on closed folios regardless of whether the charges in these folios are for past or future periods, the whole amount is reflected as Accounts Receivable..
  • Guest / Company Ledgers work based on the recognised revenues, i.e. charges for future periods were not included in these ledgers, even if these charges were in closed folios.

This difference between the two reports is very confusing for most of you. This is why we have decided to make the following changes that we hope will bring more clarity to these reports:

  • The future date charges from closed folios are now contained in a new separate "Total future charges" column in the Ledgers.
  • This column is included in the amount of the Accounts Receivable in the Ledgers.
  • Additionally, we have made one more small change to make the two reports comparable: The amount of the overpaid closed folios is now treated as a deposit. In our opinion, this is the more accurate approach compared to the practice up till now for such charges to be treated as negative Accounts Receivable.

After these changes, the data of the two reports can be compared, bringing one more benefit - through the Ledgers, you can now get data of the Accounts Receivable for each past date.

The Trial Balance also reflects these changes and now contains the data of future date charges in closed folios as well as the formulas for the check amounts in the Trial Balance have changed to include these amounts.

Please note that the above changes to the Ledger reports change the way these amounts are treated, including for past dates. This will also change the values and amounts in them. The Trial Balance, in turn, will not change, because its balance is based on the difference between revenue and payments which do not change for past dates.

To the new versions of the Guest and Company Ledgers, we have added one more feature. By default, when running the report, it is generated in a compact mode, as the important amounts are present: Accounts Receivable, Liabilities and Deposits. You can tick or untick the Show Details checkbox to see or hide the rest of columns containing: Charges, Total charges, Total future charges, Payments and Total payments.

Credit Cards

  • To the new payment providers (Six Payments and Elavon for the time being), we have added an automatic verification of the card validity with its import from channel managers. This way, you can know at the earliest stage possible if a card coming along with the booking details is a real one. This verification is performed through the payment provider features - tokenization (for Elavon) or pre-authorization of EUR 1.01 (for Six Payments).  On the booking screen, the verified cards appear with a green icon. The ones not having passed the verification successfully, are shown with a red icon, and in the card preview, you can see the error specified by the provider. The old cards, not having passed through an automatic verification, have a blue icon as before. Additionally, we create a booking To-Do containing the error text, if a credit card doesn’t pass the verification process successfully.
  • In connection with the changes under the PSD2 directive, we have expanded the support for 3D Secure. We have also added 3D Secure support for the operations  with tokenized cards on GuestConnect (Self Service Portal) and Self Check-in. Up till now, there was a 3D Secure implementation for them, but only for a new card payment or tokenization. Now 3D Secure is also supported for payments with a previously tokenized card, if the issuing bank requests a 3D Secure authentication.
  • Now you can use the tokenized cards on the Company screen for paying Event folios related to the respective Company. Up till now, you had the option to only use the cards explicitly added for the specific Event.
  • The auto payment feature will process bookings  with multiple open folios in the following way: The first open folio will be the based one. If the task contains a calculation of an amount based on folios, but not on a deposit amount, this amount will be calculated on the basis of the first folio! Additionally, if the balance of the first open folio is 0, the task will do nothing, i.e. the second folio is fully ignored.

Other

  • RoomCloud - The remarks from bookings coming from channels are now saved in the Booking Notes. Up till now, they were saved in the Client Requests. We have made this change, as the received remarks very often contain service information pertaining to the hotel, whereas Client Requests are intended for the client and can be seen on GuestConnect (the Self Service Portal). This is why it is not appropriate for service information to appear there. This change will affect the bookings received after the release of this update.
  • SmartHotel- We have improved the logic behind the creation of guest profiles and contact persons to completely avoid the creation of duplicate profiles, as well as to eliminate the need for repeated entry of the main guest data. Here is the new processing logic:
    • If the booking is for one room and among the guests there is a guest coinciding with the contact person, a new main guest with the full details will be created, as the booking will have no separate contact person. If the contact person is not present on the guest list,  a separate contact person is created for the booking.
    • If the booking is for several rooms and there is a guest coinciding with the contact person for any of these rooms, the system will proceed similarly to the case from the above bullet, while for the rest of the bookings, the same guest will be the contact person.
  • We have added a new right - Credit card refund for PMS and POS. The right is automatically granted to all users have had the “Payments - New” right so far.
  • Added a check for the length of an event. The maximum length for an event is 365 days. 

Interfaces

  • A new option added to the booking for adding cards / wristbands for charge transfers from Clock POS. The feature does not require any additional setup and is accessible from Functions - Identity Tags for each booking. This option allows the addition of new booking tags (manually or through a keyboard reader, as well as the removal of old ones.
  • In Clock POS, you can now search for a room through the Booking Identity Tag (along with the room number and the guest name).
  • API:
    • Added a booking search by booking_identiy_tag.
    • An endpoint added: assign_booking_identity_tag in PMS_API for adding booking_identiy_tag
    • An endpoint added: unassign_booking_identity_tag PMS_API for removing booking_identiy_tag
    • An endpoint added: credit_card_transactions in base_api with support for Elavon and SIX payment operators.
  • A feature added for data encrypting  that is independent from the onSubmit handler for the Client-Side Encryption JS library.
  • Slovenian fiscalisation - fixes

Fixes

  • When retrieving EU VAT service data, now a clear message is shown for a found VAT number, but there is no available data of it in the registry.
  • Auto payment feature - it used to create multiple To-Dos for bookings with multiple folios.
  • A fixed bug with the CSV export from Guest Profiles > Advanced Search which used to only include the profiles from current page.

Clock PMS+ (15 Dec 2020)

Payments Autopilot with Six Payments and Elavon

A new level of automation of payments and pre-authorizations for bookings. We have redesigned our infrastructure for credit cards and payment providers to offer you a next generation instrument - Payments Autopilot. It is an instrument through which you can fully automate each process related to credit cards:

  • Automatic payments of deposits in one or more steps;
  • Automatic payment of a bill before departure;
  • Automatic payment of a cancellation penalty;
  • Automatic pre-authorizations of booking or damage deposit amounts.

You can use the Payments Autopilot with the two newly integrated payment providers: Six Payments and Elavon. We are in a process of developing a completely new interface to Adyen to be used in our new functionality. The new Adyen interface will be released in 2021. Let’s dive deeper in the functionality of Six Payments and Elavon.

Tasks

You can set multiple Tasks, as each set task automatically watches for which bookings and when certain actions to be taken. Once set and activated, the task functions independently without your intervention. Before setting and activating an automatic task, you may preview what actions will be taken for the task-related bookings, i.e. for which booking what amount will be charged or pre-authorized. See more details below.

You may add new tasks or edit existing ones by going to Settings - Payments Autopilot. Each task has the following settings:

Active

It determines if the task will automatically be performed. For a task to be automatically performed, it must be set to Active. Before making a given task Active, please carefully check all its settings and which bookings fall in its next cycle, as well as what amounts will be charged. For more, see Test.

When?

From this section, you can set when a task to be automatically activated depending on the booking. Here are your options:

  • After Booking Creation
  • Before and Till Booking Arrival
  • After Booking Cancellation
  • Before Booking Departure
  • After Booking Departure

Additionally, you can also set "Offset hours" to move the execution of the task by the selected amount of hours. You should pay attention to the fact that the After triggers use the exact time of occurrence of a given event - Creation, Arrival or Departure. In contrast, the Before triggers use as their starting point 12 noon on the respective day - 12 noon on the date of arrival or 12 noon on the date of departure. You can use Offset hours to move the time of execution of the tasks to better match your needs.

Which bookings to process?

Use this section to specify to which bookings the task applies. If nothing is selected for a given filter, this filter is not taken into account, i.e. if you don’t choose anything in this section, the task will apply to all bookings. Here are the filters you can use:

  • Guarantee status. Leave it blank or select the guarantee status the task applies to (Guaranteed, Awaiting guarantee, Expired or Non-Guaranteed). We would like to remind you that the second and third statuses depend on the "Guarantee Period" setting in the Guarantee Policy.
  • Guarantee Policy. For bookings with certain guarantee policies - one or more.
  • OTA booking. If bookings are from the channel manager or not.
  • Credit Cards in Booking. You can process only bookings containing certain credit cards. The options are:
    • No Cards. In the booking, there are no credit cards. There is  no way to charge such a booking, but this filter can be used in combination with the  following operation: Execute 'On Success' actions only in the "What to do?" section. See more info below.
    • Guest Only. In the booking, there is one or more cards, but all marked as Guest cards, and none as ОТА cards.
    • ОТА Only. In the Booking, there is one or more cards, but all marked as ОТА (virtual) cards.
    • Guest and OTA. In the booking, there is a Guest card and an OTA one.
    • Included Companies, Excluded Companies, Included Agents, Excluded Agents. You can select among multiple companies and agents for each of these filters. Please don’t forget to click the Add button when you have selected the company or or the agent.

What to do?

In this section, you can specify what is to be performed by a given task.

  • Payment. The amount is charged to the credit card.
  • Pre-Authorization. The amount is only authorized (blocked) on the credit card. You can appropriate this amount later on or release it. The pre-authorized amounts are only kept for a certain period of time (usually 14 days), as this period depends on the payment provider, acquirer and credit card type.
  • Execute 'On Success' actions only. This option is a little bit peculiar. With it, no payment or pre-authorization will be executed, instead the task will proceed with the actions described below in the  'On Success' section. There, If you have set a To-Do to be created, the calculated amount from the next section will be added to the To-Do. This way, you can also use the task  for the organisation of tasks to be manually performed by you on the basis of the created To-Dos or other automations you need. See the On Success do section for more info.

Through the "Use" field you can specify which card (in case there is more than one) to be used for the payment or the pre-authorization. The possible options are:

  • Last credit card - the latest credit card in the booking;
  • Last OTA credit card - the latest credit card, but among the ones marked as ОТА;
  • Last GUEST credit card - the latest credit card, but among the ones marked as GUEST.

Please note that in the previous section, the choice of the OTA/Guest card refers to the filtering, i.e. to which bookings the task applies to, and here the choice refers to which of the cards the task is to be used. If you apply contradicting settings, the task may not be performed ever.

For what Amount?

How the amount for the respective operation should be calculated. You may select among:

  • Folio BALANCE based. It uses the folio balance. You can add or subtract (through a negative value) an amount from  it as a percentage or fixed sum. For example, you may not enter anything in the “%” field to get the whole balance amount of the folio, or, alternatively, you can enter -50% to calculate a half of the balance.
  • Folio CHARGES based. This method is similar to the model of determining the deposit amount. You can select the charges of which revenue groups to be included in the calculation. The obtained amount can be modified by entering a percentage of it or a number of nights (the average price per night is used for the calculation). There is an additional fixed amount which you can add or subtract. Here is an example: Enter 100% in the “%” field to get the whole amount of the charges OR 50% for a half of the amount of the charges of the selected revenue groups.
  • Booking required deposit based. It uses the amount due of the required booking deposit. It is the amount calculated as a deposit by the Guarantee policy minus all received payments so far. You can add or subtract (if a negative value entered) a percentage or fixed amount from it. Here is an example: Don’t enter anything in the “%” field to get the whole deposit due OR enter -50% to calculate a half of the deposit due.

On Success do / On Fail do

Through the above settings, you can define the payment or the pre-authorization task. In these two sections, on the other hand, you can set what to happen, if the payment/pre-authorization are successful (On Success do) or not (On Fail do). You can choose among the following options:

  • Send Booking email - select an email template to be sent to the booking. You can create different email templates containing various texts or instructions.
  • Close folio with - select if the folio is to be closed. For example, in case of an automatic payment of the whole balance amount before departure.
  • Set folio visibility on the Self Service Portal - change the folio flag specifying if the folio is to be visible on the Self Service Portal or not.
  • Set Guarantee status - On a successful operation, for example, you can make the booking guaranteed or vice versa..
  • Create a To-Do - If you wish to create a To-Do for the booking - enter some text. To the text, the calculated amount from the For what Amount? section will be added.

Limitations

Despite being  flexible, the system has its limitations. Automatic Tasks can work only if the booking contains only one open folio. It can contain other closed folios, but there should be only one open folio in the booking on which the task actions to be performed. If the booking has more than one open folio, the task is not executed, and a To-Do about it is created.

Test

Before making a task active, we strongly advise you to check if what this task will do with next cycle is the result expected by you. To preview the list of bookings or calculated amounts to be captured or pre-authorized, select "Test" from the task list.

Report

We have added a new report through which you can check the created tasks (all or referring to a specific booking) and the status of each of them. Go to "Control" -  "Booking Capture Transactions".

Six Payments and Elavon

We have added two new omni-channel payment providers. Both have similar features, namely:

  • Support for e-commerce transactions and PED terminals;
  • Tokenization with a card validity check for both online transactions and card present transactions at the terminal;
  • Omni-channel transactions - a terminal-tokenized card can be used for an online transaction;
  • Online and terminal payment and pre-authorization; 
  • Capture and release of online or terminal pre-authorizations;
  • Automatic tokenization - each payment or pre-authorization with card details creates a tokenized card that can be reused;
  • Strong Customer Authentication (3D) for online transactions. Only for Six Payment!
  • Tip processing at the terminal;
  • Support for partial payments;

Here are some specifics:

  • Elavon does not support Strong Customer Authentication (3D).
  • Elavon terminals require IoT devices. Six Payment terminals don’t require such;
  • Local bank methods (zofort, etc.) are not supported by Elavon. Six Payments are in a process of developing such support.

POS - Floor Plan

We have added a new POS feature letting you create one or more floor plans of the tables in your restaurant. This way you can much more intuitively connect the table numbers with their actual location in your restaurant. Here is a brief description of the new feature options:

  • Save the current table list. If you add one or several floor plans, they will appear as tabs on the Main screen from where you can change them or open the old table list. If your restaurant has more tables and they cannot fit in one floor plan, you can add separate floor plans for the different sectors or parts of it, e.g. "Main", "Bar", "Scene", etc.
  • To add floor plans, go to Management - Floor Plan.
  • Click Add and fill in a short name for the floor plan, an order number (in the tab), as well as if it is active (visible).
  • To edit the floor plan, select the “SVG Editor” from the list. Please note that this editor may not work properly on mobile devices. Use a laptop or desktop computer to prepare the floor plan. Thus created, the floor plan is supported by mobile devices, as well as it supports zоом-in/out and pan gestures.

Here is how you can use the floor plan editor:

  • First, select the floor plan size. You can test several sizes and select the one that is most convenient for the devices you use. Also, you can create different floor plans for different devices. It’s all up to you. To change the floor plan size, go to the SVG Edit in the top left corner - Document Properties. Enter the size and or choose one from "Select Predefined". Click OK to save.
  • You can use drawing tools (rectangular and other shapes) to draw walls or other static elements. You can also add a big rectangular as a background, if you wish.
  • If you have a ready-to-use image of your floor plan, you can use it directly. This way, your floor plan will be much more precise and you won’t need to draw anything.
    • If you use an image for your floor plan, it must be uploaded on the internet. If you don’t have where to upload it, you can use the Image Library of your Clock PMS+ account for this purpose (In your PMS account, go to Settings - Logos / Image Library). Upon uploading it, click the blue button and copy the Image URL field.
    • In the floor plan editor, from the toolbar on the left, select the "Image Tool" icon and click on the plan. In the URL field, enter the already copied URL.
    • Resize the image and adjust it through the mouse.

Here is how you can add dynamic elements to the floor plan:

  • You can add three different types of dynamic elements to the floor plan: Table name, Table amount, Colour overlay (red one, if the bill is not settled);
  • Table name. Select the text element icon (left menu) and click on the floor plan. Type '#' and then the table name, e.g. "#10", "#bar1", "#sc25", etc. This name will appear on the floor plan without the '#' sign and you will be able to click it to open the table. You can change the font colour and size to make it more visible;
  • Table amount. Same as above, instead of the '#' sign, you can type the '$' sign and the table number, e.g. "$10", "$bar1", "$sc25", etc.
  • Colour overlay. You can add a figure to be coloured in red, if the table has an order. Add a circle or rectangular by choosing the respective icon from the left toolbar. Then click the selection icon (the topmost one in the left toolbar) and click on the shape. Colour it in the colour denoting an empty table (e.g. green, white or another colour). To bind it to the actual table, in the "id" field (in the middle of the upper toolbar), enter "_" and then the number of the table. Here are examples: "_10", "_bar1", "_sc25", etc. To save the entered value, press Enter.
  • Click the Save button to save the floor plan (in the upper right corner of the screen). If “Active” is selected for the floor plan, it will appear on the Main screen. Click the respective table (Table name, Table amount or Overlay) to open a new or existing bill.
  • On the Main screen of the POS, at the bottom, you can select which floor plan (including the old table list) to be the default one for the device.


Other Improvements

  • Companies - automatic data retrieval by VAT number. We have added an option which, after entering the VAT number of the given company, retrieves the rest of the company data from the VAT register of the European Union. You can find this feature on the Company screen where next to the VAT number field there is a small search button. Additionally, this feature is also available on the Self Service Portal, the Kiosk and the self check-in when entering the company data in the folio.
  • Event - the edit of the event period also automatically moves the block to the new dates. The move of the block is made relatively to the new arrival, making it possible for the block to practically move together with the event. If the event period is shortened, on the other hand, the days dropping from the event also drop from the block.
  • Agent column in booking searches - Arrivals, In Hotel, Departures and Search.
  • On some screens containing larger data tables, we have fixed the position of the table header to make it visible when scrolling the page down, also implemented on the following screens: Occupancy Forecast, Guest/Company/Deposit Ledgers and Capacity counters by date.
  • Channel Managers - now the Commission recipient is also entered depending on the Company/Agent mapping.
  • We have added an option to delete all Screen Help boxes entered on the booking screen, the account’s home screen and the reports page. As in the screen help boxes, you can enter pure HTML, this may break the page if you enter invalid HTML. In such a case, you can use the new feature to restore the page functioning.
  • POS - the terminal payment button now works without being necessary to go through a screen, i.e. after pressing this button, the terminal is immediately activated. If you wish to pay through the terminal an amount that is different from the folio balance one or when you need to use a different terminal instead of the one set by default, you can access the old screen by clicking the small button next to the terminal payment button.
  • POS - we have improved the “Transfer to room” screen to make the whole process faster. The redesigned screen allows you when selecting a booking to use of one of these three options:
    • Room. This option is similar to the old approach - the selected booking is saved in the bill and you can continue working.
    • Transfer Now. This option makes the transfer to the booking and closes the bill. This way, you save a few clicks and the transfer happens faster.
    • Custom View. This option saves the booking in the bill and immediately opens the Client View screen, and you can pass a mobile device to the client. Under the Client View mode, the client can preview the bill, sign and leave a tip which will be transferred as an amount due to the hotel room folio. The return to the system occurs after the waiter enters a password which automatically redirects the user to the transfer confirmation screen.
  • In the Occupancy and Charges Report, the Capacity and OOS data are now in separate columns.

Integrations

  • Slovenian Fiscal Interface - Bug fixes
  • API enhancements:
    • occupancy_forecasts
    • person_titles
    • block_pickups
    • booking_charges_by_source
    • door_keys
  • Zapier integration enhancement:
  • The following details are now included in the booking details available with Booking Create and Booking Update triggers:
    • Guest_title;
    • Marketing_segment;
    • Accept_marketing_emails.

Fixes

  • Adyen - a change made for more precise submission of delivery_date data
  • Booking’s main guest passport images - they used to disappear on closing the booking document;
  • Virtual rooms with different room type components - incorrect calculations of the nights and bednights in Bednights, Occupancy and Charges и Occupancy and Charges DMY reports. The logic accounts for the nights and bednights for the booked room, i.e. for the virtual room.
  • Occupancy/Revenue Forecast and Pace Report - used to show wrong number of bookings when virtual rooms used;
  • Function sheet - the descriptions for the staff didn’t visualise if the there was nothing entered in the other field - Description;
  • A fixed bug with the log of the deleted rates when their names were too long. This caused errors on deletion;
  • With no languages defined in the system, the attempt to create a Visual Builder template resulted in an error message;

Clock PMS+ Update (9 Nov 2020)

Commission processing - by agents and revenue groups

We have improved the Commission processing logic, so that both Companies and Agents can be processed. Furthermore, we have added a possibility to determine the revenue groups for each Agent/Company on the basis of which the commission to be calculated.

The old functionality of the commission processing module allowed commissions to be calculated only if there was a Company selected in the booking. To make it possible for the module to also to work with Agents, we have made the following changes:

  • In the booking's Commission section, we have added a new field - Recipient. The possible values of this field are  "Company" and "Agent". This value specifies whether the commission is to be calculated for the Agent or the Company selected in the booking.  
  • With all new bookings, the Agent values are completed by default.
  • With all already created bookings, the value in this field is "Company".
  • If using the old organization of work, under which Agents were selected in the Company field of the booking, you will be able to continue using the module as before, but for each new booking, you will need to change the value completed by default in the Recipient field from "Agent" to "Company".
  • On the very "Commission Processing" screen, there are no changes. The system calculates commissions based on the new field in the booking.

We have additionally changed the way of determining the basis for the commission calculation. Up till now, it was calculated based on the Rooms and Packages revenue groups.

  • Now you can determine which selected revenue groups to be used as a basis for calculating the commission. It refers to each Agent individually. 
  • On the edit screen of each Agent (Company), you can select the revenue groups from the "Commission" section
  • For the existing Agents (Companies) with a completed commission field, the revenue groups are selected as before -  Rooms and Packages. For the newly created Companies, select the checkboxes you would like.

Guest and Company Ledgers - new account receivable figures

This change has been delayed. We have received a number of signals that we should preserve the old logic of the ledgers, so that the traceability for last periods is ensured. The new logic will be released as a new set of reports.

Up till now, there was a difference between the Accounts Receivable Report and the data in the Guest and Company Ledgers. This difference was determined by the different principles under which these two reports used to work, namely:

  • The Accounts Receivable Report works based on closed folios regardless of whether the charges in these folios are for past or future periods, the whole amount is reflected as Accounts Receivable..
  • Guest / Company Ledgers work based on the recognised revenues, i.e. charges for future periods were not included in these ledgers, even if these charges were in closed folios.

This difference between the two reports is very confusing for most of you. This is why we have decided to make the following changes that we hope will bring more clarity to these reports:

  • The future date charges from closed folios are now contained in a new separate "Total future charges" column in the Ledgers.
  • This column is included in the amount of the Accounts Receivable in the Ledgers.
  • Additionally, we have made one more small change to make the two reports comparable: The amount of the overpaid closed folios is now treated as a deposit. In our opinion, this is the more accurate approach compared to the practice up till now for such charges to be treated as negative Accounts Receivable.

After these changes, the data of the two reports can be compared, bringing one more benefit - through the Ledgers, you can now get data of the Accounts Receivable for each past date.

The Trial Balance also reflects these changes and now contains the data of future date charges in closed folios as well as the formulas for the check amounts in the Trial Balance have changed to include these amounts.

Please note that the above changes to the Ledger reports change the way these amounts are treated, including for past dates. This will also change the values and amounts in them. The Trial Balance, in turn, will not change, because its balance is based on the difference between revenue and payments which do not change for past dates.

New templates and modules for Visual Builder

We have added new Visual Builder templates for Event (BEO), Booking Enquiry and folio emails. To use the new templates, open the Visual Builder for the respective email category and select "Templates" from the feature bar. Click open the respective template to preview it. Choose the template through the "Select" button.

Please note that the selected template will overwrite the whole content you have opened to edit in the Visual Builder.

We have also added new Modules. In contrast to templates being examples of whole emails, modules are ready-to-use partials you can add to the template you are editing. For example, such partials are: the Google map of your hotel location, Self Service Portal links, the booking data table, the booking table for multi-booking confirmation, activity and charge tables in BEO, etc.

  • The Modules are divided into categories depending on the email types they are intended for. 
  • Through the preview type button, you can change the preview size and see the larger images. 
  • Add the desired module by dragging and dropping it to a place in the email of your choosing. 
  • After adding the respective module to your email, you can change its colours, fonts and content.

POS - optimisations

We have made the following changes to make the performed operations faster and in a fewer clicks:

  • Default menu group. A new setting on the POS settings screen to let you choose a default menu group. If a default menu group is thus chosen, the posting screen (for a new or existing bill) will open with the selected default menu group instead of showing all menu groups. You can use the new feature to directly open your most used menu group. You can also use a different approach. Create a new menu group and use it to add all of your best-selling articles giving you the quickest access to them.
  • Transfer to a room - If you have allowed transfer to only one hotel, the hotel selection step is automatically skipped.
  • Transfer to a room - New and more convenient room search interface. As the room search interface appeared small and difficult to use on mobile devices, we have redesigned the screen to make it comfortable for use even on mobile devices.  
  • Client View - now the client signature takes one button click less. Now the respective screen opens immediately after filling in the tip amount.
  • Client View - when returning from the screen to the system, you are automatically offered the room transfer option, if there is such one selected. This way we have to further speed up the room transfer process in combination with the Client View.

We would like to remind you what you can achieve if using the Client View in combination with the Room transfer:

  • The Client View is a screen that can be used by your guests to see their paperless bill, add a tip and even sign it
  • This is how you can easily and safely encourage tips even for internal credits.
  • Before choosing the Client View option, select the guest room by checking the guest's name. 
  • Then pass over the tablet to the guest for preview and signature. 
  • At the end, click "Close" and return to the system by entering your password.
  • Confirm the transfer. That's it.

POS - print spooler for background printing and ESC/P support

We have developed a print spooler that can be activated on a Clock IoT Device:

  • The printing from POS can occur in the background, completely eliminating the need to wait for the print screen to close when printing. Up till now you had to wait for the printing operation completion to proceed to the next bill. Now the screen closes immediately and you can continue your work with the next bill, and the printing itself occurs in the background.
  • The print spooler works on a Clock IoT Device, so you need to have such one. You can contact our Sales Department to buy it, if you don't have one. The Clock IoT Device is to be in the same network where your printers are.  You don't need a new Clock IoT Device, if you already have such one in the network of your printers. Contact our Support Centre to activate the print spooler on the respective Clock IoT Device.
  • Support for cheaper printers. We have also developed a new driver  for the print spooler allowing you to print on plain printers supporting the ESC/P (Epson Standard Code for Printers).Printer requirements:
    • To support the ESC/P protocol.
    • To have a TCP network port via which to connect your printers to your network. It is also possible to connect them through WiFi, if the printers have such an interface.
    • The Clock IoT Device needs to be in the same network with the printers.
    • You need to have localised your region, i.e. the printers to have necessary "code tables" for your language.

Please note that the ESC/P driver is still in its beta version. Here is why we recommend you to first test the printer model selected by you before buying it. After gathering enough info, we will also start supporting a list of printers which are tested and proven to work.

To set up an Epson TM-i or ESC/P printer to print via the print spooler: open the printer edit screen and select "IoT device connected to".

Interfaces:

  • LightSpeed POS (L series) - Improved transfer of daily sales.
  • LightSpeed POS (L series) - Now it is possible to transfer a tip, even if the bill value is 0 (100% discount).
  • HESTA Export - fixes.

Fixes:

  • Some texts were not visible as they coincided with the font colour of certain themes - the Self Service Portal Registration Cards as well as the texts in the Google map boxes in the WRS.
  • Per-guest rate copying  - it displaced the order of guest levels.
  • A closed company folio with charges transferred from the POS - the note couldn't be edited, for example.

Clock PMS+ Update (28 Oct 2020)

Email templates - a new visual builder

Experiencing difficulty creating beautiful and responsive email templates for your guests. This should be a thing of the past. 

Our new visual email builder will give you the most modern and easiest way to create your own stylish templates that meet all technical requirements. Up till now such tools were only present in specialised email marketing products, however, we have made these tools available for you, too. Furthermore, our visual email builder is perfectly integrated with Clock PMS+, as well as with the system parameters for dynamic content.

For the quick creation of emails, we have added special modules, a gallery of email templates made by us, as well as a possibility for copying your already existing email templates.

From a technical point of view, the templates based on the new visual builder, comply with the requirements of various email clients. Considering that they have a responsive layout we can confidently say that your emails will have the best presentation both on desktop and mobile devices. 

Another very useful feature is the work with images. Through the image editor, you can very easily crop, rotate or resize images, for example. The built-in gallery gives you a quick access to all images you have at least once used allowing you to reuse them in new emails. The Banner component lets you position, edit and move texts and logo onto another picture, i.e. to make a composition which then can be edited or translated into various languages.

In Clock PMS+, you can continue using your old templates, however, they are not compatible with the new visual builder. If a template uses the legacy or the new editor depends on the new setting added by us to each template - Editor. Open the template edit screen and select Visual Builder in the Editor field. Save and then select Templates and Edit. Instead of the legacy editor, the new Visual Builder editor will open:

  • Click the the Templates button at the top of the screen to see the predefined templates. Thus selected, this template will overwrite the current template.
  • Use the Copy from button to copy the whole content from another template and language. Thus created in one language, this template can easily be translated into another language. This feature can be used to create your own templates to be then used as a starting point for a new template. Please note that the selected template will overwrite the content of the current one.
  • Undo and Redo buttons for the last operations;
  • A button to see the HTML source of a template for advanced editing purposes;
  • Preview button opening the template in a new screen;
  • Save button to save the template;

To add a given parameter to the template, just position your cursor to the desired place in the text and select the parameter from the Merge Tags menu (see the next screenshot). Soon we will also publish an article on how to use the template parameters on our Support portal. 

Here is a very brief description of the feature and the editor logic:

  • In the first tab - Appearance, you can find options for basic stylization of colours, fonts and background colour or image;
  • You can also change the font or the colour of any element added at a later stage, but if you use the basic stylization, you can spare yourself much work on the stylization of each individual element;
  • In the second tab - Content, you will find the elements needed for building the content of your email;*
  • The most basic elements are Structures. They define in how many columns your content will span - 1, 2, 3 or more, as well as the ratio of these columns. In each email, you can combine multiple structures, i.e. one structure with one column, followed by one with two columns, and then - once again a structure with one column, etc.
  • In each of the columns of the structure, you can place texts, images, banners, buttons, and other elements to be found in the Blocks group. For each block, there are related settings appearing when the given block is selected;
  • In Modules, you can find parts created by us to be added to your template. Then, if needed, you can change their colours and fonts to better match your design.

Related support articles and templates coming soon.

Events - a new screen for quick date edit of dates, PAX and quantities

To give you more options for a quicker and easier edit of your more complex events, we have added a completely new screen. Its main purpose is to let you change the event dates and the number of guests in all activities and charges in a few clicks only. On just one screen, you can see and edit:

  • Event period;
  • Dates and quantities of charges posted to the folios of the Event;
  • Date and PAX for every Meeting Room Booking;
  • Date and quantity of the charges related to Meeting Room Bookings;
  • Date and PAX for every Catering;
  • Date and quantity of the charges related to every Catering;

To access the new screen, open the Event and select Functions - Bulk Update

For even quicker and more comfortable edit, we have added the Autofill featureto this screen. Use it to prevent the multiple entering of one and the same data on the Bulk Update screen.

Here is an example: If you have 4 activities and 10 charges related to them you would like to transfer from 10 Aug 2020 for 15 Aug 2020, on the Bulk Update screen, you need to enter the new  value of 15 Aug 2020 14 times. Here the new Autofill feature comes to your assistance. You simply open the Autofill screen and enter 15 Aug 2020 next to the old value of 10 Aug 2020 just once. As a result, all 14 values will automatically be completed at once. The same applies to the quantities, too. Click the Save button on the Bulk Update screen to save the changes.

A new Self Service Portal page with the booking details

The page contains info of the standard booking confirmation - period, room type, rate, prices, guest details, Google map, guarantee policy description, as well as the rate description. On the new page, you can also find a link to the Self Service Portal and its features.

This page has been designed to simplify booking confirmations, i.e. instead of creating complex booking confirmations containing all the booking info, you can focus on your email style replacing all of the booking info with a link and use the saved space upsell offers and marketing messages. The parameter for inserting a link to the new page is called:  Self Service Portal - booking details URL

Here is how the booking confirmation could look like:

Other

To improve the technical accuracy of the HTML code of the emails being sent, we have introduced a new logic analysing the email content. Depending on whether it is a whole HTML template or an HTML partial, the necessary HTML and CSS code is added. This will improve the compatibility of the HTMLS emails with the various mail clients. Furthermore, the analysis is also used by the CK editor, where there is editing before sending.

Interfaces:

LightSpeed POS (L series) - Improved transfer of daily sales.

Fixes:

  • When guaranteeing bookings from the Self Service Portal, no entry was added to the change log of the booking and no push notification was sent.
  • Ledgers - the double conversion of charges in some cases led to discrepancies in the folio balance. As a result of these discrepancies, the folios remained in the ledgers despite being already balanced.

Clock PMS+ Update (7 Oct 2020)

Rates Reflecting Adults and Children

We have added support for adults and children in other places in Clock PMS+ to let you fully use the pricing functionality in relation to the age of children in the system.

  • Web Reservation System. We have added fields for the age of children on the first screen of our Web Reservation System. The entered ages will be accounted for during the rate calculation  and the guest will be shown the precise price. These ages will be transferred to the bookings made in the WRS. By default, the fields for children are HIDDEN on the first page. To make them appear, fill in the Min children age and Max children age fields in the Children ages section of the WRS settings. The entered values will be available for selection by guests.
  • Booking Enquiry. We have also added fields for children ages to the Booking Enquiry. Apart from being accounted for in the Booking Enquiry, these ages are also transferred to the bookings made on their basis.
  • Upsell Rates. In the calculation of Upsell rates, children ages are also accounted for.

Blocks

Blocks – Manual prices 

For a greater flexibility and efficiency of the determination of the prices for Events and their blocks, we have introduced a new feature – Manual price. You can use the new Manual price functionality to quickly and easily set the room price per day for a block.

The Manual price in the block, similarly to the booking, also works in combination with the rate. Thus, charge templates and the related taxes in rates and packages are accounted for, resulting in more precise calculation of the net price of the block. The set Manual price will be transferred to the block-related bookings.

Blocks – Block name and multiple similar blocks

We have removed the restrictions on the doubling of blocks in one event. Now you can add multiple blocks for one and the same room type. They can have the same or different attributes – rate, status, etc. To be able to differentiate the blocks, when several similar blocks are created, we have added the name block field. This way, you can name each block in accordance with your needs. For example, you can have a separate block for double rooms, named 'Delegates', and another one called 'Organisers' .

Other

  • Kiosk – we have changed the settings related to the payment interfaces of Adyen, so that the POS terminals of the stationery kiosks can be used along with the e-Commerce payments in the Online check-in mode.
  • On the Capacity counters screen, you can now find availability information (quantity remaining for sale), as well  the sold quantity for the day.
  • New liquid parameters in the Booking Offers. Through the new parameters, you can include information of the Guarantee policy and the Rate in your custom template. The new parameters are, as follows:: booking.guarantee_policy.t_name, booking.guarantee_policy.t_description | html, booking_offer_item.rate.t_name, booking_offer_item.rate.t_description
  • We have increased the allowed file size for CSS files for the WRS.

Interfaces

  • SmartHotel – changed XML rate upload, so that prices for 1 and 2 guests are submitted for the purposes of the compatibility with Goldres. The RoomStays comments are also added to the booking notes.
  • Data added to API endpoints: compannies, events, meeting_room_bookings. A new caterings endpoint providing access to information of the event-related catering entries.
  • HESTA export Switzerland – Export of statistical data in compliance with the requirements of The tourist accommodation statistics (HESTA)
  • IDeaSinterface improvements. The decision import has been enhanced and now supports a maximum number of 390 days in the future for the decisions provided by IDeaS instead of 365.
  • LightSpeed POS (L series) -  A new possibility added for setting the document type and contractor data for the accounts to which the daily turnover from LightSpeed is transferred.

Fixes

  • The input of a wrong password during login used to return an ambiguous error message for the user
  • The copying of a Per-Guest rate didn't copy the guest levels.
  • The login didn't work on Mac/iOS Safari 14
  • On closing folios in rare cases, the following error appeared: Billing to has already been taken
  • WBE – The Company Code field used to lose its value upon the user's going through the Availability Calendar and product selection from there.
  • With Hurdle rate deletion, the main rate connected to this Hurdle rate was also deleted.
  • A fixed issue with the algorithm for the calculation of the Per-Guest prices in case of several children at the same age.
  • We have fixed a POS bug causing the appearance of an ambiguous error for the user when a zero-valued invoice.

Clock PMS+ Update (22 Jul 2020)

Per-Guest Rates

For the hotels whose prices depend on the number of guests or adults and children, we have introduced a new feature which can be used by hotels to manage their prices. This new functionality can considerably reduce the number of the supported rates. One rate can be set to take care of all the combinations of adults and children. The system is very flexible and can calculate a wide range of pricing cases. In contrast to other guest-based rates, with our new feature, you define the very guest levels and conditions for price calculation. This way, you can solve simple cases in a simple way, and the complex ones - through the setup of more guest levels of a more complex structure.

Use the Per-Guest rates to define a price depending on how many and what kind of guests will use the room/unit. The feature allows you to define a price considering both the number of guests and their type: adults or children. It is even possible to determine various prices for children depending on their age. The Per-Guest rates can also function as the derived ones letting you easily create package rates whose prices depend on the number of guests.

We will examine a few examples to illustrate how exactly the new Per-Guest rates work.

Example 1 - Flat Per-Guest Rate

To make a rate to a per-guest one, open the rate edit screen and simply tick the Per Guest checkbox. Let's assume the rate price, you have entered for the season or the date is EUR 100. This will be the result:

  • If the booking is for 1 guest - the price per night will be EUR 100;
  • If it is for 2 guests - EUR 200;
  • If it is for 3 guests - EUR 300, and so on;
  • In other words, for each guest (adult or child), the price will be taken from the rate;

See below how flexible the new system can be.

Per-Guest Price Levels

The more complex per-guest pricing cases are solved through the use of the Guest Levels feature. Through these levels you can determine a different price for each of the guests depending on the number of adults and children, as well as considering the children ages. Please remember the following principles:

  • The order of levels is important, as prices are looked for in accordance with the order of their addition.
  • For each next guest, a next level will be sought. If there is no such one, the last one available will be taken.


The Per-Guest price levels can be defined in the rate itself. Thus defined, these levels will be valid for all days. If you would like for the price to vary depending on the season, you can set new levels and their values for a given season. This way they will have a priority over the ones set in the rate. It is not possible to set different levels for each single date.


The addition of levels is done from the "Guest Levels" screen. You can find a link to this screen in the Rate search (in the dropdown menu next to each rate, as well as in the rate table next to each rate).

We continue with the examples:

Example 2 - The price for the first guest is EUR 100, for each next one - EUR 80

  • In the rate for the date or the season, fill in EUR 100;
  • Add one level - "Adult/Child" with EUR 80;
  • For the first guest, the rate price will be used. For the second one, the next defined level will be used, i.e. EUR 80. For each next guest, the price of EUR 80 will also be used, as this is the last defined level.

Example 3 - The price for the first guest is EUR 100, for the second one - EUR 80, and the night for the third one will be free of charge

  • In the rate for the date or the season, fill in EUR 100;
  • Add one level - "Adult/Child" with EUR 80;
  • Add one more level - "Adult/Child" with EUR 0;
  • For the first guest, the rate price will be used. For the second one, the next defined level will be used, i.e. EUR 80. For the third guest the next defined level will be used, i.e. EUR 0. For each next guest (if the room/unit allows it) , the last available level will be used, i.e. EUR 0;

Example 4 - the price for two guests - EUR 200, the price for the third guest EUR 50

  • In the rate for the date or the season, fill in EUR 200;
  • Add one level - "Adult/Child" with EUR 0;
  • Add one more level - "Adult/Child" with EUR 50;
  • For the first guest, the rate price will be used, i.e. EUR 200. For the next guest, the price will be EUR 0. This way, the price for one or two guests is one and the same. If there is a third guest, the price for this guest will be EUR 50.

Adults and Children

Let's examine a few cases where there is a difference between the prices for adults and children. The prices for children are once again defined based on the level principle, but the prices for children depend on the fact with how many adults these children are in the room/unit. In other words, they depend on their position in the structure of defined Adult/Child levels, and, in particular, after which Adult/Child level they are. Regarding the prices for children, please remember the following principle:

  • For each child, the system looks for a level, but after the level for an adult. If there is no next level - the last available is taken. If there are no levels for children or the system does not find a level after the one for an adult - children are treated as adults.

Here are some examples:

Example 5 - The price for an adult is EUR 100, and for a child with an adult - EUR 50

  • In the rate for the date or the season, fill in EUR 100;
  • Add one more level - "Child" with EUR 50; 
  • The price for the first guest will be the rate price - EUR 100;
  • The next guest: if an adult, the price will also be EUR 100, as this is the next level for adults. If a child, the system will take the level for a child with one adult - EUR 50.

Example 6 - Price for an individual room EUR 150, a second adult - EUR 100, children with one adult - EUR 80, a child with two adults - EUR 0

  • In the rate for the date or the season, fill in EUR 150;
  • Add one 'Child' level for EUR 80. Please note the 'Child' level comes right after the basic price, i.e. this is the price for a child with one adult;
  • Add one 'Adult' level for EUR 100;
  • Add one 'Child' level for EUR 0;
  • If 1+2 - the price for the adult will EUR 150, and the children will be charged at EUR 80, as this is the position for children with one adult;
  • If 2+1 - the first adult - EUR 150, and the second one - 100, and the child - EUR 0, as this is the position for children AFTER the second adult.

Percentage

Besides fixed values, the levels can form a price through percentage of the basic price. This way, the levels are relative to the basic price. Actually, you can use both a fixed price and a percentage one, if having such cases. Please note that  percentage means the percentage OF the basic price, and it is NO DISCOUNT from the basic price. In other words, if you wish to introduce a 20% discount, you need to enter 80% of the basic price.

Here is an example:

Example 7 - Price for two guests - EUR 200, the third guest, if an adult, will be at the 50% of the price for a bed, and, if a child, free of charge

  • In the rate for the date or the season, fill in EUR 200;
  • "Adult/Child" level: 0%;
  • "Child" level: 0%;
  • "Adult/Child" level: 25% (because it is 50% of the price for a bed, and not the room price).

Example 8 - Price for an adult - EUR 100. A third adult: 40% off discount. A first Child with one adult: 30% off discount. A second Child with one adult: 80% off discount. A Child with two adults: free of charge

  • In the rate for the date or the season, fill in EUR 100;
  • "Child" level: 70%;
  • "Child" level: 20%;
  • "Adult/Child" level: 100%;
  • "Child": 0% level;
  • "Adult/Child" level: 60%.

Different prices based on children ages

If the prices for children differ depending on their age, then you can solve these cases by adding the age up to which the level is valid for. The age is treated on an inclusive basis, i.e. if the level is valid for up to 5 years of age, it will also for 5-year-old children, but not for 6-year-old children.

Example 9 - Price for an adult - EUR 100; Child at up to 5 years of age - free of charge; Child at up to 12 years of age: 50% of the basic price

  • In the rate for the date or the season, fill in EUR 100;
  • "Child" level, up to 5 years of age: 0%;
  • "Child" level, up to 12 years of age: 50%.

It is important to knowthat you need to enter the children ages in each booking. If you have a booking without the children ages, and the rate only has levels with a specified age, for the children from the booking without an age, the proper level WILL NOT be used and will be treated as adults.


Example 10 - Price for a double room - EUR 200; Extra bed: EUR 50 for an adult, EUR 25 for a child at the age of up to 12, EUR 0 for a Child under the age of 5

  • In the rate for the date or the season, fill in EUR 200;
  • Adult/Child level: EUR 0;
  • "Child" level, up to 5 years of age: EUR 0;
  • "Child", up to 12 years of age: EUR 25;
  • Adult/Child: EUR 50;

Per-Guest Derived Rates

The Per-Guest and "Guest Levels" feature can also be used for derived rates (fixed and percentage amounts). In this case, the surcharge/discount defined in the derived rate is accounted for each guest. Here are examples:

Example 11 - A rate with breakfast, adding EUR 10 for an adult, and EUR 6 for a Child

  • In the rate for the date or the season, fill in EUR +10;
  • "Child" level: EUR 5;
  • Thus defined, the rate will add EUR 10 to the base rate (let's assume, it is a room-only one) for each adult, and EUR 6 for each Child.

You can also use the age filter to determine different prices for breakfast, for example, for the different ages.

Example 12 - A rate with breakfast: Adult - EUR 10,a Child of up to 12 years of age - EUR 6,a Child of up to 5 years of age - free of charge

  • In the rate for the date or the season, fill in EUR +10.
  • "Child" of up to 5 years of age: EUR 0;
  • "Child" of up to 12 years of age: EUR 6;

Here is the behaviour of the percentage derived rate, if marked as a "Per-Guest" one

Example 13 - Price discount - 5% for each adult and 3% for each Child

  • In the rate for the date or the season, fill in EUR -5%.
  • "Child" level: -3%;
  • If you have 2 adults and 1 child in the booking, the discount to be subtracted from the basic price will be 13% (5% for the first adult + 5% for the second one, and 3% for the child). Please note that the discount is on the price calculated from the base rate, i.e. on the price per night.

Per-Guest Rates and Channel Managers

Unfortunately, the new rates ARE NOT compatible with channel managers, as the new Per-Guest rates actually incorporate multiple prices simultaneously. Each price is calculated based on a specific enquiry about the number of guests, adults and children, even it can vary in terms of the ages themselves. For this reason, it is not possible for one rate to be mapped (channel manager mapping) to a product defined in the channel manager.

If you map a Per-Guest rate to a product/rate in the channel manager,the price from the rate will be sent to the channel manager - the price filled in or calculated for a date or season. In this case, the Guest levels cannot participate in the calculation.

Other Improvements

  • Agent as a segment in reports. We have added Agent as a segment in the Booking Segmentation Report, Charge Segmentation Report and Bednights Report. Through the new segment you can easily see the amount of charges belonging to bookings with an Agent selected. You will also be able to make a breakdown of bednights, nights and guests.
  • Open Folio Report breakdown of Events by check-in status. Similarly to bookings, Events and the related open documents are now arranged by the status of the respective Event. This way, it is easier to see all of the remaining open Event documents, for example, which have been voided or the ones are already sent.
  • New translation resources for credit card labels. The labels in the credit card forms of the payment processors (Adyen, Authorize.net) can now be translated. To add your custom translation in different languages, fill in the fields in Languages and Texts - Credit Card/Translations.
  • New translation resources for the WRSThe WRS steps designated as '1','2', etc. can now be replaced by text through the new translation resources to this end. To translate the steps, check out the fields in Languages and Texts - Web Booking Engine Translations. There are two new translation options added:
    • Active, when the customer is at the respective step;
    • Inactive, when this step is forthcoming or already passed;

Fixes

  • In specific situations, the deletion of passport images resulted in a missing image icon;
  • Users without explicitly granted 'Personal Data: Access' right weren't able  to send a booking;
  • Users without explicitly granted 'Company: View and Edit' weren't able  to issue an Event document;
  • If 'Closed future charges as revenue' option is selected in the Tax settings, it was not possible for deposit documents to be issued
  • Bookings with a selected company having many related rates couldn't be edited, as the edit screen used to open very slowly.
  • The custom group confirmations  weren't loaded properly, if too many bookings were selected.
  • POS - with the activation of fiscalization and use of certain settings, the closing of a POS bill redirected to the A4 printing of the following document.

Integrations

  • Slovenian Tax Certification of Invoices Act (ZDavPR) - Clock PMS + is now compatible with the fiscal requirements in Slovenia (Beta) - Here you can find out how it can be activated.

Clock PMS+ Update (16 Jun 2020)

Web Reservation System for Companies and Agents.

The Web Reservation System can now be used not only by individual customers, but also by companies and agents. To this end, we have added a new field at the first step of the booking process in the WRS - "Company/Agent Code". In this field, the individual code of each company or agent can be entered. As a result, the WRS will only visualise the rates associated with the respective company or agent.

  • The results in the Calendar will also comply with the entered parameters at the first step in the WRS. 
  • This way, the company itself can create bookings in accordance with the prices agreed with your hotel. 
  • At the end of the booking process, you have the option to specify if you wish to use the data of an already existing Contact person of the respective company or agent for the data of the guest in the booking or to make a booking for another person. 
  • Upon the creation of the booking in the PMS, the company or the agent, as well as the contact person (if any) are automatically completed in the booking. This new feature allows you to clearly distinct the received bookings. Below you will also find info of the changes related to the management of company rates through tags.

Settings:

To each company, we have added a new WRS section. The Access code and Role fields should be completed, so that the respective company or agent can have access to the Web Reservation System. Each company screen should contain the special rates of this company.

Rate Tags for Companies and Company Agreement Expiration

The old functionality that managed which rates were available for use by a company allowed a thorough control, but, on the other hand, it was very intricate, especially when working with many companies while having many hotels. Therefore we have introduced changes that will beyond any doubt be very useful for you.

We have added an option for adding one or more rate tags to the companies in Clock PMS+. This way, the company can use all rates having this tag. Here is one practical example: You have standard prices for companies depending on their turnover, e.g. Level 1 companies and Level 2 companies. Each level has 6 different rates for the different room types. With the new feature you can set the rates of each tag level (respectively Level 1 companies and Level 2 companies). So in each company, you have an agreement with, you can add the specific tag instead of adding each rate applicable to the company. In a click, you will set 6 rates to be used by the company.

The feature is even more useful, if you have multiple hotels. In this case, the addition of a tag to the company will make it possible for the company to use all rates related to this tag in each of your hotels. This is how easy it is to manage the agreement of this company across your chain of hotels. This way, the tags used in one hotel now can be offered for use in the other hotels, too. In other words, tags can now be used at the hotel chain level.

If you prefer to use the functionality in the reverse direction, you can name rate tags after companies (e.g. 'Coca-Cola', 'Bosch', etc.) and add them to the respective rates.

The change to the tags of the rates is immediately reflected in the company-rate relation, i.e. if a tag already used by companies is added to a rate, this will mean that this rate will immediately be included in the agreements of the companies having this tag. It is all the same with the case when a tag is removed from a rate, then this rate will be excluded in all company-rate relations. The old feature for connecting a company to a specific rate has been preserved and can be combined with the new one, i.e. a company can have both rate tags and specifically related rates.  

For more precise management of the agreements with companies, we have added one more field - "Rate validity date". You can enter the date until which the agreement on special prices for a company is valid. After this validity date, the special rates related to this company will no longer be offered in the WRS or on the Rate and Availability screen. If this date is not entered, such rates will always be offered.

For Rates: The rate tags for each rate are set from the rate edit screen - 'Settings' - 'Rate Plan' - 'Edit/Tags' dropdown menu. Each rate can have one or multiple tags.

For Companies:  The rate tags are set from the company screen's Rates section by clicking the Add Rate Tag button. Each company can have one or multiple rate tags. The new validity date option is set from the company edit screen.

Online Check-In Improvements

We have made multiple improvements to the Online Check-In process to make it more functional, convenient and traceable.

  • We have bound the Self Service Portal and the Online Check-In. This way, you can provide an easier and more comfortable experience for your guests. In the Self Service Portal, now you can add a link (button) to access the online check-in. To this end, there is a new setting. You know that the online check-in is performed through a kiosk app. To bind the Self Service Portal and the online check-in, in the Self Service Portal settings, you need to select the 'Kiosk' specially created for the online check-in process. This setting in the Self Service Portal is 'Online check-in' - 'Kiosk'.
  • Quick online check-in access link from emails sent to guests. We have added a new parameter to the Guest Mailer through which you add a direct link to the online check-in. With this secure link, no PIN is required. This way, yet another obstacle to the online check-in process has been removed resulting in greater conversion.
  • We have added a new booking status showing if the guest has passed the online check-in procedure. This way, the staff at the reception can better know at which stage of the check-in  process and the data verification the guest is. The new status can be seen on the Arrivals list (see the icon description) as well as on the booking screen (straight after the booking status in the upper left part of the screen). If for some reason you need the guest to pass the online check-in procedure again, you can restore this status to its initial state. This is done from the Booking screen, namely the Functions dropdown menu - Restore online check-in.
  • New 'Guest credit card required' option. If enabled, this setting will require the guest to enter a credit card of their own to complete the online check-in process. The card will be required in the events when the booking has no such guest card, or the available card in the booking is an OTA virtual OTA card. Additionally, the feature allows the guest to change the card used for payments. In other words, there might be an already entered guest card, and the guest may select not to use it as a main card for payments, but to add another one. At the back office, both guest cards, the initially added card and the newly added one, are visible.
  • Bill payment. Now you can change the behaviour of the online check-in procedure in terms of whether the guest is required to pay their bill or not. The option is called "Pay at check-in". You can find it next to the Kiosk specially created for the online check-in process (on the Kiosk settings screen).
  • Room allocation. We have changed the online check-in procedure and it no longer allocates rooms. Please note that if the Mobile Key support option is active, the old behaviour will be preserved and a room number will always be automatically allocated, as it is necessary for the mobile key issue feature itself.

    We would like to remind you that if you find an issue with the guest data, now there is an option for removing the online check-in status of a booking and sending an email to the guest asking them to go through the online check-in process again. Next we will once again talk about the card verification.
  • To-Dos. With each online check-in, a new To-Do is added. This way, you can organise a guest data verification process immediately upon the online check-in. The new To-Dos are grouped in a new To-Do channel. To see these To-Dos on the To-Dos screen, you need to select the new Online check-in channel from the To-Do Channels settings screen.
  • Verified. You can mark each registration card as "Verified" (on the Registration Card edit screen). We have added a clear visualisation (icon) showing which cards are verified (the Registration card section in the booking) and whether all cards from the booking are verified (the Arrivals screen).
  • Photo IDs and image recognition. Due to the fact that the passport image recognition (if it is actually a passport image) doesn't work properly for the ID documents of some countries, we have added a new setting allowing you to switch off this feature. The new option is "Required. No image recognition". If selected, the guest is required to provide a Photo ID, but no additional verification is performed whether it is a real Photo ID. Instead, the provided image is directly added. This way, the possible error that the image doesn't show a real passport is avoided. Such an error used to confuse guests.

Occupancy/Revenue Forecast and Pace Report

We have added a new report that:

  • Can provide a forecast of the block revenue of the Event, along with the rest of the revenue.
  • Can compare the data of occupancy and revenue in terms of a past date compared to the current state.

Here is how the new report works:

Each night after the end of the financial day, the system will automatically make a snapshot of the data of occupancy and revenue for 365 days ahead. This snapshot of the occupancy and revenue is saved for the current date. This action is repeated for each past date. This way, you have accumulation of the info of how the occupancy and revenue are changing over the time.

Here is a practical example:

  • Let's assume that today is 01 Jan 2020. Upon the end of the financial day, the system will automatically generate info of the expected occupancy and revenue for each day from 01 Jan 2020 to 01 Jan 2021 and will save this info. This will repeat with each past day.
  • Let's say that one year has passed and it is already 01 Jan 2021. We have accumulated info of progress of the occupancy and revenue for one year. On the basis of the accumulated information, we can compare two reports:
    • For example, we can run one report for the coming summer (e.g. 01 Jul 2021 - 01 Aug 2021) without entering a snapshot date in the report.
    • We can run another report for the same period from the last year  (01 Jul 2020 - 01 Aug 2020) and enter the following snapshot date: 01 Jan 2020.
    • If we compare the two reports, we will get an idea of what we can expect this year.
  • Please note the history data starts accumulating upon the release of this Clock PMS+ update.

Here are the parameters and data in the report:

  • From/To date. The period for which we wish to see the data of the occupancy and the expected revenue.
  • Currency. In what currency the revenue is to be recalculated.
  • Value type. With this option, you can choose if the values shown should include the tax or not.
  • Group by. It is the method of grouping the days of the examined period - by days, weeks or months.
  • Snapshot date:
    • If you left the field empty, you get the report for the specified period from today's point of view, i.e. what you will see the data at the current moment for this period.
    • If you fill in a past date, you will get the data for the desired period, as this data was in the snapshot on this past date, as well as the data from a past point of view, so that you can compare all this data more easily. Considering the fact that the snapshot for each date contains the data for 365 days, you will not be able to see the examined period from a date that is older than 365 days.
  • Occupancy forecast:
    • Capacity of the hotel
    • Bookings -  rooms occupied by bookings;
    • Blocks - rooms blocked by Events of the Guaranteed and Non-guaranteed statuses. Pickup rooms are not included. Only the rest of the block is counted;
    • Opt. Blocks - rooms blocked by Events of the Optional or Allotment status. Typically not taken from the inventory. As above, only the rest of the block is counted.
    • Free rooms in the hotel
  • Revenue forecast:
    • Bookings - booking-related charges;
    • Blocks - calculation of the potential revenue from guaranteed/non-guaranteed blocks, based on remaining pickup and rate in the block. The forecast is made on a daily basis and the amount doesn't reflect the changes made today.
    • The same as above in terms of Optional/Allotment Blocks;
    • All other charges in folios, including Event, Meeting Room bookings, Catering, External client folios, etc;
    • ADR. The ADR forecast is based on charges with room/package including calculations for Block and Opt.Block. This summary revenue forecast is divided by all expected room nights including the optional/allotment blocks.

OTHER IMPROVEMENTS

  • Companies - a default folio setting. You can more precisely control where the charges related to a given company are to be transferred to by choosing a default folio for each of them, as it will be used by default for the automatic transfers from bookings (Transfer rate charges to Company/Agent). With the manual transfers, the default folio selected will come up first on the list of open folios. The new setting can be found in the Default folio section on the edit screen of each company.
  • POS - New default document type setting. You can set a default document type that is to be used by default each time you close a bill. To do so, select the respective document type from the Default closed folio document type field of the Documents section on the Tax Settings screen. If necessary, you can close the bill through another document type by choosing what type it should be from the Billing To/Invoice button situated on the billing screen itself.
  • A new Bednights column added in the Occupancy and Charges Report.
  • Self Service Portal - On the Check your bill screen, a Self Checkout button has been added. Through it, the guest can check out immediately upon the bill payment (in the events when this is allowed).
  • We have improved the document closing form by making the buttons larger and more convenient for use. This change has been applied to both the booking screen and the folio screen. Click the Close button and then select the desired document type through which you would like to issue. We have introduced an additional sorting on the booking screen, arranging the folios, as follows:
    • The open folios are arranged consecutively, as the last one added is at the top.
    • the closed folios are respectively arranged in accordance with the order of their closing.
  • Booking note retention period. Set the period for which booking notes are to be kept, as upon the expiration of this period booking notes will automatically be deleted from the system. This feature can be very useful when abiding by the requirements for personal data like the ones under the GDPR. To set a retention period, please, in the Booking note retention period field of the Booking fields section, fill in the number of months for which your booking notes are to be kept.
  • ОТА - in the export log, you can find a reference to the xml messages sent to our partners. So, if a check on their part is necessary, the message can be downloaded and sent for analysis. An Echo Token to each individual export message has also been added to the screen.
  • OTA - up till now, the only method of work was through WSDL. A new option for working with a specific endpoint has been added. If you need such a setting, please contact the Support Team of Clock.

INTEGRATIONS

  • Lightspeed - an option has been added to the interface settings for specifying the connection between the Lightspeed payment subtype and the Clock PMS+ payment subtype. Please note that due to the specifics of Lightspeed,  the payment subtype is to be manually entered by you in a manner identical to the Lightspeed settings.
  • LightSpeed - a new method of the interface activation added, so that it can be done by the user straight from Clock PMS+. Learn more from the LightSpeed Restaurant POS (Series L) interface  article.
  • LightSpeed - a bug fixed causing accounts not to be transferred to Clock PMS+ during the daily transfer, if these accounts had a hotel transfer as a method of payment, but they were eventually paid through another method of payment.

FIXES

  • POS - Kitchen monitor requires at least one kitchen in order to be opened.
  • Charge Control Report - you can track all charges without a specific revenue category selected by filtering the results through the "---" option from the dropdown menu.
  • The deposit calculation sometimes used to generate errors resulting in inaccessibility of the bookings in the system for processing.
  • Arrivals/Departures Summary Report - it didn't properly account for Rooms, when run with the grouping by week and month selected.

Clock PMS+ Update (19 May 2020)

Hurdle Rates

We have added new options to the rate management of the system - Hurdle Rates. You can use them to dynamically manage multiple rates. By editing one rate (Hurdle rate), you can stop rates for certain days or increase the minimum prices of multiple related rates. Here is an example how it is done:

  • Create a separate rate plan 'Hurdle'. It is not mandatory, however, this way you can better organise your rates.
  • In this rate plan, you should create a standard base rate. It will be used as a Hurdle rate, i.e. it will be the rate through which you will manage the other rates. For the purposes of this example, we will call it 'My Hurdle'.
  • Link the rack rates, the ones from the WRS, the channels and the companies to the thus created Hurdle rate. Open the edit screen of every rate and select My Hurdle in the Hurdle Rate field. Choose the mode - STOP or Minimum price:
    • STOP. If used, for each day of the rate being offered, the rate offering will automatically be stopped, if the price of the offered rate for the day is LOWER than the price in the Hurdle rate for the day. You can use this option for your corporate contracts, for example, under which you are not allowed to change your prices, however, you can stop the offering of a rate for certain days. Please note that the restriction of the rate being offered is not changed under  this operation, but this restriction is dynamically calculated based on the Hurdle rate. In other words, if the Hurdle rate is changed and there is no longer a condition for stopping  the rate offering for the day, the use of this rate will continue as per its restrictions: if it is offered, it will continue being offered unless it is explicitly stopped.
    • Minimum price. This option has a similar behaviour to the aboveone, with the difference being that instead of the rate being automatically stopped for the day, the rate's price is automatically changed, so that it is not lower than the one in the Hurdle rate. For example, if the rack rate for 1 May is EUR 80.00, and the price of the related Hurdle rate is EUR 100.00 for this day, the rack rate price will also be increased to EUR 100.00. Please note that you will continue seeing EUR 80.00 in the rate editor, however, all calculations will be made based on the price of EUR 100.00. This way, if the price in the Hurdle rate is removed, the rack rate will once again become EUR 80.00 without any intervention being necessary.
  • You can create multiple hurdle rates depending on how precisely you would like to manage the rates being offered. There can be hurdle rates for each room type or the different levels of your corporate rates, for example. 

Room Features

A new additional classification for your rooms. You can add one or many room features to a certain room like High Floor, Low Floor, Sea View, Park View, etc. These additional features help for the optimal allocation of rooms considering the preferences of your guests. The explicit requirements for the room can be specified in each booking, as it is done in the Room Features field (located under the Arrival room* field). 

The selected features can be used both with the manual and the automatic room allocation:

  • For the manual room allocation, clicking the Allocate room... button, you will see the rooms of a specific type ordered by their room number and the number of desired feature matches allowing you to choose the most suitable room for the occasion. 
  • With the automatic room allocation, the system takes into consideration the specified preferences of the guest andselects the room that is most close to these preferences. In the events that there is no room matching the set criteria in terms of room features, the system will allocate a room based on other parameters and once again it will choose the most suitable room.

Room features can be added from these two screens:

  • Room Features screen in Settings where you can select multiple rooms for one feature.
  • Edit screen of the specific room where one or multiple features can be added.

Other improvements:

  • Price control in standard rates - set minimum and maximum allowed value (in the specific currency) that can be entered manually by the user in the standard rates and minimise the errors made. The system checks each price entered by the user as a seasonal or daily one and if its value is out of the allowed range, an error message appears. The check is also made when working with rates in various currencies, as the allowed range is calculated based on the exchange rates set in the respective account. To set a price range, use the Minimum allowed price and Maximum allowed price fields in the Rate section of the Tax Settings.
  • Events - detailed search form. We have updated the Event search form by adding many new filters to make the process easier and more flexible. You can search for custom text (e.g. Event name, Company name) and through ready-to-use filters (e.g. Periods - arrival, departure). You also have the option to sort out the results based on criteria selected by you. We have also added buttons for direct quick searches (Expected today, Created last 3 days, etc.).
  • Self Service Deep Links - we have added links to each section of the Self Service Portal allowing direct access without being necessary to enter PIN. You can use them to build various mail campaigns, e.g. you can direct your clients to the booking guarantee section, you can encourage them to buy extra services or leave their feedback on their stay at your hotel. The new links are available through the the placeholder list in the Guest Mailer (e.g. Self Service Portal - feedback URL ).
  • Self Service Fast Login. To allow your guests easier and faster access to the Self Service Portal, we have changed the system, so that guests can automatically log in to the Self Service Portal through links from the emails sent to them. This way, no PIN will be necessary. Still, we have preserved the PIN option for the events when guests don't have such an email and link, e.g. when logging in through the public link or using the Kiosk. It is our strong belief that the quick login will improve the conversion rate and the usefulness of the Self Service Portal.
  • The names of various document types can now be translated. Through the Document Type Translations option, you can translate the name of each document type for the respective language. These translations will directly be reflected in the standard printouts with the language change. If you use custom printouts, please check if the correct parameter is used (folio.display_name) that will retrieve the names of the documents in accordance with the selected language.
  • In the Commission Report, Cancelled bookings and No-shows are added as a filter allowing the easier tracking of the commissions for all received bookings regardless of their status.

Integrations:

Austrian fiscalization through FISKALY

Fixes:

Auto send folio email templates with folio closure were sent twice.  

Clock PMS+ Update (28 Apr 2020)

Dashboard

We have added a Dashboard containing the most important operational data related to the servicing of guests and the status of your hotel.

Here is the data included in the Dashboard:

  • To-Dos - the summary number of your To-Dos, as well as the overdue ones.
  • Arrivals - summary info of the number of expected and arrived bookings.
  • Departures - summary info of departures and checked-out bookings.
  • Registration - summary info of the registration cards of expected and arrived guests that are not filled in.
  • Billing - summary info of outstanding bills of expected bookings and departures.
  • Feedback - summary info of the average feedback rating from all reviews, as well as from the today's ones, as a rating that is greater than 3 is considered positive.
  • Housekeeping - summary info of the number of rooms by housekeeping statuses.
  • Occupancy - graphics of the overall occupancy for the next 7 days and comparison to the occupancy of the last year.
  • 7 days - info of each day of arrivals, departure and 'In Hotel' - rooms and guests.

The Dashboard data is automatically refreshed each hour or with the clicking of the Current Data button. You can find links to the Dashboard on the Home page: the icon before the hotel name, and in the navigation bar's Other menu.

Virtual credit cards and Guest Mailer

We have added a few features to facilitate the processing of virtual credit cards coming from the channels:

  • Recognition of whether a credit card is a virtual one or not for SiteMinder, Room Cloud and D-Edge. We would like to point out that the recognition is performed by indirect indications and data in XMLs and is different for each channel.
  • Credit card's Origin field: OTA/Guest. The field can also be edited and filled in by users on the Credit card edit screen. It is visible on the Booking screen - next to the credit card.
  • A new field in the automated Guest Mailer. You can use it to solve situations related to credit cards. For example, you can send emails to guests only having a virtual credit card and ask them to enter an additional card in the Self Service Portal. The new filterhas the following values:
    • No Card. No credit cards for the booking.
    • Guest Only. The booking has only cards designated as "Guest".
    • OTA Only. The booking has only cards designated as ОТА.
    • Guest and OTA. The booking has cards of both designations: Guest and OTA. 

Booking - Rate Availability and a new right

For the booking save and edit, we have added an additional control check: "Rate Availability Control".  It shows if the booking data (period, room/room type, adults and children) match the validity of the selected rate. In other words, if you run the Rate Availability screen with these parameters - the selected rate should be green.The check is performed both on booking creation and edit. On booking edit, the check is only made if there are changes to some of the related parameters (rate, period, room/room type, adults and children.

We have added a new "Booking: Rate Availability Control Override" right. The users having been granted this right can create and edit bookings without the "Rate Availability Control" check being performed. The right has automatically been granted to all users who already have "Booking: Create or Edit". If you are planning to revoke this right from some users, you need to also consider the following possible effect: for example, booking stay edit (also valid for the rest of the parameters), the system may not allow the operation, if there are no more free rooms or there are changes to the conditions related to rate restrictions and occupancy.   Such an outcome is possible because at the moment of the change, the booking is NO LONGER available (green) due to the new parameters. In this case, the assistance of a user with the "Booking: Rate Availability Control Override" will be required.

Folio - Hide in the Self Service Portal option

A new "Hide in the Self Service Portal" option added to the folio. It is found on the folio edit screen (click the Currency/Name/Notes button in the 'Billing to' section  of the folio to access it). If chosen, the folio will not be available for review and payment in the Self Service Portal, the web check-in and the kiosk.

Self Service and Kiosk - company invoices without the use of a VAT number/Company ID

For the countries where it is not typical for users to know the VAT number/Company ID of their company, we have made a change that will ease the issue of company invoices from the Self Service Portal, the Kiosk, the Web Check-in. Until now, the company invoice issue was available solely upon the entry of a VAT number/Company ID. We have also added an option to so by searching for a company name, too. To activate this new functionality, select the "Allow Company search by name" option in the Self Service Portal settings. Please note that the activation of this option allows the end users to double company profiles, as a unique identifier such as the VAT number is no longer used. It is up to you to assess the benefits and disadvantages of this option activation.

Events - a new more accessible BEO template and further customization options

The existing example we provided for BEO customisation showed how you can make a full customisation. But it was very complex and could not be used in the Rich Text editor for this reason. 

To let you use your company style on the BEO printout without needing to be an expert on the complex BEO logic, we have added a new example. In contrast to the old one, the new one can directly be edited in the Rich Text editor. It is possible because we have changed all tables in the template with standard ones which cannot be edited, but considerably simplify the template. You can see the new example template by going to "Settings" - "Event Document Templates" - "New or Edit" - "Apply your design examples" section. Apart from the BEO example, you can also find an Info Invoice example. The parameters of the ready-to-use tables are: activities_table_html, rooms_table_html, other_charges_table_html, както и info_invoice_table_html.

For the users relying on our standard Event printouts - BEO, Info Invoice and Function sheet, we have added an option for translation (or change) of the labels of these printouts into any language. It can be done from Settings - Languages and Texts - Language - Event Document/Translation. In this relation, we would like to remind you that you can place logo, header, footer or any other texts on our standard printout from the following section: Event Document Name/Header/Footer Translations.

Other improvements

  • New Rate Restriction - Min/Max Stay on Arrival. The new restriction is activated only, if the booking is to arrive on the date for which the restriction is. Here is an example. Min stay on arrival = 5 nights on 10.05.2020 is set to the rate. It means that if the booking arrives on 10.05, its minimum number of nights should be 5, but if it arrives on 09.05 - there are no restrictions. We would like to point out the difference from the existing "Min Stay" restriction - it is only activated, if it somehow overlaps the date in question. In the above case, it wouldn't allow the arrival on 09.05 for 2, 3 or 4 nights, because 10.05 is overlapped and at least 5 nights are required for a booking.
  • A new option for the calculation of the deposit amount based on the number of nights. The existing calculation was based on the average night price, i.e. if the deposit required 1, 2 or 3 nights, for example, they would be calculated by multiplying the average night price by 1, 2, or 3. Through the new "Average daily price" option (if switched off), instead by the average price as before, the  deposit will be calculated based on the actual price of the first, second and the third night, i.e. if they have different prices, the actual night price will be taken, and not the average one.
  • A new filter added to the Advanced Search - "Paid". You can use it to find outstanding or paid bookings. The paid bookings also include the overpaid ones, i.e. the ones having a negative balance.
  • To the WRS, we have added a new translatable rich text field: "Additional custom HTML content". To add content go to "Settings" - "Languages and Texts" - "Web Booking Engine Translations" - "Additional custom HTML content". The added content will appear on the last ("Thank you") page of the WRS. This field can be used for adding content or links to useful websites or services to redirect your guests to.
  • Authorize.net - on payment, the credit card type is now included the payment subtype.
  • We have made a change to the posting of the folio surcharge. Now it can be added with the date of the first charge instead of the today's date which led to the transfer of folios from the Deposit ledger to the Guest ledger due to a charge with today's date (the surcharge itself).
  • Links to the Housekeeping Report - now they lead by default to the new report. For the users still wishing to use the old one, there is a link to it in the upper part of the new report.

Fixes

  • Profile merge screen - the country, title and birth_country fields didn't offer the right values.
  • It wasn't possible to void a folio containing a zero-valued surcharge and currency differing from the folio one.
  • From the Room edit screen, it wasn't possible to create a room type.
  • We have fixed a temporary mailing issue causing certain emails and confirmations to have no css styles attached.
  • We have fixed the issue related to the Channel manager due to which in certain situations the new Resend option couldn't be used.

Clock PMS+ Update (6 Apr 2020)

SmartHotel

We are happy to announce the release of a new Channel Manager interface: SmartHotel.

Here is more info on the new SmartHotel interface: 

We have used an improved technology of detecting the changes to availability and prices. As a result, the changed availability and prices should update in SmartHotel from 2-3 minutes on average to up to 5 minutes maximum. The same applies to the download of bookings. During initial synchronization when the entire database is updated or there is a large volume of changes, the update time can be longer.

Availability

  • Mapping of room types (the mapping of specific rooms is not supported) between the two systems. After the completion of the process:
  • The system can automatically export Availability (at the Room Type Level) to the channel manager.
  • You can set a maximum number of available rooms to be sent for each room type. This way, if the number of available rooms exceeds the maximum set by you, only the amount corresponding to this maximum number of rooms will be sent.
  • After Clock PMS+ exports its data to SmartHotel, the latter makes sure this data is sent to each of your activated OTA channels.
  • For each room type, you can temporarily (or permanently) stop the availability export. This way you can directly manage the available rooms in SmartHotel, while keeping the mapping of room types for the purposes of the import of bookings.

Rates

  • Mapping of rates between the two systems. Rates in both systems are at a Room Type Level, i.e. one rate belongs to a certain room type.
  • The currencies of rates are not accounted for, as what is important are the numeric values only. For greater clarity, you are recommended to use one and the same currency in both systems.
  • For each rate, you can stop the export of prices and restrictions while keeping the rate mapping for the import of bookings.

Restrictions

  • The rate restrictions sent by Clock PMS+ are: Minimum Stay, Maximum Stay, Stop, Closed for Arrival, Closed for Departure.
  • In case of no available rooms, Clock PMS+ sends a zero availability for the respective room type and Stop Sell to the related rates. Should free rooms appear eventually, the rate restriction will also be removed.

Booking Import

  • Import of new bookings, modifications and cancellations
  • The bookings createdin the Channel Managerprior to the date of the interface activation will be ignored to avoid double bookings.
  • Upon booking import, a certain deposit amount can be charged to the booking credit card. For this purpose, you can specify the necessary action next to each rate in the mapping. Apart from charging, you can also set tokenization in Adyen. It will check the credit card validity through a zero transaction.
  • Please note that SmartHotel does not send the CVV codes of credit cards. If necessary, you can contact your payment gateway to allow credit card transactions without CVV codes.
  • Booking extra services. Our interface processes the extra services in bookings. For these services to be charged to folios, you need to select 'Default charge template' in the Channel Manager settings, as well as to make a mapping between the extra service codes received from OTA channels and the charge templates in Clock PMS+. If no mapping is found for the code received, the service will be charged through the default charge template. The service price is retrieved from the data of the received booking. A charge to the amount of the received value is posted.
  • We support a mapping of an OTA channel to an agent (or company), allowing you to automatically specify Booking.com as the agent (or company) in all bookings from Booking.com.
  • Processing of corporate traveller's Company or third party Agents by IATA/VAT/ID number is NOT supported.

POS Kitchen Monitor - Pins and Colours

We have added a new feature to Kitchen Monitor in the POS - an option to pin orders, as well as to colour them. The pinned orders are always positioned at the top of the order list, and through the colouring option, you can better organise your tasks. You can also unpin and remove the colouring. Click a table (the black field) to select the new features. We have also changed the processing of the completed orders. 3 minutes after their completion, these orders are removed from the list to make space for the orders to be yet completed. The completed orders stay for 3 minutes after their completion, so that you can find them if marked completed by mistake and correct their status.

Quick opening of registration cards for completion, preview or signature by the customer

We have made a small change to help you better organise the process of welcoming guestswho can on their own or through your assistance (at the hotel lobby) complete their registration cards, preview the conditions and sign them. The change itself is that we have added a Self Service Portal link to the Quick booking search. Here is how you can take advantage of this change:

  • Through a tablet specially prepared for the purposes of the guest welcoming process, log in to the system.
  • If you welcome your guests at the lobby bar, ask for a name or booking number. Find the booking from Quick Search in the navigation bar and select the Self Service Portal link. You can give the tablet to the guest or help them register on their own.
  • If you welcome your guests at the Reception, find the booking number from the workstation at the Reception and enter it straight into the Quick Search on the tablet. Open the Self Service Portal and pass the tablet to the customer.
  • After opening the Self Service Portal on the tablet, the system logs you out, so that the PMS functionality is no longer available to the guest. After finishing with the guest, you can log in to the system again.
  • We would like to remind you that the Self Service Portal link is also available on the booking screen in "Functions"

Other

  • Guest mailer - a new "After Cancellation" trigger. Now you can set up auto emailing for cancelled/no-show bookings.
  • Folio printout view for "Packaged by Dates / Qty" has been improved. The charges from booking packages are grouped in one line despite the quantity of each package element. Example: If you have a package element "Breakfast" set per Guest at 5 Euro and a booking for 2 adults, you will have a charge for the Room (100 eur) and charge for the "Breakfast" (2 x 5 EUR). After the change, you will see a package (grouping is by Print Text) for 110 EUR and qty 1.
  • Channel Managers - we have added an option for resetting selected room types and rates. Upon the execution of the option for the given rate or room type, all of its data is passed to the channel again. Please be careful with the use of this functionality for more room types and rates, as it may lead to a larger traffic volume and delay in the communication with channels. Always consult the Channel Manager about the use of this option and apply it only for the rooms/rates actually needing this action.
  • We have optimised the work of the Block Pickup Report.
  • API - a new Block pickup API endpoint added.
  • API - To the booking creation endpoint, we have added a possibility for the existing profile related to the booking to be also passed.
  • ОТА Channel Manager - we have optimised the rate mapping screen.

Fixes

  • Copy of charges from one Event to another - the copying of the Void reason and the report segment was wrong.
  • Quickbooks - a fixed bug with the category mapping and the showing of the subcategories in it.
  • Quickbooks - invoices with a space at the beginning or the end of the contractor name caused an error during export.
  • Channel Manager - added restrictions against the deletion of the default charge_template and the mapped ones.
  • On the virtual room edit, an error appeared.
  • A fixed bug related to IdeaS and their rate limit.

Clock PMS+ Update (23 Mar 2020)

Cancellation Policies

We have added a new "Cancellation Policy" feature to let you automate the process of calculation and charging the cancellation fees.

As the new feature overlapped the old "Auto-void booking charges on booking cancellation" functionality, we have removed the old one and migrated the setting. See "Migration" below for more info.

Here is the organisation of the Cancellation Policies:

  • You can create one or several Cancellation Policies, each with its own rules and cancellation fees. Select "Settings" - "Cancellation Policy".
  • You should link each of the Cancellation Policies to a Guarantee Option.
  • Upon booking cancellation (Cancelled or No-show status), the respective Cancellation Policy is applied depending on the selected Guarantee option in the booking. This is ALWAYS done upon booking cancellation regardless of how or from where the booking has been cancelled. In other words, the automated process can be triggered  upon cancellation from the Self Service Portal, Channel Manager, API or made by a Clock PMS+ user.

What can be automated through the Cancellation Policy?

The Cancellation Policies are flexible and can be set in accordance with your needs. Here are some features:

  • Automatic cancellation fee calculation and charging. To do so, select a charge template to be used for the basic details of the charge, and the amount will be calculated based on the Rules.
    • You can define multiple rules for cancellation fee calculation depending on 'days before arrival'. Here are several examples of how rules are applied depending on how many days before arrival the cancellation is made. To make the necessary settings, click the "Cancellation Fee Schema" button next to each policy:
    • Let's examine a case with two rules – one for 3 days before arrival (Rule 1), and another for 14 days before arrival (Rule 2).
    • Cancellation made 1 day before arrival - Rule 1 is applied.
    • Cancellation made 3 days before arrival - Rule 1 is applied.
    • Cancellation made 10 days before arrival - Rule 2 is applied.
    • Cancellation made 20 days before arrivalno cancellation fee is charged.
    • For each Rule, you can define how the cancellation fee to be calculated - as a fixed or relative amount. Both amounts will be collected. The relative amount is calculated based on the selected revenue group. The amount can be calculated as per cent of this value or as a certain number of nights. The amount for one night is the average night price. The calculation functions the same way as the deposit calculation. If you wish more info, you can also see the deposit calculation examples.
  • Cancel existing charges. If you choose this option, the existing booking charges (nights, packages, extra services) will automatically be voided.
    • The charges will be voided, even if they have been transferred to another folio.
    • If the folio containing the charges is already closed, it will be impossible for these charges to be voided. In this situation, the system will create a To-Do regarding the issue.
  • Close folios. Select the 'Close folios' option to close the booking folios. Empty folios (folios without any charges or payments) will be voided as they can't be closed.
    • This, in turn, can lead to the sending of a folio email to the guest (the 'Auto send folio email template with folio closure' setting ). Soon we will add a Guest Mailer option to automate other emails upon cancellation.
    • Note: Folios will not be closed if they contain charges transferred from other bookings, for example. If such an issue occurs, the system will leave the folios open and will create a To-Do regarding this situation.

Migration

For those of you who have used the old Automatic cancellation fee calculation and charge feature, we have created the following automatic migration.

  • We have created a Cancellation Policy in which both options are selected: "Cancel existing charges" and "Close folios".
  • We have added this automatically created policy to all Guarantee options.

This way you can keep the old functionality. You can also create new policies and select them in the corresponding guarantee options.

Please note that if you have not used guarantee options yet, you will need to create at least one, so that you can choose it in bookings and take advantage of the automatic void of charges and the other new features.

Other improvements and changes

  • In the POS, you can easily fill in the data of a company before closing the bill. You can create a new company or choose one of the existing companies. On the bill closure screen, select "Billing To / Invoice", then click  "Select Company" to choose from a list or use the "New" button. Click "Select" to confirm.
  • If you use the API and have settings for the recognition of individual customer folios, please note that we have made certain changes and now these folios have Person as payer instead of Account. Please contact us for more info.

Fixes:

  • In the fiscal module for Sweden, we have removed the VAT error
  • During the execution of the Profile "forget" feature, not all old archived profile data in the registration cards were deleted.
  • Tax Settings - in certain cases, the saving of settings led to the appearance of Surcharge saving error.
  • Block Pickup Report - when generated for longer periods with the Summary option selected, the report showed some columns with details. 

Clock PMS+ Update (4 Mar 2020)

A new option for the revenue recognition model - 'Future charges closed as revenue'

Let's start with the problem:

  • For example, you have a folio containing a charge with tomorrow's date.
  • The charge with tomorrow's date is not included in the revenue for today. It will be included tomorrow.
  • You close the folio.
  • The closed folio is reflected in the Accounts Receivable Report with its full value.
  • In this case, there is a discrepancy between the Guest Ledger and the Accounts Receivable Report.
  • For the Guest Ledger, this charge hasn't yet occurred and it does not show anything about this folio, while it appears in the Accounts Receivable Report.

With this in mind, we have created a new setting on the Tax Settings screen - 'Future charges closed as revenue’. If enabled, this setting leads to the following result:

  • Upon closing the folio, the system finds all charges for future dates in this folio and changes their revenue date to today's one.
  • This way these charges can be included in today's revenues, i.e. in the Ledgers.
  • The data in the Ledgers and their Accounts Receivable column will coincide with the Accounts Receivable Report.

Please pay attention to the following specifics:

  • If enabled, this setting will not change the old data. It will affect all folios closed after its enabling.
  • The change to the revenue date of the charge does not affect its service date. The service date of charges is kept the same to avoid any distortions in the operations report.

Package presentation of charges in Folio and Event custom print forms.

  • Folios – We have added two new folio charge printouts - Packaged by Dates/Qty and Packaged by Qty. The printouts are designed to solve cases related to the sale of package services. The printouts are compact, as we have removed the grouping by Source (booking, meeting room booking, etc.) and tax. Please pay attention to the method of info representation, as there are many peculiarities and in certain cases this info representation method is not suitable for customers. The main peculiarities are:
    • Lines are grouped by date, quantity, print text, as in the more compact printout, data is only grouped  by quantity and print text. This way charges having the same quantity are part of one group. Their values are accumulated, but the same does not apply to their quantities. Based on the values accumulated, their unit price is calculated.
    • Lines are not grouped by the tax rates. The tax rates are not visualised at all in the lines. Only net  and gross values are present.
    • Lines are not grouped by source.
    • For the grouped lines, a unit price is "calculated" not corresponding the one in the charges. For more info, see the example below.
  • Events – the same summary of charges (Packaged by Dates / Qty ) can also be used in Event custom templates. To this end, we have added a sample table. To use the new info presentation method, create a new template and use the the sample 'Charges table (packaged by date, qty and print text)' to be found on the 'Event Document Template' edit screen.

Here is an example of the new grouping:

Charges

DateCharge textPrint textQtyPriceTotal
Date 1Service 1Package 1253.0075.00
Date 1Service 2Package 1252.0050.00
Date 1Service 3Package 152.0010.00
Date 2Service 4Package 1106.0060.00
Date 2Service 5Package 1106.0060.00

'Packaged by Dates/Qty' will result to:

DatePrint textQtyPriceTotal
Date 1Package 1255.00125.00
Date 1Package 152.0010.00
Date 2Package 11012.00120.00

Example 2

Charges:

DateCharge textPrint textQtyPriceTotal
Date 1Service 1Package 1253.0075.00
Date 2Service 2Package 1252.0050.00
Date 3Service 3Package 1256.0060.00

'Packaged by Qty' will result to:

DatePrint textQtyPriceTotal
Date 1Package 1257.40185.00
  • We would like to once again draw your attention to the fact the new quantities are not summed up, but are used for charge grouping purposes, i.e. charges of the same quantities are reflected together on one line, and the unit price is calculated for each grouped line as a sum of the amount divided by the quantity.

Other improvements

  • Email auto send upon folio closure. We have added a new 'Auto send folio email template with folio closure' setting on following screen: Settings - Folio Email Template. The template selected on this screen will automatically be sent to customers upon each folio closure, if the payer of the folio has an email address in Clock PMS+.
  • Housekeeping Tasks. Upon the addition of the new algorithm for automated task distribution among housekeepers we got feedback from customers that the old algorithm had been better suited for their needs. Here is why we have restored it in addition to the new one. Here are more details about it:
    • On the screen for automated task distribution among housekeepers, you can choose the Algorithm to be used: Optimal or Stable Order.
    • Optimal: This is the new algorithm letting you take advantage of the equal distribution of tasks among housekeepers, however, sometimes they may receive tasks in different housekeeping sectors.
    • Stable Order: This is the old algorithm prioritizing the order of housekeeping sectors, however, sometimes housekeepers are not equally assigned tasks.
    • Test both methods of distribution and select the more suitable for you.
    • You can choose which of the methods to be the default one: Settings - Default Housekeeping Credits - Housekeeping task assignment algorithm field.
    • Event Documents. Now you can create Event documents using the standard Function Sheet printout. This way, even without creating a custom template, you will be able to quickly send an Event document to your customer using the Function Sheet printout. If you wish to create your own custom printout based on the Function Sheet. For your convenience, there is a "Sample Function Sheet" sample template on the Event Document Templates edit screen.
    • Event – We have added new standard printouts related to the Event. Now you can use the following standard printouts: 'Function Sheet', 'BEO' and 'Info Invoice' directly from the Preview button on the Event screen. Please note that this option applies only to standard printouts. To use custom printouts, it is necessary to create respective an Event Document through the respective custom printout.
    • Housekeeping Tasks – new Arrival Time column.
    • Room Calendar – the 'Group by Room Type' view is now taken into consideration when room type sorting is performed.
    • The change to the value in the City Tax mode field on the Booking screen is now controlled through the user right: 'Booking: Set manual price', similarly to the manual price.
    • Channel Managers – the received info of booking modification/cancellation is no longer processed when it refers to checked-in bookings. In case of such a situation, a To-Do is created. Prior to this change, cancellations related to checked-in bookings were accepted leading to serious discomfort and confusion in the hotel.
    • CRS – When CRS used on a mobile device, the Search form took too much space at the top of the result page. We have changed the view, so that the Search form is not shown for mobile devices. This way the page is more compact and the search results are better visible. If guests wish to change the search parameters, they can use the Back button.
    • New translation entries - CRS, SSP, POS WBE
    • We have optimised the work of several reports: Open Folios Report, Payments Report, Tax Report, Closed Folios Report.

Integrations

  • New Door Lock Interface - Messerschmitt
  • Swedish fiscalization - voided folios are now visible in X and Z reports
  • Swedish fiscalization - Negative tax amount generated error 500.

Fixes

  • Passport images – images used to disappear on booking checkout.
  • Self Service Portal – the charged extra services from the Self Service Portal in the booking had the following issue: When the booking period changed, the charged services kept their old dates instead of following the new booking period set.
  • POS - Inventory Items Report generated an error when a CSV export was attempted
  • Self Service Portal - Adyen Payment made via 3D secure, but with incorrect credit card data, used redirected to the login screen, instead of showing the error.
  • Datecs – a bug fixed causing the text to be printed not being formatted as per the 'columns'

Clock PMS+ Update (13 Feb 2020)

New Bar Mode;

We have further optimised the POS speed, the Tables page in particular.  We have also added a new Bar mode.

  • The new Bar mode has the following functionality:
  • To open a particular Table screen, post charges and close the folio.
  • Instead of being redirected to the Tables screen, a new folio is instantly opened on the Menu screen for a next bill.
  • If you still need to go to the Tables screen, you can simply click the Back button.
  • The new mode is designed to be used at the bar or other places with only a few or no open bills.
  • You can find this setting by going to “Management” - “POS Settings” - “Bar Mode” (Open new folio after bill close”).
  • The setting is PER STATION, i.e. in the the restaurant, only the devices at the bar can work under this mode, the  rest will operate under the normal mode.

Fixes and other changes:

  • A bug fixed with the creation of virtual room types containing more than one identical components.
  • Patch for the Swedish fiscalization and deposit appropriation

Clock PMS+ Updates (3 & 17 Dec 2019)

Agent in bookings – more related features

We have added and changed some functionalities to let you use the Agent in bookings similarly to the Company. Here is an example:

Charge transfer. The features related to a charge transfer can now be used for both the Company and the Agent in the Booking.

  • On the New Booking screen, we have replaced the "Transfer rate charges to Company/Event" checkbox with three new options to allow you choose where the given charges to be transferred to: the Company or the Agent of the Booking.The options are, as follows:
    • Don't transfer
    • Transfer rate charges to Company/Event
    • Transfer rate charges to Agent
  • In the event of a manual transfer of charges from the Booking, the Suggestion section will also show the Agent apart from the Company. This way you can quickly select a destination for the charges.
  • In the event of a manual transfer of charges, from the Company's All Folios screen, the Booking lists in the Open Booking Folios section now also include the bookings for which the Company is considered either an Agent, or a Company.
  • In the SiteMinder and D-edge (Availpro) Channel Managers, you can select where the charges to be transferred to: the Booking Agent, Company or not to be transferred to at all.

Other changes to the Clock PMS+ screens:

  • On the Booking Edit screen, the Rates field now shows two more groups of Suggested Rates: ''Agent/Match Booking'' and ''Agent/Other'', similarly to the Company.
  • On the Booking Edit screen, under the Agent field, we have added a quick option for selecting the Contact Person. This way, if have specified Contact persons in the Agent info, you can easily transfer one to the Booking, similarly to the Company. You can also see the Agent remark, similarly to the Company remark.
  • On the Booking Edit screen, between the Company and Agent fields, we have added the ''Switch Company/Agent' link to quickly switch the values of these two fields, if incorrectly set.
  • On the Company screen, there are different Booking links in the Booking section depending the Company role: "As Company" and "As Agent". The first ones reflect the Bookings where the Company is selected as a company, and the second ones where the Company is selected as an Agent.

Other changes and fixed bugs:

  • API – a folio_ledger endpoint. It provides data used for building the Ledgers v.2. Mandatory parameter "to_date". Example: /base_api/:s_id/:a_id/folio_ledger.yaml?to_date="2019-10-01". The data is folio by folio. As the included sections are three: the opening balance for the selected date; the daily movement for each item; the closing balance for each item for the selected date. The items by which the data is compiled are: charges; charges_from_deposit_folios; payments; debts; debts_open_folios; debts_closed_folios; deposits; deposits_in_consumption; deposits_in_advance; deposits_in_advance_from_deposit_folios; deposits_in_advance_from_non_deposit_folios.
  • In the PMS, we have changed the closures page to make its loading faster. A new report will be added to make the closure search in the Archive more comfortable.
  • Swedish Central Bureau of Statistics Report – a new rate tag filter added.
  • Quickbooks – PaymentRefNum supported
  • We have fixed a bug preventing the guest's data snapshot at the booking checkout. As a result, the changes to guest profiles (e.g. Address) were also reflected in the checked-out bookings which was not correct. Upon the change made, the checked-out bookings will contain the information as it was at the moment of the guest's checkout regardless of the changes to the guest profile.
  • Daily Charges by Sources – the Room column was always empty.

17 Dec 2019

  • Blocks – for each block, you can now add information of adults and children. This way, the calculation of packages will be totally precise and will reflect the package elements which in turn depends on the number of guests. When creating bookings using such a block, the info of adults and children is transferred to the bookings.
  • On the All folios screen of the Company, we have added the Select all / None buttons for quick selection of the booking list.
  • Table bookings in POS – the email sent to the customer about the table booking is now also sent to the restaurant email address in the WRS (in BCC)
  • Guest Ledger v2 – the report has been optimised and now it works in the background to process greater amounts of data.
  • Bookings Awaiting Guarantee Report - the report has been optimised and now it works in the background to process greater amounts of data.

Fixes

  • Self Service Portal - Request room type change – now the room type translation is shown, if any
  • POS – Upon transfer of charges to PMS, two receipts were printed instead of one
  • Quickbooks – a bug fix related to the PaymentRefNum field

Clock PMS+ Update (30 Jan 2020)

Marketing Segments and Their Transfer from the Rate, Company, Agents and Event to the Booking

We have completed the changes to the way Marketing Segments are sent to bookings from the various locations where these Marketing Segments have been set up ( Companies/Agents, Rates, Events, WRS settings, Channel Manager settings, and settings of New Booking screen default values).

For each new booking, Marketing Segments are taken following a unified model regardless of whether the booking is manually made, comes from the WRS or the Channel Manager.

The same refers to the New Booking screen itself. Upon a change to any of the fields (Rate, Company, Agent, Event), Marketing Segments are updated on the the screen as per the mentioned model.

Here is the new method of determining Marketing Segments upon booking creation:

Each of the Marketing Segments (source, channel, segment) is searched for in an order described below. If the next level has a value – it replaces the one already found. If there is no value – the already found one remains:

  • If it is a WRS booking – the field values are taken from the Default WRS settings
  • If it is a Channel Manager booking – the field values are taken from the Default Channel Manager settings. Please note that there is also a change to the settings here. See below.
  • If it is a booking made by a user – the field values are taken from the New Booking screen default values
  • Afterwards:
  • Rates – the set field values override the previously found ones
  • Company - the set field values override the previously found ones
  • Agent - the set field values override the previously found ones
  • Event - the set field values override the previously found ones

In other words, the order is as follows: Rate, Company, Agent, Event, as the last ones are most important.

There is a change to the settings of the channel manager. The settings of Marketing Segments are removed from the lines of the company map and are added as default settings for the channel manager.

If you have used various segments for each of the OTA companies, now you will have to make a small change, so that the transfer of Marketing Segments can continue the way it was.

More specifically, you will need to transfer the data of segments from the Company Map to the Companies (Agents) themselves.

Here is an example of a booking coming from a channel manager, namely the Booking.com channel, with a BB rate.

  • In the channel manager, the default settings are: Marketing channel: ОТА; Marketing source: Online
  • In the BB rate, the default setting is: Marketing segment: Individual
  • In the Booking.com, the default setting is Marketing channel: Booking.com
  • The booking will be created with: Marketing channel: Booking.com; Marketing source: Online; Marketing segment: Individual

Other changes:

  • Creation/copy of multiple bookings. We have changed the whole functionality, so that it can support the creation or copy of much more bookings at a time. Still, we have added a limitation to the number of bookings that can be created at a time to prevent user mistakes. The limitation is the capacity of the room type selected.

    We have added a new screen where you can see the task status. Upon the booking creation, you can choose if you would like to open and edit them, use the Advance Search to open them or simply close the screen.

  • Housekeeping tasks – automated assignment. We have redesigned the logic behind the automated assignment of housekeeping tasks. In our opinion, this logic is the optimal one.
    We would like to remind you of the criteria used for the automated assignment of housekeeping tasks. The idea is that tasks should be equally distributed (depending on the number of credits for each task) while minimising the movement of chambermaids among the floors or the bodies of the hotel (the housekeeping sector of each room is taken into consideration).
  • Customer Cost Centre – a new field on the Folio, Booking and Event screens.
    Use the new field to enter information on the booking or the event screen which is then to be transferred to the folio and be present in the printouts.
    The goal is for the customer to get feedback in relation to their accounting and be able to make a connection between the costs made for hotel services and their own codes, identifiers, accounts, projects, etc.
  • We have changed the Reports screen to show the new ledgers (Ledgers v2) and hide the old ones.
    On the Reports screen, the following reports have been updated to their new version: Trial balance, Guest Ledger, Company Ledger, Deposit Ledger.
    In the Obsolete Versions section, you can find the old report versions: Trial Balance, Guest Ledger, Deposit Ledger.
  • Accounts Receivable Report. To make the report clearer and easier for comparison with the data from the other reports (Trial balance, Guest Ledger, Company Ledger), we have added a section to it showing the closed, but OVERPAID folios, i.e. the negative balance ones.
  • In the ledgers (Trial balance, Guest Ledger, Company Ledger), we have made the Accounts Receivable column clearer.
    The column values now also include the values of the payments from the closed folios. Before they appeared in a separate column, and, as a result, it was very difficult to compare the values between the Ledgers and the Accounts Receivable Report.
  • Booking Pre-Authorization Report – to the status filter, we have added the following statuses: check-in, expected, checked-out
  • The Agent has been added to the booking requirements for a new booking.
    In particular, similarly to the way you can make a new booking with the selected Company without the guest contact details, now you can make a booking with the selected Agent without any other contact information.
  • In the Gift Voucher Webshop, we have added the State field.
  • Email address field validation changed. Now it supports UTF characters in the email address.
  • We have optimised the functioning speed of some screens: POS and charging; Closure screen; Room settings screen; Payment screen for folios of private customers;

Channel Managers

  • RoomCloud – now you can process Company info sent with bookings.To this end, you need to change the Channel Manager's settings. If not done, it will continue working as before. Here is how the new setting will work.
    • In the RoomCloud settings section, click the "Switch to Agent and Company mapping (v2)" link. As a result:
    • A new map will appear - Agent map (the old Company map will disappear). The data entered in it will be transferred to the Agent field in the booking. This way the bookings from Booking.com will be reflected in the Agent field instead of the Company field as before.
    • If, in the received XML, there is data of the company related to the booking (e.g. Bosch), the system will look for it by the received VAT/Tax number and enter it into the Company field of the booking, if such a company is found.
    • If not found by the VAT number, there is another way for the system to look for this company – based on the CompanyId field from the XML. The system looks for a company with the same code in the Channel manager search code field. This field is designed to be used for the manual mapping of companies to the Channel Manager, when bookings are received without a VAT/Tax number.
    • If this company search method also doesn't produce a result, a To-Do is created and the booking is imported without a Company.
    • In addition, for the Agent map, you can use the option for transferring charges for each of the OTA channels (Agents). For each of them, you can decide for the charges: not to be transferred; to be transferred to the Agent or to a Company, if present in the booking.
  • ParityRate – now the OTA channel info can be entered into the Agent field instead of the Company field. ParityRate cannot send info of the company, as RoomCloud can. Here the change is small. In the Company map, you can select in which field the OTA channel sending the booking to be entered into: the Company field of the booking or the Agent field of the booking. It is not necessary to change anything, if you wish to preserve the current way of the feature functioning.
  • SiteMainder/Availpro/OTA – At present, when info of a booking with an attached Agent is received, the system will automatically create this Agent, if no other agent with the same IATA or Tax number exists. It is, however, possible for another agent under the same name to exist, but having a different Tax number, for example. In this case, both agents have absolutely the same names and it is very difficult to distinguish them. So now the new agent is created with a new branch. This way you can easily differentiate them and name the branches of the Agents differently when their IATA numbers differ, but their names don't.
  • SiteMinder/Availpro/OTA – we have solved an issue reported by some users concerning the fact that in certain cases the newly added rates are not sent with a full update to the channel.
  • SiteMinder – now with the import of bookings, one more remark received in the XML is processed.
  • RoomCloud and ParityRate – a bug fixed which occurred during the synchronization of the availability and prices, if there are mappings of one and the same rate in Clock PMS+ to several products in the Channel Manager. In such a situation, if there is a problem with one of the products, while the other one passes without any issues, the mechanism for resending the requests for the problematic product didn't work. The issue has been fixed, but please pay attention to the following peculiarity: now if one of the products shows errors, the requests for both products will be repeated. As a result, the communication with the channel manager will be delayed. We would like to remind you that all errors sent by the Channel Manager should carefully be examined and reasons for the errors – removed in a timely manner.

Fixes:

  • WRS – the booking enquiry page was not responsive
  • Channel Managers – we forbade the deletion of room types and rooms participating in maps of the channel managers as this resulted in errors.
  • In case of Event cancellation, if the user didn't have the 'Folio: Void' right and tried to tick the Void Valid Folios checkbox, the app sent ambiguous error
  • POS – a bill couldn't be voided, if there was a surcharge set in the account
  • The VOID link for a transferred payment didn't work.
  • Accounts Receivable Report - Summary – didn't properly account for Days overdue
  • Payment with a Gift Voucher via the WRS, when in an iframe integration, it didn't work properly.
  • When making a booking by Block – the rate from the Block didn't transfer to the booking
  • Errors arising from the deletion of a room type didn't show on the screen.

Integrations:

  • Italy Export - negative quantity not allowed in XML
  • Italy Export – the ZIP code should be '00000' for non-resident companies
  • Lightspeed – The transferred revenue is incomplete when LiteServer used
  • 4suite - error 404 on the creation of a key to a hidden door

Clock PMS+ Update (18 Nov 2019)

Product updates

SITEMINDER and AVAILPRO – Import of Agents and Companies

For the channels of SITEMINDER and AVAILPRO, we have added a new feature allowing you with the import of bookings to have information of the Agent having made the booking and the Company the booking refers to when it is for corporate guests. Not all channels can provide information of the Company, but the bookings from GDS contain such details.

  • The old behaviour was for an OTA channel info to be transferred to the Company field.
  • Under the new behaviour, the OTA channel details are transferred to the Agent field, and if the booking is for corporate guests and there is Company info available, it will be transferred to the Company field.
  • We have preserved an option to use the old behaviour, if you like it more. Which of the two behaviours will be used is controlled through the new setting.

In addition, to make the new behaviour possible, we have added two new fields to the Company screen - IATA and Channel manager search code. Use the first one to enter the IATA number of the Agent, and the role of the second one to ensure additional mapping option of the received data relating to the Company or the Agent, when there is no other reliable identifier.

Here are more details of the setting and the related behaviour:

The system behaviour depends on the new 'Company map' setting:

  • Channel-to-Comnpany (v1) – the existing behaviour is preserved and the ОТА channel refers to the Company in the booking;
  • Agent and Company mapping (v2) –a new behaviour able to complete the info of the Agent and the Company in the booking;
    • In the "Company Map" linked to the Portals/ОТА channels mapping, for each of them choose the default Agent.

The processing of XML under the new behaviour (Agent and Company mapping v2)

Agents

  • If there is no info of the Agent in the XML – the info of the Default Agent as specified in the Company map is transferred to the booking.
  • If, with the XML, we receive information of the Agent and the same has an identifier (IATA or other code) – respective Agent can be found by one of these fields: Channel manager search code, IATA, VAT number
  • If we cannot find it, the system AUTOMATICALLY creates a profile of the Agent. A To-Do is generated.
  • In the cases when the XML contains info of the Agent, but the identifier (IATA or other code) is missing – the booking remains without an Agent and a To-Do is generated. The same applies also to the case when the system finds more than one Agent for the respective IATA/Code.

Companies

  • If the XML contains info of the Company and its identifier, the system will look for this Company in Clock PMS+ by the following fields: Channel manager search code, IATA, VAT number.
  • If found, the Company is transferred to the booking.
  • If not found or more than one Company found, the booking remains without a Company and a To-Do is created. The same applies to the case when there is data of the Company, but the identifier is missing (VAT number, code or similar).
  • Please note that in contrast to Agents, Companies are NOT automatically created.

IF YOU LIKE THE IMPROVEMENTS, WE'LL APPRECIATE IT IF YOU TAKE A MINUTE TO LEAVE A SHORT REVIEW HERE.

POS - New Paperless Bill with a Tip Option

To the POS, we have added a new feature for the following purposes:

  • For customers to be able review their bill on the waiter's mobile device;
  • For customers to be able to enter a tip, if they wish to leave such one. Here our goal is to enhance the collection of tips.
  • For customers to be able to sign their bill electronically, if it is to be transferred to the hotel room.

As all of these operations will be performed on the waiter's mobile device, we have made sure they don't access the system by accident, i.e. we have temporarily locked them on the new screen to prevent the access to the screens of Clock POS.

Here are more details of the new feature:

  • It is designed for both the bills paid in cash or by credit card and the ones transferred to the hotel.
  • Before closing the bill and upon the eventual selection of a room to transfer the bill to, from the Settle screen click the 'Client View' button.
  • A new screen opens with the view of the bill. The system is now locked and you can hand the device to the customer.
  • On the new screen, the customer can review their bill. In the upper and the lower parts of the bill, there are "Check and confirm the total amount" buttons. Please note that you can customise the text. For more info, see the next section.
  • The client has to click "Check and confirm the total amount" button.
  • A new screen opens where the customer is prompted to fill in the total amount to be paid, including the tip. You can enter the same or higher amount than the one on the bill. The next step is confirmation.
  • The system will show a Thank you! screen.
  • If the bills is for transfer to a room, the customer has to click the "Sign" button and use the screen to sign the bill.
  • When everything is ready, you can get back to the system using the "Back/Login" link at the bottom. Enter your password to connect.
  • You are redirected to the Settle screen, where you can complete the bill transfer to the respective room or finalise the payment and close the bill.
  • Please note that if you wish to let the client once again go through these screens, you should make sure you have voided the Tip payment (if any).

Translation/Text change

To change certain texts or translate them into another language, please select ''Management'' - ''Languages and Texts'' - ''Printout Translations'' next to to the respective language. You can change the texts of: Check and confirm the total amount, Please fill in the total amount, Thank you! and Please, sign your bill.

IF YOU LIKE THE IMPROVEMENTS, WE'LL APPRECIATE IT IF YOU TAKE A MINUTE TO LEAVE A SHORT REVIEW HERE.

Other Improvements

  • Folios – group charge sorting. As you know, in the folio charges are grouped by the so-called "Source". The "Source" can be a Booking, Event, Company, Meeting Room Booking, Catering, so on. We have made certain changes for charge groups to be sorted out chronologically (by date, and for the once having time of posting – by time). This way the folio screen, as well as its printout will be better arranged and easier to review.
  • Occupancy and Charges Report - the report has been changed, and now its generation occurs in the background. Thus it can process greater amounts of data.
  • A new Adults/Children column added to the Rate Control Report reflecting the number of adults and children, as well as the children's age.
  • A new column to the Advanced Search screen - Children age. It shows the children's age entered into the booking Adults/Children.

IF YOU LIKE THE IMPROVEMENTS, WE'LL APPRECIATE IT IF YOU TAKE A MINUTE TO LEAVE A SHORT REVIEW HERE.

Fixes

  • POS - Covers/Customers Report – the date filter now works by closing date. Thus the information is more accurate in terms of the closure reports.
  • Trial Balance v.2 – when issuing more than one correction document, there were some discrepancies in the checksums in the report.
  • When coping rates, the marketing segments were shared between the original and the copy, and the edit of one of the rates either in the original or the copy led to changes in the other one, too.
  • Self Service Portal Language – if a language is selected in the guest profile, the Portal will be visualised in this language, otherwise, it will use the Default Language, as specified in Languages and Text
  • The edit of the service date of charges is linked to the Charges: Create right.
  • The button for testing a custom SMTP already works.

Clock PMS+ Update (28 Oct 2019)

Events – Copying Event content to another one

We have added an option to ease your work with Events. The new functionality allows you to copy whole Events or parts of them to other Events. Apart from being able to copy repeatable Events, you can also use the feature to create Event templates or Packages to be used for building the new Event.

In the process of copying the information from one Event to another one, dates and quantities are copied relatively - see more details below. If you create Events to be solely used as Templates or Packages, it is best after their creation to fully cancel them (including their charges), so that they don't appear in your reports. With the copying process, both active and cancelled elements are copied as active ones.

To copy the content of an Event to another one:

  • You will first need to create the new Event which is then to be built up. Fill in the new Event form – dates, company, status, etc. 
  • In the newly created Event, click Copy from
  • Find the existing Event, Template or Package by name or company. You can also use the new "Tag" field we have added for easier search of events. Take advantage of this new functionality to designate the Events you have created to use as "Templates" or "Packages", so that you can quickly find them later on.
  • Choose the Event through the Select button
  • Fill in the data:
    • From Date. Allows you to set on which date the selected Event to be copied. Below you can find a few examples related to the use of this date in "Date Relativity" section.
    • Persons. The number of persons filled in here will be transferred to the newly created Meeting Room Bookings and Catering.
    • Charge Qty. Find more details in Qty Relativity paragraph
    • Included elements:Select which data of the Event to be copied to the new one:
      • Charges - Charges posted to the Event itself
      • Catering - All catering and the related charges
      • Meeting Room Bookings - All bookings and related charges
      • Blocks - All blocked rooms by room types and rates
  • Please note that during the copying process only the Event content is copied, and not the Event fields. In other words, the fields filled in the new event form will not be changed.

Date Ralativity

When copying the content of one Event to another one, it is very important to know how date copying works.

Let's examine these two cases:

  • Simple case.
    • The Event to copy from is on 01.01.2018. All of its elements (Meeting Room Bookings, Catering, Blocks and all related charges are for 01.01.2018)
    • We create a new Event for 01.08.2020.
    • Copy the content and enter into the From Date field: 01.08.2020
    • The newly created elements and charges will be for 01.08.2020.
  • Complex case:
    • We have created an event to be used as template – "Two-Day Corporate Package". It has elements and charges for 01.01.2018 and 02.01.2018.
    • We create a new Event for 4 days – arrival on 01.08.2020, and departure on 05.08.2020. This Event will be built up based on 2 ''Two-Day Corporate Packages".
    • And copy the content while entering into the From Date field: 01.08.2020.
    • Now the elements and charges copied from the old Event where they were for 01.01.2018 will get a new date - 01.08.2020, and the ones that were for 02.01.2018 will remain for 02.08.2020.
    • We once again copy "Two-Day Package", but this time we type the date of 03.08.2020.
    • The copied elements and charges of the old Event initially being for 01.01.2018 will now be for 03.08.2020, and the ones for 02.01.2018 will become for 04.08.2020.
    • This way we can build up an Event from several different templates for the respective dates.

Qty Relativity

When copying the content, you have two options how charges to be copied:

  • If you select Plain for Charge Qty , the values of all charges will directly be copied as they are. In other words, if a charge of the initial Event had a value of 10, the charge of the newly created Event will also have the value of 10.
  • If you select Coefficient for Charge Qty, a model will be applied under which the new quantities will follow the ratio between the old PAX and the newly entered PAX.Here is an example:
    • You have an event that you use as a template – "Hall and Drinks One-Day Package". It contains one hall booking for 10 PAXwith the following charges:
      • Room Rent - 100 EUR (no qty)
      • Water - 2 EUR x 10
      • Cola-Cola 1.5 l - 4 EUR x 2
      • Fanta 1.5 l - 4 EUR x 1
    • Create a new Event, and when copying, enter into the Persons field: 20. The Coefficient between the new and the old PAX is 20 / 10 = 2.This way the copied charges will have the following values:
      • Room Rent - 100 EUR (no qty). Its value will remain the same, as this charge has no quantity.
      • Water - 2 EUR x 20 – The water charge will become 20 (10 * 2)
      • Cola-Cola 1.5 l - 4 EUR x 4 – The Coca-Cola charge will become 4 (2*2)
      • Fanta 1.5 l - 4 EUR x 2 (1 * 2)
    • The same logic will be used if the new PAX are less than the old ones. In other words, if you specify 5 for Persons, the Coefficient will be 5 / 10 = 0.5. All quantities will be reduced by half. In this case, it is important to know that the system will apply rounding to the bigger whole number, so returning to the above example, the Fanta charge will be rounded from 0.5 to 1.

It is the same with charges related to Meeting Room Bookings or Catering. Please note that direct Event charges are copied 1:1.

Blocked Rooms

In the process of copying Blocks, the date relativity principles are followed, however, the number of rooms is copied 1:1. This way, what has been entered into the first event, this would be copied to the new Event, as only the dates will change in accordance with the Date Ralativity model.

If you copy several different Blocks for one and the same type of room/rate in one Event, the quantities will accumulate for the respective date, i.e. in the copying process, they merge instead of being updated.

Please note that you cannot copy Blocks having a longer duration than the Event they are copied to. In this case, the Вlock duration will exceed the new Event period resulting in an error.

Charges – new rights ( PMS ) and floating price ( PMS and POS )

We have improved the rights in terms of charging, so that you can more precisely regulate user access. A new "Floating price" feature added.

Floating Price. To the charge templates, we have added a new Floating Price field. You can use this field to specify which charge templates do not have a fixed price and it is to be determined in the process of charging. This way, users with a lower level of rights (e.g. not having the Custom Charge right) can charge such articles, as in this case, the system will ask you for a price only without letting you change other attributes set in the charge template. This feature is available for both PMS and POS.

Changes to the Charge Rights:

  • Charges: Create – this right allows employees to use ready-to-use charge templates without changing any other related attributes. If the charge template is "Floating price" marked – the system will ask for a price and they will be able to post the charge. This right also gives you access to the editing of the service date of the charge, and users having made a mistake when determining the date can correct it.
  • Charges: Edit and Void – this right allows you to edit the price and quantity of already posted charges, as well as to void them.
  • Charges: Edit print text – with this right, the user can edit the print text of a charge.
  • Charges – Custom Charge or Modifier Posting – having this right, users can post Custom charges by specifying all necessary attributes. It also lets you edit all other attributes of a charge: Text, Revenue Category, Custom fields, etc.

Occupancy Forecast

  • We have added totals (for the hotel as a whole) to the Occupancy Forecast: Total Capacity; Total Adjustmentс; Total Room statuses (OOS); Total Bookings and Total Blocks. If segmentation selected, you can see the total amounts like Total Non-Guaranteed and Total Guaranteed in the amounts of Total Bookings and Total Blocks.
  • We have changed the report to not show room types not having any data. This way, the archived and no longer used room types will not appear in the report.

Other Improvements

  • Deposit Ledger v2 – the report has been changed and now its generation occurs in the background. Thus it can process greater amounts of data.
  • Now on the language list in the back end, e.g the generation of guest mails or Event documents, you can find languages that are not public to be used for the purposes of your correspondence, though not used in the WRS yet, for example. Please note that WRS and Self Service will continue working with the public languages only.
  • We have made changes to the support for QR codes, so that they can be used in all email clients.

Fixes

  • Charge – in the edit form, the print text field was automatically filled in and saved without this being initiated by the user.
  • WRS – under "by room numbers" mode, the calendar didn't always show all rooms.
  • USTI – we fixed a bug related to the currency and the "undefined method `currency' for nil:NilClass" error

Clock PMS+ Update (02 Oct 2019)

Improvements

  • Occupancy Forecast - Include Optional blocks. On the Occupancy Forecast screen, we have added an option to include or exclude Optional blocks (Optional and Allotment). Click the "Include Optional" button to include them in the calculation of the Occupancy Forecast, affecting the number of occupied and free rooms.
    By choosing Segments - Booking Status, you can also see details of the occupancy by statuses. In the Blocks group, apart from the already present Guaranteed and Non-Guaranteed,now you can find the following new statuses (if you have such ones):
    • Optional
    • Allotment
    • Optional in Guaranteed
    • Optional in Non-Guaranteed
  • The last two statuses show that the event is guaranteed or not and that a specific block contained in it is marked as optional.
  • Rate – Marketing Segments. To the rate, we have added the three marketing segments: Marketing source, Marketing channel, Marketing segment. The aim, however, is to automate the completion of the marketing fields in the booking. The marketing segments in the rate, similarly to the ones on a Company or Event screen, are transferred to the Booking screen with the following priority order: If a given segment is filled in on the screen of the chosen Company or Event of the booking, this segment will directly be taken from there. If not, its value is taken from the Rate. In other words, the selected information on the Company/Event screen has priority over the on the Rate screen. The automatic transfer feature works on the new booking screen. The same applies to the creation of a new booking from the Rate and Availability screen or the Event.
  • Events – Credit cards. Now you can add credit cards (Credit Vault or Adyen Tokenizations) to the Event. Use them to pay Event bills. In this regard, we would like to remind you that, under the PCI DSS requirements, credit card details can solely be entered into fields specially designated for this purpose. Any credit card details entered in other that the specially designated ones will automatically be deleted upon their detection.
  • Room Type Sorting. We have added a room type sorting feature. To use it, go to: 'Settings' - 'Room Type' - 'Sorting'. You can rearrange the types through the drag-and-drop functionality. The arrangement applies to all operational screens of the system.
  • Confirmation letter - Extra Services text translation. The selected extra services (charge templates) in the WRS, as well as the selected templates in the 'Daily Charges' of the Booking, now appear with their translations in the confirmation letter. As before, the translations of the charge templates are set from ''Settings'' - ''Languages and Texts'' - ''Charge Template Description/Translation''. In this regard, we would like to advise you that only charge templates can have translations in contrast to charges. Charges only have a description text which cannot be translated.
  • Custom background. Now you can upload your own background image for the home screen of the application (it is selected for the account): ''Settings'' - ''Logos / Image Library'' - ''Custom Background Image'' – select an image and click ''Save / Upload''. Unfortunately, this background cannot be applied to the login screen, as it is outside the system and your account, hence no connection can be made to the background image of the account.
  • Events – we have changed the calculation of the value of Blocks (based on the selected rate), so that net values are also calculated. This way you can run a custom printout for an Event containing net prices (VAT not included) and amounts for the Event.
  • City Tax – now you can select a Revenue Category for City Tax charges: Setting - City Tax.
  • SiteMinder (ОТА) – using the contact person's details from the XML file, a contact person is created in the Booking.
  • In the Event, we have added a new user in charge field. For the time being, this new field is nowhere used in the system.
  • AvailPro – a new setting added to let you subtract the commission % when importing prices. This setting applies to each Channel individually and is set in the Company Map.
  • Service charging screen. The new screen for selecting Other Date – the second date is now automatically completed.
  • The LightSpeedrestaurant POS was enhanced and the following features were added:
    • Floor support. You can now create s revenue group / category mapping for the LightSpeed item groups separately for each floor;
    • Payment sub-type mapping. You can map the payment sub-types form the Clock POS where the end of day revenue is transferred. Please note that the payment sub-types of the Clock POS account are different then the ones in Clock PMS and you should configure them if you haven't already;
    • Charge and Payment custom fields are added in the revenue map and payment map sections. Now you can define the values which will be added with each charge and payment transferred by the interface to Clock which is very important if the data is exported to your financial platform;
    • The transferred charges from Lightspeed can be filtered in the charge reports which support Source. When you select Transfered you will be able to see the charges transfered from LightSpeed and if you select Not Transfered they will be excluded;
    • The charges are displayed in a new more convenient way in the customer folio/bill. The charges appear with their original names grouped under the Lightspeed bill number as the example bellow:
      Lightspeed bill # 123
      Coffee 1 x 3 Euro
      Tea 2 x 2.5 Euro
      Water 1 x 1.5 Euro

Fixes

  • Adyen – for a small number of customers, the tokenization feature didn't work properly leading to the occurrence of empty credit cards;
  • We have added the missing translations for Extra Services screen in the WRS;
  • Block Pickup Report – the block status was incomplete/unclear;
  • An issue fixed with the payment via the Self Service Portal and 3D Secure;
  • Block Pickup Report – when Summary view used, the amounts weren't correct (Total column);
  • Occupancy forecast - we have fixed an issue with the new Segmentation feature causing wrong Booking segmentation;
  • RoomCloud - the reference_number filter in the inbox allowed the wrong/ignored imports;
  • Bookings – we have improved the behaviour if there is a conflict (the simultaneous saving of one and the same booking from different work stations);
  • Hotel Registry – fixed issue with the sorting by Last Name
  • Event Dates Report – an issued fixed pertaining to the time zone of the account and the report's dates.
  • A fixed issue with the copying of a rate plan and the edit of restrictions afterwards.

Clock PMS Update+ (31 Jul 2019)

Events

We have made the following changes to Events in Clock PMS+:

  • A new option added to let you specify the rate of each block. This way the full price of an event can be calculated, including the nights.
  • New statuses added to Events for better management of the sales cycle.
  • Blocks not accounted for in the Occupancy Forecast (optional).
  • New printouts added to Events (Function Sheet and Banquet Event Order), as well as more options for custom templates
  • New filters to the Event search

Rates in the Block

For each block (a table row with event-blocked rooms), now you can specify the related rate. In addition, it is also possible to add a few Blocks (rows) for one and the same room type, as in each row you can specify a different rate. For example, you can have two Blocks for Double rooms, with the rooms being charged at a single room rate in the first block, and at a double room rate in the second one. Use the new feature to precisely calculate the room prices for a single event without being necessary to create and manage bookings.

This functionality does not create charges and has no option to give you a report of the expected revenue, but still it is very useful for quick change of blocks, periods and the number of rooms, as the calculation is always based on up-to-date block info. This calculation can be found in the new 'Banquet Event Order' printout, described in a greater detail below.

To use the new feature:

  • Click New or Old Event and select 'Block - Edit'.
  • To specify a rate for the Block (table row), click the pen icon in the rightmost table column. Choose the respective rate and Save.
  • To add a new Block (table row) with another rate – select the '+ Block' button at the bottom. Fill in the room type and rate. Save. Enter the number of rooms as before. Please note that you cannot have two absolutely identical blocks (table rows), i.e. there cannot be two rows for one and the same room type and rate, or two rows for one and the same room type, but not having rates.

New Statuses

We have expanded and re-organised the statuses of the Event, Meeting Room Booking, Catering and Block to better help you at the different stages of the sales process.

Event

On the Event screen, there are two status fields:

  • Guarantee Status. This status is responsible for how probable it is for an event to take place, and it also shows its stage in the sales cycle. The statuses are as follows: Allotment, Option, Non-Guaranteed, Guaranteed. Here the new statuses are Allotment and Option. It is important to know that Blocks of such a status are not included in the hotel occupancy.
  • Check-in Status. It shows if guests are already at the hotel. The statuses are as follows: Expected, Checked-in, Checked-out, Cancelled, No Show.

We have chosen an implementation with two statuses instead of one to avoid the loss of important information. This way you can also have information of lost business (Cancelled, No Show) and what guarantee status was in this case (Allotment, Option, Non-Guaranteed, Guaranteed).

Block, Meeting Room Booking and Catering

Block, Meeting Room Booking and Catering also have statuses, however, they are a bit different. Their statuses are linked to the Event status, but can also be managed independently. They have two statuses:

  • Optional - Yes/No. The elements of the Optional status are included in reports and printouts, but do not participate in the occupancy.
  • Cancelled - Yes/No. The cancelled elements are not included in reports and printouts, and do not participate in the occupancy.

Benefits of the New Statuses:

  • With the change of the Event status, the status of the Block, Meeting Room Booking and Catering is also automatically changed.
  • For example, if you make the Event Optional or Allotment - the Block, Meeting Room Booking and Catering will also immediately become Optional. With this status, they do not participate in the occupancy. Here the greatest impact is on the Block – the rooms contained in the block will not be included in the availability calculations.
    • If you specify that the Event is Cancelled or No Show – all of its elements also become Cancelled. In other words, they once again do not participate in the occupancy.
  • It is also possible to manage more aspects of the elements.
  • For example, an element of a valid Event can be cancelled. If a given Meeting Room Booking, Block or Catering is no longer relevant, it can individually be cancelled. This way you can once again keep the information of the lost business even within the already completed events.
    • You can also make a certain element Optional in an already confirmed Event. This way you will have the whole information in the most precise way possible – what has been confirmed and what is optional in the Block.
  • There are filters linked to the new statuses to be used in the search of Events and Activities.
  • In the Occupancy Forecast, you can get the details of the occupancy from the Blocks - Guarantee and Non-Guarantee.

New Printouts

We have implemented two new major Event printouts - Function Sheet and Banquet Event Order. If you wish to use the old one (Info Invoice), please see below.

  • Function Sheet – designed for the internal company organisation of the event. The printout has the following layout, each day of the event is on a separate page. Thus it is easier to see the tasks for the respective date.
  • Banquet Event Order – designed for the purposes of correspondence with customers. It contains prices, calculations, and amounts. For a greater customer convenience, it has been implemented as a representation of the event as a whole.

For the two major printouts, we have also created liquid templates. Apart from being able to customise their design, you can use them to build various documents like offers, contracts, etc.

Beo. Click on the image.

Banquet Event Order

Function Sheet. Click on the image.

Web Reservation System - multiple rooms

To print each of the forms:

  • Function Sheet
    • Open the Event
    • Select "Preview" from the top navigation
  • Banquet Event Order
    • Open the Event
    • Select "Add" from the "Event Document" section
    • For "Template" select "Banquet Event Order"; Select "Language"; Apply
    • Fill in "Subject" and "Email" and select "Create"
    • You can edit the rendered document before saving it. Save.
    • Select 'Send' to send the document via email
  • Info Invoice
    • Same as "Banquet Event Order", but for "Template" select "Info Invoice".

Other Improvements

  • Occupancy Forecast - Segments.In the occupancy forecast, we have added an option for seeing the information of the occupied rooms by bookings and blocks by various segments. For the time being, the supported segments are:
    • Booking/Reservation Status – the breakdown by this segment allows you to see the occupancy by Guaranteed / Non-guaranteed Bookings and Blocks. For the time being, it is not possible to receive information of the data that is not included in the occupancy like Cancelled/No show Bookings and Optional/Allotment Blocks, but we have planned to make it possible in the future.
    • Marketing channel; Marketing source; Marketing segment. You can see the occupancy data by any of these marketing segmentation parameters.
    • To select a segment by which to analyse your occupancy, go to 'Occupancy Forecast' and from the 'Segments' drop-down menu choose the desired segmentation approach. The segments will appear under each of the following groups - Bookings and Blocks.
  • POS – Transfer by Guest's Name.We have added a new option for the search of guest bookings from the POS when transferring bills from the POS to the PMS. Now you can search bookings by the guest's name in addition to the previously available search by Room. By default, the new feature is not enabled. If you decide that it will be useful for your property and does not pose a risk of misuse or errors, you can enable the feature in the following way:
    • Log in to the account of the PMS (Hotel) for which you would like to enable the transfer by guest's name.
    • Select Other - Settings - Allow charge transfers.
    • Click 'Allow transfer by guest's name'. Save.
    • In each POS transferring to this hotel, a new 'Guest' tab will appear on the room selection screen. Select this tab and fill in the name of the guest (e.g. the surname) and click the search icon. Choose the booking from the list.
  • Confirmation – extra services.In the confirmation, we have added information of the selected extra services in the booking. Please note that the data is not taken from the charges and the folio of the guest, but from the 'Daily Charges' section of the booking.
    • WRS uses this section precisely to specify the extra services selected by the guest. In other words, the Confirmations sent by the WRS will contain information of the extra services selected by the guests.
    • Info of the 'Daily Charges' can also be included in your custom confirmation emails. See the sample template of confirmation email to learn more about this..
  • Feratel Tourist's tax interface.
  • Block Pickup Report – we have added quick Block links as well as a Block status column. Please note that the Blocks of the Optional/Allotment status are not included in the occupancy. In the Block Pickup Report, you can see the number of rooms by such blocks, if you choose: Report type: "PickUp %". If you choose Report type: Availability – for such blocks, you will see 0 rooms because they do not participate in the occupancy and do not actually block rooms.
  • We have added two new fields designed for future use, as for the time being they are not used by the System: Settings - Account Info - Location and Settings - Logos / Image Library - Icon image.

Fixes (with this update and hotfixes)

  • Trial Balance – it didn't reflect Correctional folios properly
  • Channel Managers – marketing_segment was not transferred with the booking import
  • The export to Excel has been removed on the Event – Preview screen. The view is very complex and couldn't be exported.
  • Availpro – the export didn't start when all elements are included for export.
  • The Charge transfer to bookings screen didn't work, if there was even a single booking without a room in the hotel
  • Adyen - notifications – now event_code is also taken into account which created problems with some of the rarer payment methods
  • Italy Export - some fixes
  • During tokenization through Adyen, there was a frequent error - 'The shopper reference has no associated card in Adyen!'
  • Adyen – Capture Refunds (pre-authorized) had a wrong PSP
  • Channel Managers – it was impossible to disable the tokenization for an individual product
  • Passport Images – the error was not visible (e.g. with the images of greater sizes) and the user was unaware of what was happening.
  • WRS – the chosen profile language was not taken into account at the last step
  • Closed Folio Report – the Company filter didn't work properly in certain situations

Clock PMS+ Update (12 Jun 2019)

Booking Contact Person, Agent and Company Contact Persons

To the Booking screen, we have added an option to specify a Contact Person. This is for the cases when the booking is not made by the guest, but by someone else.

Here is an example of such a case where the new Contact Person option can be very useful: The manager of company X – S. Smith will travel. His executive assistant A. Wallis is organising the booking. In this case, A. Wallis will be the Contact Person and the communication related to the booking will be between the respective hotel and Wallis, but the guest will be S. Smith.

The booking's Contact Person is not mandatory in contrast to the guest. The Contact Person's data should be entered solely in the cases if they are different from the ones of the guests in the booking.

To expand this functionality, now you can add multiple Contact Persons to a Company. Apart from being reference info on the Company screen, you can easily choose Contact Persons in the bookings from ones related to the given Company.

Additionally, now you have an Agent field on the Booking screen. This way, a booking can also have a Company (e.g. Bosch) and an Agent (e.g. TUI). The Agents can be selected from the list of the existing companies. The role of an Agent in a booking is mainly a reference one, i.e. this way, you know which company organises and is responsible for the booking. As a booking's Agent is also a company, the above functionality (Company Contact Persons) is also valid for this Agent. You can choose the Contact Person for a booking among the ones related to the Agent.

We are now working on changing the segmentation reports, so that you can receive information by Companies and Agents.

Here is a detailed list of the new functionalities and changes:

  • On the New Booking/Edit screen, apart from Guest, you can now select one more profile – Contact Person. You can search for a profile or create a new one.
  • On the New Booking/Edit screen, apart from a Company, you can also choose an Agent. Agents are not separated from Companies and are to be found in the list of companies being common for all Accounts in the Subscription.
  • To the Company Edit screen, we have added the Contact Persons of the Company .
  • If you have selected a Company and/or Agent for a booking, a Contact Persons button will appear under each of them. Use it to select a Contact Person related to the Company or the Agent. Once selected, this Contact Person will be transferred to the booking.
  • In the Guest Profile, you now have two tables of the related booking to separate the bookings the profile is used as a guest from the ones where this profile is used as a Contact Person.
  • Search by Contact Person. Apart from the contact details (name, telephone, email), now you can also search bookings by Contact Person details. This option is available in: Quick Search (in the navigation bar); Arrivals; In Hotel; Departures and Advanced Search .
  • Search by Agent. In the booking lists (Arrivals, In Hotel, Departures), when a company is selected, the system will search for bookings in which this company is selected as Company or Agent. On the Advanced Search screen, there is a separate Agent filter to help you find the bookings related to the respective agent.
  • Creation of multiple bookings with one and the same Contact Person. Choose a Contact Person in the new booking form to be automatically selected in all the copies of the booking (Create multiple).
  • Guest Mailer. If a Contact Person is selected for a Booking, all communication will be sent to the selected Contact Person instead of the guest in the booking.
  • WRS – we have added a new option for completing a booking: "I'm booking for somebody else". When selected, the entered data (name, telephone, email, etc.) will be added to the booking(s) as a Contact Person, and for each booking the system will additionally require the names of the guests to stay at the property.
  • CSV import of bookings – a new Agent field added. Similarly to a Company, Agents can automatically be created with the import of bookings or to be included in a company import file.

Events

We have added new fields to Catering and Meeting Room bookings, as well as a new search layout for Catering and Meeting Room bookings.

Now the following fields can be filled in for both Meeting Room and Catering bookings:

  • PAX – Number of guests.
  • Event Activity Type. Use it to select the type of the given activity. For example: Banquet, Seminars, Conferences, Wedding, Teambuilding, Anniversary, etc. The list of Event Activity Types can be completed from Settings - MICE - Activity Type
  • Activity Setup Style. Through this option you can specify the style of preparation of the Meeting Room or the Restaurant for the respective Event, e.g. THEATRE, CLASSROOM, U-Shape, T-Shape, BANQUET, etc. The Activity Setup Style list can be completed from Settings - MICE - Activity Setup Style
  • To the Catering screen, we have added an option for Restaurant selection - the place of rendering the catering services.

We have also made changes to the Search of Event Activities (old Navigation - Events - Search - Meeting Room Bookings).

  • A new and clearer search layout added (Details – Compact View) to better visualize the main fields of each activity: Period, Activity Type, Meeting Room/Restaurant, Setup Style and PAX.
  • A new Restaurant filter added.
  • A new Status filter added. By default, only the valid (uncancelled) activities are now shown.
  • Bookings/Catering filter added – Use it to receive separate Booking and Catering lists.
  • Activity Type filter added – to search for activities of a certain type.

We are also working on new Event printouts - Function sheet and Banquet Event Order, as well as on the respective parameters to let you build custom templates of these documents.

Other improvements:

  • Balanced split of charges. We have added one more functionality to the Split charges screen. You can use it to easily generate invoices of advance and final payments. The essence of the new feature is that it will add positive charges (based on a certain percent of the value) to one or more folios, as well as the same charges, but being negative ones, to the source folio.
    The split charges screen can now also be used for company and event folios apart from the guest folios. To use the feature for Company folios go to the Open Folios section of the Company preview screen and select Split Charges. It is similar with the Event screen – from the Folios section - Split Charges
    Here is how the new functionality works:
    • Select Split Charges from the Booking, Company or Event screens.
    • If necessary, add a new folio through the Add Folio button, as for greater clarity, you can name it, for example 'Deposit Event 01.06.2019'
    • Select the charges to be split from t he source folio and click 'Balanced Split'
    • In the field corresponding to the destination folio (for example 'Deposit Event 01.06.2019'), enter the respective percent of split. If a deposit is to be 50% - enter 50.
    • Select the detail level of the newly split charges from the Detail level field: Details (as many as possible charges), Grouped (average quantity of charges), Summary (as little as possible charges). Please note that the detail level cannot be lower than Revenue group/category and Tax rate. This way, reports are not affected, and it is also ensured that the base of the source folio will be accurate.
    • Complete the 'Additional text' field. For example, enter 'Deposit'. Thus filled in, the full text will be added before the charge name to make its purpose clearer.
    • Select 'Split'
    • The feature will determine what and how many charges (depending of the Detail level) to be created as well as their value (% field) . The charges will be posted with a positive value to the Destination folio and a negative one to to the Source folio. The Destination folio is your deposit folio, and the source folio will reflect the remaining amount to be paid.
  • Billing Info – we have added separate fields: City, ZIP and State. If needed, you can you can fill in the fields on the Company or Folio screens screens. These fields have also been added to folio printouts. If using custom printouts, but you would like for these fields to be visible in the custom printouts, you will need to edit custom template printouts.
  • Company Export. The Company search screen now has an option to export companies to a csv file.
  • Two new liquid parameters added to the Guest Mailer and the rest of the templates: current_user_name and current_date. They will allow you to add the name of the user and the current date (and time) to your emails, offers, documentation, etc..
  • POS. In case of Company transfer, the company branch is also visible.
  • POS – to the final bill printout, we have added the fiscal codes related to the local fiscalisation (if any).

Channel Manager, Integrations and API

  • AvailPro
    Our AvailPro channel manager connection is now certified and pilot testing in a production environment are already underway. Then the interface will be available to all customers. Here are the details of the new interface and the supported features.
    • To configure the interface, you need to have an enabled AvailPro add-on in Clock PMS+ and Hotel Code, Username and Password for XML access to AvailPro.
    • The interface is asynchronous. In other words, the data sent by Clock PMS+ to the channel manager is first received in the base of the channel manager which returns a success or error message and then the channel manager sends the data to the channels. So, in Clock PMS+, you can only see the errors related to the communication to the channel manager while not being able to see the ones related to the communication to the channels. To track errors in the communication to the channels, you will need to contact the Support Centre of AvailPro.
    • Mapping of rates, room types, extra services and companies. The mapping is built in Clock PMS+ with an implemented functionality for the channel manager codes to be loaded for selection on the mapping screen. This way, the risk of mapping errors is significantly reduced. Click the AvailPro Maps button to update the mapping codes.
    • The rate structure in AvailPro is slightly different from the one in Clock PMS+. In Clock, one rate is for one room type, while, in AvailPro, one rate can be for an n number of room types. Therefore in the mapping of rates, you will need to choose: AvailPro Room Type, AvailPro Rate = Clock Rate, as the screen has a tree-like layout to save you the multiple selection of AvailPro Room Type.
    • AvailPro supports derived rates. Derived rates are automatically recognised in the mapping no data of their prices is sent. The mapping is still necessary for the purposes of the booking import.
    • The Room Type structure is the same in both systems.
    • The mapping of companies is built enable the Bookings received Gate A to be mapped to a certain Company in Clock PMS+.
    • At the level of Rate and Company, we have added a setting of the Deposit Auto Payment feature. The setting at the Rate level has priority.
    • Another supported feature is the mapping of extra services part of charge charge templates for the automatic charging of extra services. There is a default charge template to be used in the cases when a code is received which cannot be found in the mapping.
    • The messages exchanged with AvailPro are 4: Bookings, Availability, Prices, Restrictions. Each of them can be either enabled, or enabled. If a message type is disabled, this will allow the complete management of the given type of data in AvailPro.
    • The interval at which data is exchanged with AvailPro is 5 minutes for the time being. In other words, the average time for a change from Clock PMS+ to reach AvailPro is 2:30 minutes though the extent of the change itself (the XML size) is very important.
    • In the event of lack of available rooms, apart from the zero availability, stop-from-sale restriction is also sent.
    • The restrictions sent to AvailPro are: Stop, Closed for Arrival, Closed for Departure, Min Stay, Max Stay.
    • We have also implemented compression of days to periods for quicker communication and lesser size of the communication. It means that consecutive days having the same data in each message are communicated as one line with a period instead of a separate line for each date. Data of one year ahead is sent.
    • The mechanism for automatic stop of the communication after 3 consecutive errors. The most frequent reason for errors in the communication to the channel manager is the mistaken mappings or wrong usernames and passwords. In case of such errors, it is pointless to repeat messages before the fixation of the error. With each error, and email is sent to the hotel, as well as in the cases of stopped communication.
    • Clock PMS+ implements the mechanism of automated change of the password each 6 months thus meeting the PCI DSS requirements. Users are not prompted to do anything, but please note that the initially provided passwords won't be valid after some time due to the above-mentioned password change.
    • The system also supports messages prompting the repeated synchronisation of data on the part of AvailPro to Clock PMS+. For the resending of rate/room type data, please contact AvailPro for more information by creating a synchronisation request in AvailPro. Clock PMS+ checks for such requests each15 minutes, and, if any, they are processed and the requested info of Availability, Prices and Restrictions is resent.
    • In importing bookings, we send confirmation containing the booking number in the channel manager (the reference number in Clock PMS+) instead of the booking number.
  • SiteMinder/OTA – We have changed the rate mapping to allow the mapping of one channel manager rate to several PMS rate/room type combinations.
  • Italy Export - drop city, zip_code, province from config
  • Italian B2B invoice XML export
  • Lightspeed – a bug fixed on the config screen
  • API – financial date (revenu_date) to the root endpoint of the account.

Fixes:

  • We have optimised the Tax Report to eliminate the delays.
  • Adyen – the PSP reference has been changed from integer to string.
  • A few missing translations added.
  • The link to the Charge Control Report from Charge Summary DMY is now only for the selected date.

Marketing Segments on the Event and Company Screens (20 Jun 2019)

We have added Marketing Segments to the event and company screens. This way, these Marketing Segments along with ones on the Booking screen will allow you to have consolidated marketing data of your revenue segmentation. Use the Charge Segmentation Report to retrieve the info you need in terms of revenues by segments.

  • Charges directly posted to Company folios are referred to the Marketing Segments selected for the Company.
  • Charges posted on the Event, Meeting Room Booking or Catering screens are referred to the Marketing Segment chosen for the Event.
  • In creating a booking for a given Event, the Marketing Segments selected for the Event are transferred to the booking. On the booking screen they can be changed or supplemented. As before, charges posted to bookings are referred to the Marketing Segments set in the booking.
  • For all charges to have a Marketing Segment, we have added an option to also specify these Marketing Segments in Non-resident client folios. You can choose which Marketing Segments to be used when referring the charges posted to the folios of non-resident guests. To do so, specify the necessary Marketing Segments on the Account Info screen.
  • Please note that the changes to Marketing Segments are not chronologically tracked in charges. In other words, if you set or change Marketing Segments on the Company, Event or Booking screen, reports by Marketing Segments run for previous periods will show updated values. You can use this to add Marketing Segment info of your revenues from past periods.

Clock PMS+ Update (15 May 2019)

Package elements: Per Adult, Per Child, On particular nights only and Offset days

We have added a few options to the package elements to make their management easier and increase their functionality.`

Per Adult and Per Child

For each package element, you can now specify if its quantity refers to a night (regardless of the number of guests), each adult, each child or each guest (regardless if the same is a child or adult).

When accounting for the package element, the set quantity will be multiplied by the number of adults, children or guests depending on the setting.

There might be no information of the number of the adults or children in the booking. For such cases, we have added a new field to the package elements – "Guests by default”. The system use this value when calculating the package element, if the booking contains no information of the adults or children.

On Particular Nights Only

We have removed the 'First night only' option from the package elements and added a new feature to let you specify which specific nights to be accounted for by the package element. The package elements with active 'First night only' option have been migrated to the new field "On particular nights only" setting the value to "1". In the field, you can now specify nights separating them through a comma for which the package element to be activated. Example: "1,3,5". Leave the field empty to have the package element activated for all nights.

Offset days

Through the new setting, you can shift the date of a given charge forward or backward compared to the date of the night. This way, the dates of the breakfast and lunch meals can be on the actual dates they are to be provided instead of the date of the night. By entering '1', they will be charged on the next date. Negative values are also accepted to allow you to have charges referring to the previous date.

In combination with Capacity Counters and Package Availability

Please note that there is certain incompatibility between Package Availability and the new parameters in the package elements. The issue is related to the fact that not always when calculating the Package Availability there is exact information of the arrival, departure, adults and children. These are the cases with the 'Calendar' type availability: date by date. For example, the channel manager availability is sent date by date for one year ahead. In this situation, it is impossible to determine the sequence of a night in the stay, because there is no such one. For this reason, when it comes to 'Calendar' type availability, it is not possible to calculate the availability of the packages containing elements dependent on the sequence of the night in stay (On particular nights only).

Other improvements:

  • A new field in bookings - Marketing Segment. We have added a new field to bookings for the purposes of marketing reports – Marketing Segment. To set its value, go to 'Settings' - 'Marketing Sources / Channels / Segment', and the new field can be used on:
    • New booking/Edit screen
    • Booking Fields Setting Screen – you can choose a default value for the booking screen.
    • Advanced Search Screen – filter and column.
    • Channel Manager Settings – a default value for bookings created in the channel manager
    • WRS Settings – a default value for bookings created in the WRS
    • Charge Segmentation Report – segmentation
    • Booking Segmentation Report – filter and segmentation
    • Bednights Report - segmentation
    • Booking Pace Report - filter
    • Booking Day-By-Day Report - column
    • Booking Import from CSV
  • In the Charge Template Availability Report, we have added another filter - by 'Template group'. This way you can see the availability of a group of similar charge templates.
  • A new feature for import of companies from a csv file. See the sample structure from 'Settings' - 'Import from CSV file' - 'Company sample CSV file'
  • Guest Profile import can import custom fileds (non system fields) now. See the sample structure from ‘Settings' - 'Import from CSV file' - 'Profiles sample CSV file'

API and Interfaces

  • AvailPro - Beta version of the interface has been released;
  • SiteMinder/AvailPro – a new flag in rate maps – price export disabled. This way the map can be preserved for the purposes of the import but no prices to be exported which are not necessary for derived rates defined in the channels.
  • API – to the booking_guest endpoint, a new method of adding guests has been introduced;
  • 4Suite – Virtual keys are deleted upon a change to the status of a checked-in booking;
  • BRP - Show SPA treatment time in UTC;
  • Custom Fiscalization – a new model of maps/settings added;
  • ОТА/Availpro – the change to maps didn't cause the sending of new availability for the changed sequence;

Fixes:

  • WRS – some translations were missing on the 'Edges' product page;
  • The export button didn't get activated in the new Trial Balance;
  • The Channel manager error emails didn't show the channel manager the error originated from;
  • New booking screen – the selection of a room, meals or company led to the loss of the selected rate;

Clock PMS+ Update (20 Mar 2019)

SiteMinder

We are happy to announce the release of a new Channel Manager interface: SiteMinder.

SiteMinder has a reputation for being a powerful, capable and stable channel manager, suited for large and medium-sized hotels and chains. It will make a fine addition to our automated online distribution functionality. The new feature is designed to meet the needs of our large customers.

Here is more info on the new interface to SiteMinder

We have used an improved technology of detecting the changes to availability and prices. As a result, the changed availability and prices should update in SiteMinder for 2-3 minutes average to maximum of 5 minutes. The same applies to the download of bookings. During initial synchronization when the entire database is updated or there is a large volume of changes, the update time can be longer.

Availability

  • Mapping of room types (mapping of specific rooms is not supported) between the two systems. After the completion of the process
  • The system can automatically export Availability (Room Type Level) to the channel manager.
  • You can set a maximum number of available rooms to be sent for each room type. This way, if the number of available rooms exceeds the maximum set by you, only amount corresponding to this maximum number of rooms will be sent.
  • After Clock PMS+ exports its data to SiteMinder, the latter makes sure this data is sent to each of your activated OTA channels.
  • For each room type, you can temporarily (or permanently) stop the availability export. This way you can directly manage the available rooms in SiteMinder, while keeping the mapping of room types for the purposes of the import of bookings.

Rates

  • Mapping of rates between the two systems. Rates in both systems are Room Type Level, i.e. one rate belongs to a certain room type.
  • The currencies of rates are not accounted for, as what is important are the numeric values only. For greater clarity, you are recommended to use one and the same currency in both systems.
  • There is a setting to specify if the exported prices are to be treated by the Channel Manager and respectively the OTA channels as prices including tax or not.
  • For each rate, you can stop the export of prices and restrictions while keeping the rate mapping for the import of bookings

Restrictions

  • The rate restrictions sent by Clock PMS+ are: Minimum Stay, Maximum Stay, Stop, Closed for Arrival, Closed for Departure.
  • In case of no available rooms, Clock PMS+ sends a zero availability for the respective room type and Stop Sell to the related rates. Should free rooms appear eventually, the rate restriction will also be removed.

Booking Import

  • Import of new bookings, modifications and cancellations
  • The bookings created in the Channel Manager prior to the date of the interface activation will be ignored to avoid doubled bookings.
  • On booking import, a certain deposit amount can be charged to the booking credit card. For this purpose, you can specify the necessary action next to each rate in the mapping. Apart from charging, you can also set tokenization in Adyen. It will check the credit card validity through a zero transaction.
  • Please note that SideMinder does not send the CVC codes of credit cards. If necessary, you can contact your payment gateway to allow credit card transactions without CVV codes.
  • Booking extra services. Our interface processes the additional services in bookings. For these services to be charged to folios, you need to select 'Default charge template' in the Channel Manager settings, as well as to make a mapping between the extra services codes received from OTA channels and the charge templates in Clock PMS+. If no mapping is found for the code received, the service will be charged through the default charge template. The service price is retrieved from the data of the received booking. A charge to the amount of the received value is posted.
  • We also support a mapping of a channel to a company, allowing you to automatically specify Booking.com as company in all bookings from booking.com.

User Support

  • In contrast to the Integrated Channel Manager of Clock PMS+, the failed exports to channels, including OTA channel deactivation, as well as any other issues pertaining to the channel manager are to be directed to the SiteMinder Support Centre.

Ledgers v.2

Our target is to achieve a clear distinction between deposits, liabilities and account receivables. Four new reports: Guest Ledger, Company Ledger, Deposit Ledger and Trial Balance

The reports are still under development and testing. We will appreciate your feedback!

Guest Ledger

  • Includes bookings and non-resident folios.
  • Bookings are shown instead of folios
  • Bookings are grouped by status (checked-in, checked-out, cancelled).
  • All checked-in bookings are shown, even if their folios are paid which gives you a clearer picture of your current guests.
  • Typically, there should not be expected bookings as they don't have liability yet.
  • A new term in the report - LIABILITIES **

Company Ledger.

  • Includes company and event folios.
  • Only folios with non-zero balance or some movement are shown.
  • A new term in the report - LIABILITIES **

Deposit Ledger.

  • Includes folios with PAYMENTS but without LIABILITIES
  • To issue VAT invoices for payments made, you need to use Deposit Folios. If no VAT invoice is needed - use normal folio with regular payment instead.

All of the reports can be run for past dates. Reports will show the picture of bookings, charges and payments the way they were in that past date.
The reports can be run on the current date also, so they can be used as operational reports.

* CHARGES: Only charges for the selected or past revenue date are included. Charges for future dates (dates after the selected report date) are NOT included in the report.

** LIABILITIES and ACCOUNT RECEIVABLES: The services rendered to clients, not covered by the existing payment. In other words, the amount of charges MINUS payments, but not less than ZERO. Liabilities are in Open folios. Account Receivables - Closed folios. Examples:

  • Charges 100 EUR, no payments. Liability: 100 EUR
  • Charges 100 EUR, payments 40 EUR. Liability: 60 EUR
  • Charges 100 EUR, payments 120 EUR. Liability: 0 EUR

*** DEPOSITS: Taken payments in normal or deposit folios MINUS liabilities but not less than zero. Example: A stay of 3 nights charged at 100 EUR each. Payment in the folio: 300 EUR.

  • Before check-in - 300 EUR prepayment ( 0 EUR liability)
  • On check-in date - 200 EUR prepayment ( 100 EUR liability)
  • Second day - 100 EUR prepayment ( 200 EUR liability)
  • Third day and after check-out - 0 EUR prepayment ( 300 EUR liability)

Trial balance

Trial balance gives you summarised information of charges and payments in all three ledgers.

WRS - Asks for a guest name for each room

Prior to this change, the multiple bookings created at one and the same time in the WRS were all linked to the profile of the person having created them. To some extent, it was convenient because you could see all bookings created by someone from their profile screen. However, it also led to many errors when guests were checked in or registration cards were filled in (the data of the first guest got erased because no new profile was created for the next guest). There were issues with the Self Service Portal when guests while completing their registration cards were deleting the data of the previous guest.

Here is why we made the following change :

  • If multiple bookings are created in the WRS, with each next booking, guest names are required for the respective room.
  • Now there are two settings regarding which guest fields to be required in the WRS (Settings - Guest Profile Fields - Set visibility/requirement on different screens) – the existing 'WRS' setting related to the guest creating the bookings and a new one 'WRS Additional Guests' related to the data of each room after the first one. You can set the names of the other guests to be required only or add other fields, too.
  • If you set a separate email address to be filled in for each of the rooms, the confirmation letters will be sent to each of the entered email addresses.

As bookings can no longer be linked to one profile, you won't also be able to find them all through a simple search by name of the person having created them as before. To solve this issue, we have made following changes:

  • We have enhanced the 'Related bookings' feature. Related bookings are those having one and the same reference number. The bookings created in the WRS are such, as well as the ones created through the Create Multiple or Save as multiple features.
  • We would like to remind you that you can easily 'relate' bookings by entering '#' and the number of one of these bookings in reference number field of all of the bookings.
  • The already related bookings are now visible in all booking searches: Quick Search, Arrivals/Departures/In Hotel, Advanced Search, as well as in the form of a list of bookings in the guest's profile. So if you find one booking by guest's name, you can quickly and easily find all the related bookings. The related bookings are marked with .... (the number of all related bookings). Click on the icon to open the list of all related bookings.
  • On the screens of all related bookings, we have added a 'Master Booking' section with the contact details of the booking they are related to. This way you can effortlessly find the guest having created all these bookings via the WRS .

Web Reservation System - multiple rooms

Self Service – Housekeeping Tasks

With the last change to the Housekeeping functionality, we have added the option for multiple housekeeping tasks to be assigned to a housekeeper. We have extended this scope to the Self Service, where now there is an option for guests to directly create housekeeping tasks. Such tasks can be all kinds of guest requests like: "Softer pillow", "Extra blanket", "Please clean the room" or "Please do not disturb". Here is how the new feature works:

Web Reservation System - multiple rooms

  • In the "Self Service Housekeeping Tasks" of the Self Service Settings, you can describe the most common tasks related to requests of your guests. Each text (task) is to be on a separate role. At least one line of text is necessary to activate this feature.
  • These tasks can be selected in the "Housekeeping Requests" section of the Self Service Portal (upon the booking check-in).
  • In this section, guests can select among predefined tasks or enter their own text of a request.
  • Upon the confirmation of a request in the Self Service Portal:
    • The system will create a task for the respective room with a 'task' status (this status does not change the room status to dirty or clean). These tasks will directly go to the housekeeping task list and can be assigned to a certain housekeeper.
    • The system will send a task email to the email address of the housekeeping department. This email is a new setting, you can find by going to Settings - Account Info - Housekeeping email. If this email address is empty, the task email will be sent to the hotel email address.

Other improvements

  • The booking import from a csv file now has an option to also import the booking deposit. The amount is described in three new fields: deposit amount, deposit currency and deposit payment type. The payment types are fixed and can be: 'cash', 'card', 'bank', 'debit', 'on-line', 'check', 'voucher', 'other'. You can also see the sample file on the import screen.
  • WRS – occupancy adaptable rate bookings would be created with manual prices. We have made this change to guarantee bookings will have the price the guest has seen in your WRS. Here is more on the issue: The occupancy adaptable rates work in real time. Each change to occupancy instantly changes the price of this rate. This is fine, but it also turns out to be the issue essence in the WRS. When multiple rooms booked at once, after each room (booking), the occupancy changes. As a result, the last rooms can have different prices from the first ones, though booked together.
  • On tax mode change, we have improved the recalculation process of open folios to the new tax mode. It is a background operation and can take some time to finish. This does not stop the work of users.
  • POS – The kitchen monitor can now be set to 1, 2 or 3-column display mode. This way if you have a larger display, you can see more orders on your screen. Test all column modes and choose the most suitable one for you.
  • We have added a new setting – account default currency. Before the national currency set in the subscription was taken as a default currency. The default value was used when creating new folios, rates, etc. With larger chains having hotels in several countries, it was not very convenient. Now using the new option, each hotel can select its default currency from Settings - Tax Settings - Account default currency. If not set, the system will continue using the national currency set in the subscription as a default one.

Fixes

  • Booking edit screen. Once a company entered, it could not be removed leaving the booking without a company.
  • We have hidden column showing tax amount for each row in folio printouts when 'Tax not included in prices, rounding – total' mode selected, because the actual calculation is made at total amount level.
  • Languages and Texts – the new plain text editor did not open
  • Credit card screen – in some browsers, the month field did not fit well and the month was not properly displayed.
  • Guest profile fields – it was not possible to set value list and Important for the system fields (locked icon)
  • Lightspeed – fixed issue related to the values of imported charges

Clock PMS+ Update (25 Feb 2019)

  • Custom Confirmation Template for multiple bookings. We have added all necessary liquid parameters to create a custom booking confirmation for more than one booking. We have also added two sample templates. These templates have a more complex structure which the CKEditor breaks. Instead, you should use the plain text editor.

    You can find the samples in: Settings - Guest Mailer – at the bottom.

    The first one is simpler and contains a ready-to-use booking table (similar to a folio one).

    The second one contains full implementation of a custom template – for more advanced users.

  • Custom Guest Mailer Templates – with or without CSS A new option added allowing you to specify if a template contains our standard CSS or not. If using an external app for the creation of your templates, these templates will contain all necessary CSS styles. In this case, our CSS and the customer's template CSS will be in conflict resulting in the template breaking. If needed, you can disable our CSS. Additionally, we have changed the template preview and editor to resemble more precisely what the actual template looks like and would be sent to guests.
  • Guest emails – a new room/non-room booking filter. To let you have different email templates for room and non-room bookings.
  • Meeting Room Calendar – ultra compact view. The new view shows if there are bookings in the chosen period or not. It allows easier previewing of bookings (when a date with bookings clicked, a panel containing more information pops up to the right).

    Ultra Compact View in meeting room calendar

  • New Report - Out Of Service Rooms. For a selected date, it shows all stopped rooms. Clicking a room, all OOS's are shown and they can be edited.
  • Passport images – a new setting to run them via image recognition. Due to the fact that image recognition not always recognises ID documents of some countries properly, we have added a new setting to disable the check whether these documents resemble real documents. The setting can be found in the Self Service settings, as well as in the Kiosk settings.
  • Companies - restoration. Now you can find an archived company (a new search filter) and restore it (a new button in the archived company).
  • WRS – we have checked it for accessibility issues. Due to the growing number of queries of American customers regarding ADA Compliance, we have carried out some system checks. In our opinion, we have eliminated the major issues, and, to a great extent, it complies to the ADA requirements.
  • POS – Discount on selected articles. From the split screen, you can select several articles and apply a discount on them only.
  • Channel managers (RoomCloud/ParityRate) - 'deduct_tax_rate' now supports precision of up to 4 digits after the decimal point.
  • POS – now the service surcharge is in the last place in total printouts.
  • Housekeeping Tasks Report - Room Type added to rooms
  • Profiles – export to CSV – now it works separately for both tabs (Search and Advanced Search) and reflects the results in each of them.
  • WRS – the First day of week setting (subscription-related) is now reflected in the date calendars in the WRS.
  • We have removed the editor for 'tinymce' templates. It has been replaced by CKEditor.
    We have changed the plain text editor also. The new editor is more convenient than the old plain text editor.

API

  • A new endpoint for adding (tokenization) of encrypted credit card.

    POST /base_api/:s_id/:a_id/credit_cards

    Via the new endpoint, customers can add credit cards to the system. Credit cards, however, have to have client-side encryption. To enable client-side encryption of credit cards, we have prepared, we have prepared special javascript to be generated for each account. The javascript can be added on the customer's credit card page.

  • Here are the details:
    • A given user wants to create their own WRS, in which guests can enter their details. But what the same doesn't want is to undergo a PCI DSS audit or make their own payment interfaces.
    • The customer creates a credit card collection page (it has to be https) by adding special tags (data-encrypted-name) to the form fields.
    • Takes the path to the specially generated JS library from Settings - Credit Card - Client-Side Encryption for API integrations
    • Places the library in the format for credit cards in their WRS. Example

      <script src="https://sky-eu1.clock-software.com/subscriptions/:s_id/:a_id/credit_cards_client_side_encryptions"></script>
    • The guest enters their CC details in the already-mentioned form.
    • Our library encrypts the data in one block which is sent to the customer's server.
    • The customer's server receives the encrypted block and therefore it is not necessary to undergo a PCI DSS audit. Still a self-assessment questionnaire (SAQ A-EP) is to completed. For more info on the Javascript method, please visit:  https://www.pcisecuritystandards.org/pdfs/best_practices_securing_ecommerce.pdf
    • This method DOES NOT save the encrypted block on its side.
    • Instead, the encrypted block is sent to our server and a Token is returned. If the Token is needed at a later stage, it can be saved.
    • Bookings are created and the above Token can be added to them (see below).
    • You can add some charges to bookings (see below)
    • Samples of customer's forms: https://sky-eu1.clock-software.com/examples/credit_cards_client_side_encryption.html
  • An endpoint for adding credit cards to a booking

    POST: /pms_api/:s_id/:a_id/bookings/:booking_id/booking_credit_cards

    It takes a token, i.e. a credit card has been already added and the token is available to be added to the booking.

  • Endpoint for charging booking credit cards

    POST: /pms_api/:s_id/:a_id/bookings/:booking_id/booking_credit_cards/:cc_token/charge_token

    You have to know the token which is to have already been added to the booking, so that the booking can be charged. It takes a value and returns execution flag complete: true, as well as payment_service – the service used for making the payment (it is automatically selected among the available active services)

  • To the booking endpoint, a search by main guest name can be implemented. A parameter is to be passed

    main_guest_free_text_search

Fixes

  • WRS in iframe – the Adyen error alerts were not visible
  • WRS – with iframe and custom payment, it didn't redirect to the custom payment page in Safari.
  • Adyen (and Authorize) – the payment making process accounted for user rights (to create payments) and the successful payments were added to the system.
  • Rate and Availability screen – popovers (price details) were broken and stopped working in combination with the descriptions for the staff.
  • Kiosk – registration card – the date fields had no pop-up calendars
  • Rate package elements – the quantity checkbox disabled the price one
  • WRS – not all free rooms could be booked, if they are few and "Max Rooms/Units with one click" enabled
  • Charge Template Availability Report – when in a modern window and by days, it went out of it
  • Room edit screen – the old housekeeping warning and status fields are already removed
  • The edit link for custom notes in the Navigation bar disappeared in certain situations
  • GL payment code – now two lines containing one and the same code can co-exist
  • When checking in non-room booking, a missing room warning no longer appears on the small screen
  • Room Plan – it doesn't update after clicking on something in the housekeeping pop-up
  • Events – it was not possible to pay with Adyen and credit cards, if the card is new and not added to the Company screen.
  • Zapier API - adding a charge version

Clock PMS+ Update (14 Jan 2019)

Housekeeping v2

We have entirely redesigned our housekeeping feature. A key moment in our concept was to find a model that can solve all standard cases we have come across in housekeeping management.

Here your enquiries and suggestions have helped us a lot. In short, we successfully made a transition from a model based on 'Room Status' to one based on 'Housekeeping Tasks'.

In the final paragraph of this section, we have explained how you could continue using the old feature with certain changes.

Here are the cases on which we have focused on:

  • Which rooms should be cleaned and what procedures and consumables will be needed for each room, considering the fact that tasks can differ depending on the specific day of stay, room type and rate (package);
  • How many housekeepers will be necessary to perform the tasks for next week;
  • How to evenly distribute the tasks among the available housekeepers;
  • How to inform housekeepers of the rooms with early arrival which are a high priority;
  • How to let housekeepers know that certain rooms need an additional bed or baby cot;
  • How to notify housekeepers that a guest has specific wishes, e.g. 'More blankets' or 'Lower pillows';
  • How to better make it clear that, for certain rooms, special consumables are needed, e.g. 'A bottle of champagne and flowers', or the opposite case – 'No mini bar re-stocking';
  • How to alert that certain guests have special needs, e.g. "Hypoallergenic blankets";
  • How to keep track of other room issues related to maintenance, e.g. "The remote control is not working". In short, what's the nature of issue and who will fix it;
  • How to handle lost and found property at the hotel;
  • How to determine which housekeeper cleaned a certain room on a given date;

All of the above issues can be solved by our new housekeeping module.

Housekeeping activities, scheme and forecast

The activities are the individual tasks performed by housekeepers in relation to the servicing of each room. Depending on your needs, you can define activities in general or in greater detail. For example, you can set various individual activities like vacuum cleaning, 'WC cleaning', 'Bath cleaning', etc. or include all of the already mentioned tasks in one general activity: 'Daily cleaning and consumable re-stocking'. The detailed approach is suitable when certain activities are omitted on certain days of the stay. This way you can specify what should be done on each day of the stay. The general approach is recommended when the tasks don't differ from day to day.

For each each activity, you can set a number of Credits. You can view these credits as the time needed for each task. Their role is very important for the proper distribution of work among housekeepers. The credit quantity can be specified in the housekeeping scheme itself, there this quantity will refer to the combination of activities in the specific line of the scheme.

To set up activities, go to 'Settings' - 'Housekeeping Activities'. We strongly advise you to explore the full set of options of the module before proceeding with the setup.

Housekeeping schemes determine which activities and when to be performed. You may specify what to be done on arrival, each N days or on departure. For example, each 2 days – 'cleaning and sheet change', each 1 day – "towel change".

For each line of the housekeeping scheme, you can specify a certain number of credits (i.e. how much time will be needed for the performance of the specific tasks), if left empty, the system will use the sum of credits predefined for each activity. To activate the scheme, you will need to link it to the room types it will refer to. If several schemes are linked to a room type, they will all apply to this room type. This way you can separate all common activities for the different room types into one scheme and link it to all room types, while creating separate schemes of specific activities for each room type.

You can have schemes not linked to any room type. These schemes will not be activated automatically. You can use them for specific rates and packages. We will explain this in greater detail below.

Please note that the creation of even one scheme will prevent you to use the old housekeeping functionality. More about this in the last paragraph of this section.

Housekeeping activity forecast. After creating the schemes, the system will generate a housekeeping forecast based on the entered bookings. It accounts for maintenance shifts and two other options discussed below: 'Arrival housekeeping activities' for a specific booking and housekeeping activities related to certain rates and packages.

The forecast gives you info of each date – number of tasks and sum of credits. Based on the number of credits for a housekeeper predefined by you, i.e. how much work a housekeeper can daily handle, the system calculates how many housekeepers will be needed for the expected amount of work.

WRS - profile login

Arrival housekeeping activities for a given booking

If a booking requires a certain special room preparation, you can specify this in the booking itself. For example, VIP consumables or a special request of the guests. These activities are also included in the forecast.

On the booking edit screen, select the necessary activities in the 'Arrival Housekeeping Activities' field. You can use the existing housekeeping notes. To avoid the creation of activities for each special request, you can create only one activity, named Special Arrival Activities, for example, and describe its specifics in a housekeeping note to the booking. The notes in bookings will continue to appear in the Housekeeping Task Report.

Housekeeping activities related to certain rates, packages or additional services.

To automatically relay the information coming from the sales department to the housekeeping department, we have added an option to specify the applicable special housekeeping scheme in the charge templates. This way there is now a link among the additional services, rates (through the charge templates for the package elements) and the specific housekeeping activities. The already mentioned housekeeping schemes without a room type are designed this way, because otherwise they will automatically be applied instead of being only activated when there is a charge (for a room, additional service or package element) linked to the this housekeeping scheme for the given date.

You can use this feature to solve the issues with additional beds and baby cots, as well as the stocking of special consumables related to various packages. Here is how:

If for a specific date, there is a posted charge containing a housekeeping scheme, this scheme will be activated on this date. This doesn't mean there should necessarily be an activity for this date under this scheme.

If it is an arrival scheme, and there are charges for each day of a stay, this will lead to the creation of an arrival activity only. And the opposite is also true. If the scheme is for all days of a stay, but there is a charge only on arrival, only an arrival activity will be created. In other words, to have an activity created for a date, you need to have a combination of a charge and a scheme defining an activity for this date.

Here is another example concerning additional beds:

  • Set two activities: "Additional bed" and "Additional bed sheet change";
  • Set an 'Additional bed' scheme without specifying any room type;
  • Create a scheme line with 'Additional bed' activity set on arrival;
  • Create another scheme line with 'Additional bed sheet change' to be performed each N days;
  • Set a charge template (or edit an existing one) and select the above scheme in it;
  • If you have rates including additional bed, add this charge template to the packages containing an additional bed. If you don't use rate packages, add the housekeeping scheme to the room charge of the rate including an additional bed.
  • Create a booking with this rate and charge the additional service;
  • You can use the Housekeeping Forecast to check if the above activities are accordingly shown for the arrival and the rest of the days of the stay;

Housekeeping Task Management

Thus defined activities, schemes, booking specifics, as well as packages, charges and rates will form the actual tasks for each date. A housekeeping task is a particular task defining when, where and by whom certain activities are to be performed. The completed tasks from the previous days are stored as an archive. Soon we will introduce a task archive report.

The housekeeping task management for a date follows these steps:

  • Creation of tasks for the given date
  • Task prioritization
  • Task distribution among the housekeepers
  • Change of the status of each task
  • Addition of new tasks for the housekeepers or the maintenance staff

Creation of tasks for the given date

At the beginning of each day, set the tasks for this day. Go to 'Availability' - 'Housekeeping Tasks' - 'Generate'. You will see how many tasks will be created. Confirm.

Tasks are created as "Unassigned", i.e. it is not set who is to perform a certain task. Please note that if you have tasks set for arrival, the arrival bookings must have allocated rooms because the rule is that each task is to be linked to a room. Only then you will be able to see the info of the booking-related tasks.

Task prioritization

Each task has a certain priority. It can be determined automatically or manually. The task priority level affects the arrangement of tasks in the reports for the housekeepers (Housekeeping Tasks), so that they are informed of the tasks of the highest priority. With the automatically created tasks, the priority is determined based on whether there is an early arrival or late departure. Early arrival and Late departure have been added as new options to bookings. If you have an early arrival, the cleaning tasks have a high priority. A late departure lowers the priority level of the cleaning tasks, and the rest of the tasks get a normal priority level. You can change the priority of each task using the star button next to it, clicking it as many times as you need to reach the desired priority level.

Task distribution among the housekeepers

The distribution can be manual or automatic. To automatically distribute the tasks, go to 'Availability' - 'Housekeeping Tasks' - 'Auto Assign'. The system will suggest the necessary number of housekeepers for the tasks (based on the sum of credits). You can choose among how many housekeepers the tasks to be distributed. The system will use the housekeeper number given by you to distribute the tasks and create a list of tasks for each of these housekeepers. The system will also assign a consecutive number to each list: 1, 2, 3, etc.

Here is a little more info on how the automated task distribution works:

  • The unassigned tasks are ordered by room number following the room sorting order set by you.
  • When distributing the tasks, the system aims at evenly distributing the workload among the given number of housekeepers while accounting for the set number of credits.
  • If there is more than one task for a room, all of these tasks are given to one and the same housekeeper.
  • The rooms selected for a housekeeper are assigned following the defined room sorting order, so that they are as close to one another as possible. Depending on the hotel occupancy, however, the tasks can be located on several consecutive floors. If you wish, you can specify a name (housekeeper) for each of the already numbered lists. Click the button next to the number and enter a name or select one of the already existing names by typing the first letter of that name. Use this feature to also transfer all tasks from one housekeeper to another. You can easily transfer tasks among housekeepers. Simply choose one or more tasks and click the person button from the side panel. Fill in the name or select one from the list. The same way you can manually distribute tasks among housekeepers. The task management allows the quick filtering and printing of the tasks of a housekeeper. Just select the housekeeper's name (or number) from the panel. Click 'All' to see all housekeepers

Change of the status of each task and the link to room statuses

The final room status as appearing on the Room Calendar or other reports is determined on the basis of the task statuses related to this room. If the task status is 'Dirty', the room status is also 'Dirty'. If the task is completed, the room status is 'Clean'. If you have a room with different task statuses, the room status becomes the lowest one of them (Dirty).

The other task statuses are: 'Progress' – the task is being performed at the moment; 'Inspect' – the task is to be inspected by a senior staff member to be concluded. There is one additional status explained below.

Tasks not linked to a room status

If you have a task that, in your opinion, shouldn't affect the room status (i.e. it should not prevent the guest check-in to this room ), select 'Task' as its status. This way this task won't lead to the room having a 'Dirty' status, but it will be present on the task list. You can use such tasks when it comes to minor maintenance issues, e.g. "battery change of a remote control' or requests of your guests regarding lower pillows or an additional blanket. These tasks will replace the the old Housekeeping Warning field preserving their functionality.

Task Archive

We have added a new 'Housekeeping Task Archive' Report to let you review the list of completed tasks for a period. Using the room or housekeeper filters, you can easily track all the housekeepers having entered a certain room, for example.

Preserving the old organisation of work

We have tried to preserve the possibility for you to use the old room-status-based Housekeeping Report as much as possible. It looks and is used as before. If you take advantage of the full potential of the new task functionality, we recommend you not use the old report for quick status changes because this may lead to information loss. When changing a room status via the old report, all tasks linked to this room will be erased and a new task will be created with the selected status.

Another thing you should know is that when a booking is checked out under the old room-status-based organisation of work, the status of the respective room had to be changed to 'Checked-out'. With the new Housekeeping Tasks functionality, no such operation is needed because the cleaning tasks for the rooms to be checked out on a given date are created at the beginning of that day and are distributed among the housekeepers.

If you wish to preserve the old organisation of work, do not create cleaning schemes or delete the already created ones. If there are no cleaning schemes, on booking checkout, the system will create a 'Task' regarding the room cleaning. This way the room will be marked as dirty. To clean the room, make the task completed.

There is a small change to screen which was used for changing the room status from the Room Calendar or the Room Plan. If you want to make a room 'Dirty', click the 'Dirty' button, and to clean it, make the task completed by clicking green tick button.

Lost and found

We have added a new option for you to register found and lost property of guests. You can add various information of the found or lost property to the register, including a photo of it. Search by custom text or period of losing or finding of such property. To use the new module, go to 'Other' – 'Lost and Found'.

Bookings (and packages) without rooms

For the hotels offering a wide range of products and packages, we have changed the current bookings, so that they can be created without rooms. This way you can create bookings for SPA packages which don't require room allocation. Use the new feature to create bookings for SPA packages, conferences, meals, etc. for guests not intending to stay at your hotel. This functionality can also be used for billing bookings of guests checked in/moved to another hotel.

Here is more about this new type of bookings:

  • For the hotels not offering such products nothing has changed. The system will have the same behaviour as before.
  • For the hotels also selling non-room products and packages, the new booking option will allow you to skip room allocation while continuing to use the well-familiar user interface of bookings.
  • For billing purposes, you can use folios, rates, booking charge templates and manual prices. We would like to remind you that you can now create a rate whose main charge may not belong to the Room/Packages revenue group. This way the revenue from these packages will properly be accounted for and will not affect the ADR.
  • For the time being, there is a certain peculiarity about rates. They require a room type, at least for now. You will need to choose a room type, though there is no link between the rate and the room type. This peculiarity will soon be removed allowing the existence of rates not linked to a specific room type. In other words, these will be rates for non-room packages.
  • Package elements or charges linked to counters will be accounted for the same way, enabling you to track package availability regardless of whether they are consumed in relation to a room or non-room booking. In other words, you can track the availability of non-room packages, too.
  • The transfer of charges to a company has also remained the same, but now you can use it to bill events no matter if the respective bookings are linked or not to rooms.
  • You can use the Guest mailer the same way with the new non-room bookings. We will also add a new filter to distinguish between the room and the non-room bookings. But for the time being, they are treated the same way.
  • If guests with a non-room booking change their mind and decide to stay at your hotel, this can very easily be done. Simply allocate a room, the booking will automatically be transformed, as the related data, folios and charges will remain intact.

Setup and use

To allow the creation of non-room bookings, go to: Settings - Booking fields. Untick the 'Required' checkbox for the 'Arrival bookable' field.

To create a non-room booking: On the new booking screen, untick 'Require room resource' checkbox and skip the room allocation. We would like to remind you that if your customers change their mind and decide to stay at your hotel, you can allocate a room at any time.

Reports

In all reports, where possible, we have added filters ("Room Bookings" / "Non-Room Bookings"), so that you can differentiate between the two types of bookings.

Such filters are added to: Booking Segmentation Report, Advanced Search, Booking Day-By-Day Report, Booking Pace Report, Groups Report.

The non-room bookings are also added to the operational reports: Arrivals, In Hotel, Departures, Search Booking.

API

The existing booking endpoint continues to also work for non-room bookings. If you wish to create such a booking via the API, please remember to make the require_room_resource field false.

Channel Managers

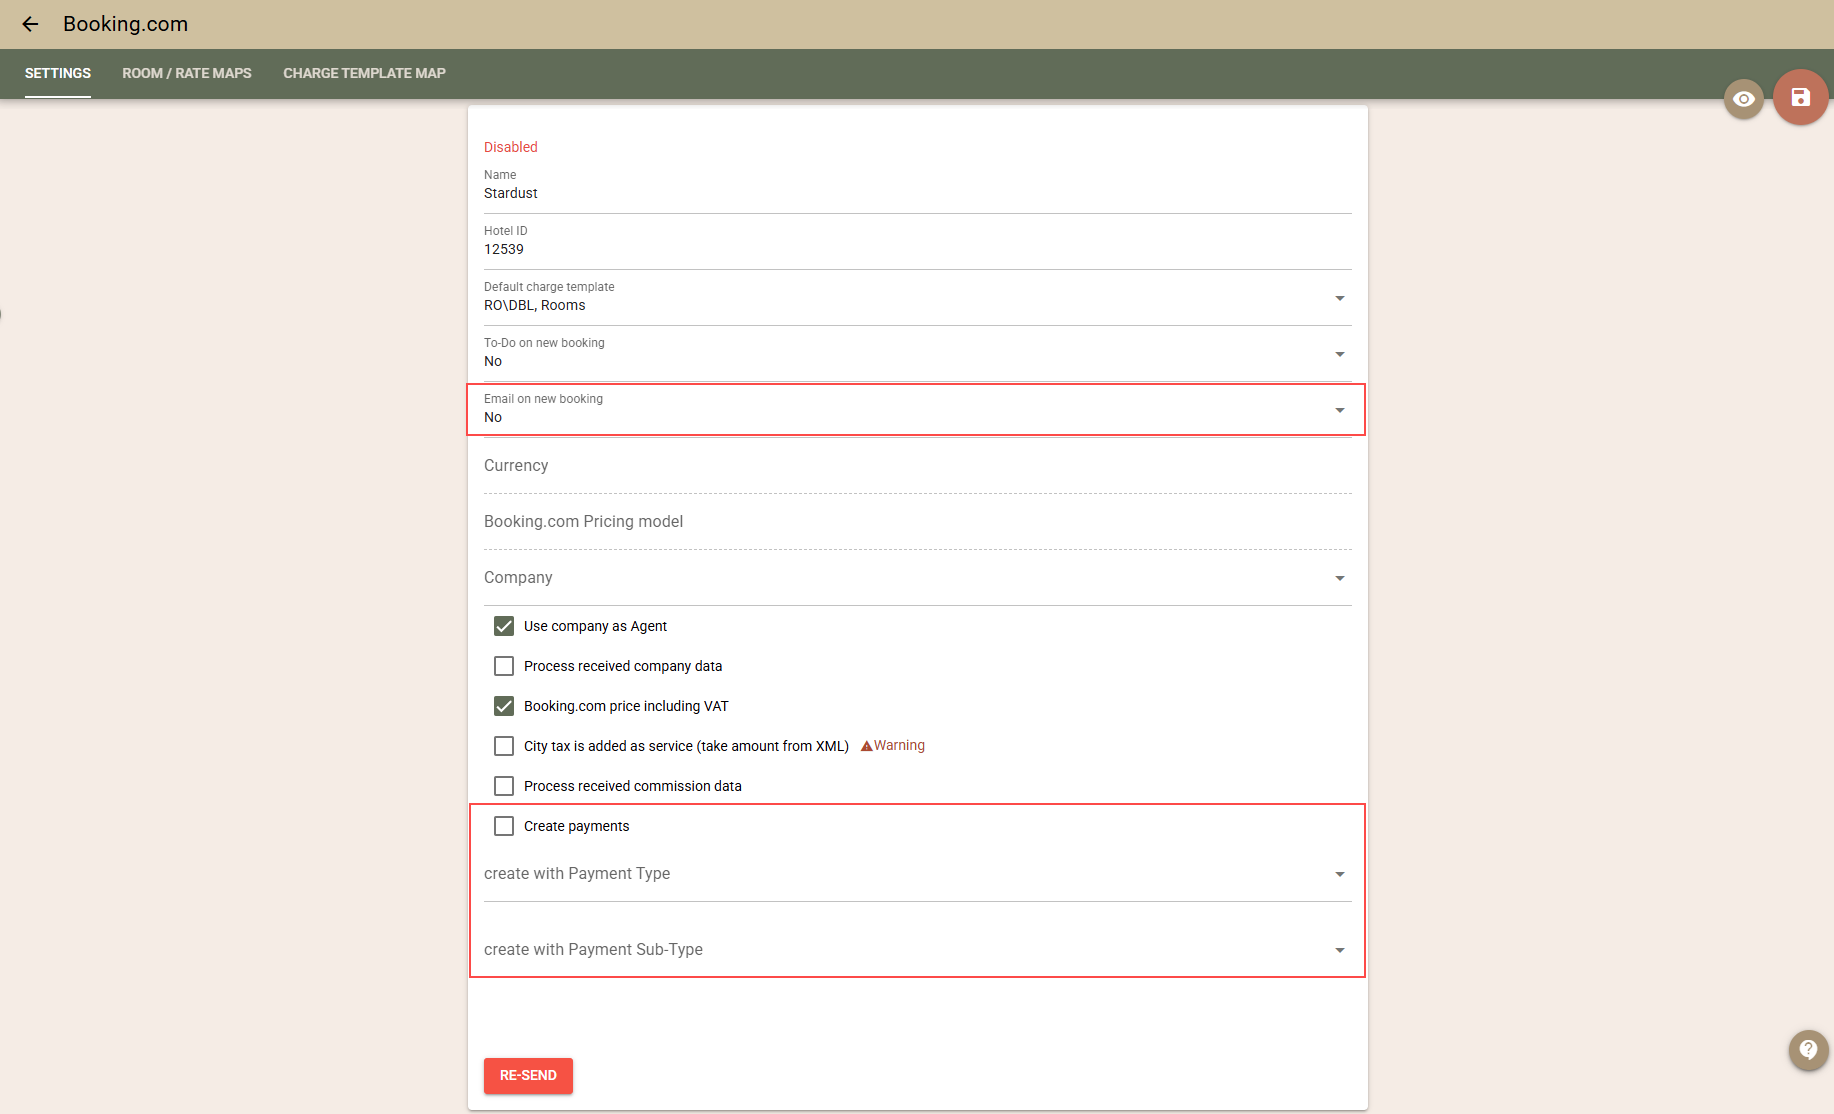
  • RoomCloud – New mapping for the setup of the the processing of extra services (supplement). You can link the text of the extra service coming from the channels to a charge template to charge the service. The amount of the charge is taken from the data of extra services in the received booking instead of the charge template.
  • The 'Deposit auto payment' setting has been added to each product. If there is a setting for the product itself, this setting is used instead of the main setting. Choose the most suitable behaviour for each of the products. You can disable the product function in channels sending a virtual card which cannot be used prior to the check-in date. To do so, remove the main setting and select the desired function for each of the products.
  • We have disabled the auto send of confirmations upon import of bookings with an enabled automated payment feature. If you still wish to use this feature, you can set up a special Guest mailer template for this purpose.

Reports

  • New 'Nights from last occupancy' Report. The report gives information of each room regarding how many nights it has been since the last stay of guests. This reports is for housekeeping purposes. If a room has not been used for more than 30 nights, the report will show '30+' marking. Use the Min nights filter to get the list of rooms being vacant for already 5 or more nights, for example.
  • New 'Adyen Settlement Report'. To track the settlement of Adyen payments, we have added information to each payment detailing when the payment is expected to be received from Adyen, as well as whether it is received. The expected date of payment receipt from Adyen is filled in automatically with the booking arrival date. From report, you can receive information regarding the expected payments and mark which of the payments have already been received to better track the pending payments.
  • New "Closed Folios in Print Format" Report. The new report contains all closed folios for a period, as each folio is shown in a detailed format the way it has printed out. The new report can be used as an electronic document archive.
  • In the Booking Pre-Authorization Report, we have added new booking filters – period type (Arrival, Departure, In Hotel), as well as booking status: Valid (default), Cancelled and No-Show, All. Additionally for each pre-authorization, we have added a cancel button for the quick release of pre-authorization amount.
  • In the Advanced Search, we have added new two columns – times of expected arrival and departure
  • In the Booking Day-By-Day Report, there is now address column.

Other improvements

  • Event Offers - new custom templates. In the Event Offer templates, we have added multiple parameters to let you use offers both as static price lists and functional printouts containing the whole information of the respective offer. Because such a template already exists and it contains additional liquid code, you are not advised to edit it using the CK editor. This may lead to the displacement of important code by the editor. Please use the Plain Text Editor for such complex templates. We have added a sample template resembling the present standard print template. You can find the sample at the bottom of the New/Edit Offer Template screen.

    WRS - profile login

  • Credit Card Screens – Customization. We have redesigned the credit card screens adding a few new customization settings: Background and font colours, as well as images for the screen header and footer. Use the image options to show the brands of the cards you support, the logo of your hotel or the payment operator. To use the new settings, go to 'Settings' - 'Credit Card' - 'Credit card screen layout'. We would like to point out that our approach to the customization of this screen is highly conservative. We have deliberately refrained from supporting a custom CSS, because this poses a security issue and may facilitate hacker attacks which violates the ground rules of PCI DSS.

  • Rate and Availability - Descriptions for the Staff. The Descriptions for the Staff allowing you to give more information about guarantee policies, room types and rates are now available on the Rate and Availability calendar screen, too. Click the caption balloon next to each of the above mentioned. Enter the Descriptions for the Staff in the respective edit screens – the list of rates, the list of guarantee policies and the list of room types.
  • QR code login via the Kiosk We have added a possibility for guests to quickly log in via the Кiosk. If this option enabled (Settings – Kiosks – QR Code Login), in each booking confirmation, there will be a QR code. On arrival at the hotel, the guest can use this QR code to log in to the Kiosk instead of using their booking number and PIN. To do so, the guest needs to click the 'Scan QR code to log in' button from the Kiosk and show the QR code from their smart phone or the printed booking confirmation to the Kiosk camera.
  • Self Service Portal – ID photo option. We have added a new 'ID Photos' setting to the Self Service Portal's 'Fill your Registration Card(s)' section. If enabled, when completing their registration cards, guests will be prompted ID photo.
  • General Ledger Codes for Payments. General Ledger Maps are designed to help you assign a general ledger code to each payment depending on whether the respective payment data is for export or integration purposes. Maps are evaluated as per the defined sorting order (coming from the Sort Order field). The first line of the map to meet the defined criteria is taken and the evaluation stops. This behaviour can be used to define more precise filters with a smaller sorting order and broad (default) maps below in the table. A map can be changed at any time. This way reports generated for past periods will reflect the newly created or changed maps, too. The code is not saved in the payment, instead it is evaluated each time. Please contact our support for more information. To create the map, select: 'Settings' - 'Payment Subtype' - 'General ledger accounts'
  • Adyen Integrated Payment – to the payment created by the interface, now we transfer the card type (in the sub-type field), as well as the masked card number (in the text field). For this data to be successfully transferred, your Adyen account is to be set up to return this type of information. To do so, in the Adyen portal, go to the navigation bar - 'Account' - 'API URLs'. Then in the 'Additional data in API response' section, tick the 'Card Summary' checkbox to enable the transfer of the masked card number to the payment text field. Also select 'Variant' (paymentMethod) to allow the transfer of the card type to the 'Payment Sub-type field. If you wish more detailed information of the card type, you can also select 'Subvariant' (paymentMethodVariant). In this case, for example, instead of simply 'visa', you will receive the detailed card type: visadebit, visapremiumdebit, visacommercialpremiumcredit, visadankort, etc. Unfortunately, if using HPP (Hosted Payment Page) integration, the masked card number is not returned by the interface and we cannot add it to the payment.
  • Payments - Custom fields. For the purposes of integrations, we have added custom fields to payments. You can find their setup by going to 'Settings' - 'Payment fields'. The custom charge fields are now accessible in the POS, too.
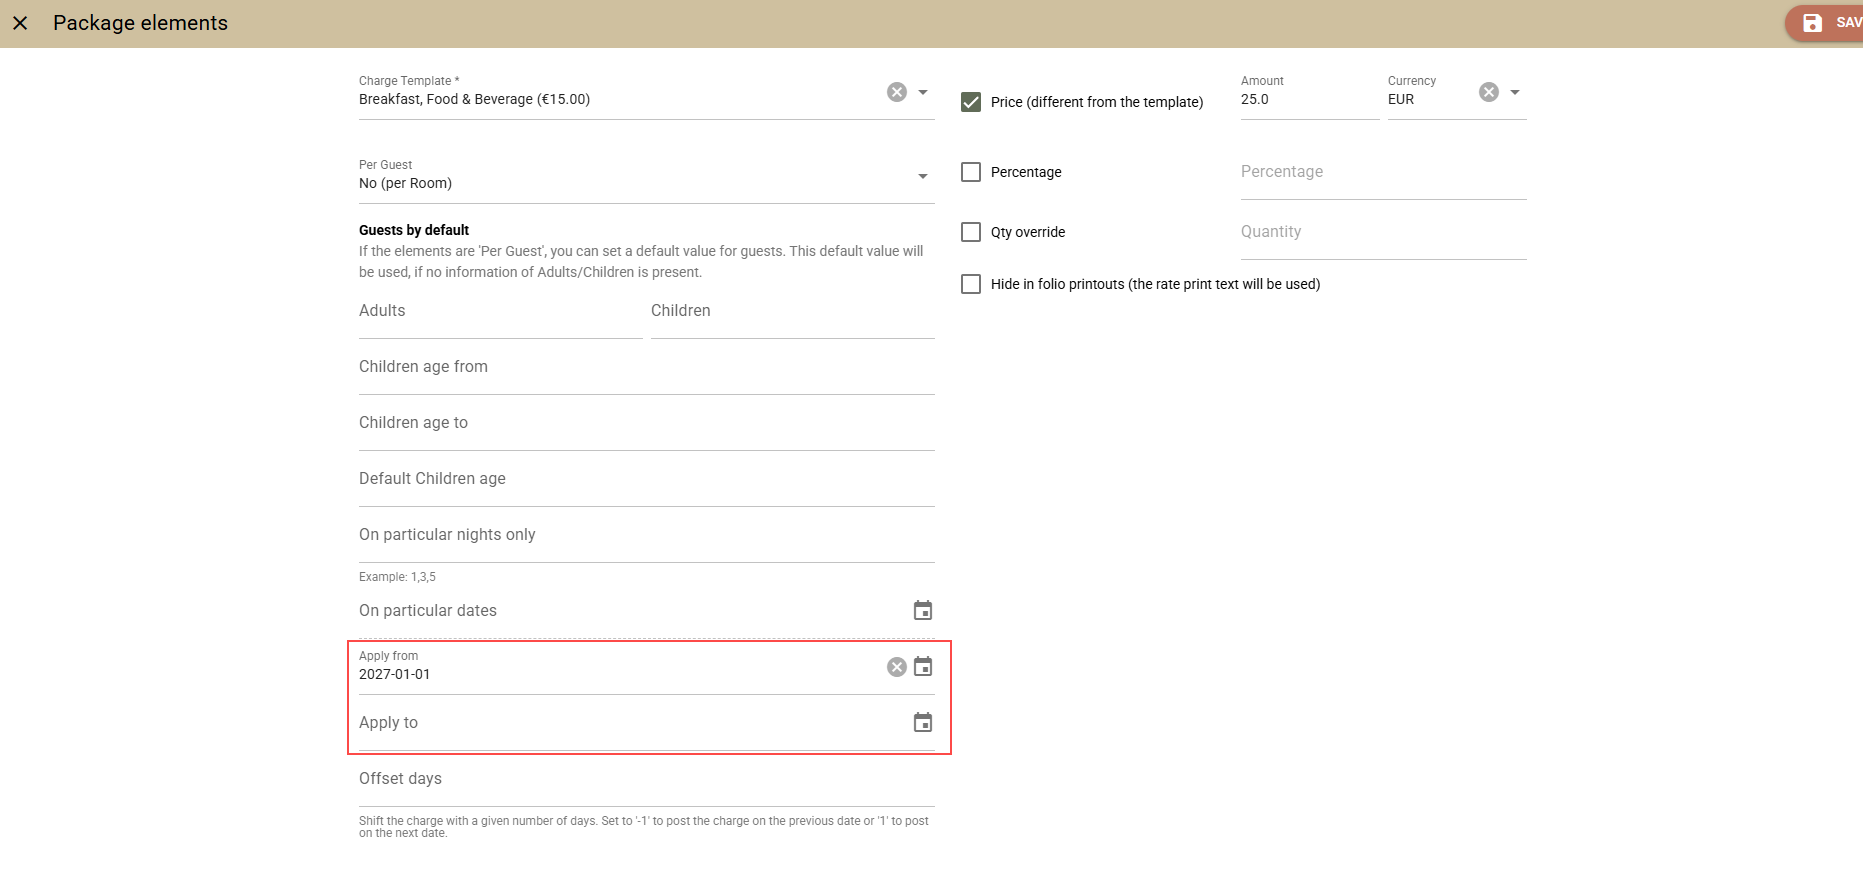
  • Package elements – two new options. If you don't want a package element to be visible as a separate description in guests' folios, now you can use the 'Hide in folio printouts (the rate print text will be used)' option. As a result, the print text field in the charge of the package element will automatically be filled in with the value taken from the rate's 'Print Text' field. This is a way of hiding the charge which will be added to the room price in most of the folio printouts. The second option we have added to custom fields is about quantity determination. Now it is no longer necessary to create separate charge templates to track quantities.
  • Account owner's email change. Now it is possible to change the email of the subscription owner. To do so, log in as owner. Go to 'Settings' - 'Users' - 'Change your password'. Click the 'Change accounts owner e-mail' button. Retype your current password and your email address (in the respective fields). Confirm. The system will generate a new password which you need to copy. This password will also be sent to your new email account. If you wish, you can change it for greater security 
  • Guest mailer – now the email's subject can also contain liquid parameters. This way you can add the booking number, arrival date or guest name to the email's subject, for example.
  • Room Calendar – bookings are now opened in a new browser tab allowing you to work with multiple bookings simultaneously.
  • WRS – user profile edit. Apart from the possibility to use the data already entered in your profile, we have added the option to edit this data. The access to this functionality requires email address entered in the guest profile as well as the creation of an additional password which will be used for accessing the personal data. Both of them can be entered by the guest themselves. We have also addend an option in the WRS to allow you to hide the whole profile functionality in the WRS.
  • Rate copying. Apart from the copying of a whole Rate Plan, we have added an option to copy a single.
  • City Tax – maximum amounts for an adult and child. If you have a City Tax that percent of the nights, however, it is greater than a certain amount, you can now use the new fields to set their maximum amounts. The system will determine the maximum City Tax amount by multiplying the number of adults and children in the booking by the set maximum values. If the calculated tax is greater than the limit, the limit value is taken. It is necessary to fill in both fields, if you wish to use this functionality.
  • Companies - Branch. We have added the Branch field to all Company searches.
  • Kiosk – bill payments by a private individual – the data fields now account for the new visibility setting (Folio column)
  • New liquid parameters for templates. To the respective templates, we have added the parameters related to: billing info of persons, the company branch, booking main guest, all booking guests.
  • We have added a new setting to enable you to forbid the issue of room key cards if the booking has not been checked in yet. The new setting is called 'Issue keys for checked-in bookings only' and you can find it by going to: 'Settings' - 'Room Key Settings'.
  • On the Event Blocks screen, we have added the number of available hotel rooms to the edit table.

Integrations

  • Hotek - new door lock interface
  • QuickBooks online. We have added an Auto Export option. When enabled, the data will be exported to QuickBooks every 12 hours. In order to enable the Auto Export, you need to go to 'Other' - 'Settings' - 'QuickBooks Settings' - 'Check Auto Export' under the Export from date. If Fax number is filled in the guest or company profile in the Clock PMS+, it will now be exported to QuickBooks;
  • Zapier functionality has been extended and it now includes Clock PMS+ To-Dos (Pull of new To-Dos, Pull of updated To-Dos, Create a To-Do,Update a To-Do);
  • LightSpeed POS
    • The Configuration screen of the interface has been redesigned and all configurations are now available by going to 'Other' – 'Settings' - 'Lightspeed Account Settings'. The following options have been added:
    • Allow Transfers to Company (Hotel Transfer) – If enabled, when you search for a guest in LightSpeed POS interface, you will be able to find all open folios of companies matching the entered names;
    • Allow Payment Data Transfer (Daily POS Transfer) - If enabled the daily revenue will be transferred along the payment information to a specially created POS account to allow you to generate common hotel and restaurant revenue or payment reports;
    • Clock PMS+ Revenue group/category - LightSpeed Product category mapping - The feature allows you to control in which Clock PMS+ revenue group and category the revenue generated by LightSpeed product category items will fall. If the mapping is not configured, a charge of the Food and Beverage revenue Group will be created, as its revenue category will be LightSpeed POS transfer.

Fixes

  • The export to Excel didn't interpret data properly for certain time zones. We have disabled the interpretation and dates are exported as a text.
  • City Tax – the percent didn't allow for more than 2 characters after the comma.
  • In the folios issued to private individuals, the address and postal code fields were missing in the address section after the last changes.
  • WRS – upon integration with iframe, sometimes the errors returned by the payment services were missing.
  • POS – the navigation bar was hiding the content of some of the screens when a mobile device used
  • The Room Type filter in the Room Calendar didn't work properly for virtual rooms
  • Booking Edit Screen – The Save button remained disabled with certain type of errors.
  • WRS – We have improved the processing of rival requests to minimise the risk of automatic allocation of one and the same room to two bookings when two or more bookings made simultaneously.
  •  The default values for the "Charge transfers Accept" field didn't work with new bookings
  • In certain cases, the 'Tax settings' screen showed an error when saving the % surcharge and templates fields
  • The Rate and Availability screen didn't open from the Channel Manager screen, if the rates are too many
  • WRS – now at least one completed guest data field is required if there no settings to that end.
  • The profile import no longer requires email.
  •  POS – In the Closure report didn't show the name of the Control Event
  • The log of adjustments didn't always work properly.
  • The folio links to "Invoice To" (Booking or Company) of closed folios didn't work.
  • Kiosk – the folio payments issue fixed.
  • Adyen - refund – if the user hasn't been granted negative payment rights, there was an error with the processing of the requests

Clock PMS+ Update (15 Oct 2018)

Adding Guest Identifier to Your Invoices

To add a guest identifier to the invoices you issue to individual customers:

  • Go to 'Settings' - 'Guest Profile Fields'
  • In the '2. Set visibility/requirement on different screens' section, choose the hotel this setting will apply to;
  • For the fields that are to be visible in folios, select 'Show' from the 'Folio' column;
  • Save.

In addition, we have added two buttons in folios next to the invoice recipient for faster billing info edit of the respective guest or company.

  • Edit – to locate the guest or the company and edit their data. Please note that this way you will also edit this data in the guest/company profile as a whole, and not just this invoice only.
  • Change – use this button to change the invoice recipient to another guest, create a new one or choose a company. The button is similar to 'Billing to' button, but has been added again for greater clarity.

Company: Custom Fields

We have added a flexible system to the Company functionality to let you define custom fields.
You will be able to segment booking and sales data, and get sales summary reports based on these fields, e.g. Agents and Small Companies, Foreign and Local Companies, Mother Companies, etc. For even greater convenience, you will be able to define the indicators to be used for generating the summary/segmentation reports.

By default, we have added three custom fields to demonstrate the feature, however, you can delete them or add more, if necessary.

The three custom fields are:

  • Company type – here you can enter a company type in accordance with your needs and then use it to get segmented data of sales and bookings, e.g. Agent, Online Portal, Small Company, etc.
  • Master account – if working with many subsidiaries of a company, but needing summary info on the mother company, you can use this field to specify it.
  • Report group – this field will let you create your own additional grouping parameter for the companies in the report, e.g. Local and Foreign.

To ease you with the entry of custom fields, we have also added an option for you to define a Value list for each of them. This way, instead of typing, you can simply choose the desired value for the given field from a predefined list. It is up to you to decide for which fields it is suitable to have a Value list. To create a 'Value list' for a field, go to Settings - Company Fields. Select the field and add the necessary values to the 'Value list' field.

From this screen, you can also add more fields. The custom fields can be used in segmentation reports, as well as for various other purposes of yours, such as custom data exports, for example.

The segmentation reports allowing you to segment by company fields are:

  • Bed nights report
  • Booking Segmentation Report
  • Charges Segmentation Report

A new 'Branch' field to the Company screen. It is very convenient when working with different branches of a company letting you specify these branches. On all company search screens, now you can also search by Branch and company address to filter the results and quickly find the company you are looking for.

Charge Templates, Custom Fields and Packages

We have redesigned the use of charge templates to unify the way they are set up and add the new custom field feature.

The changes concern the rates and packages mainly. Until now, in every rate or package element, you had to enter all the necessary data like tax, revenue category, etc. This has changed and instead of repeated entry of one and the same information, now you can simply choose a charge template. For example, you may have only one nights charge template, now you can choose it in the different rates. The same applies to the package elements.

To let you keep the name of nights charge (along with the rate name), we have added a new option 'Use the full rate name as charge text'. If unchecked, the system will take the charge name from the charge template instead of the rate name.

Apart from being easier to define rates and package elements, the new changes significantly reduce the error risk. This unified approach allows you to freely define revenue groups and category everywhere, as well as the values of the new custom fields.

The new custom field feature in charge templates and charges is incredibly useful in exports and connections to accounting systems.

The existing data from rates and package elements have been migrated and used for the automatic creation of charge templates. You may need to edit their names to better distinguish them, because during the automatic migration they have one and the same name.

You can also use the "Hide from posting screen" option – a new check box letting you hide certain charge templates from the charge posting screen and still be able to use them in rates and package elements.

There are certain changes to the behaviour of the Surcharge functionality. Until now, if used for some of the folios, you weren't required to complete the Text, the Surcharge fields, etc., in the Surcharge section of the "Tax Settings" screen. Now it is necessary to fill in at least the 'Text' field in the already mentioned section to be able to the surcharge in folios.

Companies and Billing Info in Folios

We have introduced changes to the billing info section of invoices.

Our goal is to make the connection between invoices and companies clearer.

Before being changed, the functionality allowed invoices to be filled in with data of companies (directly in the 'Billing To' fields) not registered with Clock PMS+ which led to confusion in reports and ambiguity in exports.

Now apart from the company invoices, there are also invoices for private individuals, not containing a tax number field, for example. For your convenience, the new companies can be created from the same screen. In addition, if the invoice is issued to a company, now it is possible to make changes to the invoice data at customer's request, but the invoice remains linked to to the previously selected company. A new right and control event have been added to administer and audit such invoice editing.

WRS – Profile Login

WRS - profile login

In the WRS, we have added an option for guests to log in through the number of an old booking and its PIN.

The idea behind this feature is to reduce the number of doubled profiles. At login:

  • The guest doesn't need to enter the necessary booking data again which speeds up the process.
  • The registration card fields are also completed with data from the guest profile to make the check-in quicker.
  • The booking is then linked to the guest profile eliminating the chance of profile doubling which leads to more precise statistics.

Other improvements

  • Package elements – a new option "First night only". Now you can add one-off elements to packages to be charged only at arrival.
  • The "Advanced" profile search has been redesigned. Search profiles by period of stay at a hotel. This search was missing after the last major changes to the profile system.
  • New GDPR-related changes - retention period and "Forget" option.
    • Guest data retention period. Now you can set a period during which the guest data to be kept. With the expiry of this period (counted from the departure), the personal guest data for these bookings is deleted. Please note that only the data marked as encrypted is deleted. The rest of the details, which are of marketing importance are preserved. Nothing else of the booking changes. In short, you won't be able to see the personal guest data. You can find the new setting by going to Settings - Guest Fileds. The minimal retention period is 6 months.
    • "Forget" option. With the new GDPR-required option, you can easily destroy the data of a given profile in all the related bookings and registration cards. This feature cannot be used for profiles linked to expected bookings.
  • Guest - a new "Show in the register" field has been added to the Guest edit screen. If it is not checked, the guest is not included in the "Hotel Registry" report. Use this field to remove persons from the Hotel Registry that are not real guests, but booking arrangers. Additionally, this new field is used by previous profile migration to mark the automatically created guests from the booking contact info as hidden.
  • Guest Mailer - new Guarantee Policy filters. You can specify one or multiple guarantee policies for the email.
  • Capacity Counters – set to zero for certain days. Now you can stop certain days by setting a zero availability.
  • Events – now you can use Company credit cards in the Event folio.
  • Profiles - export to CSV. Both normal and advanced profile searches can export results to a CSV file.
  • Rates – The Set multiple days option can now update Guarantee policies.
  • Passport images are added to the Guest edit screen for easier check and completion of guest data.
  • The new WRS booking email sent to the hotel now contains the guest's notes and requests, too.
  • Occupancy and Charges Report - a new booking guarantee status filter added.
  • Occupancy and Charges D-M-Y Report - the report is generated in the background now. This way the volume of the processed data is of no concern any more.
  • Charge Segmentation Report - the report format has been changed for greater export compatibility. Amounts are splinted in different columns.
  • Split charges screen – an option to select all / none added.
  • print_text is added as a Liquid parameter to the charge.
  • POS E-Menu. Orders from the E-Menu Room Service can be sent to an email. To activate the feature, set an email from Management - 'Kitchen notify email'
  • API - Guest index now shows top profiles only, not inducing history records. The family_id is added to guest show. This is the id of the profile (guest)
  • Adyen tokenizations and missing e-mails. 'no-replay@clock-software.com' is used as a customer email if emails are missing in the Channel Manager booking import. If the back office tokenization function is used, an additional confirmation screen is added for entering/checking the e-mail.
  • Booking screen - profile note, profile level, profile picture and booking statistics are added to the guest data
  • Guests - "important" mark in guest custom fields is used to mark guests with missing important information. The Missing important information icon is shown for these guests on the register, booking and booking search screens (Arrival, In hotel, Departures).

Integrations

  • Third Party Ficalization API. Generic API for third party fiscalization integrations.
  • The LightSpeed integration has been enhanced and now it can transfer your daily revenue to a special Clock POS account.
    After activating the daily revenue transfer, all charges that are not transferred to Clock PMS+ Suite yet will be transferred to a specially created Clock POS account.

    All charges will be transferred to one folio which will be automatically closed. You can configure how the folio will be closed from Management > LightSpeed Account Settings.

    Once you start receiving daily revenue transfers, you can begin generating common reports showing the charges for your PMS and POS account.

Fixes

  • Channel Manager - duplicated guests are no longer imported.
  • Profile Merge - related bookings and booking enquiries are reassigned to the master profile (target of the merge operation)
  • Creation of multiple guests by double clicking the button is prevented.
  • POS - The field for selecting surcharge base ("Surcharge calculated on") has been added to the screen.
  • Revenue group "discount" has been added to the select menu on the Charge edit screen
  • Hotel Registry export - column names have been fixed.
  • The Fast booking search wasn't working if used on email sending screen.
  • The Profile import is now working properly.
  • The Guest title field appeared in the WRS even when there was no values to select from.
  • Hotel Registry - cancelled bookings also appeared on the list. A Country filter added.
  • WRS - Person Title - values didn't translate.
  • The language of the WRS confirmations wasn't correct in some cases.
  • The language in the Self Service – it was impossible to change the language if it had been selected in guest profile.
  • Guest signature moved from the guest profile to the registration card.

Clock PMS+ Update (30 Jul 2018)

New Guest Profiles

We have entirely redesigned the Guest Profile system. Our goal is to:

  • Provide more flexible, powerful and secure Guest Profile system
  • Meet the GDPR requirements
  • Merge the data of Guest Profiles and Registration Cards into one

New Structure

The Guest Profile and Registration Cards have been merged into one and the information, entered at the booking stage (names, contacts, etc.) can be enriched with more detailed information from the Registration card at a later stage.
The new profile has the entire information in one place. In case of a guest's repeat visit, the whole information is associated with the bookings and there is no need for repeated information entry.

Main guest

Each booking has one main guest who cannot be deleted from the booking.


The same, however, can be changed for a new guest (new profile) or already existing profile.


The entry of new guest data at the booking creation actually creates a new profile. If an existing one is chosen, the booking is associated with the same. Unlike before, with the editing of the booking data, the profile data is now also edited, i.e. the data associated with this profile in all checked-in and expected bookings. The behaviour of checked-out bookings is a little bit different. For more information on that, see Data History below.

Additional guests

You can add data of other guests to each booking. Each of these guests is also a Profile and remains in the Profile database, similar to any other guest.

Data history

When a booking is checked out, the contained guest data is kept intact. During the last guest edit (e.g. change of the address or passport), the data of this profile is NOT CHANGED, but kept the same as before.

Migration of old data

Due to the merge of Profiles and Registration Cards, after the addition of the registration Cards to the Profile database, some information doubling occurred. For the time being, we have added a first version of the profile merge feature. We are working on its improvement and various changes to reduce the number of doubled profiles.

Custom fields

Our new Guest Profile system enables you to define any kind of fields to be contained in Guest Profiles, Registration Cards and the Register.


By default, the field settings have some system fields which cannot be deleted, but can be hidden when unnecessary (see below).

The field types supported by the Guest Profile system are:

  • Text field. The field allows the entry of text or numerical information. In addition, a value list can be defined to select from instead of typing the data every time.
  • Numerical field. This field is for entering numerical values only. Here you can also define a list of allowed values to select from instead of typing them every time.
  • Date. The field is for dates checking their format.
  • Phone. The field is for phone numbers checking their format.
  • Email. The field is for email addresses checking their format.
  • Country. A field with a list of countries of your choosing.
  • Language. A field with a list of the subscription languages.

To set up these fields, go to 'Settings' - 'Guest Profile Fields'. For the existing accounts, the fields are transferred the way they have been in the Registration card. See below how you can hide the unnecessary fields.

Personal Data Encryption

Each of the Guest Profile fields can also be encrypted. In other words:

  • Encrypted. If your local legislation (e.g. GDPR) requires special access to a field, you can choose to make this field encrypted. In this case, the access to it will depend on a special right: Personal Data: Access. A disadvantage of encrypted fields is that they cannot be used in marketing segmentation reports. Examples of encrypted fields: guest names, phone, email, address, passport number, date of birth and other personal data.
  • Non-encrypted fields. The access to non-encrypted fields is easier and can be used in the marketing segmentation reports. Examples of such fields: country, guest loyalty programme level, guest type, marketing source and other additional information.

Please note that the field type (encrypted or not) cannot be changed upon its creation. Carefully think through what information will be stored in it and what kind of field it should be.

Field arrangement, visibility and requirements on the different screens

Now you can order the fields in a way suitable for your needs and in accordance with the applicable norms. For example, the arrangement of the address fields is different for the various parts of the world. The field arrangement is different for each account. To order the fields, go to 'Settings' - 'Guest Profile Fields' and at point 2, select the account.

Choose the Sort Order for each field. The smaller numbers are on top.

In the same screen, you can set whether and on which screens a field is to be visible

  • Short/Long Guest Form. For your convenience, the guest data is initially shown compactly in the booking (Short Guest Form). Through the 'Show All Fields' button you can choose to also see the rest of the fields. This way, apart from being compact, the form can also allow the entry of additional data, if you wish. Should you decide for a field to be completely invisible, don't choose any of the options for it.
  • Hotel Registry. Select if the field is to be included in the Register ('Booking' – 'Hotel Registry')
  • Print Form. Choose whether it should be included on the Registration Card Preview/Print screen. This setting is useful, when using a standard registration card. In case of a custom registration card, the contained fields depend on the template itself.
  • Self Service/Kiosk. Set if a field is to be used for data entry on the registration screen in the Kiosk or the Self Service Portal.
    If you make the field 'Required', the guest will be required to complete it, and if the field is 'Shown', it will be visible, but not required and may be left empty.
  • WRS. Select if a field is to be shown at the last booking process stage. Once again, it can be 'Hidden', 'Sown', and 'Required'.

Important fields and Default values

If your local legislation (e.g. Police Registers) requires you to collect certain data of your guests (e.g. passport number, date of birth, etc.), you can make the respective fields Important. This will give you an additional option to track if all these Important fields are filled in by guests. Thus, a booking can initially be created with the contact details only, and the rest of the information to be gathered at a later stage: during the self check-in or at the reception check-in. The Important option also lets easily check and review if all the necessary data is entered.

On Arrivals list, there is an icon denoting the bookings with missing Important data. In the Register, there is a filter to show all all the guests with missing Important data.

For each of the fields, a default value can be filled in. This is most useful when it comes to Country and Language, as well as in the cases of eventual additional fields, e.g. Level, Marketing Segment, etc.

Masking (Anonymisation) of values

Through the system of masking/anonymisation of data, you can choose the way in which data to be shown on most screens.
The masking is aimed at maximally limiting the access to personal data for staff who don't need to have such access and for the places where such data is not necessary.


By default, data masking is applied to first name, email and phone, but not the surname. This way almost everywhere in the system, the guest data is shown the following way: "J Smith, j.sm****@***.com, ******456". If you wish, you can choose and change which data to be masked. If you change this setting, it will be valid for the newly created profiles, and the old ones will stay the way they were, if not edited and saved again.

Masking is available for the following fields through following format:

  • First Name – The first letter of the name
  • Surname - The first letter of the surname
  • Email – The first 4 characters of the email address. The masked email looks this way: 'j.sm****@***.com'
  • Phone – The last 3 digits of the phone number. This is a masked phone number: '*******456'

Access Rights

We have changed and enriched the access rights to personal data, so that you have greater flexibility when determining which employee to what information to have access to.

For this reason, we have added two new rights: Personal Data: Access and Personal Data: Bulk Access. Here is their behaviour:

  • If a user does not have the Personal Data: Access right, but still has access rights to the system, bookings and other screens, the same can see the masked fields (First Name and Surname, Email and Phone) the way you have chosen for these fields to be visualised (masked or not). The rest of the guest data contained in the encrypted fields will not available for this employee. For the same to perform their duties, the screens are accessible, but the encrypted information is shown this way: ****.
  • If the user has the Personal Data: Access right, the same can see the full content of the encrypted fields. Still, on most screens the guest info is minimised and only the masked fields are shown. The full information can be seen on the screen of the booking itself and in the respective Guest Profile.
  • Advanced Personal Data: Bulk Access. This right has been created for screens and features allowing access to multiple personal data records. Such screens are: the Register, various data exports to the police, as well as the API. Through this right, you can meet the GDPR requirements to grant access only to personnel who need direct access to this information.

Profile Merge

Use the Profile Merge feature to remove doubled profiles in your database.


From the profile search, choose two or more profiles and then decide which of them to become the main one. If there is missing or doubled information, choose which of the data for each field to be kept and then merge the profiles.

Acceptance of marketing emails

To the Profiles, we have added a new Accept Marketing Emails field. In the WRS settings, you define if this field is to be shown in the WRS.

In addition, there is a new filter in the Guest Mailer. So if you decide that an email is a marketing one, you can set the filter in such a way that this email will not be sent to the booking. Alternatively, you can have different emails sent to guests having chosen to accept marketing emails and such who haven't.

Marketing Email Unsubscription

In the Guest Mailer template, now you have a new parameter to let you add a link for marketing emails unsubscription. If chosen by guests, they will be sent to a confirmation page. Upon the confirmation, the system will find all profiles containing this email address and update the Accept Marketing Emails field.

Capacity counters – daily capacity

We have enriched the capacity counters functionality, adding an option for certain dates to be able to set a different availability. For the dates for which there is no surplus availability set, the availability defined in the counter itself is considered.

Example: You have a PARKING counter with a capacity of 20 spaces. For 10 and 11 January, you would like to reserve 3 spaces for your staff. With the new feature, you can set a capacity counter of 17 spaces.

To set daily capacities:

  • 'Settings' - 'Charge Template' - choose 'Capacity counters by dates' from the 'Capacity counter' section
  • Select the number of days as of today or a period
  • In the table, mark days of your choosing. You can choose random cells by holding Ctrl/Cmd.
  • Click 'Set Capacity' and enter a value.

Other improvements

  • Notes in bookings and Credit Card details. We would like to remind you that in accordance with the requirements of PCI DSS and banks, the Credit Card details should be filled in solely in the fields specially designated for this purpose and providing the necessary levels of data protection. For this reason, we have added a content check to the Notes fields in bookings to prevent the entry of such information.
  • Room Change and Housekeeping. A new feature added to let you mark the room change completion. After moving guests to a new room and marking this operation as completed, the housekeeping status of the old room of the guests will be changed to 'Checked-Out'.
    To mark the guest moving as completed, open the Booking Edit screen and click the Done button next to the respective moving.
  • Company on the Rate and Availability screen and in the CRS. If you select a company on these screens, only the rates associated with the company will be shown.
    In addition, in case of a new booking, the selected company will be transferred to the booking.
  • Housekeeping Report. The OOS status has been added to the report, as well as a room status filter.
  • A new 'Booking: Set manual price' right. It has automatically been granted to all having the 'Booking: Create and edit' right.
  • Kiosk – passport pictures. We have added a new setting for the Kiosk to require passport pictures or not. Now there is a third option: 'Requested, but not required'. If selected, the Kiosk will prompt passport pictures, but there will be a button for the guest to decline. Should the guest decide to do so, the same will go to the next step of the check-in process.
  • Guest mailer – a new Confirmed filter added. The 'Confirmed' status of a booking shows if the booking has received confirmation from the system. Through the new filter, you can set the automatic confirmation of all bookings not having received confirmation in any other way. The new filter will also prevent the receipt of doubled confirmations by guests.
  • Guest Mailer. Now you can also use parameters in the email subject.
  • In the multiple booking update features (from booking search screens), we have added an option to update the Confirmed status of a booking.
  • Now you can translate the Badge field in the rate. You can find the translations in 'Rate Description/Translation'.
  • The new parameters for Room and Guest Mailer. In the Guest mailer, you can now access the following fields from the guest room: "Room door code(s)" and "Common door codes" ( booking.arrival_room.room_door_codes, booking.arrival_room.common_door_codes )
  • To the reports allowing the merge of data from many accounts, we have added buttons for the quick selection of all accounts.

Interfaces

Saflok

One of the most popular access systems Saflok can now be used through integration with Clock PMS Suite. The version of the Saflok software should support the PMS protocols: Messenger PMS Web Service Interface Rev. 4. An API plugin and ClockIoT device are also required.

QuickBooks

We are glad to announce the last addition to our list of interfaces. The integration with Quickbooks Online. It links your Clock PMS Suite account and your QuickBooks Online company. The interface is designed to automate and simplify the accounting process by syncing invoices, credit notes, payments, and related data with QuickBooks Online.

API

  • We have added a new access right to personal data in bookings. If your integration needs access to personal data of guests in bookings, grant the API user the new 'Personal Data: Access' right. If your API user doesn't have this right, the same will be able to access bookings, but instead of the personal data of guests will get masked data. Please be careful when granting this access right to personal data, considering the GDPR requirements.
  • New API endpoint – guests (pms_api). It provides access to Guest Profiles and all related data. To access this endpoint, apart from the 'Personal Data: Access' right, the API user will need to also have 'Personal Data: Bulk Access' right. Please be careful when granting this access right to personal data, considering the GDPR requirements.
  • New API endpoint - charge_template_availabilities (base_api). It gives information of the available quantities of charge templates with capacity counters for a selected period.
  • New API endpoint - bookings/:booking_id/charges_by_source (pms_api). It gives information of the charges whose source is the booking (being posted in the booking). Please note that these are not charges owed by the booking. These charges are posted to the booking regardless of where they are transferred. Respectively, here you won't find charges transferred from other bookings to this one.
  • New API endpoint - event (pms_api). Index, creation and update of Events.
  • New API endpoints - /events/:event_id/folios and /events/:event_id/folios/default (pms_api). The first returns a list of of the folios of a Event, and the second - the default folio of the Event, as if there is no such one, it is created.
  • New API endpoint - meeting_room (pms_api). List of set-up Meeting Rooms.
  • New API endpoint - meeting_room_booking (pms_api). List, creation and update of Meeting Room bookings.
  • New API endpoint - meeting_room_booking/:id/charge (pms_api). Addition of a charge to the default folio of the Meeting Room Booking, as the Meeting Room becomes the source of the charge.
  • New API endpoint - meeting_room_availability (pms_api). It gives information of the available slots for booking in the Meeting Room Calendar.
  • To the 'companies' API endpoint (base_api), now there is POST method for the creation of a Company.
  • Companies endpoint, can search a company by VAT number using 'vat' parameter - examle: /companies.xml?vat=UK123456789
  • To the API endpoints rooms and room_types, a new is_virtual field has been added to show you if a room is a virtual one or not.
  • To the 'rooms' API endpoint, information of the OOS statuses of each room (room_status_allocations) has been added.
  • To the exchange_rates API endpoint, a new subunit_to_unit field has been added. This is the value by which a given value_cents is to be divided to get the value in the main currency. For more information, please see the documentation and the description of the money fields.
  • To the API endpoint for a new charge, the 'print_text' field has been added.

Fixes

  • Booking offers – sometimes in the WRS, a line in the offer appears as invalid, if for a room type there is only one available room left.
  • The Event-blocked virtual rooms didn't properly block the component rooms.
  • In some very rare cases, it was possible for a booking to take two rooms through the Self Service Portal or the Kiosk.
  • Daily charges by sources – the amounts are to be by currency, as no currency conversion is to be made, so that they can correspond to the other reports.
  • The editing of the manual price for multiple bookings didn't work in certain situations.
  • Folio Mail Template – a parameter for the public folio URL link was missing
  • The printing of multiple registration cards is now properly sorted by last name.
  • Rate Control Report – it also showed the departure date.
  • Kiosk – for guests moved to another room, the Kiosk issued a key to the old room
  • Out of season couldn't be for 1 day only, but only for multiple days
  • The corrected and doubled folios also copied the fiscalisation data which was not correct.
  • The font colour of the custom colouring of bookings in the calendar was not proper and made the text illegible.
  • The City Tax defined as percent was calculated on everything instead on the Room & Package Revenue Groups
  • Adyen – only the tokenization didn't work with the 3D secure cards
  • Event – payment posting to a folio. The payment subtype didn't update after the payment type selection.
  • Atomize – the button was also available in demo accounts

Clock PMS+ Update (31 May 2018)

Other Improvements

  • GDPR. GDPR statements for personal data collection in the WRS, the Self Service and the Kiosk. A new customisable statement about personal data collection has been added to the last WRS page (personal data collection) and Registration Cards on the Self Service Portal and the Kiosk. The statement contains the following default text:

    "By default, your personal data shall be used solely in relation to the processing of this booking.".

    If you need to change this default text:

    • For the WRS: 'Settings' - 'Languages and Texts' - 'Advanced Labels/Translations: Account' - 'GDPR notice in WRS'
    • For Self Service Portal/Kiosk: 'Settings' - 'Languages and Texts' - 'Advanced Self Service Portal Labels/Translations : Account' - 'GDPR notice in Registration Card'
  • More changes are underway.
  • Kiosk - a new setting regarding the mandatory Registration Card completion. Now it is possible to completely turn off this feature. To use the new setting, go to: 'Settings' - Kiosk' - 'Registration cards required' and select 'None', so that no Registration Card completion is required for the Kiosk/Online check-in.
  • Default Folio Email Template for the Self Service Portal and Kiosk.Now you can select an email template to be sent to your customers having checked out via the Self Service Portal or paid their bills at check-in using the Kiosk. The email template can be entirely html-based and contain a link to the folio.
    • To create Folio Email Templates for different cases (just for information purposes or as payment reminders): 'Settings' - 'Folio Email Template'
    • To select the template which is to be automatically sent to the guests having paid at the Kiosk or checked out via the Self Service Portal: 'Settings' - 'Self service settings' - 'Self service folio email template' in the 'Self check out' section.
  • WRS Tracking Scripts - new parameters and change log.We have added new parameters to the tracking scripts in the WRS: first_name, last_name, e_mail. Please note that sharing personal data with third parties via tracking scripts containing such parameters may violate GDPR or other local regulations. Please use this feature with caution.
    • A change log of the tracking script has been added, too, so that you can track users and changes over time starting from now.
  • 'Booking - Edit multiple' screen – a guarantee policy column has been added. To edit this property, select the column from the 'Columns' button.
  • The Room OOS change log is now included in the main room change log. This way all changes can be found in one report.
  • New user right for the Room OOS creation and editing. The right has automatically been granted to all users having the 'Settings: Update' user right.
  • Company Credit Cards - the cards will now be kept until the next day after the card expiry date.
  • Room calendar colours for bookings. A new 'Calendar colour' field has been added to the booking screen. Bookings in the Room Calendar will be shown in this colour. If no colour is selected, the booking will be shown using the default colour system based on the guarantee/check-in/checkout status.
  • Cash payment number. Some local tax regulations require a sequence number for each cash payment. The number is automatically generated on payment creation and can't be altered. It is included in folio printouts and payment reports. You can format the elements of this number: prefix, suffix, a starting number, etc. by going to 'Settings' - 'Tax settings' - 'Cash payment number'
  • Email list for locked user notifications. A new email list has been created for CC of locked user notifications. This way more users will be alerted in such cases, so that the respective measures can be taken. The new email list can be found in: 'Settings' - 'Users' - 'Administrators' email addresses '.

Interfaces

Zapier

Zapier is a tool for connecting applications. 1000+ applications can exchange data through Zapier.
It integrates apps such as Facebook Lead Ads, Slack, QuickBooks, Google Sheets, Google Docs & many more!

The integration is still in beta, but you can opt for a test drive. Please note that the integration is not available on the Zapier website yet. Please contact our Support Team for the activation of the interface.

The available triggers are: New Charge, New Payment, New Booking, New Company, New Folio, New Booking Enquiry Room.

Fixes

  • Charge Template edit screen. An error occurred after selecting the revenue group.
  • Derived Rates. The resulted price was converted into the currency of the base rate. All prices are now in the currency of the rate itself.
  • Self Service Portal - Request Room Change. Archived room types were also included on the list.
  • Group Report - cancelled bookings were included.
  • Rate price edit table. In some cases, the season price for the weekends was not correctly displayed.
  • WRS Settings – The Non-Compatible Product Management checkboxes were not displayed correctly.
  • WRS - the active restrictions text was displayed multiple times for a single product.
  • Booking screen - the link "Make Check-In" is working now.
  • WRS - Adyen HPP - The transaction error was not displayed back to the WRS.
  • The "Daily Charges By Sources" report: when run by Revenue Date, it took too long for the report to be generated and it couldn't be rendered.
  • The "User" segmentation in the Charge Segmentation Report is now working.
  • The Room Calendar was showing old data regarding guest names in some cases.
  • Room list on the Booking edit screen - some rooms were missing from the list in some rare cases.
  • Adyen Tokenization - the email is now validated for smoother operations.
  • The deletion of a rate was not possible.

Clock PMS+ Update (26 Apr 2018)

Preparing for GDPR

As you know, we have been working on some changes to the system to meet all the requirements arising from the GDPR. We have combined these tasks with in-depth redesign of user profiles and registration cards, and in particular, their merging into a new feature - "Person Data". With this update, we are starting to introduce system adjustments related to the above tasks. Still these changes have no impact on the user interface – no screen or report has been changed yet. The final amendments are planned to be released at stages in the course of a few updates. Here is what will come with the next updates.

  • The introduction of higher standards of personal data encryption. To provide first class data protection, we are changing the current encryption with such one that meets the highest requirements for encryption and encrypting keys. The new class of encryption complies with the strict and practice-oriented requirements of PCI DSS.
  • Richer array of access rights.We have added more access rights to let you precisely determine which employees to be able to view the personal data of each guest and which ones – the lists of personal data and mass exports. In addition, we have redesigned the system, so that the reception desk staff having the lowest level of clearance to be unable to directly work with guests' personal details, but only with the anonymised (masked) ones. This way these employees will still be able to work with bookings. Here are the new rights:
    • Basic access to personal data. It provides partial access to guests' personal details (anonymised ones – for more info, see below). Without it, users will only see '********' instead of the personal data. Having such a right, your employees will partially see guest details to be able to find their bookings. But it will be impossible for them to identify the guest within the meaning of the GDPR.
    • Operational access to personal data. This right gives access to the personal data of each guest on the booking, profile and other screens.
    • Mass access to personal data. This is the highest level of access to the screens and reports where the personal data of multiple guests or profiles can be seen, exported or copied. The GDPR pays special attention to these operations.
  • Anonymisation.Partially masking or restricting the visible information of each guest on the screens and in the reports to the minimum. The guests' personal details are hidden and only accessible when having additional access rights.
    • A first name initial and surname ( J Smith ).
    • The first 4 letters of the email address ( jsmi******** )
    • The last 4 digits of the telephone number ( ********4578 )
  • Consent to marketing emails or giving information to third parties. In the creation of a booking, a new field and related text will be present in the WRS and the guest profiles to ask for the guest's permission to send them marketing emails and/or provide their data to third parties. In the Guest Mailer, we have also added an option to filter the guests who haven't consented to the receipt of marketing emails.
  • Personal data retention period. Depending on your legal requirements for guest personal data retention, you can set how long after the booking checkout the personal data to be kept. In addition, for certain profiles (e.g. participants in your client loyalty programmes), you can choose to forbid the automatic data deletion.
  • Personal data forgetting. Use this feature to search for and erase the personal data of a guest from bookings and profiles. This operation doesn't delete the bookings, but simply erases the personal data in them.

Improvements and changes

  • Company credit cards. Now you can save credit cards or Adyen tokenized credit cards on the Company page. The added credit cards or tokens can be used for one-click payments of the company's folios similar to booking folio payments. A PCI DSS note: In contrast to the credit cards related to bookings which are automatically deleted with the bookings checkout, the company ones are kept until the cards' expiry date (if this date is 08/2018, the card is deleted on 01.09.2018).
  • Export of all reports to Excel. As the existing copy/paste feature is no longer supported by most browsers, we have created a functionality to export reports to Excel. Use the 'Excel' button on the bar at the top of each report. The new feature will generate a ready-to-use Excel file and prompt you to choose a location for its saving. We hope you find the new option to be more convenient.
  • Check of the room for a checked-in booking or pending room cleaning at check-in. We have added this booking check-in option to make sure that the room is clean, there is no housekeeping warning or checked-in booking in it. A pop-up message of the issue appears. In addition, if you still decide to check in a new booking before the previous one is checked out, you will need to have the Room Sharing right.
  • To the Guest Ledger and Accounts Receivable, we have added a new payer type filter. This way besides seeing the data of all folios, now you will also be able to only view company folios or booking and event ones.
  • A new Credit limit field on the Company screen. The field is shown in the Accounts Receivable Report when the Summary view mode used.
  • To the Booking screen and the pre-authorization list, we have added a date of the pre-authorization creation and its age in days to let you easily notice when it has already expired.
  • A new Groups Report. Through it, you can easily find group bookings (Event bookings), filter them by arrival, departure or stay period. Apart from bookings linked to an event, you can use other report views, too - grouped by reference number. In this case, all bookings with a reference number are visible, even if they are not linked to an event.
  • Virtual Credit Cards and Channel Manager bookings. We have created a new option for the better processing of virtual credit cards. If from a certain channel (e.g. Expedia), the virtual credit cards cannot be used (tokenized, charged or pre-authorized) before the check-in date, now you can efficiently deal with such a situation. We have changed the 'Deposit auto payment' option. With the new update, it will apply to each channel separately and can differ with the various channels. This way you can enable it for certain channels, and leave it disabled for others (e.g. Expedia). In the latter case, cards will only be saved to be used after the check-in date. You can check this option on the Channel Manager settings screen. Please contact our Support Team if you need to have it changed for a given channel.
  • A new Charge Transfer right. The transfer of charges among folios is no longer controlled by the 'Charges: Edit and Void' right, but by 'Charges: Transfer'. The new right has automatically been granted to all users having the 'Charges: Edit and Void' one.
  • Improved performance of the analytical 'Charges Segmentation Report' and 'Booking Segmentation Report'. Now you can run analyses for longer periods.
  • OOS creation and edit log. Use the detailed log to track the created and edited OOS room statuses. Access the general log through 'Settings' - 'Room' – 'Log' button. And for each individual room, use the 'Log' button on its screen.
  • Passport images in Registration Cards: Now you can view them in a larger size for greater convenience.
  • To each ParityRate product, we have added the option for their disabling/enabling without being necessary to delete the already existing mapping.
  • A new payment type - Barter.

API

  • We have changed the implementation of the System API access. Now the API users are created by our Support Team, as you will need to provide: username, contact email, organisation or if it is an individual developer – contact person details. All of the rest operations like generating Access Key, granting or revoking access rights can still be performed by the system users.
  • New 'Booking Enquiry' endpoint (booking_offers)
  • To each room endpoint, we have added info of the OOS statuses.

Fixes

  • The payments on the Folio screen are now sorted by date.
  • The City Tax, included in the price per night was sometimes subtracted from the value of the package element instead of the price per night.
  • Kiosk – despite being set to payment via an Adyen Terminal, tokenized cards were also available for payment.
  • POS – The kitchen monitor beeped without being necessary
  • API – The booking update (cancellation) required users to have the To-Do edit right without being actually necessary.
  • The API user screen – it was impossible to copy the api key when the Mozilla Firefox browser used.
  • The quick booking search did not work if the Channel Manager's inbox was opened at the same time.

Clock PMS+ Update (21 Mar 2018)

Dynamic Package Capacity and Availability Management

We have significantly expanded the functionality tracking the availability of extra services. Now it covers rates, too.

The rate availability can also be managed through the elements of the rate package. For example, if you have limited meal capabilities and you can't provide breakfast for all your guests, now you can limit the sale of the packages including breakfast.

What we have done is much more than giving you another availability report. Now you have an integrated approach at your disposal. The restrictions on the sales of packages extend to all modules of the system. Apart from the Rate Availability Screen, these limitations are also reflected in the Web Reservation system, the Channel Manager, the Upsell Module, as well as in the API.

Our integrated approach enables the better control through restricting the sales of both packages and individual services under one and the same capacity. In other words, taking the breakfast from the above example, it won't be possible to sell it neither as a part of a package, nor as an individual service, no matter whether it is the WRS or Self Service Portal, when for the given date there is no availability. Apart from the cases of limited availability of services like breakfast, excursions, training courses, spa procedures, parking spaces or assets like baby cots, rented bikes, etc., now you can use the functionality to restrict the sales of a given rate for the purposes of the revenue management. If you have a promotion rate, and you would like to only sell a certain quantity of packages (e.g. 20), you can use the new functionality.

Detailed description

  • The old feature with the inventory code and capacity in the charge template has been replaced by the new one. The old data - transferred to the new functionality and it will continue operating without additional adjustments.
  • A new setting - "Capacity counter". Create counters for anything whose daily availability you would like to track when it comes to daily sales. The counters define the daily capacity. One counter can be linked to multiple different charge templates or rate package elements. This way several charge templates can draw from a common capacity. For example, you can define one counter "Parking Lot" and assign it to multiple charge templates to sell your parking spaces at different prices such as "Car Parking Space", "Bus Parking Space", "VIP Parking Space", etc.
  • Charge templates.To link a counter to a charge template, open the edit screen of the charge template and select the counter.
    • You can track the availability through charge templates in the "Charge Template Availability Report". The same can easily be accessed from the booking screen, where it is run with the period of the booking.
    • Web Reservation System and Self Service Portal. The list of available services is checked for sufficient availability. Guests cannot select more services than the available ones.
  • Rate Packages.You can assign a capacity counter to any package element. Also, different counters can be used for individual package elements, e.g. breakfast for one of the elements, and SPA - for another one. The availability of such a package will be the lesser one of the two elements. In other words, if you have 20 available breakfasts and 10 spa procedures, the whole package availability will be 10. If you wish to control the number of sold packages for the purposes of the revenue management, you can add an additional element to the package at a zero price whose availability to track.
    • Rate Availability screen. The availability of packages is automatically reflected on the Rate Availability Screen. The package is marked when sold out. There is also information of the availability of the package itself.
    • The Web Reservation System automatically stops the sales of the packages without availability.
    • Channel Manager. The availabilities sent to the Channel Manager also take into account the availability of each package.

How it works:

  • The capacity is determined by the Capacity Counter
  • The capacity counter uses the valid charges in the folios for which it has been selected.
  • No matter how the charge has been created: manually, through a charge template or a rate package, if a counter is assigned, the quantity of the charge is deducted as sold.
  • If you cancel the charge, the related quantity is returned for sale, i.e. the cancelled charges are not reflected as sales.
  • The sold quantity accounted for by the service date of the charge.
  • Charges without quantity are considered to have a quantity of 1.

Online Check-In

With airlines, the Online Check-In feature definitely brings benefits for both the airlines saving working hours and the passengers saving time. If it works for them, it will work for you, too.

Actually, we already provide this functionality in the form of Clock Kiosk. Now you can use the software of Clock Kiosk to offer Online Check-In to your clients through your website. The design of the screens is responsive and the software can operate on the customer smartphones and tablets. And all being true cloud-based, no application installation on the client's device is required. Your guests go through all formalities before their arrival to avoid the queues and the processing at the reception desk. The new feature has step-by-step instructions of the process. In accordance with your needs and preferences, some of the steps can be skipped.

Here is the process and what the Online Check-In feature offers:

  • After enabling this feature (please contact the support team to do so), youíll receive a link to the Online Check-In functionality. You may place it on your website, confirmation emails or the automated emails from the Guest Mailer.
  • After clicking the link, the guest has to log in to the Online Check-In module using either their booking number and PIN, or their booking number and surname. The login through a booking number and surname is optional. If wish to offer this option, please let our support team know.
  • Email check. There is an option to set the system to require the guest to check whether their email is correct. This is also very useful in the cases where the guest has a booking with automatically generated email by the OTA portal. This is the moment when the guest can fill in their own email to receive the paid bills.
  • Review and confirmation of the hotel policy. The guest goes through a screen where the same can review and agree to your hotel and guarantee policy.
  • Upsell. If you have taken advantage of the option to enable this feature, the system will offer your guests upsell suggestions. It can be a higher class room or package. The settings are up to you. If the guest chooses the higher class package, its price will automatically be updated.
  • Registration cards and signature. The guest enters their data for the registration cards. Depending on the settings, this can be one registration card or an individual registration card for each booking. For each registration card, the system will require a signature, too. It is optional.
  • Passport image. There is an option to require the guest to provide you with an image of their photo ID to verify the personal data.
  • Bill payment. There is also an option to require the payment of the amount due for the booking. The guest can pay it in a click, if their credit card has already been tokenized or use another credit card. In the process of payment, one can also choose the issue of an invoice for a company or private individual. The invoice for the payment made is sent to the clientís email.
  • Automated allocation of a free room.
  • Mobile Key. If your access system is compatible with Clock PMS Suite and supports mobile keys, you can send your guest a mobile key. Thus the same use their smartphone for room entry.

For the time being, the Online Check-In is released as a separate feature. Our next step will be to merge it with the Self Service Portal to give your guests a clearer and easier way of electronic communication with your hotel.

Guarantee Policy by Seasons and Days

We have expanded the options for connection between the rate and the guarantee policy. So far, one rate could be linked to only one guarantee policy. Now it is possible for a guarantee policy to depend on the booking period and to be a different one for the different seasons or days even.

This way you have the flexibility to manage the required deposit and the cancellation conditions depending on the demand. For example, with many events and greater demand, you can apply a policy with non-refundable rates, in periods of lesser demand and a free cancellation policy.

If a booking falls in a period when two or more guarantee policies apply, the one having a higher priority is chosen. For this reason, we have added a new field to the Guarantee Policy - priority. Similar to the rate restrictions, the guarantee policy can be set at three levels: Rate, Season and Day. Each next level has a higher priority. You can set the default guarantee policy on the rate screen, and for the seasons and days when necessary to set any other policy.

The automated selection of a guarantee policy is reflected on the Availability and Rate screen, the API, as well as in the Web Reservation System. Bookings imported from the channels do not account for mixed guarantee policies. They take the guarantee policy set in the rate.

Channel Manager

  • Delay Policy. For the RoomCloud channel manager, we have developed additional logic aimed at accelerating the product communication without errors while delaying the product communication with repeating errors. The delay policy tracks the accumulation of consecutive errors for one and the same product. When the accumulated errors exceed a certain threshold, the sending of info of the product starts delaying. Initially, it is twice slower than usual, and with the accumulation of errors in the course of several days the data sending of this product ceases. In such a situation, emails are sent. When the reason for the errors is removed, the product can again be released for synchronisation.
  • Disable Registration Card Creation. With this new setting, you can forbid the import of bookings from the channels to create registration cards to the bookings.
  • Auto charge deposit setting is for each portal now. This way you can control this feature more precisely.

Other improvements and changes

  • Folio emails. We have expanded the options for design of the folio emails. Now you can create different HTML templates for various purposes using parameters for the folio itself. For example, the number of the document, date, the amount due, etc. We have added a list of the sent emails, so that you can check the chronology for each folio. The whole functionality is not fully completed yet and the automated emails are still sent using the old format, but we are working on it. The new email templates can be found in 'Settings' - ' Folio Email Template'
  • Out of Service Rooms -new implementation. We have changed the implementation of room statuses.
    • Active From and Active To fields are added to the Room settings screen. They define the time frame for each room. If outside this time frame, the room is not included in the hotel capacity.
    • Out of Service. The OOS functionality has changed. Now you can define the period of the OOS room status instead of its start date only. These statuses can be edited from the Room Calendar drop-down menu for each room or using the OOS buttons on the Room settings screen. Additionally, you can select a predefined type and enter a description for each status. You can set these types by going to 'Settings' – 'OOS Room Type' and also choose their colour for the Room Calendar.
  • Booking Advanced Search - we have added a new filter and column by date of last booking update. We have also introduced a booking balance column.
  • POS terminal payments - the info of the card type and number of the created payment. The type of the created payment is now "Credit Card".
  • Guest Mailer - we have added a few parameters to use in the emails: Arrival Time (booking.arrival_time), Departure Time (booking.departure_time), as well as parameters related to the location of the room itself (or the room type): booking.bookable_location_t_name, booking.bookable_location_t_description, booking.bookable_location.image_url, booking.bookable_location.google_map_url
  • The room change is now included in the confirmation email. If the booking has a room change planned during the stay, the info of the change is now added to the confirmation email.
  • In all reports, we have introduced a label appearing in the printouts showing the hotel the reports refer to.
  • The registration cards now contain a new checkbox "Checked by user" for marking by whom and when the data of the registration card was verified. This is for the cases when the registration cards are completed by the users themselves and this data is to be checked against the details from the photo ID.
  • The images of photo IDs are now deleted after 10 days of the departure or after the cancellation date.
  • The default values of the meal fields on the booking screen have been changed. Now you can select more than one default meal.
  • Meal translations. We have added an option for the meal names to be translated.
  • Multiple booking edit screen - the selected columns can now be saved and when opened again, the screen will look the same as the previous time.
  • Kiosk. We have changed the login screen to be more compatible with the various device sizes, allowing you to use the Kiosk software on your own tablet or PC.

Interfaces

  • Datecs:
    • The fiscal printer now supports non-fiscal printouts and can be used with the POS for printing orders, totals or kitchen receipts. This way if you need only one printer, you can save on buying a new Epson printer.
    • A new option for repeated fiscalisation in the POS.
    • Fiscalisation can be undergone only by folios with mapped payment types.
    • The "Wait for fiscalisation" option when printing folios now accounts for whether the folio is a fiscal one or not.
    • We have added user, date and time info to the fiscal requests.
  • Salto. A new option for compatibility to the old protocol versions. This way Onity is also supported.
  • Lightspeed. Integration between Lightspeed POS and Clock PMS.

Fixes

  • POS printers. The spaces are now stripped away from the IP address.
  • In certain rare situations, the guests with RoomCloud bookings were allocated wrong rooms
  • The API call statistics didn't show for certain accounts
  • Adyen Terminal in the Kiosk - the back button appeared after 3 minutes to avoid the confusion among the users.
  • Virtual room types - already with an upsell index
  • In certain rare situations, the tax amount in a given folio could be doubled.
  • CRS WRS - the iframe resize didnít work
  • Adyen 3D secure - the check is now skipped for the cases when the transaction is initialised by the hotel employees.
  • Advanced Search - the note was hidden, if the reference number column was hidden.

Clock PMS+ Update (11 Jan 2018)

Photo ID pictures

Do you check guests' photo IDs at check-in? If so, then our new feature can be very useful for you.

We have added it to let you add a picture of the guest's passport or ID card to the registration card.

This way your guests will be able to completely skip the registration process at the reception desk. Instead, the whole registration process can be completed online via the Self Service Portal (still in progress) prior to the arrival or through the Kiosk at the hotel lobby.

You can also make a picture of the ID documents through the back office app and speed up the check-in procedure without having to keep their photo IDs. Using the taken pictures, the hotel staff can verify the authenticity and accuracy of the guest details entered into the registration card and mark it as 'Checked' (the Checked marking option is still in progress).

photo id pictures

The new feature fully complies with GDPR, as well as with the modern data security requirements.

The pictures of ID documents are kept for a period of 10 days after departure or booking cancellation and then – automatically erased. It's not necessary to take care of this process, otherwise mandatory as per GDPR.

When guests themselves make these pictures via the Self Service Portal or the hotel kiosk, a special Artificial Intelligence based algorithm, we have created, will check if the provided picture resembles a photo ID.

If the AI-based algorithm doesn't recognise it as a picture of an identity document, your guests will kindly be reminded to provide a picture of their photo ID.

Still there is a possibility for the algorithm to not correctly recognise a guest's document. Here is why there is an option for keeping the picture though it has not been accepted as a valid one.

Considering that ID documents differ from country to country, we have allowed for the system's learning of the ID documents of the different countries. This way, the functionality will become more and more precise with time.

To enable the new feature for the Kiosk: Go to 'Settings' – 'Kiosks'. For each of the kiosks which should require photo ID pictures, select: 'Requirement document picture'.

Integrated Payments

  • Channel Manager – automated processing of refundable/non-refundable bookings with an option for payment or pre-authorization only. Here is the whole credit card handling feature when bookings are imported after the following changes:
    • First, a credit card is recorded in the booking. The initially received credit card details can always be checked and used by you (provided you have been granted the necessary access rights).
    • Then, if the booking requires a deposit (as per the guarantee policy related to the rate), the deposit is directly paid or is only pre-authorized. Whether it is paid or pre-authorized depends on a new setting. The credit card is tokenized through Adyen and can be used for one-click payments later on.
    • If the booking does not require a deposit, the credit card is only tokenized through Adyen. This operation does not check for certain funds availability, but verifies if it is a valid and active one. This is done through an actual €0 transaction.
    • The available settings are: 1. Save Credit Card Only (only the fist step of the above is implemented); 2. Tokenize. Pay the deposit, if any (it determines if a deposit is to be paid at step 2); 3. Tokenize. Pre-Authorize the deposit, if any (It determines if a deposit is to be only pre-authorized at step 2).
  • The tokenized cards (both the Adyen-tokenized ones, and the ones recorded in the booking) can now be used by guests via the Self Service Portal or at the Kiosk for one-click payments. Here are a few possible ways to ease your guests:
    • A guest books via the WRS and guarantees by credit card. The card data is tokenized through Adyen. At arrival, the guest checks in using the hotel kiosk. As tokenized cards allow for one-click payments, your customer doesn't need to enter all the details once again.
    • The booking is made through Booking.com. It is imported by the Channel Manager and one night is automatically charged to the guest's card. Check-in. At departure, the guest decides to check out via the Self Service Portal. There the hotel bill can be paid in a click with the already tokenized card.
  • Adyen tokenization of an already recorded card. If a booking contains card details, now you can automatically create an Adyen Token without any data copying and pasting.
  • Interface to Adyen Terminal. A window close button appears in 60 seconds. This should reduce the number of interface issues arising from the accidental screen closing which makes instructions no longer visible from the POS terminal, especially during signature confirmation.

Other improvements and changes

  • Booking period change and auto-charges. We have improved the logic of the automated adding and removal of charges in case of a stay period change. Up till now there was a requirement for a folio to be open for charges to be automatically voided in case of a shortened stay.
    We have redesigned the feature, so that these charges can be voided even if the folio is already closed. So if a stay is shortened after closing a folio and certain charges are to be voided, now they will be posted with a negative value to the new open folio. This applies to all automatically posted charges: nights, package elements, city tax, service and booking charge templates.
  • Housekeeping sector and Housekeeping report.
    • For the purposes of the Housekeeping report, we have added a new field to the Room screen – Housekeeping sector.
    • To the housekeeping report, we have added a new option for grouping rooms. The grouping can be done by Housekeeping sector, as well as by Room Type, Room Location or without grouping.
    • A new option for sorting rooms added to the Housekeeping report. The room arrangement can be a standard one (defined by you from the Settings - Room - Sorting ) or by time of arrival.
  • New Report - Daily Charges By Sources. The report can show the summarised charges by revenue groups for each date and source (booking, company, event, etc.) which makes it very useful for management and operational purposes.
  • Show unit price in the folio printout. The new setting allows you to show or hide the unit price column (gross and net) in the folio printout. Use this setting (Settings - Tax settings - Folio Printing section), if there are legal requirements for this attribute to be present on your invoices. We don't recommend you to use this column without a good reason. This is because of the way the values in this column are calculated: the value of the charge is divided by the quantity. In such an operation, the result is rounded. As a result, if you multiply the already rounded value by the quantity, you may get certain differences to the values due to the rounding. In principle, this does not affect the invoice and its values, however, these it may lead to confusion in your customers. For example: if the column value is $100, tax not included, and the quantity is 3, the rounded unit price value without the tax will be $33.33 The invoice will show Unit price: $33.33; Quantity: 3; Value: $100.
  • For easier selection of rates, we have changed the standard selects for ones which you can search for on the derived rate edit screen and multiple booking edit screen.
  • On the Room Calendar screen, we have added a housekeeping note and guest requests to the booking details section.
  • Telephone and Email have been added to the settings of the booking mandatory fields.
  • We have restricted the period within which the WRS, Rate and Availability screen and the respective API ends. This period is now 10 years ahead.

Localizations

  • Bulgaria - Interface to the Datecs FP705 fiscal printer and other printers supporting the same protocol.
  • Sweden - Swedish Central Bureau of Statistics Report

POS

  • eMenu – Opening hours. For those of you using the eMenu for room service orders from the Self Service Portal, we have added an option for setting the opening times. This way your guests will know when they may place a room service order and when it's not longer possible for the day. For each day of the week, you can set the opening hours from 'Management' - 'eMenu'. Your customers will not be able to place orders outside these opening hours and will get clear info of the room service opening hours.
  • The last kitchen for each table, is now visible on the main screen. If using the kitchen instructions to track which meal is served to each table, this new feature will allow you to track the status of each table and send instructions to the kitchen regarding the next meal. For example, if your customers have ordered a 5-course menu and the final instruction sent to the kitchen is 'd-3', on the main screen you'll be able to see that 'd-3' is already ordered and thus you will know which meal your guests have reached.
  • The number of guests (covers) has been added to the kitchen receipts. This way the kitchen staff will be better informed of the specifics of the orders.
  • To the multiple menu item edit screen, we have added the Order Group field.

API

  • The rate end point now supports the creation of a new rate.
  • To the folio end point, a new payment_terms_date field has been added.
  • To the occupancy_forecast end point, the id_room_type field has been added.
  • To the booking end point, a new rate_calculation field has been added. It contains information of the initial price at which the booking was created. The information is necessary for revenue management systems.

Fixes

  • On the price edit screen, two unnecessary empty lines appeared
  • Sometimes there were cases when the transactionReference was missing in successful or failed Adyen payments
  • On the WRS, it was possible to book using an already cancelled Booking Enquery.
  • Guest mailer – a few parameters were missing in the drop-down menu
  • WRS – the order of picture showing was incorrect.
  • The import of bookings from a file with the option for automatic company creation didn't work.
  • In the registration card, the hotel log took the whole width instead of just the half.
  • The deletion of a standard room, although it is a component of a virtual room type.

Clock PMS+ Update (30 Oct 2017)

Kiosk

Checkout

We have added a new option to our Kiosk – the Checkout feature. Through it, guests can check out on their own and timely notify the Housekeeping department of their departure. All of this significantly shortens the time for the preparation of the room for the next guests. Furthermore, it allows your customers to pay their bill, if not paid yet, of course.

We would like to remind you that Clock Kiosk can require the payment of the hotel bill at check-in, however, if the guest has unpaid extra services, the same will be able to pay them when leaving the hotel.

The checkout feature is similar to the one on the Self Service Portal, so that guests have the same experience, no matter if the Self Service Portal or the Kiosk is used.

To activate the new functionality, go to: "Settings" – "Kiosks" and select "Allow checkout".

Mobile Keys

For the check-in and room key issuing, we have added an option for guests to receive a mobile key. In other words, they will be able to open the room door using a special smartphone application. It should only be installed on their smartphones. Clock Kiosk now has QR codes to make the installation even easier. A guest is only required to enter their mobile phone number to receive this mobile key.

The new feature is part of the planned comprehensive support of mobile keys, which will also be extended to the Self Service Portal where guests will be able to have mobile keys issued prior to their arrival.

The mobile key functionality has to be supported by your room access system. For the time being, it is only supported for the Salto system, but soon other interfaces will be added, too.

You can also build your own interface to the system through our 'DoorKey API'.

Other

  • Auto logout at the last page. After finishing the check-in, we have added an automatic timer of 15 seconds to the last page in the Kiosk. With the elapsing of these seconds, the system logs out the user. This change has been inspired by the many reported cases of guests leaving the kiosk without logging out and thus creating inconvenience for the next guest.

POS - Kitchen Instructions

Clock POS now has an option for sending instructions to the kitchen. The existing one, "Notes", has been preserved, but it refers to order comments and couldn’t be used without an order. The new functionality allows you to add instructions or a command at any time which then to be printed or shown on the selected printers or kitchen monitors. The instructions have a completion status for more efficient communication between waiters and the kitchen. For example, waiters can use this option to send a notification for the start of the preparation of the next meal, as well as to check if it is ready.

You can set a preliminary list of commands to be sent for greater efficiency and ease. Furthermore, you can enter your own text. For the time being, the preliminary list of instructions can be found by going to: "Management" - "POS Settings", however, it will be moved with the next update.

To send an instruction to the kitchen:

  • Select a table from the main screen.
  • Click the Instructions button
  • Choose the kitchens to receive the instructions.
  • Use one of the standard instructions or enter your own one
  • Send.

You can see the instruction status – pending or completed. It can be changed to completed from the kitchen monitor.

Please note that if you open a new bill (for an empty table), send an instruction and then add items to the bill, the instruction will be printed, however, it will not be possible to track its status, as the empty bill will be archived after leaving the charging screen.

Central WRS

Theme and Custom CSS

We have added the option for the selection of a theme and CSS to our Central Web Reservation System (C-WRS). Please note that through the C-WRS you can show all your properties on one page along with the respective availability and minimum rates. The users can search by region or destination, as well as by other criteria. With these changes, you can customise the layout and design of the C-WRS to meet your corporate identity.

To change a theme or custom CSS files:

  • On the main hotel selection screen, (click the ‘eject’ screen, if you have accessed a certain hotel), select "Central Reservation System".
  • Click "Gear" icon to access the settings screen.
  • Select one of the standard themes or 'None', if you wish to use entirely your design.
  • You can upload up to 2 own CSS files.

Deep Links

Now you can build deep links to your Central Reservation System being similar to the ones to the Web Reservation System (WRS). Use deep links to better integrate your C-WRS with your site. For example, you can place links to specific destination/regions or links containing a certain type of hotels only. It is also possible to integrate your own widget for quick search.

For the time being, we haven’t prepared an editor for the quick building of links, but your web designer can create links using the following parameters:

  • search[arrival]
  • search[nights]
  • search[location]
  • search[adult_count]
  • search[children_count]
  • search[bonus_code]

Example of a parameterized URL to the first page:

https://sky-eu1.clock-software.com/wrs/YOUR_SUBSCRIPTION_ID/searches/new?language=en&search[arrival]=2017-11-01&search[nights]=2&search[location]=London&search[adult_count]=1&search[children_count]=1&search[bonus_code]=BONUS

Example of a parameterized URL to the second page: (hotel list):

https://sky-eu1.clock-software.com/wrs/YOUR_SUBSCRIPTION_ID/searches/products?language=en&search[arrival]=2017-11-01&search[nights]=2&search[location]=London&search[adult_count]=1&search[children_count]=1&search[bonus_code]=BONUS

Other Improvements

  • A new report - "Housekeeping Summary" and totals on the Room Plan screen. We have added totals of the different statuses on the Room Plan screen. Select the icon next to a room type to see the statuses and the number of rooms for each status. You can see the totals below – the same icon in the footer. The whole information is available in the "Housekeeping" section of the new report "Housekeeping Summary".
  • Quick change of dates on the "Arrival" and "Departure" screens. On both screens, after the date itself we have added buttons for a quick change of the date by one day forward or back.
  • Booking edit – the Marketing channel and Marketing Segment fields are now drop-down menus of predefined values to select from. In other words, it is no longer possible to be freely completed. The free entering of values led to many user-made mistakes. The same refers to the Revenue Category fields for charges and charge templates.
  • On the multiple booking edit screen, we have added a new email column. This way when creating a booking for multiple rooms, you will be able to create a profile for each of them entering an individual email. However, it is not possible to search for profiles and transfer data on this screen.
  • Self Service Portal Links. So far you could set a "More Info" URL. Very often it is not enough. Here is why we have added an option for multiple links, as you can also enter text and define a button style for each of these links. The Self Service Portal styles are: "list-group-item" and "list-group-item active". Test the others styles, too, and choose the most suitable for you. Furthermore, you can use your own style predefined in a custom CSS file.
  • RoomCloud - Inbox – we have added a column with the reference number of the booking for quick check.
  • Use of tokenized cards in Clock PMS for payment via the Adyen Gateway, giving greater flexibility when different payment instruments are used. The tokenized cards in Clock PMS have the following advantage – the complete card details are available to you to also enter them through your terminal. And the benefit of the tokenized cards in Adyen is the dynamic validation through an actual transaction for EUR 0 or 1. Select the tokenization that better suits your needs.
    To use the tokenized card in Clock PMS:
    • Open a booking folio
    • Click the "Credit Card" button in the "Payments" section
    • Fill in the amount and click the button corresponding to the tokenized card ("Pay with ...").
    • Confirm the operation.
  • Please note that this operation requires a special setting and right on part of Adyen. Please, contact Adyen, if you receive the "Refused (010 Not allowed)!" error code.
  • Booking – when adding a credit card (Clock PMS tokenization), the card number is verified by the checksum which prevents the typing errors. The verification by the checksum validates whether the card numbers complies with the common standards and is a basic control check of the entered data. Please note that this does not mean the card is real or active. If you prefer to be sure of the card validity, use the Adyen tokenization.
  • The rate log now records the changes to rate restrictions, too.
  • A new control report - "Failed credit card transactions". Now you can find a log of the transactions with rejected credit cards, as well as the related errors. To access it, go to "Reports" - "Control" section
  • In the "Payments Report", a new"Through a payment gateway only" filter has been added. Use this filter for easier comparison of amounts and payments in Clock PMS against the ones in the payment service provider. The report also give information of the reference number of each transaction.
  • Closed Folio Report – the balance sum has been added to the report total
  • Folio Fast Search – if the search results are too many, they are divided into separate pages to speed up the report.
  • A new fiscalization setting. It is called "Folio printing to start after fiscalization" and you can find it in "Settings" - "Tax Settings". This setting refers to the cases of fiscalization when a certain code or number from the fiscal interface has to appear on the printout. If "On" selected, at the folio closing, the system will wait for the fiscalization-related fields to be filled in before opening the folio print screen. This way you can be sure that the mandatory attributes will be present on the printout. The setting can also be used in combination with the API where the special fiscalization fields are also available for updating.
  • Contract Rates – a new feature added for charging City Tax. For each contract rate, you can choose if city tax is to be charged or not.

API

  • A new occupamcy_forecast endpoint added. It allows the information from the "Availability" - "Occupancy Forecast" screen to be also accessible via the API. The endpoint provides summarized information of occupancy and how it is formed – by days and room types, as well as the respective total.
  • Booking – a new "rate_price_calculation" field added. It contains information of the initial price calculation for the selected rate for each day of a guest stay. This field also gives you a reliable history of the prices at which the bookings have been created.
  • Booking – a new "ota?" field added for easier differentiation between the bookings received from OTAs and the rest of the bookings. The reservations imported by the channel manager have the following value: "true".

Fixes

  • The Register no longer contains fields whose columns were doubled on the Register screen.
  • Events – The Change log did not account for when an event is created or edited.
  • POS – the editing of multiple items at once required the tax % entering
  • RoomCloud – import of bookings. The communication errors were visible in the inbox, but they resembled bookings
  • RoomCloud. In the last version, the supplements are charged once (for the arrival date), without the amount being multiplied by the number of nights or guests, and now have a correct source.
  • Booking – the manually chosen city tax mode did not work properly if the rate contained city tax.
  • Guarantee Policy – the filter now contains all revenue groups.
  • Occupancy and Charges – fixed bug causing an error in certain cases of groupings by room type in combination with virtual rooms
  • Booking – when "Route rate charges to Company/Event" selected, the setting "Allow charge transfer" didn’t work on the Company screen
  • Rarely and only in certain events of multiple requests at the same time, it was possible for an invoice number to be skipped.
  • It was possible for catering to be deleted despite the existence of related charges .
  • Booking – in cases of coexistent rates and manual prices, it was possible for room charges to be fewer than the number of nights.
  • Advanced Search – the csv export didn’t work.
  • ParityRate – the new status didn’t appear in the documents ( 4 - Rejected ), and now it is processed as cancellation
  • When data migrated from ParityRate to RoomCloud, the errors from the old channel manager remained on the screen.

Clock PMS+ Update (11 Sep 2017)

Credit Card Data in the Notes fields: For security reasons and in compliance with the PCI DSS rules for protecting stored credit card data, we have introduced limitations to the entry of numbers resembling credit card numbers in some note fields.

We would like to remind you that credit card data is to be solely entered in the fields specially designated for this purpose. The entry of such data in unprotected fields exposes both you and us to a risk of various data misuse and serious financial fines.

Reports

  • New Report: 'Charges by Rooms'. The report is suitable for viewing the services used with each room for a certain date, as well as for various management purposes. It provides information of charges posted for a room, based on all bookings for the room for a certain date (room changes are also accounted for) and the charges posted on the selected date in these bookings (service date filter used). The bookings without an allocated room and their charges are not included in this report. The same applies to cancelled bookings.
  • New Report: 'Open Folio Charge Age Report'.The report is designed to help you easily find all open folios which should have already been closed . To do so, it calculates the 'age' of each charge of the folio. The 'Age' is the difference in days between the today’s date and the one (Service date) the charge refers to. Then follows the determination of the age of the oldest and the newest charges for each folio. The two filters of the report: 'Oldest charge age' and 'Newest charge age' pinpoint the open folios you need. Example:
    • If you set the 'Newest charge age' to 1, it means you are looking for all open folios containing charges for past dates only. In other words, these should be the folios which can now be closed.
    • If you set 'Oldest charge age' to 30, for example, it means you need to see the open folios having at least one charge being 30 days or more old. You’ll find this feature very useful when complying with legal deadlines for document issue.
  • 'Occupancy and Charges Report'. Now it can be run by room types.From the 'Show' drop-down menu, select 'By room type'. If using virtual rooms, please note that:
    • The revenue refers to the booked room type. When this is a virtual one, the revenue entirely refers to the virtual room type. The number of bookings and the revenue for the component rooms involved are NOT accounted for. The only value shown for the component rooms is in the ‘Occupancy’ column.
    • The capacity of virtual rooms is not included in the total capacity sum.
  • Segmentation by 'Room' in segmentation reports: 'Charge Segmentation Report'; 'Bednights Report'; 'Booking Segmentation Report'. In the first two reports, the segmentation accounts for room changes. The 'Booking Segmentation Report' disregards for room changes because the opposite contradicts the report logic. Instead, the segmentation is made based on the arrival room.
  • To the 'Occupancy and charges' and 'Occupancy and charges D-M-Y' Reports, a new option has been added to let you choose the type of the amount to be shown in the report. Click 'Value' to choose: 'Charged amount'; 'Net value' or 'Gross value'.
  • The 'Payments Report' now contains information of the PSP/Transaction reference, if the payment is automatically generated through an interface linked to a Payment Gateway (Adyen, Authorize.net, PayPal, etc.).

Improvements

  • POS. Now you can use an Adyen Credit Card terminal to accept payments in Clock POS.
    Setup:
    • To use an Adyen POS Terminal, you need to have a Clock IoT Device. If you are a holder of multiple accounts (hotels, restaurants), you’ll have to use a separate Clock IoT Device for each account.
    • The settings of Clock IoT Device and Adyen POS are the same as the ones of Clock PMS and are accessed from the ‘Management' menu. You can also contact our Support Team for more information.
  • How it works:
    • After activating the 'Adyen (POS Terminal)', fill in all fields and add at least one POS terminal on the settings screen. A 'Terminal' button will appear on the bill closure screen, replacing the old 'Credit Card' one.
    • After clicking the button, the amount to be paid will be sent to the POS terminal and a credit card will be requested.
    • If the credit card payment is successful, it will automatically be added to the bill. The bill itself will be closed and printed similarly to the other payments.
  • We have improved the import from csv file of Bookings, Profiles and Menu Items to let you work with big files, too. You no longer need to break them into smaller ones.
  • Users - Idle timeout. In compliance with PCI DSS requirements, we have added a new feature to automatically log out users having been idle for X minutes. You can find this setting on the user edit screen under the name of 'Auto Logout Idle Minutes'. Here the default value is 720 minutes. Change default value can be changed to better suit your needs.
  • Payment interfaces. We have forbidden to reverting from 'Live' to 'Test'. If you need to take such an action, please contact our Support Team.
  • Gift Vouchers. We have changed the way gift vouchers are numbered. Now their numbering looks like the following: 'ABCD 1234 5678'. The reason for this change is that the old numbering style visually resembled credit card numbers which triggered various security protection measures.

Fixes

  • WRS. We have fixed the issue making it impossible to create a booking with a Booking offer, when the Latest hour feature is used.
  • WRS. The booking amount parameter tracking scripts no longer contains a currency. The currency itself is now an individual parameter.
  • Folio. The folio amount didn’t get updated immediately, when the feature for charge transferring to a new folio was used.
  • POS. The inventory codes weren’t included in the charges posted through charge templates of the Service revenue group.

Clock PMS+ Update (4 Aug 2017)

Improvements

  • Channel Manager - automatic deposit charging for imported bookings. When a booking is imported, this feature allows the system to automatically charge the deposit,if any, to the related credit card.
    • The deposit amount is determined by the guarantee policy related to the booking rate. If no deposit is set in the guarantee policy or the rate cannot be determined, the system won't charge the deposit.
    • If the deposit charging fails (insufficient funds on the credit card or for other reasons)), a To-Do is created to inform you of the failed transaction. In this case the booking status remains Not guaranteed. The booking also remains 'Not guaranteed', if the credit card data is not received.
    • This feature is available for the payment processors Authorize.Net (immediately) and Adyen (after 30 August).
    • Please contact a Clock representative to activate your service.
  • Favourite Countries. Now you can set the codes of the countries you most frequently use. This way they will appear first on the list of countries to quickly choose them. To set these codes, go to 'Settings' - 'Booking fields'. Enter the two-lettter codes ( ISO 3166-1 alpha-2 ) in the field 'Favourite Country Codes' – each code in a new line.
  • WRS - a new implementation of the tracking scripts.Through the new feature it is now possible:
    • To add a tracking code in the HEADER and the BODY section as well.
    • If necessary, you can have a different tracking code for the last page.
    • Support for more complex dynamic data scripts such as ecommerce scripts containing the booking amount, period of stay, etc. All parameters you can use in the tracking scripts are listed Here. Please note some of the parameters will be empty for certain pages, where they don't have a context yet.
  • WRS – Latest hour for accepting bookings. Apart from the existing 'Days in advance' setting defining how many days in advance bookings can be accepted, we have added a new setting for the time until which you can accept bookings on the day in question. Example: If you set 'Days in advance': 0 and 'Latest Hour': 19:00 - this means that you can receive bookings for today, but no later than 19:00. After 19:00 bookings for today are not allowed.
  • Kiosk – several folio-related changes:
    • A new setting whether the issue of a company folio is allowed.
    • A new setting whether a folio to be automatically closed after payment and what document type to be used. If automatically closed, the folio will be emailed to the guest.
    • We have changed the folio details (the screen before payment) for easier data reviewing. The charge table is the same as the one on folio printouts.
  • We have added a new right to view and edit To-Dos. It refers to the To-Dos on the Home and To-Do search pages. The To-Dos, however, on the booking, company, etc. pages do not depend on this right, but on the access rights to these bookings, companies, etc .
  • Self Service – a new setting to disable the 'Request change of the number of guests' feature.
  • A new booking export in a csv format to match the format of the imported file. It can be used for transferring bookings among the accounts. This export option can be found on the Advanced Search page. The bookings matching the search criteria set will be exported.
  • Advanced Search – we have also added the cancelled events to the Event search filter. This way you can also find the bookings of the cancelled events.
  • On the booking screen – we have also added the cancelled charges to the section of the transferred charges. This way it is easier for you to track the made transfers.
  • To the 'Charge Segmentation Report' screen, we have added Net Values as well as the quantities. You can choose which values to be visualized on the report: Quantity, Charged value, Net value, VAT value, Gross value
  • Now the emailed folios are seen by the guest the same way you see them in the PMS. If you open the folio print preview screen and set the View to one of the following: Details, By Date, By Text/ Price or Compact, the set View will be used for emailing the folio to the guest. Your choice for the folio is stored and used next time you open it.
  • On the Booking Enquiry screen, you can use To-Dos.
  • Event – Undo Cancel. The new feature reverts the status of an event back to 'Active' again. Please note that the status of the event is changed only, this change does not affect the statuses of the Meeting Room bookings, Catering, bookings or folios.
  • Out of Season – now accessed through the right: Rate: Create and Update.

POS

  • We have added a new functionality to support Complimentary Items.
    • To the Edit/Split screen, we have added a new 'Make Complimentary' feature. The price of the selected items become zero.
    • We have also added a right to access this feature.
    • New report - 'Complimentary Report' to track the use of this functionality. The report provides information of all items having a zero price (i.e. this means that apart from the items which have been made complimentary, the report also includes the items directly posted with a zero charge). For the items which had a different initial price, (i.e. the 'Make Complimentary' option has been used after their posting), the report will also show the initial price, as well as the total amount of all complimentary items provided.

API

  • In the endpoint users, we have added a new fiscal_code field for the purposes of the fiscal interfaces. From the User Edit screen, you can edit the field.
  • A new endpoint for adding Adyen tokens (tokenized credit cards in Adyen) to the booking.
  • A new endpoint for closing the folio.
  • The booking's meals have been added to the booking endpoint.
  • A new room status endpoint. Use it to receive information whether a room is occupied/vacant for a certain period as well as what its booking status is.

Fixes

  • RoomCloud – in certain situations with several bookings imported from one XML, the daily prices weren't properly determined.
  • Kiosk – it was possible for the client to see an error message on the folio screen, when the folio itself was closed by the back-office in this very same time.
  • Channel Manager – when comparing manual prices during import, sometimes an conflict error message appeared, while actually there was no reason for that.
  • On the API user edit screen, there were password fields which couldn't be filled in.
  • Booking screen. The information of the bookings sharing one room with the current one was wrong, if these were cancelled bookings.
  • On the rate's 'Set multiple days', the 'Close' option didn't appear, if the 'Advanced Rates' add-on hadn't been enabled.
  • Folio – the discount feature didn't accept decimal numbers.
  • Guest mail edit screen – the calendar fields got hidden behind the other fields .
  • Registration card print preview – the background was white, even for the customised registration cards. This led to problems with the customisation and the white font themes.
  • 'Occupancy and Charges D-M-Y' issue fixed. The value in the 'Total Charges' month cell for the previous year wasn't correct when running the report by service date.
  • POS - 'Charge Modifier Report' – the period filter now works the way it does on the other similar reports (e.g. Inventory Items Report)
  • When sending the booking, the disabling of the folio closing without a document didn't work properly.
  • When copying a booking, the charge templates from the Daily Charges section didn't copy.

Clock PMS+ Update (29 May 2017)

Change to the credit card section

The credit card section is no longer on the booking edit screen, but on the main booking screen. Furthermore, you can add more than one credit card to a booking.

  • To add a new credit card select 'Operations' - 'Save Credit Card (Tokenization)' on the main booking screen.
  • The fields on the screen are different depending on whether you are using 'Clock Secure Vault' or 'Adyen Tokenization'. Save.
  • To get access to a credit card number, click the button next to the card - 'Open'. With 'Clock Secure Vault', you will see the credit card details, including its number (if granted the respective right), with 'Adyen Tokenization' you will only see the last 4 digits of the credit card number.
  • Using the same button, you can delete the credit card or see its operations change log.

Booking: Daily charges

We have added new charge automation options and expanded the existing ones.

Daily charges

We have improved the Daily Charges feature in bookings:

Daily Charges

  • Now you can add a charge of your choosing to the booking's Daily Charges section. The Booking charge templates feature remains to facilitate your choice of charges. You can set the most used ones to directly appear on the booking screen for fast selection.
  • Now you can also choose one-time charges (i.e. not being posted on a daily basis). They are added on the arrival date.
  • For the daily charges, you can make changes to the posting period. For example, this period can be set to only refer to a half of the guest's stay or include the departure date, too. To change the period, click the 'more...' link and fill in the desired period. If the fields are left empty, the charge will be posted as before – for all days of the stay except for the departure date.
  • We have improved the reposting logic, so that the system stores the manually changed price of a charge and does not replace it when the booking is saved.

Room Type auto-charge templates

Use this feature to define charge templates which to be automatically added to a booking depending on the booked room type, e.g. a one-time cleaning charge or daily charges.

How it works:

  • For each room type, you can set different charge templates, specifying for each them whether it is a one-time or daily charge.
  • After the booking creation and depending on the booked room type, the charge templates are added to the Daily Charges section of the booking. Please note that these charge templates are not visible on the new booking screen. These charges will automatically be added AFTER the booking saving.
  • You can easily remove a room type auto-charge template at a later stage by simply unticking its checkbox in the Daily Charges section of the booking.
  • 'Room type auto-charge templates' are automatically posted regardless of where a booking is created: WRS, channel manager, based on an enquiry, file import or from the API.

Setup:

  • First, set up the desired charge templates by going to 'Settings' - 'Charge Template'.
  • In the 'Room Type auto-charge templates' section on the Charge Template screen, click the Edit button next to each room type and select which charges to be automatically posted. You can also define whether an auto-charge template to be a one-time or daily one.

WRS and Extra Services on the Self Service Portal

We have changed the way the extra services selected on the WRS or the Self Service Portal operate. Up till now, they were charged directly in the folio, which was not very convenient if a guest's period of stay had to be changed. Now they are added to the Daily Charges section of the booking. This way:

  • It is easy to remove them. Simply untick the checkbox of the charge and save the booking – the charges will be voided automatically.
  • If the period of stay is changed, the unnecessary charges are voided, and the missing ones are added automatically.

Codes for standalone pin pad door locks

We have added a new feature to let you send your guests the codes for the common doors in your hotel. This is very convenient for the self service hotels, apartment hotels and the ones without a 24-hour reception desk. If your hotel has an entrance door with a pin pad, you can prepare code changing schedule and enter it into Clock PMS. With the confirmation of each booking, the system will determine the codes related to the period of stay and send them to the guest. Please note this feature is designed for standalone pin pad door locks, i.e. Clock PMS will not change the lock codes. The code changing schedule itself is prepared by you, and Clock PMS only sends these codes to the guests. Here is the setup of the feature:

  • For each location, enter an individual access code changing schedule. If you haven't used 'Locations' ever before, create at least one ('Settings' - 'Locations') and select it to be the location of your hotel ('Settings' - 'Hotel Map').
  • Click 'Settings' - 'Codes for standalone pin pad door locks'.
  • Add your code changing schedule for each location. Select 'New'. Fill in the location, the date from which the code will be valid and the code itself.
  • Done!

With each new booking, the system will establish the location of the booking depending on the type of your property and the settings in 'Hotel Map', 'Room Type' or 'Room'. Based on the location and booking period, the confirmation email will contain the hotel entrance door codes for the respective period.

Daily Charges

If using custom booking confirmation templates or you need to send a reminder email via the Guest Mailer, you can use the following parameter to add these codes to your email:

Guest mailer

  • Number of nights filters. If you want to create different email templates for your guests with a longer or shorter period of stay, you can use the two new filters: Minimum stay and Max stay. Both filters work on the 'included' basis, i.e. if you set Minimum stay = 3 and Max stay = 6, emails will be sent for the bookings for: 3, 4, 5 and 6 nights. You can also use the filters separately, i.e. only the Minimum stay or Max stay.
  • Another setting for automated emails - 'Up to arrival'. The differences between the former 'Before Arrival' setting and the new 'Up to arrival' one are:
    • If you set 'Before arrival' to 72 hours (3 days), then bookings created earlier than 3 days before arrival will receive emails, however, the last minute bookings and the ones created within 3 days of the arrival won't receive emails.
    • If you set 'Up to arrival' to 72 hours (3 days), then all bookings, even the last minute ones, will receive an email. The sending will start 72 hours before arrival, and the last minute bookings will be sent an email with their very creation.

Credit Cards

We have changed the organisation of the work with credit cards. Here are the changes and the new options:

  • The credit cards related to bookings imported from the channels now can be tokenized in Adyen. This way the sensitive clients' credit card data is protected and inaccessible to users which does not prevent the use of these cards for the convenient one-click payments or pre-authorizations.
  • Booking edit screen – the credit card fields are removed from this screen and moved to the booking screen. A new credit card can be added from the 'Credit card' section through the 'Operations ' button.
  • Kiosk – now you can use the 'Adyen - Authorize, Capture and Tokenize' interface. Once a bill is paid by credit card, the data of the credit card is tokenized and can be used later, if necessary (e.g. for damage charges). To select the interface of your Kiosk, click 'Settings' - 'Kiosks'. Choose the payment service for your Kiosk devices in the 'Payment service' field.
  • Self Service Portal – now you can use a custom payment interface for the payment of your bills.

Other Improvements

  • Split of charges by a given percent.We have added a new option for splitting certain charges in two or more parts by specifying a different percent for each of the parts. For example, the nights of one folio can be split among three folios in the following ratio: 20%; 30%; 70%. How to use the new option:
    • Click the 'Split Charges' in the 'Rate and Folios' section on the booking screen
    • Add new folios, if needed
    • Select the charges to be split and click 'Split by percent'
    • Enter the percent for each of the folios where you need the charges to be transferred. The total percent sum has to be 100.
    • Click the 'Split' button
  • A new view mode added to the Accounts Receivable Report: Summary. Use it to see the summary information on accounts receivable arranged in four groups based on the delay in payment: 0-30 days, 30-60 days, 60-90 days and over 90 days. To switch to the new view mode, go to 'Other' – 'Reports' - 'Accounts Receivable report" and click the 'View' button and choose 'Summary'
  • Booking Segmentation report – we have added a new Period type parameter to let you filter bookings by Arrival, Departure or In Hotel.
  • We have added a To-Dos section to the Event screen and now it is easier to manage the related tasks.
  • Now you can see the information of the user having created or edited in the Events, Meeting Room bookings and Catering sections.
  • We have changed the formatting of the guest name for a few Asian countries. According to the language of the booking or the country of the guest, the names are formatted 'FamilyNameFirstName' (without a space in between) for the following countries: 'KR', 'KP', 'JP', 'VN', 'CN'.
  • Registration card number.Due to local legal requirements in some countries, we have added a new field to Registration cards - number. It can be generated in the following ways:
    • Manually. The number of the registration card is generated by the user through a button on the Registration card screen.
    • Automatically with the registration card saving. When saving a registration card, the system automatically generates an order number for the registration card.
    • Automatically with the booking check-in. When checking in a booking, a number is generated for the related registration cards. The registration cards created after the check-in also automatically receive a number with the saving of the registration card.
    • The settings related to the number generation method, as well as its formatting and initial value can be found here: 'Settings' - 'Tax Settings' – 'Numbering'.
    • You can specify if this number field is to be shown on the screen, printouts or the Self Service Portal by going to 'Settings' - 'Registration Card fields'
  • Now the surcharge can be calculated on the basis of the gross or net value of the charge. The new 'Surcharge calculated on' field can be found on the 'Settings' - 'Tax Settings' screen.
  • Departures: we have added a column containing the number of open folios for easier check of unsettled folios.
  • Extra Services in WRS/Self Service Portal: we have improved the availability check (inventory items), so that the overbooking is decreased to its minimum.
  • Self Service Portal: now it uses the language of the booking.
  • You can also upload photos of the system users now.
  • We have added a new language - Slovenian
  • POS – bill printout label translations added, so that bills can be localised in your language.
  • POS – printer language and encoding settings added. If you printer does not support UTF-8, you can check these settings.
  • POS – bill printing from the browser. If you don't have a special printer, you can use the option for bill printing on the bill closing screen directly from your browser.

API and Customisation

  • For custom folio printouts, we have added new liquid parameters for charges: charge.net_value|currency, charge.tax_value|currency, charge.gross_value|currency.
  • For the purposes of local fiscalisation requirements, we have added three new fields to the API: fiscal_request_code, fiscal_response_code, and qr_code. These fields can be updated through the API. For this matter, we have also added liquid parameters to add them to the custom folio printouts: folio.fiscal_request_code, folio.fiscal_response_code, folio.qr_code_svg
  • A new endpoint to the API and of the POS for easier access to the orders related to a given folio:
    • Folio orders: folio_orders: "/pos_api/1/2/folios/:folio_id/orders"
    • Charges in each folio: folio_order_charges: "/pos_api/1/2/folios/:folio_id/orders/:order_id/charges"

Fixes

  • When setting a No show status to a booking and 'Auto-void booking charges on booking cancellation' is active, the message was incorrect.
  • When surcharge percent deleted from a folio, the surcharge charges weren't correctly accounted for in the folio.
  • It was impossible to remove blocked rooms for past periods from the table .
  • WRS - Extra Services – the services "per day" were all charged on one date.
  • Channel Managers – the check for conflicting manually edited prices didn't work always properly and unnecessary warnings appeared.
  • The transferred charges didn't appear correctly in the Booking Segmentation report
  • The calculation of rate charges used to also void daily charges as well as the manual charges from the room revenue group.
  • WRS – The extra services weren't included in the total at the final step and the related deposit wasn't calculated properly either.
  • It is no longer possible to delete a rate mapped by the channels.
  • The booking preview showed the rate guarantee policy, even when it wasn't selected in the booking.
  • Adyen - 3D-Secure – didn't work properly
  • Adyen – now it can be used on the Self Service Portal
  • On the virtual room screen, the statuses couldn't be added.
  • Mass confirmation of multiple bookings led to errors
  • POS – the manual charge required kitchen specifying when it wasn't necessary.

Clock PMS+ Update (22 Mar 2017)

Booking: Daily Charges

We have added a new feature to quickly charge various services for the booking period. Furthermore, for your convenience, the charged services are synchronised with the booking period and if the period is changed, the charges are automatically corrected.

How to use

  • The selected charge templates are shown in the 'Daily Charges' section on the booking edit screen as checkboxes.
  • The ticked checkboxes are automatically charged for each day of the booking period.
  • If the booking period is changed, the unnecessary charges are automatically voided, and the missing ones are added.
  • It is possible to manually change a charge price and it will be stored.

How to set up

  • Add charge templates of your choosing, if not added yet
  • On the Charge Template screen (Settings - Charge Templates), find the Booking Charge Templates section (at the bottom of the screen) and click 'Edit'
  • Tick the checkboxes of the charge templates you want to see in the booking. Save.
  • The selected charge templates will appear as checkboxes on the booking edit screen.

Booking daily charges

<[>Booking daily charges. Checkboxes in booking for fast charging.

Inventory Items

We have added a new functionality to let you track services with limited availability like 'Parking spaces', 'Baby cots', etc. You can easily check their availability for a given period through a new report specially designed for this purpose. The new feature is also linked to the WRS, as it automatically stops the sales of these services when they are not available for the period of a booking.

How it works

The new daily capacity tracking functionality is based on:

  • Charge templates with set-up 'Capacity' and 'Inventory Code'
  • The posted charges with their inventory code, quantities and service date.

For the charge templates whose availability you need to track on a daily basis, do the following settings:

  • Daily capacity- this is the maximum quantity of a service you can sell for a day. Charge template example: 'Parking spaces (guests)', set the number of parking spaces to 20.
  • Inventory code. Specify the inventory code and then use it to track the availability. For example: 'PARKING'

Open the 'Charge Template Availability Report'. Select the period, tick the 'Detailed by days' checkbox and run the report.
For each day of the period, you'll see the available parking spaces - 20.

The remaining availability, parking spaces in our example, is calculated on the basis of the charges containing the same Inventory code as the 'PARKING' charge template and the respective quantities of these charges. If you post a charge to a folio with the following quantity: 2, date: 01/01 and Inventory code: 'PARKING', then the Charge Template Availability Report will show availability of 18 for the date: 01/01.

Using the other new feature – 'Booking: Daily Charges', you can set the 'Parking spaces (guests)' charge template to appear in bookings for fast selection and charging on a daily basis for the booking period. Furthermore, we have added a quick link to Charge Template Availability Report on the booking edit screen. The report is run for the booking period and you can easily check the availability of each service.

Inventory Items

Available charge template. Fast link from booking screen/

Also, you can sell one and the same availability at different prices.
For example, you can offer the parking spaces at different prices to hotel guests and external customers. To do so, create two charge templates with different prices: Parking spaces (guests) and Parking space (external) and specify one and the same inventory code: 'PARKING' and capacity of 20. The sale of each of them will reduce the availability for both hotel guests and external customers, as both services have one and the same inventory code.

It is even possible to set different capacity for a service. For example, set Parking spaces (guests) to 20, and Parking spaces (external) - 10. This way you will limit the sale of parking spaces to external customers to no more than 10 spaces. Once again, with each sale, the availability for both hotel guests and external customers will simultaneously be reduced.

Reusable Rate Packages

Up till now, the rate feature had the option to define package elements, however, you needed to set these package elements separately for each rate, even when these elements were the same. This was a bit inconvenient. We have changed the way these packages and their elements are defined. Now they are set separately from rates and then can be be easily selected in a rate, if necessary. In other words, each package is set only once and can be used on multiple occasions (in many rates). This makes the management of packages and rates really easy. Furthermore, now you can specify package element quantities and track them in the reports. The existing packages (defined in the settings of rates before) are stored and transferred as separate packages, i.e. you can continue using them without any additional settings on your part.

To set up the new packages:

  • Go to 'Settings' - 'Rate Package'.
  • On the Rate Package screen, you can see the separate rate packages and the rates they are used with.
  • Add a new package and its elements. As before, the values of the package elements are deducted from the rate prices and are posted as separate charges. We have paid attention to another specifics you often ask about - if it is possible for package elements not to be visible to your guests. You can use the print text field, if you need these package elements to be shown in another way on guests' folios. For example, if you set one and the same 'print text', let's say 'Room', to all elements of the package, then these charges will be summed and shown in one line only when the 'By Date' or 'Compact' folio view used.
  • Save
  • Find the rate you need on the Rate search screen.
  • Select Edit/Tags (from the dropdown menu next to the rate)
  • In the 'Rate package' field, select the respective package. Save.
  • Repeat the last steps with the rates having the same package.
  • If you need to delete a package, you can do it from the edit screen of the package, but, first, make sure it is not used by any rate.

Mobile Keys & SALTO

We have added an interface to the SALTO access control system. Apart from using it to issue standard room key cards, you can also issue mobile keys for your guests to open their rooms through their smartphones.

Salto Mobile Keys

Mobile app opens the room door

How mobile keys work

  • Your guests need to install a special app on their mobile phones (Android or iPhone) - JustIN Mobile.For your guests' convenience, you can add a 'JustIN Mobile' link (or QR code) to the confirmation letters:
  • Click the Key button on the booking screen or the booking search screens.
  • Select 'Mobile Key' and the country code, check or enter the phone number (the phone number from the booking is suggested).
  • Issue the key.
    • Please pay attention to the following: the issue of a new original key terminates the validity of the previously issued keys. Therefore if there are already issued keys (mobile ones or cards), use the the 'Duplicate' or 'Duplicate Mobile Key' feature to add a new key without invalidating the already existing ones.
  • Your guest will immediately receive their key in the app installed on their mobile phone (JustIN Mobile) as well as a notification.
  • When your guest arrives and is in front of the room door, they need to open the app and activate the respective mobile key to open the room door.

How to set up the interface

For the functioning of the interface to Salto, you need to have Clock IoT Device and API addon. Please get in touch with our team for more info.The supported interface to Salto is 'INDUSTRY STANDARD PMS PROTOCOL Version 1.16 over TCP/IP. Short set of commands (CN, CC, CO)'. Please contact a representative of Salto to make sure that your software supports this interface. Furthermore, check if your Salto software and your locks support the mobile key functionality. If mobile keys are not supported by your locks, you can use the interface for the issue of room key cards only.
  • Create a new API user 'Salto' and grant this user access to accounts of your choosing ('Settings' - 'API User').
  • Set the IP and port of the server where the PMS interface to Salto is. Open 'Settings '- 'Room keys settings' - 'Salto'. Fill in the API User (the one you have created during the previous step), Server Host (IP address or host name for the PMS interface to Salto), Server Port (port of the server). Select Active and Safe.
  • In 'Settings' - 'Room key settings', define:
    • Default 'From' time for Room Keys and Default 'To' time for Room Keys
    • If your system supports mobile keys, enable 'Mobile Key support'
    • If the cards issued to your guests have to open doors to common areas, you can fill in the codes for these zones and easily choose them afterwards.
    • Add the encoders you have by entering their names in the Identifier field the way they appear in the Salto system.
  • Map the rooms of ClockPMS to the ones in Salto.
    • On the screen of each room ('Settings' – 'Room'), enter the names of the rooms from Salto (if more than one, use a comma to separate them) in the 'Room door code(s)' field.
    • In the the 'Common door codes', fill in the codes for the common areas (PMS Authorizations), linked to this room (for example, the front door, the door for accessing the floor ). You can find these codes in your Salto software. Contact your Salto representative for more information. Please note that the codes (PMS Authorizations) from Salto are not always filled in as a one-to-one match in Clock PMS. The PMS Authorizations codes in Salto are in the range from 1 to 62, however, each of them corresponds to one character. For example, for the range from 1 to 9, there is no change and the codes are the same . In the range from 10 to 35, the codes correspond to the capital Latin letters from A to Z, and for the range: 36 to 62, there are special characters. Please contact our support team for more details if using more than 9 codes.

Other Improvements

  • Guest profiles - picture. Now you can add a guest profile picture. Apart from being able to upload it as a file, you can also use the experimental feature for taking pictures through the web camera of your computer or tablet. This functionality is not supported by all browsers yet, but we hope its support will advance over the time.
  • Bookings – a button for quick folio closing. On the booking edit screen, we have added a quick folio closing button next to each folio. Use it to close a folio in a way of your choosing and go to the folio print screen.
  • Kiosk – credit card payment via Adyen POS terminal. As part of the integrated payment features, now you can use the Adyen terminal with the Kiosk. You can order a Clock Kiosk with built-in POS terminal or use your own kiosk with an added terminal. Please pay attention that the connection to Adyen POS terminal requires Clock IoT Device (you don't need an extra device, if you already have one).
  • Kiosk - Salto. From the Kiosk, you can issue Salto system cards. You can order a Clock Kiosk with built-in Salto card encoder or use your own one.
  • Booking enquiry templates – we have added salutation and custom editable fields: Custom header and Custom footer.
  • Catering – now you can use the rich text format in the description and note fields.
  • Booking email. Now you can change the email message language without being necessary to edit the booking language.
  • Multiple booking edit – we have added the following fields: marketing source, marketing segment and language.
  • RoomCloud – the value of the shop field from the booking can now be entered in the note
  • POS – a new right - Discount and Surcharge. Use it to restrict the access to the following operations: 'Discount', 'Surcharge', as well as the 'Remove/Subtract taxes from prices'.

Profile Pictures

Guest Profile Photos

Fixes

  • Registration cards - Document expiry date and Visa expiry date field calendars were for only 6 years ahead. Now they are for 20 years ahead.
  • In some cases the language of the automatically sent emails was not correct.
  • The problem with surcharge charge voiding after removing the surcharge percent has been fixed.
  • Events – info invoice – the charge list showed the corrections (negative values) due to charge changes.
  • Occupancy and Charges Report when run by room type sometimes didn't include the voided charges and there were discrepancies in the charge reports.
  • In rare cases, the multiple day price update of a rate through the Multiple Days feature produced unclear error message.
  • The quick search (from the navigation) didn't work, if called from a report screen.
  • The problem causing a WRS error message when creating a booking based on a booking enquiry containing a deleted rate has been fixed.
  • New booking: the Restaurant field information was missing, even when there was a default value selected.
  • WRS error when max adults and guests defined in the WRS settings in case of integrated links for a greater number of adults and children.
  • Channel managers – booking folios didn't account for the 'Default booking folios currency' setting
  • Guest emails – the TinyMice editor ruined the links when saving the template.
  • Booking Segmentation Report – the ACB parameter wasn't calculated properly

Clock PMS+ Update (28 Feb 2017)

RoomCloud

We have added an interface to link our integrated channel manager to a new connectivity partner – RoomCloud. This is the newer version of the ParityRate interface. The RoomCloud functionality and organisation resembles the one of ParityRate.

Here are the improvements and changes introduced with the RoomCloud interface:

  • RoomCloud has a slightly more different product organisation. There are room types (corresponding to the hotel room types) and Rates (as a single rate can be used with different room types).
  • Example of room types: DBL, DBL-LUX, APP.
  • Rate example: 2-ADULTS. In this case the 2-ADULTS rate can be used with all three room types, as the price will be different for every room type.
  • Price examples: DBL/2-ADULTS = 90 EUR, DBL-LUX/2-ADULTS = 110 EUR, APP/2-ADULTS = 150 EUR.

Mappings

In Clock PMS, you need the following mappings:

  • Room Types. We support 'Room Type' mapping, where 1 room type of RoomCloud is mapped to 1 room type of Clock PMS. Two or more room types of RoomCloud can be mapped to 1 room type of Clock PMS. In other words, the same available rooms coming from Clock PMS can be sold under different room types in RoomCloud. For each line of the mapping, max room restricts the number of available rooms to be sent (channel width).
  • Rates.The combination of room type and rate of RoomCloud is mapped to one Clock PMS rate. Two or more RoomCloud products can be mapped to one and the same Clock PMS rate. And these products will be sent with the same array of prices and available room types.
    • Rate - export disabled. A new option is the temporary stop of the export of a certain product. By clicking the 'Export disabled' checkbox in the mapping rate lines, you can temporary disable and then re-enable the export of a certain product.
  • Companies.OTA channels can be mapped to companies. Similarly to ParityRate, you can map them to an event and manage block pickups.
    • Transfer charges to company. We have added a new setting to the company mapping. Use it for the setup of the automatic transfer of guests' charges to a company folio for certain companies. This option can only be used when creating a booking and resembles the function of the 'Transfer room charges to Company/Event' checkbox in a booking.

Other improvements and changes

  • Automatic charging of extra services.All extra services, selected in the channels and present in the XMLs of bookings, are now automatically charged to guests' folios. The supported charging modes in RoomCloud are:
    • Daily – one charge for each day of a stay – with the submitted quantity for each day.
    • By Person – one charge with a quantity depending on the number of guests.
    • By Number – one charge with the submitted quantity
    • The revenue group of these charges is 'Other'.
  • To-Do for prepaid bookings. For bookings tagged as prepaid by the connectivity partner, we have created a special To-Do for the hotel staff to handle them appropriately.
  • An option for mixed sales of room types and rooms. Up till now you could only map and sell one of these two in ParityRate – either room types or rooms.
  • Improved logs of exports and errors.We have developed a new log of exports for the easier tracking of export problems and the reasons for them.
    • Flexible search. Now you can also search by 'Affected date', i.e. the date for which you need the price and the availability. There are also additional filters for RoomCloud codes of a room type and rate, as well as for Clock PMS codes of a room type / room.
    • Due to the large amount of data in the log, we have set the following restrictions:
    • Products. We support a log of all products, as for each one:
    • Dates. We support a log by 'Affected date' - 360 days in the future and 30 days in the past.
    • For each 'Affected date', we keep the last 10 real changes. Changes are tracked only if something is actually changed. If a message is sent, being the same as the previous one, it is not recorded as a change and is only counted.
    • Errors. The detailed descriptions of the received errors from channels are stored for a period of 30 days.

Improvements

  • Void Reason. We have added a new option for entering a reason for voiding charges, payments or folios. This reason appears in the Charge Control and Payment Control reports.
  • Folio closing without a document restriction. Hotels requiring all issued documents to be invoices, now can forbid the folio closing without a document. Choose 'Disable' for the 'Folio closing without a document' setting in 'Settings' - 'Document Type(s)'. By default the setting is 'Enabled'.
  • New quick search.The quick search from the navigation bar is now opened in a sidebar, allowing the user to stay in the page being used.

    New fast booking search

    New Fast Booking and Company Search

  • WRS – restriction of the number of the entered adults and children on the first page. Up till now guests could enter any value for adults and children on the first page of your WRS. Despite being specified that only the number of adults and children for the first room is to be entered, sometimes guests make the mistake to enter the entire number of adults and children (when multiple rooms are booked). To avoid this confusion, we have added a new setting to the WRS - 'Max guests per unit'. Enter the maximum capacity of your largest room – max guests and max children. This way the first page will show dropdown menus (selects) instead of fields to be filled in. Guests will be able to choose within the restrictions set by you and will know they need to enter the number of guests only for the first room being booked.
  • Advanced search – new guarantee policy column.
  • Payment report – a change to the columns. The information used to appear in one column. Now it is divided and shown into two columns - Payer and Document number/date. This way it is easier to be copied for the purposes of other systems. The change applies to the export in a CSV format, too.
  • PBX add-on is no longer a beta version and the use of the module is tracked.
  • Adyen - integrated payments. We have changed the pre-authorization capture, pre-authorization cancellation and refund screens to give you a clearer feedback of the operation status.
  • The name of the subscription has been added to the login format for easier identification of the subscription used by users having more than one subscription.

Kiosk

  • Additional login options for guests not having a PIN. If you work with guests whose email addresses you don't have (ТТОО/GDS guests), you can enable the new 'Allow login with last name (as alternative pin) ' setting in 'Settings' - 'Kiosks'. The Kiosk will also show an alternative field – 'Last name' and guests will be able to choose how to log in – through PIN or their last name. In both cases a booking number is required, as the change here is that apart from the hotel booking number, the booking reference number can be entered, too. It is specified in the reference number field of the booking and can correspond to the voucher number (for TTOO guests), GDS number of the booking or the number of the booking from ОТА channels.

    Kiosk - login with last name

    Kiosk - login with PIN or Last Name

  • Touch screen display calibration. With new firmware of the Kiosk, we have added a new option for the display calibration. It only applies to new installations. On the first startup, the Kiosk requires calibration. There is also an option for reset and new calibration, if needed.
  • Default background. We have added a default background for the Kiosk, which can be changed from the 'Start background image' and 'Background image' settings in 'Settings' - 'Kiosk'.

Fixes

  • Room calendar – the suggested available days weren't correct for indirect occupations, when no direct occupation followed.
  • Contract rate vouchers – the amount of the voucher did not appear immediately after calculation.
  • The change of the company in the event did not the company in the booking
  • The search for booking offers by text sometimes didn't work.
  • An email field was missing on the Authorize.Net payment screen when even set to appear.
  • CRS-WBE – the language selection did not work correctly and it didn't transfer to the WRS.
  • PmsApi – a company booking couldn't be created.
  • Contract Rate – the deletion of a season in a filled-in contract led to an error.
  • Booking edit – entering the 'Enter' key in the contact info fields activated the automatic room change feature.
  • Contract rate vouchers – voucher voiding didn't work.
  • There was a problem with the combination of offers without a guarantee policy in the WRS.
  • WRS – calendar by from date – the minimum wasn't correctly determined and in some cases it also showed the yesterday's date.
  • Booking screen – the Early checkout message sometimes appeared without being necessary.
  • Booking offers – the custom template table was different from our standard one and columns were missing.

POS

  • Covers/Customers.A new setting has been added ('Management' - 'POS settings' - 'Ask for covers on new folio'). If enabled:
    • With each new bill, a screen will appear prompting you to enter the number of covers/customers for this bill.
    • The number of clients can be edited on the charging screen – 'Covers' button. The button shows the entered number.
    • Use the new 'Covers/Customers Report' to see the statistics of the number of covers/customers. For a certain period, by days or in total, it shows statistics of the closed folios: Total, Covers, Folios, Amount Per Cover, Amount Per Folio, Average stay (per folio).
  • Void Reason. When voiding a charge, payment or bill, you need to enter a reason for the voiding. This reason appears in the control reports.
  • POS API. An 'orders' endpoint in a new branch of pos_api. The new end point gives information of the orders (not the bills) made for each table. There is also a push channel via which a signal is sent for each newly added order. The new endpoint can be used for order fiscalisation (separately from bills) for the states where it is required.
  • The list of closed folios has been paginated. This way it opens much faster for the users not performing daily closures in the POS.
  • Fix - The quantity of a charged product could no longer be increased without an order.

Clock PMS+ Update (24 Jan 2017)

Booking Enquiries

We have added an option for your guests to finish their bookings in your web reservation system on their own.
This is done on the basis of the booking enquiry replies you have sent. With this feature, you make the booking process easier and more convenient for your customers.

Now they can book 24/7 regardless of the work time of your call centre. This way the booking enquiries resulting in bookings and the conversion rate will increase.

In addition, the new Waiting List option is another tool for boosting your sales through active interaction with potential guests.
We have also connected the booking enquiries to guest profiles to give you all the necessary profile information in one place.

WRS Integration

How it works

  • When preparing your reply to a guest's booking enquiry with the desired periods of stay, room types and rates, you can include several different products. This way the guest has options to choose from, e.g. refundable and prepaid rates, with or without supper, etc. Also, if you wish, you can fix the prices in your offer, so that they stay the same for the guest, even in the event of changes to the rate.
  • You email your reply to the guest's booking enquiry.
  • After viewing your products and taking a booking decision, the guest can use the "Click here to create your booking" link in your email and make a booking.
  • The offer opens in a browser. Clock PMS makes a few checks and highlights lines of the offer, if they contain:
    • Changed prices. If the price you have offered the guest has meanwhile changed, the system notifies the guest and highlights the line with the change.
    • Please note that when creating your offer, you can fix the price, so that it stays unaffected by changes to the rates.
    • No longer available rooms. If the available rooms have meanwhile been sold or the products have been stopped from sale, the respective lines will be highlighted, and the guest will receive a notification that unfortunately these rooms or products cannot be booked.
  • The guest chooses which rooms from the offer to book and clicks the Next button. Please note that this way the WRS will allow a booking to be made with a rate, which may not have been included in the WRS. In other words, using booking enquiry replies, you can offer your guests special rates, which are not normally shown in your WRS.
  • The system brings the guest to the third page of your WRS with the chosen rooms and guest details shown. Here rooms can be removed or added.
  • The guest chooses a booking guarantee method and finishes the booking process accordingly. Even thus created, the bookings are the same as all of the rest bookings, and guests receive a confirmation email and link to the Self Service Portal.
    • Please note that the guarantee methods are connected to another change we have made to the WRS: "Booking products with different guarantee polices". See the description of this change below.

How it is set up

  • The feature does not need setup. If your WRS is active, the link to it is automatically included in the booking enquiry reply.
  • If you use a custom booking enquiry template, add the link to your template. To create the link, use the "WRS link for booking creation" parameter: . Example: Click Here

Booking Enquiry - link to Web Reservation System

Link to WRS in booking enquiry e-mail

Booking Enquiry - Web Reservation System integration

Booking Enquiry opened in WRS.

Management

  • Booking enquiry search. The new booking enquiry search gives you an easy and quick way to find a specific booking enquiry, as well as view multiple booking enquiries meeting certain criteria. Use the new feature to search by: arrival date or in hotel bookings; Waiting List; booking enquiry number; guest contact info. There is also a booking enquiry status filter (see below). To use the new search option, go to Bookings – Booking Enquiry Search.

    Booking Enquiry Search

  • Waiting List. We have added a new checkbox to the Booking Enquiry data edit screen - Waiting List. Use it to highlight certain enquiries. Then you can easily find them using a combination of the other filters or not with the enquiry search.
  • Booking enquiry status. We have added a status to booking enquiries to make their search and management easier. All valid booking enquiries where a guest is yet to make a booking are active. All booking enquiries where a guest has made a booking become "Closed". Cancelled – these are the enquiries guests have cancelled and you have marked as invalid ones.
  • Connection to profiles. When you create a new booking enquiry reply, you can search among the existing profiles, as well as in the bookings. Apart from completing guest's details faster, you will be able to view their profile history. This helps you decide on the prices to offer. We have also added links to all of the guest's booking enquiries .
  • Quick price fixing. When editing the lines of a booking enquiry reply, use the newly added buttons (->) to fix the price for a specific line or for all the lines simultaneously, if needed.

Advanced Payment Processing Integration

We are introducing a new approach to online and card-present payment operations.

We are turning to a new innovative model of credit card operations, which we believe does away with a number of the shortcomings of the traditional method, namely:

Important:

  • High risk of fraud and resulting costs.
  • Complicated, expensive to conform to and unclear PCI DSS requirements.
  • Inconvenient second, third, etc. operations with the same credit card.
  • Duplications in blocked amounts.
  • Errors resulting in unhappy clients and missed revenue opportunities.

Main principles and functions of the Advanced Payment Processing Integration:

  • The credit card is only REQUIRED ONCE - on booking through the WRS, on guaranteeing through the hotel app (the digital guest portal), or on import from the Channel manager. Once the card details are in the system, clients don’t even need to present their card physically.
  • The credit card details are TOKENIZED as early as possible. The tokenization uses reliable secure technology so that no person has access to sensitive information, like credit card numbers or CSV codes. Not hotel staff, not even the system itself. The credit card details are safely tokenized in the secure environment of the payment provider and cannot be abused in any way. With this approach the hotel only needs to meet the lowest PCI DSS requirements, i.e. SAQ A.
  • The tokenization includes an actual transaction to CHECK THE VALIDITY of the credit card. Fake, stolen, expired, ‘Do not Honor’ cards or cards invalid in any other way are automatically rejected. Additionally, you can use any other risk management mechanism - CSV check, address verification, filtering by IP and country, etc.
  • Tokenized cards can be used multiple times but only for payments for that specific guest at that specific hotel. This allows for secure ONE-CLICK PAYMENTS at Reception (check-in, during stay, on and after checkout) as well as by guests themselves ( digital guest portal, kiosk).
  • Tokenized cards are also convenient for PRE-AUTHORIZATION where one click guarantees the payment. Again, with just one click you can CAPTURE part of or the entire pre-authorized amount.
  • Payments initiated in the system will automatically ADD PAYMENT TO THE FOLIO of the guest. This eliminates errors and mismatching between the actual payments, the information in the folio, and the financial reports.
  • Based on the tokenized card, you can also initiate REFUNDS from the system. The only thing you have to do is specify the refunded amount.
  • The credit card payments interface to the POINT OF SALE TERMINAL eliminates the double entering of the payment amount. The amount can be entered manually, of course, but normally it is defined by the charges on the folio. Payments made through the POS terminal are automatically added to the folio. Clients are served faster and without mistakes.
  • An interface between Clock POS and point of sale terminal will also be released soon to facilitate payments in the busy restaurant environment.

* A RoomCloud interface for importing credit cards from the Channel manager will be released soon.

How guests use it

  • Web Reservation System. When guests complete their booking in the WRS, they input their credit card details. If the validity check confirms the card is good, the booking is guaranteed and the card is tokenized. This may include deposit payment or not.
  • OTA bookings. If an OTA sends credit card details, the card is tokenized. If for some reason the card is rejected, the system creates a ToDo task. Then you can use the automated Guest mailer to send a message to the guest and request another credit card. Clients can use the hotel app (the guest self service portal) to guarantee their booking with another credit card.
  • Offline bookings. Guests use the digital portal to guarantee the bookings they have made offline. Again, beside the validity check and the tokenization, this may or may not include a deposit payment.
  • Kiosk - self check-in. In cases of unassisted check-in, the tokenized credit card allows guests to pay with one click. If the card has not been tokenized yet, they enter its details, pay, and have it tokenized.
  • Assisted mobile check-in. If you are meeting guests with a tablet, you can do everything that can be done at the kiosk.
  • Self checkout. Guests check out on their own or pay their bills in the digital guest portal while still at the hotel. Paying with a tokenized card takes one click. If they haven’t used their card so far, they can enter its details at this point.

One click payment with tokenized credit card

One-Click payment with tokenized credit card

Credit Card POS terminal

Integrated credit card payment terminal

POS terminal full integration

Fully integrated POS terminal

How the hotel uses it

  • Tokenized cards can be found in section Credit Card of their respective bookings. There you can also:
    • Add a card if you have received its details over the phone, for example. Click button ‘Operations’ - 'Save Credit Card (Tokenization)'.
    • Pre-authorize amounts on the credit card: 'Operations' - 'Preauthorize (Authorization Hold)'.
    • Capture the full or part of the pre-authorized amount: 'Operations' - 'Capture prior preauthorization'.
    • Cancel the existing pre-authorization and release the funds on the client credit card: 'Operations' - Cancel prior preauthorization'
  • To preview the bookings for a certain period and find those with or without pre-authorization:
    • Open the Booking Pre-Authorizations report in section Bookings of menu Reports.
    • Use filters Arrival in the period, Guarantee and Pre-authorization to find the bookings you need.
    • Check the bookings without tokenized cards or pre-authorizations. Open each of them to pre-authorize amounts or contact the guests for another card.
  • To make a payment:
    • Open the payment recipient folio and click Credit Card.
    • The default amount is the folio balance. Change it if necessary.
    • If there are tokenized cards for this folio, click the button of the card that will be used for this payment.
    • If there are no tokenized cards, enter a credit card details in the fields. This will initialize payment AND tokenization.
  • Refund:
    • Open the folio where the payment is. Click Refund in the Credit Card dropdown menu.
    • Specify the refunded amount and select the payment and the credit card the refund affects.
  • To make a card-present payment on a credit card terminal:
    • Open the payment recipient folio and click button Terminal.
    • Enter the amount. The first time you perform the operation you will need to select the terminal as well.
    • Follow the instructions. Depending on your account settings, you may see and possibly have to confirm the client signature.

Setting it up

In your Adyen account:

  • Set "Standard Notification" (also for your online payments account and for your POS terminal if you have one). You will need the "Standard notification url", which is found in Clock PMS - Settings - Adyen (Integrated Payments). See §2 to §6 in the help article (https://www.clock-software.com/support-center/pms-web-reservation-system/adyen-setup).
  • Set "Capture Delay" to "Manual" if you are going to use pre-authorization. Find the setting in your Adyen account - Settings - Merchant Settings.
    • The POS terminal interface does not currently support pre-authorization. Please enable this option for your online payments accounts only!

In Clock PMS (Internet payments)

  • Go to Clock PMS - Settings - Adyen (Integrated Payments).
  • Fill in fields Account code, API username and API password with the details from your Adyen account.
  • Fill in CSE library URL. It can be found in your Adyen account - Settings - Users. Select 'System' from the menu in the top right in the user table. Select the user created for API payments ( ws...@.... ). In the 'Easy Encryption' section, copy the content of field 'Library location'. Contact Adyen support for more information.
  • Select the currency that is going to be used for the amounts sent to Adyen.
  • Select ‘Address verification required (AVS)’ if you use Adyen address verification. The address fields will be added to the credit card form your clients fill.
  • Select services (Authorize and Capture (Payment), Tokenize (Save Card) Only, Authorize, Capture (Payment) and Tokenize (Save Card), Authorize Only (Pre-Authorization), Refund) to activate them.
  • Save.

In Clock PMS (Point-of-sale terminal)

  • This interface requires ClockIoT Device installed in the same network as the POS terminals.
  • Select Clock PMS - Settings - Adyen (POS Terminal)
  • Fill in Merchant Account, User Name, Password from your Adyen account.
  • Select the currency in which the amounts will be sent to the terminal.
  • In section 'POS Terminals' add the POS terminals you are going to be using. Give a name to each (e.g. Reception1) and IP address.
  • Each terminal has an additional setting, 'Signature Autoconfirm'. It defines whether you will be required to confirm the client signature for each transaction. Select the option you need.
    • If the setting is disabled, the signature will be displayed in Clock PMS and you will be required to confirm it after comparing it to the on the card. If the signature is not confirmed, the transaction fails.
    • If the setting is enabled, the signature will be displayed in Clock PMS, but you will not be required to do anything. The system will confirm it automatically and the transaction will proceed.

Guest Mailer

  • We have added a new filter to the Guest Mailer – Companies.Use it to select to which companies the specific template to be or not to be sent. You can set up two lists:
    • Included companies. In this case, the template will be sent for the bookings of the companies on this list.
    • Excluded companies. In this case, the template will be sent for the bookings of all companies but the ones of the companies on this list.
    • Example: If you wish to have one template for the bookings from booking.com, another for the Expedia bookings, and a third one for all other bookings, you can make the following three templates: For the first one, select booking.com to be on the Included companies list; for the second one, specify Expedia to be on the Included companies list, and on the Excluded companies list of the third template, enter booking.com and Expedia.
  • Pre-departure emails. Now you can set automated emails to to sent a certain number of hours prior to departure. As with all of the rest templates, the hours are counted back from 12:00 noon (on the date of departure). Example: If you want the pre-departure emails to be sent at 17:00 on the day before departure, you need to enter in the 'Time Range (hours)' field: 19, i.e. 19 hours before 12:00 noon on the date of departure. The emails are only sent for bookings with a "Checked-in" status.
  • Editor selection.We have added an option to choose the editor of the template content. Your editor selection is saved and used for opening this template afterwards. This change gives greater flexibility when creating your templates:
    • The two built-in rich text (HTML) editors (CKeditor and TinyMCE) allow you to easily and quickly edit simple templates. The editors provide easy access to rich text formatting: styles, bold, various fonts, plain tables, etc. You can choose the editor that is most convenient for you. Please note that a parameter list is only supported by CKeditor. You can add parameters to TinyMCE too, but you need to write them in full (e.g.: ).
    • 'Plain text editor'. Use it to have full control over the HTML content. It is very convenient when you create your templates through an external design system or import them from another system. This way you can build custom templates of a more complex design.
    • Please note that switching the editor used can change the format of your HTML. For the complex design templates in particular, going from 'Plain text editor' to a rich text editor will add new tags and remove the ones this editor does not support.

Out Of season

For seasonal hotels or the ones closed for a short period, we have added a new ''Out of season'' feature. It has two functions:

  • Help your customers know when your hotel will be open again.
  • Quickly stop all your rates.

Helping your customers know when your hotel will be open again.

Out of Season

Message in WRS for out of season hotel

Up till now if you have closed the hotel for the season, renovations, maintenance or other reasons, you had to stop all your rates, so that hotel rooms are no longer sold over the WRS or the channel manager.
The inconvenience for your clients was that WRS notification was merely: "No available rooms". This way it was not clear when the hotel would be open again.
The new feature lets your customers receive a clear message from the first page of your WRS when your hotel is closed and for how long, as well as when it opens again. This notification can also be received from the second WRS page with the results when looking for a room in a period, for which your hotel is set to be closed.
Once again, your customers will know how long the hotel will be closed and when it opens.

Quick stop of all your rates.

It is no longer necessary to stop all your rates to stop the sales over the WRS and the channel manager. With only one setting, it happens automatically. To set up the periods, in which your hotel will be closed:

  • Go to Settings - Rate Plan.
  • Click the 'Out of season' button in upper right corner.
  • Add the periods when your hotel is closed.
  • Save.

Bookings & Folios

  • Automatic cancellation of charges for cancelled bookings.We have added a new setting to choose the system behaviour when a booking is cancelled. No matter how a booking is cancelled (by an employee, automatically by the channel manager or by the guest via the Self Service Portal), the system behaviour will be the one you set:
    • No automatic voiding. This will be the default behaviour. The booking charges remain valid and it is up to you to decide what to do with them. For your convenience, the system automatically creates a To-Do, if it finds valid charges in cancelled bookings.
    • Automatic voiding. If you choose this system behaviour, the system will try to automatically void the folio charges of cancelled booking. If it fails (for example, the folio is closed), it will create a To-Do for further actions.
    • The new setting is on the Guarantee options screen - Settings - Guarantee Options - Auto-void booking charges on booking cancellation.
  • Booking folio currency.If you use multiple currencies, now you have a default currency setting for booking folio creation. There are two possible options:
    • Rate currency. This is the default behaviour. The booking folio is created using the currency of the set rate.
    • National currency. The booking folio is always created using the national currency.
    • The new settings can be accessed from Settings - Tax Settings - Default booking folios currency
  • On the New booking/booking edit screens, we have added short information of the number of bookings connected to the booking's guest profile. There you can find info of the number of the checked-out and expected bookings in this hotel, as well as the number of checked-out bookings in the other hotels of the subscription.
  • Update of the 'Disable Room Change' field for multiple bookings. Now you can update the 'Disable Room Change' field for multiple bookings simultaneously from the booking search screens (Advanced Search, Arrivals, In Hotel, Departures). The option is to be found on the 'Room' menu.
  • Tax removal for folios.The feature facilitates the removal of the tax from a folio, when your contractor is entitled to this. The action of this feature depends on the tax mode you use:
    • If you use the 'Tax included in prices' tax mode, the feature will decrease the value of each charge by the amount of its tax and will make the tax percent zero. In other words, if you have a charge to the amount of EUR 120 and 20% VAT, after using this feature, you will have a charge to the amount of EUR 100 and 0% VAT.
    • If you use the 'Tax not included in prices' tax mode, this functionality will make the charge tax zero. Example: if you have a charge to the amount EUR 100 and 20% VAT, after using the feature, you will have a charge to the amount of EUR 100 and 0% VAT.
    • To access this feature: Open a folio and select Functions from the Charges section, and then "Remove/Subtract taxes from prices".
    • This functionality has also been added to the POS – on the Settle screen, go to the Functions section and click "Remove/Subtract taxes from prices".
  • In the section for editing multiple bookings on the 'Booking - edit multiple' screen, we have added a field for quick departure date editing. Now you can choose to edit the field that is more convenient for you – Stay or Departure date.
  • Group booking confirmation – we have added a field showing the total amount of charges from all included bookings.
  • Group booking confirmation – we have added a new translation field, letting you enter a custom text to be shown only in group booking confirmations. The text appears immediately after the the 'Confirmation email text' – at the top of the confirmation email. The text can be edited from Settings - "Languages and Texts" - "Booking Confirmation - Cancellation - Page" - "Additional text for multi-booking confirmation".
  • Registration cards – we have added a language field.

PBX

  • Charging by Phone Call Zones. The price of a telephone call can be determined by the zone of the dialled number. The zones are determined depending on your needs. To set up this charging:
    • Go to Setting - Phone Call Settings - Edit. In the Pricing Method field, select Price per Zone. Save.
    • In the Zones section (Pricing Method: Price per zone), add all the zones, you will charge by clicking the 'Add' button.
    • For each zone, enter: Name (e.g.: 'International 1'), Dialled number prefixes – all prefixes you wish to belong to this zone, entering each of them in a separate line. Fill in the call price, as it is the sum of the fixed price and price per minute (each of these two can be left empty). Each started minute will be charged.
    • Test it. Use the Test button to enter a phone number and call duration in minutes. The system will show you the phone call zone and how much the call would cost.
  • Domestic lines. You can exclude certain domestic lines from charging. This way they will be marked as excluded. To fill in the list of domestic lines, excluded from charging, go to Settings - Phone Call Settings - Edit. In the Excluded lines field, enter each line in a separate line.

Rates

  • Percent package elements. Now you can add elements of a percent value to a package. The percent value is always calculated on the basis of the initial rate price and does not depend on the order in which you have added the elements or the values of the other elements.
  • We have added a rate change log.The log does not include each of the actions, because they can be too many in number. However, you can quickly find out the user and the time of the last edit of a parameter. To open the change log of a rate – find the rate through the rate search; click the dropdown menu icon next to the rate and select "Change Log".
    • We have also added a deleted rate log. This way you can see the user and time of rate deleting. The link to the log can be found in the lower left corner of the rate search screen (Rate Plan).
    • Please note that the tracking of this log information will start after the update release on 24 Jan 2017.

Virtual Rooms

Based on your comments, we have changed the way virtual rooms are reflected in the statistics and occupancy reports. The goal of these changes is to let you get statistics from your main indicators like occupancy %, ADR, not accounting for virtual rooms, and still to be able to have info on the sales of virtual rooms and their performance. Here are the changes in greater detail:

  • Occupancy Forecast – it shows the total of occupied and available rooms, as well as the occupancy percentage accounting for the real rooms only. Additionally, you can see the values, which include the virtual rooms (shown under the main figures and in a smaller font). Example: If you use a FAM virtual room type, the number of occupied and available rooms of this type will be shown in the report, but the data of these rooms will not be included in the report's total.
  • Occupancy and Charges.We have made the following changes for you to have correct occupancy data, as well as information on the sales of virtual rooms, if you wish.
    • When the report is run with a filter to see all room types, the Capacity, Booked rooms and Occupancy columns DO NOT include virtual room types. Therefore the Occupancy % is calculated for the real rooms.
    • When the report is run with a filter for a specific room type, the Booked rooms column only includes the direct bookings for this room type, and the Occupancy column – the entire occupancy for this room type, no matter whether a room is directly or indirectly occupied. We have added Booked% accounting for the percentage of direct sales of the room type. The ADR quotient also accounts for the direct sale of this room type.
  • Occupancy and Charges D-M-Y Report. The changes are similar to the ones in the previous report.
  • Bednights Report – it does not account for the indirectly occupied rooms. Example: A booking for a virtual FAM room type indirectly occupies two more double rooms. These two indirectly occupied rooms are not accounted for in the report.

Other Improvements

  • WRS – now guests can book rates together, even if they have different guarantee policies. Up till now it was forbidden by the system. With such bookings, the required deposit is calculated separately for each booking depending on its guarantee policy. There are also changes to the way of determining the payment methods to be used for finishing the booking process in the WRS. The list is determined based on the payment methods selected in the participating guarantee policies. Please note that your settings may prevent your clients from finishing their bookings in some cases. For example, if one of the guarantee policies requires the collection of credit card details only, and the other requires an on-line payment through PayPal only. In such cases, the system cannot find a common payment method between the two policies and shows a notification of a booking containing incompatible guarantee policies.
  • New report - Booking Segmentation Report.The report gives information on: Number of bookings and nights, Lead days (how many days before arrival bookings have been made), LOS (Average length of stay), avg. Guests (average guests per booking), Room charges (sum of room charges), Total charges (total of all charges), ADR (Average Daily Rate), ACB (Average charges per booking). With an option to:
    • Filter bookings by: Period, Company, Marketing source, Marketing channel, Room type, Status, Country
    • Segment bookings by: Company, Country, City, Adults + Children, Rate, Arrival Day, Departure Day, Nights, Marketing Channel, Marketing Source, Meals, User, Room type, Guaranteed.
  • New report - Self Service Statistics. The report shows the number of visits to your Self Service Portal and the individual portal pages for a certain period. The collection of information for this statistics starts with the update on 24 Jan 2017.
  • The To-Do list is now paginated for easier viewing.
  • Self Service Portal – the screen requiring PIN can now be translated, showing the customisations made (theme or custom css)
  • The liquid parameters referring to amounts (custom template parameters) now have a division function and various values can be calculated directly in the template.

Fixes

  • The 'min children' restriction of rates has been fixed. Now it is applied separately from the total number of guests, i.e. it is applied to the number of children only.
  • Self Service Portal – extra services. If a guest does not select services and confirms the screen, a To-Do is no longer created.
  • The icons of some buttons did not show in the WRS, when custom css used.
  • Vouchers – the voucher folio did not open.
  • iCalc – it did not work for virtual rooms
  • User copying – it did not copy the To-Do channels set up by the user.
  • Rate Control Report – when virtual rooms used, it showed the values of both virtual and real rooms.
  • User groups. In certain cases, a group could not be created under a given name.
  • Booking Enquiry – the printout did not show the set footer.
  • Kiosk – when issuing an invoice for a company, an unclear error message appeared if the company name was missing
  • The charges related to events did not appear under the respective company in the charge segmentation reports.
  • Credit (and Debit) folio did not copy the billing data from the original invoice and the data had to be entered manually.
  • Registration card – standard printout – the field labels can now be translated.

Clock PMS+ Update (3 Nov 2016)

Booking Enquiry

We are proud to present to you the beta version of our new Booking Enquiry module. The new module supplements the existing tools for electronic guest communication with a new one – for servicing guest enquiries. Now you can use the following features: generate and send an enquiry reply to a guest and then create a booking based on the guest enquiry. We are working on the second part of the module, which will enable guests to complete their bookings in the hotel's web reservation system on the basis of the received enquiry reply.

We believe that the new instrument will help you increase your sales, enhance your hotel image from the very start of your communication with guests and it will provide you with more flexible tools for personalised offers and special prices.

Creation of Booking Enquiry

We have added the creation of a new booking enquiry to the Rate&Availability screen. This way the new feature naturally follows the steps of a conversation with a guest – i.e. while answering the guest's questions regarding availability and prices, you can add the products the guest is interested in to the booking enquiry reply. At the end of your conversation, you can send the guest an email with the discussed products.

To create a booking enquiry reply:

  • Open the Rate&Availability screen.
  • From the Booking Enquiry menu (top right), click the 'New' button and fill in the guest's details.
  • Enter the period, room types and rates on the Rate&Availability screen as usual
  • Next to the 'Book' button, we have a small button for each product. Click it.
  • Fill in the number of rooms (when working with room types only) and click 'Add to Enquiry'
  • On the Booking Enquiry menu (top right), you will see the number of the rooms you have added.
  • You can add rooms for different periods, room types, rates and number of guests.

Clock PMS - New Booking Enquiry

The rooms added to an enquiry retain the prices they had at the moment of adding. This lets you know the price you offered the guest. By default, this price is only informative and the booking will be created at the current prices. We have added an option for fixing the price, so that the client can make a booking at the price initially offered by you, even when the rate has changed. See below how to fix certain prices.

Booking Enquiry Editing

The Rate&Availability screen remembers your last Booking Enquiry. Even if you leave the screen, this reply will be available to you when you return to this screen. You can create a new Booking Enquiry or remove the current one from the screen by clicking the small drop-down menu button (the rightmost one on the Booking Enquiry menu).

To edit guest details:

  • Click the button with the enquiry number and surname of a guest.
  • Change the data and save.

To edit the rooms added to a booking enquiry reply:

  • Click the 'Edit Rooms' button
  • You can remove a row through the 'X' button and save.
  • You can add more rooms from the Rate&Availability screen.

Also you can search for a specific enquiry by going to 'Booking' – 'Booking Enquiry Search'. Find the enquiry and click 'Open on the Rate and Availability screen' to add more rooms or alternatively use any other feature of this screen.

Sending Email or Printing

Booking Enquery email

To email the Booking Enquiry reply to your guest, you can use our standard form, which provides certain customisation options. You can also build an entirely new custom form with your own design and arrangement (see below).

To print or email a booking enquiry reply to a guest:

  • Choose the 'Next' button from the Booking Enquiry menu. Before clicking the 'Print/Send' button, you can once again check all the details.
  • Additionally, you can further customise the email before sending it by adding specific notes above and under the grid with rooms. Click 'Edit' and enter the specific notes. Save.
  • An archive of all emails sent is maintained. It can be viewed in the Email section of any Booking Enquiry.

Check for changed prices and price fixing

Another aspect of the enquiry management is their prices. The Booking Enquiries in Clock PMS answers the following questions:

  • What prices have you offered your guests?
  • Have the current prices changed compared to the ones you sent?
  • How to fix certain prices, so that the guest can book at the prices in the enquiry reply regardless of the changes to the current ones?

What prices have you offered your guests?

A Booking Enquiry shows the prices of the rooms at the moment of their adding. These are not fixed prices, but informative ones showing what you have offered the guest.

Have the current prices changed compared to the ones you sent?

Here is how you check this:

  • Click the 'Edit Rooms' button and select 'Check current prices and show differences'.
  • The rows with price changes are highlighted, showing the old prices and the new ones.
  • If you want to resend the enquiry reply with the new prices, click the 'Recalculate and update prices' button . Then send the enquiry reply to the client. Please have in mind that this does not fix the prices. If you want to make sure that that the guest will book at the prices of the enquiry reply instead of the current ones, see below.

How to fix certain prices, so that the guest can book at these prices regardless of the changes to the current ones?

If you want to fix a given price, fill it in the the 'Manual price' field and select a currency. Thus entered, the price will be transferred to the 'Manual Price' field of the booking and the guest will be able to book at the offered price.

From an Enquiry to a Booking

There are two options for an enquiry to become a booking:

  • It can be done by the hotel after receiving an email or telephone call from a guest with a request for a booking based on the enquiry. Here is how you can do it:
    • Find the guest's enquiry ('Bookings' - 'Booking Enquiry Search')
    • Open it.
    • Click 'Create Booking' button next to the respective room.
    • Click the link of the newly created booking to edit it or send confirmation.
  • Soon clients will also be able to do it ( the feature is still at a developmental stage). Guests will visit a special page, part of your web reservation system. There a booking will easily be created on the basis of the data from the enquiry reply in a click. Apart from saving time, a client can also take advantage of special prices and packages, if offered.

Enquiry Form Customisation

If you decide to use the standard enquiry form - here is how you can customise it:

  • Title. It is at the top. If not set, the hotel name appears there. It can be changed from 'Settings' - 'Languages and Texts' - 'Booking Enquiry' - 'Title'.
  • Logo ( top left). It uses the logo you have uploaded as 'Confirmation Logo' from 'Settings' – 'Logos / Image Library'
  • Contact Info (top right). The contact info entered in 'Languages and Texts' - 'Booking Confirmation - Cancellation - Page' - 'Page - Hotel contacts label' is used.
  • Name. You can change or translate the default name of the document to be sent. Instead of 'Booking Enquiry', you can choose 'Offer', 'Price Quotation', etc. To do so, go to 'Languages and Texts' - 'Booking Enquiry' - 'Name'.
  • Header. A text that appears in the space between the guest contact info and the grid with prices. You can edit it from 'Languages and Texts' - 'Booking Enquiry' - 'Header'.
  • Footer. A text appearing under the grid with prices. You can edit it from from 'Languages and Texts' - 'Booking Enquiry' - 'Footer'.

You can also build your custom Booking Enquiry form using HTML. This way the form can contain dynamic data coming from the defined parameters. The creation of this custom form is similar to the creation of other custom forms – custom confirmation, folio, guest emails, registration cards, etc. You can set up the custom booking enquiry form from 'Settings' - 'Booking Enquiry Template'. After completing the template, click 'Use a custom booking enquiry template' to enable it. Soon we will add a sample template to give a starting point.

Booking Enquery custom form

Booking - Required fields and Default values

We have added a new setting. Use it to set which fields of a booking to be required ones. You can do so from the New Booking screen or the Booking Edit screen. In practice, it means that if you open and edit an old booking with empty, but now required fields, you will have to fill in these fields to save the booking. These required fields setting applies to these two screens only – 'New Booking' and 'Booking Edit' and does affect the rest of the booking sources for the system. In other words, the bookings received from the channel manager, WRS, through the file import or the API are not checked by the system for compliance with the required fields setting.

The fields which can be set to be required ones are:

Adults, Children, Meal, Rate, Guarantee Option, Guaranteed, Arrival Time, Departure Time, Transfer Arrival, Transfer Departure, Charge transfers, Country, Language, Marketing source, Marketing channel, Restaurant

Default values. Now you can set default values for the fields of a booking. These default values will apply to the fields of a booking when started from the 'New Booking' screen only. The setting will not affect the other booking sources (channel manager, WRS, through the file import or the API ).

When you start a booking from another screen (Rate&Availability, Room Calendar, etc.), the values coming from these screens have priority over the set default values. So if you start a new booking from the Rate&Availability screen, the values selected by you on this screen (period, rate, room type, adults and children, etc.) will override the existing default values for the booking fields.

The fields which can be set to be default ones are:

Stay, Room/Room Type, Adults, Children, Meal, Rate, Guarantee Option, Guaranteed, Arrival Time, Departure Time, Transfer Arrival, Transfer Departure, Charge transfers, Country, Language, Marketing source, Marketing channel, Restaurant

To do the above "Settings" - "Booking Fields".

Required and default fields in booking

PBX interface / Call accounting

If you have a PBX (telephone system) and charge the calls of your guests, now you can take advantage of the new interface and integrate your PBX with the Clock PMS. Once installed, the new interface can be set up to work with your PBX and the made phone calls will directly be charged to the bills of your guests. The first version of the interface only supports its own charging system. Please let us know if you need the interface to support external charging systems. The PBX interface is a paid feature. Please contact us to get a quotation for your PBX.

Requirements: A PC with Windows XP or higher; depending on your PBX: COM port or COM to USB adapter; Ethernet. Clock PMS - API add-on installed. Contact our support team for more information, as well as to check if your PBX is compatible with our interface.

Clock PMS settings:

  • Go to 'Settings' - 'Phone Call Settings' and fill in:
    • Charge text, Revenue group, Revenue category – this data will be used for posting the charges to the folios of guests
    • Pricing Method.Choose a method of call charging:
      • Native Price – a price sent by the system itself. Use the 'Currency' field to set the currency of the charges to be posted to guest folios.
      • Price per Unit. If calls are charged at units (aka Impulses) in your PBX, the phone call charge that is posted to the guest's folio is a result of the multiplication of the respective units by the price per unit. This price is set in the 'Price per unit' field. The currency of the posted charge will be the one set in the 'Currency' field.
      • Price per Minute. Fill in the 'Price per minute' field. Each started minute of a phone call will be charged at this price. Once again the currency of the charge will be the one set in the 'Currency' field.
  • Save.
  • Add phone line for each room. To do so, click 'Edit' in the 'Phone lines' section.
  • Enter a phone line for each room. If you need to enter more than one line for a room, use a comma to separate the lines. Each phone line needs to be entered the way it is submitted by the PBX.
  • Save.

How the PBX interface works:

  • The PBX sends information of each call made through a COM port or TCP/IP to the PC, where our local interface is installed (TCScanner.exe, SpoolPMS service).
  • SpoolPMS connects to Clock PMS, using the Clock PMS API and sends the call. Note: The SpoolPMS connection to the API requires an enabled API add-on and set API user to access the API.
  • The call data is received by Clock PMS and can be seen on the screen for phone call search ('Other' – 'Phone Call'). The calls have three statuses:
    • Charged – the call is successfully charged to the folio of a booking
    • Uncharged – the call is not charged to any booking. You can also find the related error.
    • Ignored – you can ignore the phone calls which cannot be charged and describe the reason for that.
  • Clock PMS determines the call price using the chosen pricing method.
  • The mapping between rooms and phone lines is used for identifying which room a phone call comes from.
  • Clock PMS looks for the checked-in booking for this room and check whether the call falls within the period of this booking. In case of multiple bookings found, the first one is selected.
  • The call charge is posted to the first valid folio of the booking. In case of no valid folio, a new one is created.
  • The call gets the Charged status.

Activity control. If the communication between the SpoolPMS service and Clock PMS stops for more than 5 minutes, a no communication warning appears on the Home screen of Clock PMS. Please contact your system administrator to look for a possible issue with your network or the PC where the interface is installed.

Other

  • New rate restriction - 'Last Minute days'. Use it to create last minute rates. For each rate or season, you can set the number of days before arrival for which the rate will be active. For example, if you enter '2' in the 'Last Minute days', this means that the rate will be active for guests arriving today, tomorrow or the day after tomorrow. If '0' set, the rate will be active only for guests arriving today. This restriction does not limit the length of a stay. The difference between this restriction and the other similar one – 'Max Days Before Arrival' is that the new restriction refers to the nights (but not to the arrivals) after the set number of days. You can use a combination of both these restrictions, if you want to limit the period within which nights to be charged at the last minute rate. For example, if you enter '1' in the 'Last Minute days' field and '7' in the 'Max Days Before Arrival' field, guests will be able to book for today and tomorrow, but their departures must be within 7 days as of today. The new restriction is supported by all the modules of the system, except for the Channel Manger. There it cannot operate, because it depends on arrivals, i.e. the result is different for each enquiry.
  • Custom Screen Help.You can enter texts for several key screens, which will appear on the screen and remind your staff of specific procedures and operations.
    • Reports. On the Reports screen, you can enter your own description texts for each report, as well as a text, which will appear in the lower right corner of the screen. To use this feature, you need to have the 'Settings' right granted. Click the small 'Comment' icon next to the respective report or links in the lower part of the screen. You can use rich text descriptions for your texts.
    • Booking Screen. Various texts can be set to appear on the Booking screen or the Booking Edit screen. You can add a text to appear at the top or the bottom of the screen. To do so, find the links ('Custom screen help' - 'At the top/bottom of the page)) at the bottom of each of these screens.
    • Home Screen. Enter a text to appear on the Home screen, so that it can be seen by all your employees. To do so, go to the Help menu in the navigation bar and select 'Home screen top and bottom'.
    • POS home screen. Enter a text to appear at the top of the main screen. You can use it to remind your staff of ongoing promotions or stopped products. To do so, select 'Custom screen help' from the Help menu.
    • POS reports. Similar to the PMS, you can set a help text for each report.

Custom help in Clock PMS

Custom help in Clock POS

  • Events - Cancellation. Now you can quickly cancel an event without causing the cancellation of the block, meeting room bookings and catering. When cancelling the event, you can specify if all event folios are to be cancelled or not. The cancellation button is situated on the event screen.
  • Event – Company change. We have added an option for changing the company of an event. The company change leads to the change of the folio payer, i.e. the folio will be transferred to the newly set company. To change the event-associated company, open the event's Edit screen and change it in the company field.
  • WRS - Departure date. A 'Departure date' field has been added to the first page of the WRS. This way clients can select what is easier for them – Stay or Departure date.
  • WRS - Hide prices on the Availability Calendar. We have added a new setting to the WRS letting you hide the prices on the Availability Calendar, so that it shows only if there are available rooms. This setting makes the Calendar clearer to your guests in the cases with more complex rates used. For example, if you use packages depending on the stay length, the Calendar shows minimum price for each day. However, this is a package of 14 nights. The client may not understand this peculiarity and wonder why there is no such a price for 3-day stay. It is up to you to choose if minimum prices are to be shown, which stimulates sales or not, which makes the Calendar clearer to your guests.
  • Tax Report. We have added a column with the Gross values for each tax.
  • Booking – a short list of To-Dos. The short list of open To-Dos can be found at the screen near the Notes section, so that it is easier for your staff to see them.
  • Import of checked-out bookings. Now you can import the checked-out bookings by arrival date for a period of up to 2 years back. No room charges are created for these bookings.
  • Booking import - notes. When importing bookings, you can now add Notes and Client Requests
  • To-Do – log information. On the To-Do edit screen, you can find information when and by whom a To-Do was created, edited and/or completed.
  • Adyen. You can require the address of guests paying by credit card, if you use the address verification service. The related setting can be found in: 'Settings' - 'Adyen (Easy Encryption)' - 'Address verification' field.

Fixes

  • Registration Cards – the 'Next destination' did not appear
  • In the automatic allocation of a room of the virtual room type, there were cases of incorrectly allocated rooms.
  • Adyen. We have fixed the the issue when the Adyen notifications stopped being sent and some payments weren't registered in the folio.
  • We fixed the the issue with the "Languages and Texts" system causing some texts not to appear, despite being entered.
  • The following bug has also been fixed: The rate search did not work if rates contained letters not belonging to the English alphabet.
  • The Add Multiple Rooms feature- it showed the virtual room types too.

Clock PMS Update (27 Sep 2016)

To-Dos

We have improved To-Dos and now you can use them more efficiently for any organizational or communicational purposes related to your property.

To-Dos in Clock PMS are designed to have everything you need to use them as a system for Work Orders or Issue Tracking. They can help you with the tasks related to guest servicing, marketing and distribution, maintenance, supply management, etc. Try our new organization of the To-Dos and send us your recommendations and improvement ideas.

Channels

This newly introduced feature of To-Dos lets you organise the different tasks by their specifics or the departments responsible for their implementation. And with the option for each user to only follow the channels that interests them, you can increase the number of task types you manage through the To-Dos in Clock PMS.

ToDo list with work order and issues in Clock PMS. Channels can be customized.

The automatic sytem-created To-Dos are distributed by their type into several system channels:

  • Bookings – for all booking-related To-Dos, e.g. a new booking from the WRS or the channel manager; a period change request from the Self Service Portal; a booking cancellation via the Self Service Portal, etc.
  • Channel Manager – To-Dos related to the channel manager functioning: data mapping errors or other similar ones.
  • Gift vouchers – gift vouchers from the Gift Voucher Shop.
  • Payments – all automatically created To-Dos in relation to guest payments in the WRS, on the Self Service Portal (advance or check-out ones) and via Kiosk (at check-in).
  • Housekeeping – To-Dos related to housekeeping and maintenance.
  • Events – event-related To-Dos – meeting room bookings, as well as To-Dos referring to the specific event catering.
  • Feedback – notifications linked to guest feedback (reviews) from the Self Service Portal.

You can add your own channels to the system ones to organise the To-Dos from the other departments of your organisation. These channels can be for general or specific purposes depending on your needs, e.g:

  • Accounting. Here you can manage tasks referring to invoicing and accounts receivable.
  • General. Use this channel to manage any general tasks.
  • Supply Management- To-Dos related to deliveries and orders.
  • Transfers – tasks referring to airport transfers and other transport services, etc.

Note: If you delete a To-Do channel already containing To-Dos, they will not be deleted, however, it is possible for you to be unable to see them on the screen. In case of a channel erased by mistake, you can create it again by entering the exact name of the erased channel.

User Interface

We have made changes to the User Interface making the management of tasks easier.

  • Short list of To-Dos on the Home screen. It shows the first 5 To-Dos only from the two important groups: 'Assigned to me' and 'Unassigned'. It is also possible to see all your To-Dos (just click the 'Show more' button at the end of the list).

    ToDos on home screen in Clock PMS.

     Clicking the name of a group, you will open:

  • To-Do search.To the left of the the To-Do list, there are filters for quick and improved review of the information that interests you:
    • Channel. Select a single channel or all of them. Only the channels you have chosen to track appear (see the end of the paragraph for more info on this setting).
    • Date. You can filter which tasks to appear: Current (tasks from today or yesterday); Today (only today's tasks); Tomorrow (the tasks for tomorrow); Expired (expired tasks); Without date (tasks with no assigned date).
    • Assignment: All; Assigned to me; Assigned to other; Unassigned.
    • Status: All; Completed; Not completed.
    • You can save the selected filters to be the default ones, this way you won't need to choose them each time you open the screen. Click 'Save as Default' in the lower part of the screen.
    • To select the channels you are interested in or add new ones (the Settings right required), click the 'To-Do Channels' link in the lower left part of the screen.
  • Completing a To-Do. Each task can quickly be checked as completed from the To-Do list itself. The completed tasks are stored (in contrast to the deleted ones) and can be reviewed later. To check a To-Do as completed click the 'V' icon next to it. If you check a task as completed by mistake, you can restore its status from the Edit screen of the To-Do.
  • Quick assignment of To-Dos. We have added a quick assignment button to the To-Do list (the user icon). Your name is the first one on the list to quickly assign a To-Do to yourself. What follows are the names of all the users having access to the current account and being interested in the channel containing the To-Do. The last item on this list is 'Remove Assignment' to quickly remove the assigned user.
  • Urgent. If you check a To-Do as 'Urgent' (on the Edit screen of the To-Do), it will appear first on the To-Do list.
  • To-Do Edit - click the To-Do or the pencil icon. Edit the fields and save.
  • New To-Do. Click the 'Add' button in the upper part of the To-Do search screen to add a new To-Do to a channel.

Other Improvements

  • Kiosk – email required/checking. We have added a new option to the Kiosk – 'Require Booking Email'. When this option is used, at check-in, a guest is prompted to enter their email, where all his bills will be sent. If the booking already contains an email, the guest will be prompted to check and update it, if necessary. This way if your guest is from an OTA channel and has a booking with an automatically generated email, you will have the chance to get their actual personal email.
  • Fast search for folios and invoices. Based on your feedback, we have established that it is very often difficult to find open or closed folios by their number only. This is the case when you communicate to your guests over the phone and they don't know the booking number. This is why we have created a new 'Folio Fast Search' screen. You can find it on the 'Other' menu from the Navigation bar. Search for all folios (open, closed or voided) by the number of a folio, invoice, name or VAT ID of the invoice recipient.
  • New right - 'Rates: Create or Edit'. The edit of of rates, restrictions and prices now depends on the new right - 'Rates: Create or Edit' instead of the general access right to 'Settings'. The new right is granted to all users having the 'Settings' right. Edit users' rights, if necessary.
  • Translations of payment servicenames. With the new translation option ('Settings' - 'Languages and Texts' - 'Payment services/Translations'), you can change the name of any of the payment services appearing by default in the WRS or the Self Service Portal or translate it into other languages of your choosing.
  • Rate search. We have changed the screen to let you search the way you do it in a file explorer. When a rate plan is selected, you will see its rates to the right of it. Select the rates and you can edit them. We have also added a restriction to the number of rates you can simultaneously open in the Price Editor. Now you can open up to 50 rates at once.
  • WRS - guest titles. If you have set up titles, now their completing will be required in the WRS. This fields can no longer be left empty.
  • List of folios of a booking. We have added the name of a folio itself to the table.
  • Now you can generate the list of all empty, but voided folios through the Closed Folios Report. Just click the 'Include open/voided folios' option of the report.
  • Bednights Report – the room type segmentation now accounts for the booking moving to another room, i.e. now it no longer works by the Arrival Room Type, but by the actual room type for a booking.
  • Channel Manager. We have improved the mapping screen by adding the rate search option.
  • Yield Planet. Due to the large volume of data and the difficulties reading it, we have decreased the size of the log we store for the communication with Yield Planet. The log now contains data for the last 5 days.

API

  • PMS API - rate_prices endpoint now has a 2-year restriction for the update of prices and restrictions.
  • The call rate limit now operates by the API user, set in the URL of each API call. Note: To take advantage of this feature, you need to use the new API call URLs, containing API users. You can find the new URLs on the edit screen of an API user.
  • The API call statistics is now generated by users. A link to the statistics by months can be found on the list of API users. Note: This feature DOES NOT depend on whether you use the new URLs or not.

Fixes

  • The event search didn't work in some cases.
  • The Room Calendar allowed room sharing (two bookings in one room) when dragging and dropping a booking to the left or right.
  • The payment transfer screen showed folios twice.
  • The charge transfer screen also showed the deposit folios along with the standard ones.
  • Guest Ledger – the report showed balanced folios as unbalanced ones.

Clock PMS / POS Update (25 Aug 2016)

Clock Kiosk

We are proud to announce the latest addition to our digital guest interaction products - Clock Kiosk.

Clock Kiosk is designed and developed entirely by Clock Software. It is created as the ultimate combination of reliable specially designed hardware, secure operating system, guest servicing software, and close connection with the hotel PMS. In result, our new product provides reliable secure environment which operates in real time with the PMS and ensures the best possible guest service on check-in.

  • Security. Data and system security is a our primary concern. PCI DSS places the highest requirements towards the operating systems and hardware involved in the processing of credit card data. Aiming to provide the most reliable environment possible, we decided against Windows as it is the most popular and therefore the most targeted operating system. Instead, we turned to a Linux-based environment and modified it further to provide the highest security in the field.
  • Hardware and software designed to work together. Clock Kiosk offers hardware and software specially designed to ensure maximum usability and ultimate guest experience.
  • High quality reliable components. Best quality touch-screen monitor, fanless computer system, original keycard encoders and specially designed Linux version guarantee problem-free 24*7 kiosk uptime.
  • Integration. Saying that Clock Kiosk is fully integrated with Clock PMS is not entirely accurate. Rather, Clock Kiosk is a continuation of Clock PMS and the Self Service portal. This software design prevents any duplication of data between the systems and completely eliminates mismatch of data, delays and synchronisation issues.
  • Slick Hardware Design. Clock Kiosk is made of high-quality steel and is only 7 cm thick. It is a solid piece of hardware which can be bolted or even glued to the floor.
  • Rich Software Functionality. Clock Kiosk takes a step beyond the traditional guest check-in. It is a point of active communication, which changes the experience of your guests completely.

Clock Kiosk

Functionality

Here are the functions included in the first version and those planned to be added shortly:

  • Access with booking number and PIN. The PIN is the code guests use for the self service portal, either the original one sent with the booking confirmation or their own they have chosen later.
  • Upsell / Special Offers. Personalised offers to guests for room type or package upgrades. The offers are completely synchronised with the booking parameters and with your availability. They can be finely tuned through rate restrictions and upgrade policies. The selected upsell rate is effective immediately and the folio of the guest displays the correct charges. You receive a notification about the upgrade, but you don’t need to do anything. All changes are applied automatically.
  • Early checkin (*under development). An Early checkin option charged extra on the account of the guest. The charge is posted in real time and the folio is updated immediately.
  • Understandable hotel policy. Enter the hotel policy on checkin, checkout, stay, damages, and so on in as many languages as you may need.
  • Registration cards. Filling in guest details in registration cards. If the details have been entered in advance in the self service portal, guests only need to check and confirm them. Easy setup of registration card fields. The fields displayed in the kiosk are the same as those in the self service portal.
  • Electronic signature. Guests sign their registration cards on the touch screen monitor. The signatures are saved digitally.
  • Paying bills.The Kiosk can be set to require credit card payment of bills on check-in. The bills are up-to-date and include all charges, upgrades, extra services selected in the web reservation system or in the self service portal as well as any advance credit card payments.
    • Additionally for Corporate clients: corporate clients can select the option of company invoice. The invoices are emailed to the addresses they provide.
    • Credit cards. Credit card payment requires clients to enter their credit card details. Authorize.net and Adyen Easy Encryption are the interfaces currently supported.
  • Credit Card Pre-Authorization (*under development). An Authorization Only transaction blocks a certain amount on the credit card for any possible damages or unpaid charges.
  • Automatic room assignment. If this setting is activated and the guest has no room assigned, the system will automatically select a clean available room of the type booked and your guest will be able to go there immediately.
  • Room selected by guest (*under development). If this setting is activated, guests will be prompted to choose their rooms from a list of free clean rooms. For return guests, the rooms they have stayed in before will be marked to help them select the same ones easily if desired.
  • Keycard. Guests are issued their room keycards. The issuing depends on the system of access the hotel uses. Currently the Kiosk supports Visionline by Assa Abloy (Vingcard). Other popular systems will be interfaced soon.
    • Custom access system. If your system of access is not included in the standard list of interfaces, it can be interfaced through the API of Clock PMS for issuing cards. To do this, you can order your Clock Kiosk with the card encoder used by your access system.
  • Feedback (*under development). After checkin guests can rate their experience and/or leave a review. This allows you to identify dissatisfied guests and take measures to avoid negative reviews in public forums.

Clock Kiosk

Clock Kiosk

 IF YOU LIKE THE IMPROVEMENTS, WE'LL APPRECIATE IT IF YOU TAKE A MINUTE TO LEAVE A SHORT REVIEW HERE.

Upsell Rates & Extra Services

With “Upsell Rates” you can organise a self-driving yet personalised yield management procedure to induce your clients to purchase higher priced rooms or packages.

Clock PMS - Upsell Rates in self service

Clock PMS - Upsell Rates list

Special Offers

The available upsell rates are displayed to the Guest in the Self Service Portal (prior to check-in or on self check-in) and Clock Kiosk(on self check-in). Receptionists can access applicable upsell rates in PMS as well.

The “Special Offers” list is uniquely calculated for each booking and consists of rates applicable to this booking only.

Guest can find all special offer details and check the upgrade price (the difference between the current booking price and each special offer) and select a Special Offer to upgrade into. Once the guest selects the desired offer, the booking is updated and the rate price is recalculated.

Use this feature with the guest mailer to send invitations to your guests and promote the special offers section in the self service portal.

Settings and Logic

Upsell Rate List.

Activate the feature and select the rates to be included in the “Upsell list”. You can use your standard rates or create a new set with discounted rates (standard or derived), or even occupancy adaptable rates. To setup the rate list go to “Settings - Self Service Settings - Upsell rates.

The suitable upsell rates will be available for choosing in the Self Service or in Clock Kiosk. A rate will be presented to the guest only if:

  • There are free rooms for the rate room type for the booking period
  • All restrictions of the rates are compatible with the booking attributes (arrival, stay, departure, adults, children, …) and all other restrictions permit the rate to be available (Close, Close for arrival, Min Free Rooms, Minimum days before arrival”, …)
  • The total price of the upsell rate is MORE than the price of the booking (extra services selected in WRS or posted manually are not calculated in booking price).

Upgrade Index

Sometimes automated upgrade suggestions may be inappropriate. For example, a special offer an APP may be sold at a lower price than the regular DBL, or HB sold at a lower price than standard BB. In such cases the system will annoyingly offer upgrade from APP to DBL, or from HB to BB, because of the price. The upgrade index is an additional parameter which helps avoid this.

  • You can set upsell index for each room type. Then only room types with higher index than that of the booking room type will be offered.
  • You can set upsell index for each rate. Then only rates with higher booking rate index will be offered.

Using Restrictions

  • You can use the “Minimum days before arrival” restriction to allow upsell to be available a certain number of days before arrival.
  • You can use the “Minimum free rooms” restriction to allow upgrades to be available only if there are a certain number of free rooms available.

Extra Services

Extra Services upsell is now available in Self Service portal as well. Extra Services set in WRS will be displayed in Self Service.

The Guest can select the services prior to arrival or during they stay. The service will be charged to the guest folio automatically. A ToDo will be created for review and potentinal service refusal. The services set as 'per day' will be charged for each day of rest of the guest stay. This way if the guest selects a Dinner (which is marked as 'per day' service) in the middle of his stay, charges will be posted only for remaining part of the stay.

Room Calendar

  • Events. We have added a section with events for a period. Additionally, a colour can be chosen for each event for clearer presentation. Open an event by just clicking it. You can show or hide the event section from the 'View' menu, as the system remembers your choice.
  • Group by Room Type or Location. We have added new grouping options - by room type or location. The grouping can be changed from the 'View' menu, as Clock PMS stores your selection.
  • Filter by Room Type. Use the new filter (located in the upper left part of the table) to see a certain room type only in the calendar.
  • Hide the repeating dates. From the 'View' menu, you can show or hide repeating date rows. Your choice is stored.

Clock PMS - room calendar

To-Do

We have been working on the improvement of To-Dos and their usability. Part of the changes are included in this update, and the development of others is in progress. The changes are:

  • An 'Assignment' option for To-Dos added. You can select the user to perform a task. This way this To-Do will appear in their To-Do list only.
  • Now you can mark To-Dos as'Completed'. Thus you have a history of the completed To-Dos – by whom and when they were completed. More new changes are coming up.

Clock PMS - room calendar

Other Improvements

  • Room Type KPI.To provide you with more accurate statistics by room types, we have improved the following reports:
    • Charge Segmentation Report – now when you run the report by room types, booking movements are also accounted for. So far, the report worked on the basis of the arrival room type, which led to to statistics deviations.
    • Occupancy and Charge Report – if you choose to filter by room type, now you'll see the following columns: Charges, ADR and RevPAR for the selected room type. The amount of charges is calculated based on the revenue groups of Rooms and Packages and corresponds to the amount from the Charge Segmentation Report run by room type. Please note that it is impossible to determine a room type for each charge of the revenue groups of Rooms and Packages. For example, you post charges of these groups directly to a group folio. These charges are not related to a booking. Then these charges cannot be referred to any room type. In other words, they will appear in the Charge Segmentation Report as segment '-'. In the Occupancy and Charges Report, these charges will be shown when the report is run without using the room type filter. And when the room type filter is selected, the report will not show them.
  • Deposit - new scheme.We have changed the way a deposit scheme is set up, expanding the number of options for deposit calculation with two new ones: fixed amount and selection of the revenue groups to be used for deposit calculation as percent or nights. The data of the existing deposit schemes has been transferred the new ones. Thus you don't need to do anything else.. The setup of a deposit is done the following way:
    • A deposit can contain a fixed and/or relative amount. You can use both (fixed + relative amount) or only one of them (fixed OR relative one).
    • In the 'Deposit fixed amount' field, enter the fixed amount if any.
    • A deposit relative amount can be based on a percentage of the booking amount and/or nights. If both are defined, the greater amount applies.
    • Booking amount – The booking amount depends on the revenue groups you have selected. This way the deposit can be calculated on the room charges only or any other combination of revenue groups.
    • Deposit percent - Percentage of the booking amount as defined above.
    • Deposit night count - How many nights to be counted as a deposit. The night amount is calculated as the average night price based on the booking amount (as defined above).
  • Send Invoices as links. Instead of PDF files, the issued folios and invoices can now be sent as links to clients. The link can be used to open the folio and print it. The subject and text of the emails with folio links can be changed from 'Languages and Texts' - "Folio/Invoice Translations" - 'Folio email subject' and 'Folio email text' fields. The new method for sending links is much more reliable than the generating and sending of PDF files, leading to more secure delivery of your documents to guests' emails.
  • Charge and POS transfers to Event folios. Now the option for transferring bills from POS to PMS or charges from one to another bill is also available for event folios. These folios can be found on transfer screen after selecting an event company.
  • Self Service – Room selection – a new setting: "Days before arrival". Use the new setting to determine how many days before arrival the room selection option is to be available to guests on the Self Service Portal.
  • Rounding of Derived Percent Rates. As the percent calculation may leads to amounts such as EUR 126.67, for example, we have added an option for the result rounding. This way amounts can have more commercial appearance. Depending on the currency used with the derived rates, select the most suitable rounding option: 0.1, 1, 10, 100 or 1000. You can find the new setting in Settings - Tax Settings - Derived percent rate rounding. It applies to all 'Derived percent rates' for your account.
  • Booking – a new company note option has been added. And when a company is selected, you can see the company-related note, if any.
  • ParityRate – when a booking with a supplement is received, a To-Do containing a description of the received supplements is created
  • YieldPlanet – with the import of bookings, a check is performed for overbooking and an email sent to the hotel

Interface to the Key Cards of the VisiOnline (Assa Abloy) system

We have developed an interface to the VisiOnline access system of Assa Abloy (VingCard).

Requirements:

  • VisiOnline with enabled "Hospitality Web API"
  • Clock IoT Device. A hardware device delivered by Clock connected to the network where VisiOnline is installed. One device is linked to one account.
  • Door keys Add-On enabled
  • API Add-on enabled.

Settings :

  • Log in to the account to be set up.
  • Clock IoT Device. After connecting the device to the network, choose Settings - Door keys settings - Clock IoT Devices. You need to find the identifier code of your device in the 'Unassigned IoT Devices' list. If you can't find it, wait for 2 minutes and click 'Refresh'. After the device's appearing on the list, click the 'Assign IoT device to account: ...' button next to it. The device will move to the 'Assigned Devices' list.
  • API user. Create a new API user (e.g. api_visionline) and grant this user access to the necessary accounts.
  • Interface setup. Select Settings - Door keys settings - Visionline (Assa Abloy / Vingcard).
    • Choose Active
    • Select the API user you have created
    • Fill in the IP address, on which the VisiOnline system is installed. Consult your system administrator, if necessary.
    • Enter the username and password to access the "Hospitality Web API" of VisiOnline. Consult an Assa Abloy specialist, if necessary.
    • Fill in the Key format (e.g. with TLCode), as you need to consult an Assa Abloy specialist if this is the proper format for your key cards.
    • Save
  • Other settings. Select Settings - Door keys settings
  • Fill in the "Default 'From' time for Door Keys" and "Default 'To' time for Door Keys" with the times to be available on the screen when issuing a key card.
  • Add one or more encoders to be used for key card issuing. For each device, enter such a name that lets you easily distinguish them, and in the "Identifier" field fill in the precise name of the encoder, as it appears on VisiOnline. Make sure the name is accurately entered, as this field is used for the mapping between the two systems. Consult an Assa Abloy specialist about the encoder name.

Use :

  • To issue a new key card, click 'Key' on the booking screen or the arrivals screen. The button is visible when a room is allocated to a booking.
  • The guest's name is automatically completed, however, it can be changed, if necessary.
  • Select the encoder you'll use to issue the key card. The encoder is stored and is offered by the system next time you issue a key card, but it can be changed.
  • If necessary, change the dates and times.
  • Click "Issue Original ..."
  • After receiving a signal from the encoder, insert the key card in it.
  • If you do not get a signal or error message, select "Retry Key Creation" to try again.

API

  • We have added statistics of the API calls in the system. This way you get a clear idea of the number and specifics of the API calls for each month. To view the statistics, choose 'Settings' - 'API Users' - 'API calls statistics'
  • We have introduced an option for separating the API calls of the individual users. Thus the call limit filter ( 5 calls per second ) can be applied to each user separately. The user ID is added before the id of the subscription and the account. You can find your 'User Base Api Url' and 'User Pms Api Url' by opening the Edit screen of the API user - Settings - API users - Edit - 'Api Endpoints' section. The API can be used with the existing URLs, too – you don't need to change anything.
  • We have added rate_restrictions object for each day to the rates_availabiliti endpoint

Fixes

  • ParityRate – the issue which could cause multiple repeating messages of the cancellation of a booking in the Inbox has been fixed.
  • On the folio screen, the amounts didn't update immediately after charge editing, if the folio contained a surcharge.
  • On the Events screen -> In Hotel / Expected Events , the Bookings column also counted the cancelled bookings
  • The issue which prevented the deletion of a virtual room or virtual room type has been fixed
  • The signature in the registration cards appeared too high and the printout didn't look good.
  • WRS – the title field appeared on the last page of the WRS, even though there were no titles entered
  • Gift Voucher Webshop - services are now sorted out by sort order

POS

  • The Inventory Items Report didn't filter the charges for a given period properly

Clock PMS / POS Update (21 Jun 2016)

Virtual rooms

We are introducing Virtual rooms. They allow defining rooms (units) which are made up of other rooms (units). We call these other rooms Component rooms. With the virtual rooms you can sell the same resources in different ways, diversify your products to better meet customer demand and increase your sales. The logic behind the virtual rooms will take care of all aspects of your availability. They have been designed to be used as regular rooms (units) in all modules of the system: Bookings, Rates (including occupancy adaptable rates), Event blocks, Web reservation system, Digital guest portal, Channel manager, Housekeeping, Reports, and so on.

Some examples of virtual rooms

  • Family rooms made up of two connected double rooms, which can be sold both as two separate double rooms and together, as one family room.
  • Hostel private rooms with four beds, which can be sold both as separate beds and as a room.
  • Two-floor villa, which can be sold as two separate floors or as a whole villa.
  • Quadruple apartment made up of adouble apartment and a double room, which can be sold together as well as separately.

How Virtual rooms work

  • When you define the virtual room types and rooms, they get their own capacity. It increases the capacity of the property like regular rooms would.
  • When a Virtual room type is booked, the system automatically (indirectly) books the respective number of rooms of the Component type. The Occupancy forecast shows the component room types, which are booked indirectly, in the total number of Bookings. They are also shown separately in the row called “From Virtual Room”, i.e. these are bookings resulting from a booked virtual type.
  • When a Component room type is booked separately, the occupancy only shows that if the availability of the component type is lower than what is needed for the virtual rooms. For example:
    • You have 6 DBL and 2 FAM rooms. Each FAM is made up of 2 DBL.
    • If you sell one DBL, the FAM availability will not change, because for the 2 FAM you need at least 4 DBL.
    • If you sell 3 or more DBL, the FAM availability will be reduced.
    • The reduction of the availability of virtual rooms (FAM) resulting from the sales of component ones (DBL) is shown in the row called “Constraint” in the Availability forecast.
  • When specific virtual rooms are booked, their component rooms are indirectly booked, too. These indirectly booked component rooms are shown in the Occupancy forecast, like the bookings of virtual room types, and in the Room calendar, where the indirect bookings are cross-hatched.
  • When specific component rooms are booked, the virtual room they make up is booked indirectly as well. The indirect bookings of virtual rooms are shown in section “Used as component” in the Occupancy forecast, and cross-hatched in the Room calendar.
  • When a virtual room is stopped for sale (OOS), its components are still available.
  • When a component room is stopped for sale (OOS), the virtual one that uses it is stopped as well.

Booking and OOS of Virtual and Component rooms.

  • Virtual room type blocks are reflected in two places in the Occupancy forecast: in section “Blocked” of the virtual type and in section “Blocked” of the component type, where they are marked as “From Virtual Room”.
  • Component room type blocks can be seen in section “Blocked” of the component room type and - if the available component rooms left are fewer than what are needed for the virtual ones, in section “Constraint” of the virtual type.

Set up

Virtual room types

Use the virtual room types if you have units made up of other units. First add the standard room types through the 'Add' button, then the virtual ones through the 'Add Virtual Room' button. Examples:

  • 2 connecting DBL rooms can be sold separately or as a FAM (family) room. DBL is a standard room type, FAM is a virtual one.
  • 4 beds in a single room can be sold separately or as a Private room. BED is a standard unit type, PRIVATE is a virtual one.
  • 2 floors of a villa can be sold separately or together, as a villa. The FLOOR is a standard unit type, VILLA is a virtual one.
  • Go to Settings - Room Type - Add Virtual Room
  • Enter a name for the virtual room type
  • Add a line for each room that makes up the virtual room type. Examples:
    • If a family room is made up of two DBL rooms, add two lines and select DBL for each of them.
    • If a private room is made up of four beds, add four lines and select BED for each of them.
    • If a four-bed apartment is made up of one DBL room and one two-bedded apartment (APP2), add two lines - one for DBL and one for APP2.
  • A virtual room type cannot be made of another virtual room. Only standard room types can be used as components.

Virtual rooms

When the virtual types are defined,

  • Go to Settings - Room - Add Virtual Room. Select the virtual type of your new virtual room.
  • Fill the fields as for a regular room.
  • In section “Components” select the component room for each row. The number of rows is defined in the virtual type settings.
    • One standard room can be used as part of only one virtual room. For example: if 101 (standard DBL room) is used as part of a virtual FAM room, 101 can't be used for any other virtual room.
    • Be careful! The components of a virtual room are defined only once, when it is created. After it has been saved, it cannot be changed. If you find an error in the room type or in its components, you can delete the virtual room or – if deleting is not allowed, remove the room from bookings.

Some side effects of using virtual rooms

  • The increased hotel capacity resulting from the added virtual rooms will change the occupancy ratio (%) and the RevPar.
  • The increased number of booked rooms will change the ADR and the % ratio of the occupancy.
  • Selling the same resources twice, once as virtual and again as components, may lead to increased risk of overbooking with OTAs.

Events and Meeting Rooms

Events: Offers and Templates.

Event: Calendar button.

Meeting Room Calendar: Associated Event.

  • Events: Offers and Templates. A new functionality allowing drawing and tracking event offers to clients. For optimal flexibility we have avoided any fixed structure. The offers look like a Word document, allowing you to input and format their contents to your needs. Saving an offer as a template will let you use it again. Offers for different events can be different and content can be added or changed freely. They can be emailed to clients. Each emailed offer is stored as a sort of 'event history'and can be accessed later for reference.
    • To draw an offer, open the Event and click Add in section Offers. Select a new blank offer or a template you have created earlier.
    • Subject – enter the name of the offer. The field is used as the subject for the email sent to the client.
    • Description for staff – the information in this field is for house use only and is not included in the email to the client.
    • Enter contact details or at least an email address. A special button lets you copy the contact details of the Company.
    • In section Content edit (if you are using a template) or enter the details of your offer. Use the rich text editor to format the text and any tables.
    • Save the offer.
    • To save the offer as a template and reuse it, click button "Create Template". Enter a name for the template and edit the contents if necessary.
    • To save the existing offer and send a new, edited version of it, use button “Copy”.
    • Email the offer with button 'Send'. The Event screen offers an archive of all sent emails and lets you view them.
  • New screen: “Info invoice”. We have added a new Event printout intended for your clients. It gives them information about the bookings of meeting room, the catering, and the charges for them. It also includes a grand total section to communicate the worth of the event clearly. To preview or print the new screen, select 'Preview' in the upper right corner of the Event screen.
  • A new detailed Function Sheet for each booking and/or catering event. The sheet is intended for house use by staff and includes the details needed for preparing the booking or the catering event. It can be printed for each individual booking/catering (Event – Booking/Catering list – the printer button) or for a list of them (booking search – option 'Details'. See below).
  • New search screen for meeting room bookings and catering events. You can search by Period, Company, Event, Booking status, and booked Meeting rooms. Additionally, the results can be displayed in summary or in detail. Selecting option 'Details' gives you a list of all bookings and catering events for the day or just for a specific event, as well as the details needed for the preparation of each room. To open the new screen, go to Event – Search Meeting Room Bookings.
  • Call up the Meeting Room calendar from the event.A new button in the Event opens the Meeting Room calendar. When it is used:
    • All new bookings created in the calendar will be automatically associated with the Event. This gives you a shortcut for checking the availability of meeting rooms and quickly book them for the specific Event.
    • The bookings associated with the Event stand out in a brighter colour. If you have a lot of bookings, you can easily identify those linked to a certain event.
    • The associated event is shown in the upper left part of the calendar.

WRS

  • "Ask for guests on first screen" setting. This new setting has been designed to meet the needs of Hostels, where clients book Beds as well as Rooms. The problem with such mixed types of sales is that guests often can't decide what they should enter for adults and children in the first screen of the WRS. Even if you are not running a hostel, you may still want to try this setting, as it may lead to better conversion of WRS bookings.
    • What does the new setting do? If you select 'No' for "Ask for guests on first screen", the first screen of the WRS will not require number of guests (adults and/or children). As a result, the products on the second page will not be filtered by number of guests and clients will seeall your products. If the product they select allows more than 1 guest (e.g. a room), they will be prompted to fill in a number of adults and/or children. If it allows 1 guest only, the product will be added to their basket without further prompts. Whether a product allows 1 or more guests depends on the max_adults / max_children restriction of the rate.
    • Where is the setting? Find it in menu 'WEB' – 'Settings – Web Reservation System'. To preserve the current functioning of the system, the setting is enabled by default. If necessary, change it and save.
  • New setting:"Hide the 'Free Rooms Left' label". As its name suggests, the setting hides the red label indicating the number of free rooms left, which appears on the second WRS page for each product with availability lower than 5. The default option is 'No', i.e. the label is shown.
  • New payment interface: "Adyen - Easy Encryption". The new interface allows credit card payments in the WRS and in the Self service portal without redirecting clients to external pages like Adyen Hosted Payment Page does. Instead, clients remain in the hotel website where they complete their payment. Apart from being more convenient, this option is said to increase the conversion ratio as well.
  • The parameters set on the first page do not change after switching the language. This way deep links and integrations with extra filters still work properly.

Bookings

  • Charge split.There is a new screen designed specially for quick splitting of charges when guests staying in the same room wish to split the bill.
    • Click Split Charges in the Rate and Folios section of the booking screen.

    • Add more folios through the 'Add Folio' button. For clarity, enter the guest name in the folio name field.
    • Split: Select the charges you need to split between the parties. Click 'Split the selected charges'. Select the folios where these charges will be paid. The charges will be split equally and transferred to the folios.
    • Transfer: Select one or more charges. Click 'Move the selected ones here' in the destination folio.
    • Select 'Open' to access the folio and issue an invoice or pay the folio.

Select charges

Select parties

The result

  • Transfer room charges to Company/Event. There is a new option in the booking designed to make the management of group bookings and folios easier. If you select "Transfer room charges to Company/Event" from the new booking screen, all charges will be transferred to the company/event folio automatically. Changes in the stay or the rate of the booking will change/add/delete charges there, too. If the company/event has no open folios, a new folio will be created. Please note that this function affects newly created charges only. It will not transfer charges created previously in the booking folio.

Reports

  • New report: Deposit Ledger. The new report gives information about deposit folios for a selected period. It includes each deposit folio, its start balance (unused deposit at the start of the period), Payments (received in the selected period), used amounts (in the period), End balance (unused deposit amount at the end of the selected period).
  • Bednights Report can now be run with a breakdown of data by days, weeks and months as well, beside the existing summary option.
  • Housekeeping report: added booking arrival and departure times.

Security and Users

  • Network security.Added two new functions for better system and data protection: Trusted Networks and Blacklist Networks.
    • Blacklist Networks. Use this function for instant unconditional denial of access to your subscription from a certain IP address or network. The restriction affects all accounts in the subscription. Use the function with extreme caution to avoid restricting your own access. If this happens, the subscription owner can disable the “Blacklist Networks” rules through link 'I have lost my password' in the login screen.
      To change the network blacklist, go to "Settings" - "Network Security". Add IP addresses or networks in CIDR format (please consult your network administrator). Select “Enable” to activate the function.
    • Trusted Networks. This function allows dividing users in two groups: users who can access the system from anywhere and users who can only access the system from a specified list of IP addresses and networks, e.g. your hotel network. By default each new user is authorized to use Trusted Networks only.
      • In the user editing screen for “Network” select “Unrestricted” to allow access from anywhere, or “Trusted only” to allow access from IP addresses and networks listed as Trusted Networks only.
      • Go to 'Settings' - 'Network Security'. Enter the Trusted Networks list. Use CIDR format for the IP addresses and networks (please, consult your network administrator). Click 'Enable' to activate the function.
  • User groups.These have been added for easier user management. They let you edit the rights of more than one user at the same time instead of having to do it user by user. Here is how:
    • Create a Group from 'Settings' – 'User groups'. For example, user group “Reception”, “Housekeeping”, “Marketing”, and so on.
    • Select the rights of the group. Please note that the User group affects just the rights, not the access to accounts.
    • From the user editing screen select the group to which the it belongs. The user then has the rights granted to the group. This is indicated with a special icon.

    • Changes in the group automatically affect all users in it.
    • Important! User rights granted to a user directly override those granted to the group the same belongs to. For example, if the user “Smith” has been given right “Settings:Update”, he will have the right to decide whether the user group “Smith” belongs to has it or not.
  • Access to subscription Serial Number. The serial number required for registering new devices/computers in the system is now only accessible to users with access right "Users: Create and Edit". The serial number itself can still be found in the same place, in the navigation, under the help menu icon - “"What is my serial number?".
  • Access log. There is a new report giving information about who, when and from where has accessed the system. It also includes data about failed login attempts and the logouts. The information in the report starts from the date of this update, 21 June 2016. Find the report in section 'PCI DSS' in 'Other' - 'Report' - 'Access Log'
  • Log out from all devices. When you log out of the system, you automatically log out from all devices.

CRS - Occupancy Forecast

The CRS now has a new screen offering summary occupancy forecast for all properties. It shows the available rooms day by day for a selected period. It also provides flexible filter options: location, property or room type by part of its name. Beside the free rooms, it also shows your descriptions, pictures or other information regarding each room type.

Profiles

  • Level. A new field added to the profiles. It can be used in customer loyalty programmes. Information about the level of each profile can be seen when you select the profile in the booking or in the new profile search.
  • Advanced Search and Export. A new option for profile search and export. You can find the profiles which have booked at one or more properties in a selected period of time and export them in a .csv file. The new field, Level, is also added as a filter. This new search and export can be used to create mailing lists for your mailing campaigns.

Self Service

  • The “Check your bill” option, which allows checking and paying hotel bills, can now be hidden with a special setting.
  • When the first registration card is filled, the system automatically suggest the details entered for the booking.
  • The first page of the digital guest portal now shows the number of adults and children in the booking. This way any errors made while booking through the WRS or an OTA will be noticed sooner.
  • Guests now see the number of their assigned room only in two cases: when option “Select room” is allowed and when the WRS allows booking room numbers.

Other Improvements

  • Folios - Payment Term Days. A new field added to the folios. It indicates the date by which the folio must be paid. The date is calculated using the information in field 'Payment term – days', which specifies how many days after closing it, the folio must be paid. In other words, it defines the allowed payment delay after the date of the invoice. Field 'Payment term – days' can be set in three levels:
    • 'Tax Settings' - 'Payment term – days': this is the default value and it affects all folios, except those which have explicitly been set differently.
    • Company - 'Payment term – days': this is the default value for the invoices of the specific company. It overrides the setting above.
    • Folio - 'Payment term - days' : this is the default setting for the specific folio and it overrides the two other settings above.
  • Report Accounts Receivable has been modified to take into account the newly added Payment Term Date field. If you do not specify filter "Minimum delay days", you will see all outstanding invoices, including those that are not overdue, as their “Delay days' field is blank. To see just the overdue invoices, enter a number in filter, e.g. zero (0).
  • Image Library. Now you can upload Pictures for general purposes. They can be used in Guest emails, in custom booking confirmations, in Folios and Registration cards, in Event offers, and in the staff descriptions of room types and rates in the CRS. To upload a picture, go to 'Settings' - 'Logos / Image Library' - 'Add Image'. You can copy the URL of each uploaded picture with button 'Get Image URL'. The screen that opens gives you both the URL and the HTML code for the picture itself.
  • Credit cards. A new setting defining whether the credit card CSV code is required and displayed. If your credit card POS terminal does not require CSV, you must not collect or store CSV information. The setting can be found in Settings - Credit Card - CSV required.
  • Time zone for the API. A new setting allows selecting time zone for the API, UTC or the account local time zone. Find it in Settings - API users - 'API time zone'. However, the setting is available to existing accounts only. All new accounts will use the account time zone.
  • Added history for the changes of currency exchange rates. For each currency there is a button 'History'.
  • Booking import from csv:
    • Added option for automatic creating of company. This way you don't need to create a company to import bookings.
    • You can no longer import checked out bookings.

Fixes

  • Guest Ledger: the balance did not take into account the correction folios.
  • Rate Control Report: the company was not displayed.
  • Edit booking: the company/event field and buttons sometimes were too large and hid other elements on the screen.
  • The Control Event report did not work in some cases.
  • WRS: the system returned an error when you select online payment with no deposit defined.
  • ParityRate/YieldPlanet: added a second check for new bookings to solve the issue of booking that were not imported.
  • ParityRate: field 'Active from' changed on saving the channel settings.

POS

  • The bills are now printed with identical items grouped in summary rows.
  • Fixed a bug which deactivated the buttons in the closing screen after signing the bill and selecting a room.

Clock PMS Update (21 Apr 2016)

Events: Meeting Rooms, Catering and Event Folios

We have very seriously been working on a package of new features. It provides solutions to main issues and tasks related to the organisation of events at hotels and the communication with clients for that matter.

With this update, we have released the first batch of features to be tested: Meeting Rooms, Meeting Room Calendar, Catering and Event folios. In addition, we have been working on event offers and their sending via email, as well as various printouts, e.g. Function Sheet.

Here are more details of the features in this update:

Meeting Room Bookings and Meeting Room Calendar

Events: Meeting Room Bookings Calendar

  • Use the calendar to easily see the availability of any meeting room. For your convenience, the system lets you view up to 31 days at a time and find the most suitable available time for your client.
  • You can add a description to any of your meeting rooms to be visible directly in the calendar. The description is to be in the rich text format. Enter all the information of the meeting room – possible seating arrangements, equipment and any other details leading to more sales. To set up your meeting rooms, go to: 'Other' - 'Settings' - 'Meeting Room'.
  • In the Calendar you can see which of the bookings areconfirmed, pending or expired. Easily cancel a pending booking with expired confirmation period. This way you can make the meeting room available for a new booking.
  • You can create new bookings directly from the Calendar after choosing the respective time.
  • Add as many meeting room bookings to a new or existing event as you need and easily organize even big and complex events.
  • You can add the related services to any booking, e.g. a flip chart, projector, microphone, etc. The booking can also contain an event description in a rich text format to emphasize the important moments of the event agenda. The system supports a separate event description for the purposes of the staff and the internal organisation.
  • To organise the tasks related to a booking, you can add To-Dos to any individual booking.

Events: Meeting Room Description

Staff Description for each meeting room

Catering

  • To any event, you can add multiple catering times and locations.
  • Apart from the catering times and locations, you can also charge the related menus. There are two charge options – to have charges for each catering menu item or one charge for the whole menu, and the menu items to be added as a detailed catering description. If the catering requires the booking of a meeting room or venue, you can do so through the meeting room booking feature.
  • To ease the catering organization, use To-Dos for each catering time and location.

Folio, Invoice and Deposit

Event Folio - grouped by source

Event Folio (proforma invoice) or Invoice

  • Use event folios to organise the whole process of accepting deposits, issuing proforma and final invoices and tracking accounts receivable.
  • You can operate with event folios the same way you do with booking and company folios, so you don't need to learn anything new.
  • All event charges: coming from Meeting Room Bookings (rent, equipment and services), Catering (food, beverages and services), and the Event itself (other services, discounts, etc.) are conveniently gathered in a folio and grouped by their source. As a result, you can see all charges from all bookings and catering locations and times.

Other Changes

The Event screen has been entirely reorganized and now its sections are arranged in a clearer way.

  • The Block screen has been moved to a new screen. To access it, click the 'Edit button next to the Blocks section.
  • The Blocks now contains brief information on the blocked rooms.
  • A new list of the event bookings has been added. Select "Show Bookings" in the "Bookings" section to see them.
  • Now you can create bookings related to the event from its screen. Select "New Booking" in the "Bookings" section and then – the block, if any.

Events - new screen

WRS

We have added a new layout to the product page of the WRS. The new layout is clearer and focused on the room images.

Combine the new layout with the existing design settings ('Theme', 'Left/Right column proportion', 'Custom CSS') to create the best appearance for you WRS.

The layout of the product page can be changed from 'Other' - 'Settings' - 'Web Reservation System' - 'Layout' in the 'Product Page Layout' section. The new layout is 'Edges'.

WRS: layout edges / simplex

Layout: Edges, Theme: Simplex, Left/Right column proportion: 5/7

WRS: layout edges / darkly

Layout: Edges, Theme: Darkly, Left/Right column proportion: 5/7

CRS

  • Guarantee policy button has been added to the Rate and Availability screen. This way you can easily check the conditions for any of the products.
  • description option has been added toHotels, Rates, Room Types and Guarantee Policies. Use it to enter descriptions helping your employees with detailed information on your products. Each hotel, room type, rate or guarantee policy can have a description. This way the employees at the central office don't need to remember the specifics of each product, but can easily check the details they need. These descriptions are directly added from the Central Reservation System:
    • Open the Rate and Availability screen. Select a hotel or destination and start the search.
    • Click the description icon and enter the description for each hotel, room type, rate and guarantee policy. Save. The icon changes when there is a description entered.

CRS - hotel description

Example hotel description in the CRS

Security

Continuing striving to make Clock PMS the most secure property management system on the market, here are the new improvements in this direction.

Automatic User Locking

The new feature protects your accounts better against hacking attempts aimed at finding your password through guessing or the so-called brute force attacks.

After 6 unsuccessful login attempts, the user account is automatically locked for a period of 30 minutes. A notification email is also sent with the following subject: "[CLOCK PMS SECURITY] Too many login errors detected. The user is locked".

If you happen to lock your account, you can contact your system administrator to unlock it or you can wait for the user account to unlock automatically. The feature is also applicable to the API access.

Multi-Factor Authentication (MFA)

This practice considerably improves your account security. The MFA principle is the following: to access your account, you'll need to combine what you know (username and password) and what you possess (smartphone and one-time password generated on it).

MFA in CLock PMS

How it works:

  • After activating this option for your account, apart from the password, you'll need to enter one more code (6 digits) to access your account.
  • You can get this code from a special app installed on your smartphone (Google Authenticator).
  • What you receive is a one-time code, i.e. each time it is different making its guessing impossible.
  • The combination of a password and one-time code makes the access impossible without the presence of both of them, i.e. even if your smartphone gets into someone else's hands, it doesn't provide access to your account, because the password is missing. And in the other case, if someone learns your access password, it won't be enough, because only your smartphone can generate the required additional one-time code.

To activate the MFA access for your user:

  • Log in to the system.
  • Select 'Other' - 'Settings' - 'Users'
  • Choose 'Activate MFA' from the upper part of the screen.
  • Follow the instructions

.

To remove the MFA access:

  • The MFA access of a user can be removed, if you have the 'User Management' right granted.
  • Access the list of users and select 'Remove MFA' from the drop-down menu next to the respective user.

The Google Authenticator app is widely used for these purposes, even with the major online services: Facebook, Google, Amazon, Saleforse, etc. Please pay attention to the fact that the use of Google Authenticator is in NO WAY connected to your google account. Google Authenticator is a universal mobile app for generating one-time passwords.

Revenue system and Reports

  • New report - Guest Ledger. The new report provides a historical overview of the accumulated charges and payments to guest folios. For a given period, you can see which folios were unbalanced, what the final balance between the accumulated charges and payments was at the end of the selected period. Also you can check the folio status at the end of this period – open or closed. The 'Guest Ledger' data is directly comparable to the turnovers in the Trial Balance Report, as well as to the'Charge Summary Report', 'Charge Summary D-M-Y Report', 'Charges Segmentation Report', 'Payments Report' and 'Charge, Tax and Payment Records'.
  • Trial Balance. The report can now be generated with all tax modes.
  • Tax Modes rounding the total and Gross/Tax/Net fields. All charge fields (Gross, Tax and Net) contain a value regardless of the the used tax mode. Before this change, the Gross and Tax fields didn't contain any value with the 'Tax Not included in prices, rounding - total', and the Net field didn't contain any value with the other tax mode - 'Tax included in prices, rounding on Total'.
  • Tax Modes rounding the total and Rounding Differences. The specifics of these two tax modes with total rounding is that the final tax amount is calculated on the basis of the folio amounts (folio total) and respectively it can be changed until the folio is closed. Now the charges also have all the values individually calculated for each for them. As a result of the different rounding modes, a difference might occur between the sum of the taxes calculated for each charge and the total folio tax amount calculated for the whole tax. With the new change, this difference is now taken into account by the financial system and the Clock PMS reports. It is added to the charge reports through the 'Tax Rounding Difference' revenue group. It is calculated on the folio closing date.

Other improvements

  • The stopped rates are considered archived. Until now it was possible to add a STOP restriction to the rate to stop the rate as a whole. However, it still appeared in lists, search results, etc., though it couldn't be used. After the change made by us, these rates are considered archived and don't appear in the lists. The stopped rates can be seen, if you select the "Show the stopped ones too" when running a rate search. Instead of stopping all the dates of a rate, we strongly recommend archiving rates when they are temporarily stopped or no long used. To do so, select 'Add STOP' from the drop-down menu next to each rate when searching for rates. This way your WRS will be more responsive and the searches - faster.
  • When you change the starting date of a period on the "Set Multiple days" screen, the end date of the period will automatically change too.
  • When transferring charges from a booking linked to a company, this company is now suggested as a quick transfer option .
  • "Remove Room" and "Change Room Type"– two new features to be used with the booking lists. These features can be applied to a single booking or multiple ones.
    • "Remove Room" removes the allocated room, as well as the movements between rooms, if any. If the booking's "Disable Room Change" check-box is selected, you won't be able to use the Remove Room option. Untick the check-box to remove the allocated room.
    • "Change Room Type" changes the room type for the selected booking. If the type of the room allocated for a booking differs from the newly set one, the allocated room will be automatically removed.
  • Self Service Portal – the options for checking, paying and downloading folios and invoices are now accessible for cancelled bookings. This way you can process cancellation fees too.
  • A new option for segmenting charges by Guarantee status has been added to the Charge Segmentation Report and the Bednights Report
  • ADR (Average Daily Rate) no longer takes into account the created blocks, because room charges are very rarely posted for these blocks. The ADR formula now takes into account the bookings only.
  • Self Service Portal – new settings for switching on/off the 'Request change of Period' and 'Request change of Room type' options
  • The credit card brand is automatically determined when it is missing in the credit card details of the bookings imported from channel managers.
  • New "Booking: Create Shared Room" right. Through this new right you can set which users to be able to create bookings sharing a room for one and the same period.

Fixes

  • Booking meals are now sorted by their meal order.
  • Now rate tags in derived and occupancy adaptable rates can be deleted.
  • The bug with the deep links to the WRS occurring when they contain both room type and room number filters has been fixed. The link generator has been fixed and it no longer allows the creation of such links.
  • The bug with the quantities set in charge templates not appearing as the quantity of the posted charge has been fixed.
  • The Room Calendar bug in some cells leading to the miscalculation of the available dates till the next booking .
  • Booking import from a channel manager - sometimes day prices weren't arranged properly, though the total amount was correct.

API

  • The new POST method has been added to the existing endpoint for rooms. Through this method, you or an external system can update the room status and change it to cleaned or dirty. The housekeeping warnings can also be updated through this method.

Clock PMS Update (9 Mar 2016)

CRS / C-WRS

C-WRS (Central Web Reservation System)

We have added new customisation and design features to our central reservation system, as well as instruments to help your clients easily find the hotel they are looking for.

Clock PMS Central Web Reservation System

  • Property type, Facilities and Star Rating. With these new filters, it is easier than ever for your clients to search for and view your hotels. If your chain has a greater number of hotels, especially in one destination, this might be a problem when presenting them all to your potential guests. The long list of hotels can be confusing and make it hard to make a choice. Therefore we have added an option for grouping hotels by three indicators, so your clients can have clearer results
    • Property type – you can enter the type of your property, e.g. Hotel, villa, apartment or bungalow. To do so, go to Settings - Account info - CRS - Property type. The web system enables clients to search by multiple property types.
    • Star Rating – enter the star category of each hotel in Settings - Account info - CRS - Star rating. In the web system, once again clients have the option to search by multiple star categories.
    • Facilities – you can enter a list of the facilities you offer and clients expect to find in your hotel, e.g. Free Wi-Fi, Pool, Restaurant, Car Park, etc. This can be done in: Settings - Account info - CRS - Facilities, as each of them is to be entered in a separate row. In the web system, multiple facilities can be chosen. In contrast to the other filters, the search results will only show the properties meeting all the criteria set.
    • If you fill in a field for one hotel at least, the related filter will appear automatically in your C-WRS.
    • The list of search criteria will be automatically completed with the entered information of property types, facilities and star rating for all your hotels. If you don't like the automatic list for some reason, you can stop its automatic generation and create it manually. This way you can arrange the list the way you need it to appear. To do so, select CRS (from the All Accounts screen) - Settings (from the navigation bar). In the 'Customize search fields' section, enter your text for the respective fields.
    • You can also change the names of the search filter lists (Property type, Star Rating and Facilities). This way these filters can be used for other purposes, too. For example, change the name of the Property type list to 'Apartment Size' or something else.
  • Logo or header image – use the new setting to customise the view of your C-WRS. Upload an image to appear at the beginning of each page. You can use it as your logo or a design element of your reservation system. To do so, from the CRS, click the settings gear icon and upload an image from the 'Header image' field. Save.
  • First page background image. Upload a large size image to use it as a background image on the first page. From the CRS, click the settings gear icon and upload the image from the 'Background image' field. Save.
  • Header and Footer text. Enter the header text for each page (e.g. the name of your hotel chain), as well as the footer (e.g. Contact info). To do so, access any of your hotels and go to Settings - Languages and Texts - C-WRS Header/Footer/Other. Enter the 'WRS page title' and 'WRS page footer'.
  • We have improved the C-WRS design and fixed some issues.

Central Rate & Availability

To meet the needs of the central booking offices of hotel chains even better, we have started the development of a new CRS module. Apart from providing quick access to any hotel of the chain, it also has a Rate&Availability screen for work with multiple hotels simultaneously. Even if you have no central booking office, the new instruments will help you boost cross sales.

The new CRS Rate&Availability screen features:

  • Search for hotels by location. All your hotels can easily be found by multiple location tags. For example, you can set the following tags for your hotel: Paris, France, Europe and it will appear as a result of wider or narrower searches.
  • Choosing a specific hotel. You can select a particular hotel from the list of results of the given search.
  • Filter the desired rates through the 'Rate Tag'. Use different rate tags to quickly group and find the rates in all your hotels. For example, you can create the following rate groups: Golf_package, SPA_package, Promo, Long_stay, etc. This way you will be able to easily see all SPA packages in all your hotels in a certain destination.
  • A company and related rates. Selecting a company, the filtered search results will also include the company-related rates.
  • Event. Choosing an Event, you will see information on the remaining block of rooms for the event next to each room type.
  • Availability and prices. Take advantage of the compact availability view - by room types, available rates and amount of room charges for the period selected. Use the button next to each rate to make a booking, as the period data, number of adults and children, the room type and rate will be automatically filled in. Enter the guest's contact info and the booking is ready.

A link to to the new CRS (Central Reservation System) module can be found on the hotel selection screen. To access this screen, click the Eject button or the All accounts link in the Other dropdown menu. The CRS module is a paid add-on. Contact our support team to ask for a trial or enquire about the price.

Clock PMS CRS - Central Reservation System

Attachments

We have added an option for sharing and archiving files in your organisation. Through the new feature, you can upload multiple attachments (up to 2 MB each) to any booking, company or event. Use attachments to store enquiries from your guests, contracts, offers or any other documents.

The files attached are stored in the Amazon cloud providing exceptionally high level of information security.

To add an attachment:

  • Booking. Open a booking. In the Attachments section, click Upload. Select a file. Enter a description, if you wish. Save. To download the file – click its link. To delete it – click the Delete button.
  • Companies. Open a company screen. The rest of operations are similar to the ones for a booking.
  • Event. Open an event screen. The rest of operations are similar to the ones for a booking.

Profiles

Clock PMS supports guest profiles automatically, using the guest email as identifier. The profiles generated automatically are auto updated with each new contact detail entered for a booking. This is an easy way to build profile database without unnecessary complications.

The automatic update, however, is not always convenient. Now you can create and/or edit profiles manually, and also add a profile note. Once entered manually, the guest details are no longer updated automatically. Since it has to be done manually, we have made the procedure easy and convenient.

We have made some improvements to the profile features, so that the work with the manually created or edited profiles is much more convenient.

  • On the booking edit screen, we have added a quick access button (a pencil icon next to the guest email field:

    to edit/save a profile.

  • When changing or saving guest profile data, the system also shows how many related expected or checked-in bookings there are. By default, it updates these bookings with the data you have edited in the profile. This automatic update can be stopped by unticking the checkbox in the lower part of the profile edit screen.
  • When automatically creating a new profile based on the booking info, the data entered in the booking is automatically transferred to the new profile screen to spare you the entering of the same information twice.

  • The entered or edited data on a profile screen is also used for updating the booking information.

Here is an example how it works:

  • You create a booking
  • Search for the guest by email, but you don't find any match
  • Click the button to edit/save a new profile (the pencil icon next to the the guest email field)
  • Enter the rest of the guest details in the new profile and save it

More:

  • The profile screen, which can be accessed from the booking screen now shows information on the bookings from all hotels in your chain.
  • Profiles can be viewed and edited, if you have the following right granted: "Access: basic"

Reports

We have added two new reports.

Trial Balance. The report tracks the balance of charges (debit) against payments (credit). It can be run for a certain period and provides information on:

  • Opening balance at the beginning of the period.
  • Summarised turnover (debit and credit) by items (revenue groups or payment types) for the period.
  • Closing balance at the end of the period.
  • Note: The report is based on the chronological entries of charges and payments and it does not change for previous periods.

Charge, Tax and Payment Records. A new detailed report for a certain period, summarising all information in one place regarding each charge (net value), its tax (presented as a separate entry), as well as each payment. The report supports a standard CSV export and is suitable for exporting information to accounting systems.

YieldPlanet

We have integrated a new channel manager to Clock PMS: YieldPlanet. The new integrated channel manager expands the portfolio of supported channels, preserving the same model of management of OTA channels.

The channel manager has four main features:

  • Availability update in OTA channels
  • Update of prices and restrictions in OTA channels
  • Download of bookings created in OTA channels
  • Error control

Availability

The update process is fully automated and doesn't require user intervention. The integrated channel manager lets you apply the desired availability management strategy, maintaining the balance between maximum sold rooms and the risk of overbooking.

Here are the possible strategies:

  • Automatic upload of all available hotel rooms. All availability elements are taken into account: bookings, OOS rooms, blocks and their expiry dates, availability adjustments, etc. In case of changes, Clock PMS uploads the updated availability to the channel manager automatically. Then the information is sent to all OTA channels.

    This strategy aims at maximising sales via all channels. In this case, the risk of overbooking is highest, as all available rooms can be booked through all channels at the same time.

  • Max rooms for each room type. Set a maximum number of rooms per room type that can be submitted for sale by OTAs. When these rooms are sold, new ones will be submitted to restore the set maximum.

    This strategy limits the risk of overbooking by reducing the number of rooms sold at a time.

  • Allotment for each OTA channel. Enter each of the OTA channel allotments as individual events or blocks for the respective company (OTA). The blocks will reduce the total number of available rooms.
    Then, the rooms sent through the channel manager will never exceed your actual availability and you can fulfil your allotment commitments to OTA channels without overbooking.

    Here is how it works:
    • The free rooms exceeding the OTA allotments will be sold through all channels.
    • When the only free rooms are those blocked for OTA allotments, sales will stop through all channels without allotments.
    • Sales through channels with allotments will continue until all blocked rooms are sold.

Prices and Restrictions

Clock PMS tracks changes to the prices and if there are such ones, it automatically updates the channel manager which applies these changes to all channels.

The integrated channel manager enables you to manage the prices in all channels through the powerful rate system of Clock PMS.

The Clock PMS rate system also provides you with great flexibility and options to apply your Yield Management strategies and maximise your ADR:

  • Seasons, weekend prices and day prices. You can define prices in detail as per your pricing policy.
  • Derived rates. Easily use a rate as the basis for another one. Just add or subtract a certain amount or % to or from the base rate. This option considerably reduces the number of rates you need to manage.
  • Occupancy Adaptable Rates. These rates can automatically change price levels depending on the hotel occupancy for the specific room type. This way you can apply a very complex yield management policy increasing prices with the increase in the hotel occupancy without even lifting a finger.
  • Rate Restrictions. Channel managers usually maintain a limited number of rate restrictions (STOP, Closed for arrival, Min stay). The integration of a channel manager with the Clock PMS rates adds a few more restrictions to the list: Active from date, Active to date, Min days before arrival, Max days before arrival, Max free rooms, Min free rooms.
  • Different rates for each channel or one rate for all channels. You can choose to easily manage all channels with one rate or have different prices for different channels (or at least for the more important ones only).

Download of Bookings

The integrated channel manager of Clock PMS automatically tracks, downloads and imports new bookings.

Here are the import features:

  • Automatic recognition of new bookings, cancellations and booking updates and implementation of a suitable operation. You can track the information on all bookings, cancellations or booking updates in a special Inbox.
  • Creation of To-Dos for each operation to be informed of each action. You can easily check the progress of each operation in the booking change log.
  • Detection of update conflicts.In case you haven't edited a booking, the automatic update checks if there is a conflict between your changes and the information coming from the channel. In case of conflict, the system notifies you and requires your intervention to solve it, and if not, the changes are automatically imported. Here is an example of a conflict:
    • Initially, the booking is imported for a DBL room type
    • You edit it to DBL++
    • The channel updates it to become for an APP room type.
    • In this case the system detects the conflict and notifies you with a special To-Do. You can edit the booking room type, e.g. to APP room type and import the rest of the changes automatically.
  • Creation of bookings having prices coming from the channel (through the use of the manual price feature).
  • Detection of missing data or incorrect mappings. For example, you receive a booking for APP4 room type, but you don't have the necessary mapping entered to import the booking. The system detects the missing setting and informs you with a To-Do. After fixing the problem, you can import the booking successfully.
  • Automatic Room Number Allocation. For the properties requiring bookings to come with initially allocated rooms, the system offers you a setting to use this option or not.
  • Automatic recognition of profiles. When channels submit the real guest's email, the system finds if there is a match. If so, the booking is linked to the matching profile automatically. This way you will know if this guest has stayed at your hotel (or at any other hotel in your chain) before.
  • Processing various taxes. If you receive different types of prices from the different channels, with the tax included or not, this can be reflected in the settings for each channel.
  • Adding marketing information to each booking. You can set the marketing channel and source for each OTA channel
  • Sending special pre-arrival emails. You can create special emails to be sent to OTA guests. For more information, see the Guest Mailer feature.
  • Confirmation, Self Service Portal, Kiosk, etc. All features of the system are accessible for the bookings imported.
  • PCI DSS compliant. The integrated channel manager processes credit card data in compliance with the strict requirements of the PCI DSS standard.

Error Control

In any operation involving a price or availability change, there is a possibility for the respective OTA channel not to accept the change. The reasons for that can be various, but the most common ones are:

  • Wrong rate or room codes submitted due to incorrect mappings or non-existing products.
  • Violated contract terms – most often these are agreed allotments, minimum and maximum price limits, etc.
  • Incorrect setup of access – user names and passwords

Whatever the channel communication mistakes are, users should be able to check them, as well as the channel manager status. To that end, the integrated channel manager offers the following options:

  • Channel manager communication status
  • Full log of updates and prices with options to search by period of change submitted or date updated. There is a product filter, too.
  • Full log of XMLs sent for thorough investigation.
  • Full log of XMLs received in relation to the import of bookings, with all the originally sent data.

Adyen

We have added an online payment interface to a new payment operator - Adyen. Adyen operates on a global scale with offices all over the world. It offers a wide range of payment instruments, combining payments by credit card, on-line banking payments and other specific regional payment methods. As a result, you can provide your clients with the most convenient payment methods for them.

The interface to Adyen is Hosted Payment Page based and therefore there are no PCI DSS requirements to the hotel.

Here are some payment methods supported by Adyen:

  • Visa, V-PAY, MasterCard, Maestro, American Express, Diners Club, Discover, JCB, CUP - Expresspay, UPOP, Western Union, Bitpay, PayPal, Neteller, Boku, UATP, Carte Bancaire, BanContact/Mr. Cash, Moneta, Qiwi, WebMoney, Argencard, Cabal, MercadoPago, Dineromail, Oxxo, Alipay, TenPay, Doku Wallet and more
  • SEPA Direct Debit, SOFORT Überweisung, Giropay, Ideal, Trustly, Open Invoice, Finnish e-Banking, MultiBanco, PayShop, Safetypay, Polish eBanking, Mandiri Clickpay, CashU, POLi, Bank Transfer and more

For the full list of payment instruments, including the ones specific for your region, please contact Adyen.

The payment interface has been added to all points where your guests can pay:Web Reservation System, Web Voucher shop, Self Service Booking Guarantee/Check-out, Kiosk Check-in/Check-out.

More information on the activation and setup of your Adyen HPP (hosted payment page) payment interface can found here: Adyen Setup.

Users

Constantly striving through Clock PMS to offer the highest class of of security and PCI DSS compliance, we have made some changes to the structure of users:

  • API Users. For the needs of the API, we have introduced a new type of users – API users. Now the API can be used by API users only. They cannot log in to the system as regular users. This division of users gives a clearer idea of the operations performed by each user or external system. All current users with a generated API key are migrated as API users. The setup of the API users is similar to the one of the regular users, but it is done in Settings – API Users. Instead of a password, an API key is generated for accessing the API.
  • System Users. We have changed the activation procedures for the WRS, Self Service Portal, Gift Voucher Webshop, Web Table Booking System, ParityRate. They no longer require you to create a user. This facilitates the settings. And you can easily see if a operation has been performed by the system or an actual user. In the logs, the system users have the '~' prefix before their names ( ~web, ~self_service, etc.) and the regular and API users don't. To enhance security, you can deactivate the users created for this purpose.
  • Activation of deactivated users. Now it is possible to activate a deactivated user . To do so, access the user's edit screen and press the 'Reactivate' button.

Other improvements and changes

  • Self Service Portal– a new feature – PIN change. Your guests can change their PIN for the Self Service Portal with one being easier to remember, for example.
  • Authorize.net – a new setting has been added, so that your clients can know if their credit card type is supported without being necessary to enter their credit card details.
  • WRS – Additional services – it is no longer forbidden to enter 0 in the quantity field. When 0 is entered in the field, no service charge is posted.
  • New subscription - "Demo data" checkbox. When creating a new subscription, you can choose whether to have it with demo data or not. This way you can start a completely blank subscription.
  • API add-on. In order to use the API, you need to contact the Clock PMS support team and request the API add-on activation.
  • To-Do – deletion and editing – now you need to have the "PMS - Access: basic" right granted
  • Now you can also use the browser spell checker in the rich text editors (Guest Mailer, Mail Templates, etc.)

Fixes

  • Blocks are no longer included in the occupancy data for previous periods which used to distort the occupancy figures.
  • Occupancy and Charges D-M-Y Report – the bug with the doubling of figures has been fixed.
  • Channel manager – it is no longer needed to enter your password when editing the channel manager settings.
  • Self Service Portal – background image and theme are now shown on the login screen.
  • Self Service Portal - Guarantee – now you can guarantee by credit card if no deposit is defined.
  • The right/control event 'Booking: Add or delete past nights' now works with new bookings, too.
  • When a To-Do is deleted on the home screen, this To-Do is no longer shown on the booking screen.
  • Custom confirmations – no more problems with the visualization of the location (map) in certain situations.
  • Advanced Search – the amount columns no longer include amounts from deposit folios.
  • Advanced translations for a subscription can now be edited by other users, not only by the subscription owner.
  • Gift Voucher Webshop – in case of wrong email when paying through Authorize.net, now there is a clear error message.
  • Channel Managers – in case of a conflict when editing a booking, now there is a clear error message.

API

  • A new API for updating rate prices. The goal of the API is to enable the integration of external revenue management and rate comparison systems with Clock PMS. The updated rate prices can be used for reference or comparison purposes or for actual sales.
  • pms_api - product_search – now there are period validation and clear error messages in case of a wrong period.

Clock POS update (9 Mar 2016)

  • Bill ownership. We have added features for the restaurants of the bill-owner organization type. In this bill organisation, a bill belongs to the user having created it. No one else can post charges or close it. The following features are available for this type of organization:
    • New 'Work with Other Users' Bills' right. The new right lets the managers having it to work with the bills of other users, as well as to change a bill owner. The users not having this right granted cannot post charges, pay, close or transfer a bill of another user.
    • New 'Change Owner' feature. It can be used by pressing the Change Owner button on the bill edit/split screen. Select a user to transfer a bill to. A new bill will be created in the name of the user selected and all the bill charges will be transferred to it. To use the feature you need to have the following right granted: 'Work with Other Users' Bills.
    • A new 'Create New Bill' feature. It can be found on the same (bill edit/split) screen. Use it to create a new empty bill in your name.
  • Local printer for receipt copies. The new feature enables you to specify a printer for printing receipt copies for the kitchen, bar, etc. What's important is that a device can be set to have a separate printer for receipt copies.
    • Set a receipt printer for each of the devices: On the main table screen, click "There is no local printer for kitchen receipts selected. Click here if you want to select one." in the lower part of the screen and select a printer.
  • In order to use the Web Table Booking System you need to contact Clock PMS support team to activate it.
  • Transfer to hotel – the room list is now sorted.
  • The user filter in the Closed Folios Report has been fixed.
  • The table booking calendar is now sorted out by table names.
  • Now the drawer opens even if the bill print is disabled.
  • Archive of users' cashier closures. Now the archive can be accessed by:
    • Selecting 'Management' - 'Closures - History'.
    • Clicking 'Related User Closures' next to 'Day Closure'
    • Clicking 'Show report' for the respective user's closure.

Clock PMS Update (21 Jan 2016)

Central Web Reservation System

To meet the needs of hotel chains and groups even better, we have added the Central Web Reservation System add-on to the system. Your guests can use it to see all your hotels or the ones in a certain destination, compare prices and availability, or make a booking through the WRS of the specific hotel.

The Central Web Reservation System (C-WRS) only shows the hotels belonging to one and the same subscription, i.e. guests will only see the group of hotels being part of a certain subscription.

How Does It Work?

Central Web Reservation System form

  • When a guest visits your central web reservation system page, the following form is shown:
  • It can be used to fill in either the desired location only, or the location and information of arrivals, nights, the bonus code and number of guests.
  • If you fill in the location only, you will be able to view the related hotels with their general information.
  • If you fill in the rest of the information, you will also see the available room types and the minimum price for each of them.

  • The search form remains in a side panel and guests can easily change the period or view other locations.
  • When a hotel is chosen, guests are redirected to its WRS, where they can see all the related products in detail and make a booking.
  • The hotel's WRS has a button to get back to the hotel search page and choose another hotel.

Settings

If you have already set the web reservation systems of the individual hotels, the launch of the new central web reservation system will be very quick and easy.

To add a hotel to your central web reservation system, you need:

  • Hotel with a set WRS
  • To add one hotel location tag at least. The hotel can have multiple location tags depending on how you would like your guests to be able to search for and find your hotels. For example, it can be possible for your guests to find the hotel by three locations tags: Paris, France, Europe. Thus the system provides them with options for a narrower search (Paris) or a wider one (Europe). Enter the location tags (each one in a separate line) for each account - 'Settings' - 'Account info' – 'Location' field situated in the 'CRS' section.
  • Done! See below how you can add a gallery and description of each hotel.

You can make the following changes to the settings of your central web reservation system:

  • Gallery. For each hotel, you can upload multiple pictures using the WRS settings screen: 'Settings'- 'Web Reservation System': 'Hotel Images' in the 'Images' Section.
  • Hotel Description. You can add a multi-lingual description of each hotel. The description can be in a rich text format. Fill in the text in: 'Settings' - 'Languages and Texts' - 'WRS Header/Footer/Translation': 'Hotel Description' field.
  • Header and Footer of the C-WRS Page. You can customise your system by entering texts in the upper page part (WRS page title) and also in the lower page part (WRS page footer). Add the texts by going to: 'Settings' - 'Languages and Texts' - 'C-WRS Header/Footer/Other'. Fill in: WRS page title and WRS page footer.
  • Languages, Translations and Customisation of Labels.
    • The languages set and chosen by you to be 'Public' will be shown on the C-WRS for guests to select from.
    • You can translate the labels and change their texts: 'Settings' - 'Languages and Texts' - 'Advanced Labels/Translations' - 'Account' and 'Subscription'. The texts in the Account can be different for each of your hotels and for each of them you have to enter the text individually. The texts in the Subscription are general for all hotels. Entered only once, they apply to all your hotels. Additionally, there are a few texts being specific for the C-WRS only. You can find them in 'Settings' - 'Languages and Texts' - 'C-WRS Header/Footer/Other'

You can open your C-WRS from: 'Navigation' - 'WRS'- 'C-WRS'

The central web reservation system is a paid add-on. For a trial or subscription for this add-on - please get in touch with us.

Rates

Tags

Now you can add multiple tags to each rate to help you find and edit a group of rates faster. For example, you could use a 'Base' tag for all the base rates that are most edited, or a 'Promo' tag for all the current promotions. This will enable you to quickly find and open the group of promotions or the most edited rates only. In addition, in one of the next updates, we will develop the option to use tags on the Rate and Availability screen.

You can add tags for each rate on the rate edit screen:

  • The already used tags appear in a list to select from. Click 'Add'. Add more tags, if you wish. Save the rate.
  • If you want to enter a new tag – enter its name in the related field. Click 'Add'. Save the rate.
  • To remove a tag, click its red 'x' box. Save the rate.

Search

We have entirely changed the rate search screen by adding options for a flexible search and quick rate editing. Here are the changes:

  • The screen is divided into two. The left part shows rate plans, as we have preserved the option to edit all the rates of a rate plan. New quick features (buttons next to each rate) have also been added.
  • Rate Search by Name and Tag. You can easily search for rates by name (rate name, rate plan name or name of a room type/room), as well as by tag. Apart from being able to type a search text, you can also take advantage of a quick selection button (Tags dropdown menu). This menu contains tags, room types and rate plan names. Thus you can use multiple search criteria by simply choosing them from the dropdown menu.
  • Editing Prices for Selected Rates. After finding the desired rates, choose them and click 'Price Table' to open them in a table where you can edit their prices and restrictions. In this price and restriction editor, only the selected rates will be shown. This way the screen looks much more compact and you can easily find the desired days and prices.
  • Use the "Set multiple days" button to open the old batch update screen, however, this time, it will show the selected rates only.
  • Quick functionsfor Each Rate. Clicking the button next to any of the rates in the list, you will have access to the following quick functions for this rate:
    • Price Table – Price and restriction edit screen for the respective rate
    • Edit / Tags – Opening a screen for editing the main rate parameters, where you can also add or remove rate tags.
    • Package – Use it to edit rate package elements
    • Restrictions – Showing rate restrictions screen.
    • Remove from WRS / List in WRS – A quick feature for adding (or removing) a rate to (or from) the rate list supported by your WRS.
    • Add / Remove STOP restriction – A quick function for starting or stopping the sale of a whole rate (STOP restriction of a rate).
    • Delete – Rate deletion.

Others

  • Occupancy Adaptable Rates - Adapt by Total Free Rooms. Now there is an option to choose the adaptation criterion for an Occupancy Adaptable Rate: number of available rooms of a room type (old option) or the total number of available rooms in the hotel (new option). The new option can be found on the rate edit screen – the 'Tracking' field.
  • Changes to Advanced Translations (for subscriptions with multiple hotels). The greater part of advanced translations (labels and WRS notifications, confirmation, self service portal translations, invoices and registration cards) have been moved to the subscription level. Their transfer to this level means that most of these translations are done only once and they apply to all your accounts (hotel). For example, now it is enough to translate 'arrival' once and the translation will be used in all your accounts in the subscription. Part of advanced translations can still remain applicable only to a certain account - by setting them to refer to this account only. The two groups of translations are edited from one and the same place ( Languages and Texts). Here, next to the group of translations, you can choose Account or Subscription. The existing translation data will be updated and stored.
  • Registration card – Only showing room charges owed by the respective guest. The room charge field in a registration card now contains the charges from the booking folio only. For example, if some room charges are moved to a company account, now they do not appear in the guest's registration card. The purpose of this change is to maintain the confidentiality in the relationships with agents, tour operators or companies.
  • WRS – An option for guests to enter their addresses. You can set whether the WRS to require the guest's address at the last step in the reservation system. The new setting (Address Required) can be found in the Optional settings' section of WRS settings screen.
  • Transfer from POS to PMS.
    • Transfers of bills from POS to PMS now take into consideration the tax modes of these two accounts. If they are different, the net or gross amount is transferred. This depends on the specifics of the two tax modes. Please note that in case of different tax modes, there is a possibility for a difference in the total amount owed by a guest due to the different method of calculation and rounding of the tax in each mode.
    • Surcharge on Charges Transferred.PMS no longer calculates and adds surcharges to the bills coming from POS. PMS only calculates surcharges for its own charges. The charges transferred from POS to PMS come with their POS surcharge, if any, which is shown as a separate charge in PMS.
  • Guest Mailer – Rich Text Parameters. The rich text parameters (for example, a guarantee policy description, hotel policy, etc.) can now be used in the Guest Mailer templates with their complete rich text formatting. To use the rich text format value of a parameter, you need to add '| html' to the parameter. Otherwise, the plain text format will be used. Example: To use the rich text format of the description (translation) of a guarantee policy, the parameter has to look like this: . The parameters supporting rich text are now offered this way by default (in the {p} button menu). To change your old templates, you can delete the old parameter and add it again from the {p} button menu.
  • Authorize.net – The credit card screen no longer requires to fill in the address (the fields are shown, but not required). If you want these fields to be required, you can change the Address Verification Service settings on your Authorize.net account edit screen.
  • The amount of a required deposit has been added to the booking screen, as well as the amounts of the payments received. Thus you can easily see if a booking has been guaranteed or not.
  • New Language column on the Advanced Search Screen.

API

  • Booking Create/Update. Support for the new successive notes added.
  • DoorKeys API - new documentation.
  • Booking To-Dos. New API for reading/creating Self Service Portal To-Dos added to the booking.

Fixes

  • DoorKeys API - GUI fixes.
  • Occupancy and Charges DMY report - 29.02 fix.
  • WRS - guarantee with gift voucher fix.
  • New booking - Occupancy forecast link fix.
  • Automated guest emails - t_... parameters (t_description, t_salutation, etc.) now uses the right language.
  • WRS – The WorldPay payment form is now opened on a new screen for greater compatibility with guests' browsers.

Clock POS update (21 Jan 2016)

  • A new link has been added to the Cashier Closure screen enabling you to have access to the cashier closures done by each user.
  • The drawer now opens even when device printing is switched off.
  • The User filter in the Closed Folios Report has been fixed.

Clock PMS Update (8 Dec 2015)

Capacity Adjustment

We have added a new feature - 'Capacity Adjustment'. It enables you to add or subtract rooms from the respective availability of rooms for any date or room type.

Use the new feature to effectively perform some specific operations like:

  • Controlled Overbooking. Increase the number of the available rooms for sale for certain dates. This way you can create and use controlled overbooking. The controlled overbooking can help you compensate for the normal amount of no-shows and cancellations. As a result, you can reach maximum hotel occupancy and even sell your last rooms.
  • Fast Block. You can easily stop the sale of a certain amount of rooms for a given period of time, and there is no need to create an event or bookings. After creating an event (or booking), it is just as easy to remove this adjustment.
  • External Availability. Using the API, you can manage hotel availability through an external system (like Revenue Management), increasing or decreasing the number of rooms for sale.

Availability Adjustoments

How Does It Work?

The Capacity Adjustment participates in the calculation of the available rooms for sale. It adds or subtracts amounts from the number of rooms entered by you (or set through the AP)I.

The positive values add available rooms for sale, and the negative ones decrease the number of available rooms for sale.

The resulting value of available rooms becomes the current availability for the whole system:

  • Occupancy Forecast, Rate and Availability, Rate edit screen, etc.
  • WRS. Your WRS will sell (or stop the sale of) rooms depending on the resulting value of available rooms.
  • Channel Manager. The Channel Manager will receive the new values of available rooms. 

To set the Capacity Adjustment

  • Choose 'Availability' - 'Occupancy Forecast' from the navigation bar
  • In the 'Adjustment' row of a room type, select one or more days: Select a date (clicking), consecutive dates (dragging) or random dates (holding the Ctrl key or the Cmd key and clicking/dragging).
  • Click on the 'Adjustment' button
  • Enter a positive value to add rooms or a negative one to subtract rooms from the value of available rooms. Example: If you have 5 available DBL rooms for Jan1: entering 2 will result in 7 available rooms, and entering -2 will result in 3 available rooms.
  • Save.

Change Log

If you want to see when and by whom the Capacity Adjustment data was changed, select a room type from the small eye icon to the right of the Adjustment button.

API

Use the API to retrieve information on the currently set adjustments or change the information for certain dates and room types. For more information, see the Clock Base / PMS API

Rates

We have added new features to improve the season management:

New Season View

We have added a new 'Season' View to the 'Flat' and 'Calendar' ones. Use it to have a compact view of all seasons for the rates on the list (regardless of the period entered on the screen). The Season View also enables you to quickly edit or define new seasons. It is particularly suitable for those intensively using seasons in the rate management.

Season button

Season View

Flat View – Current Season

Active season

In the 'Flat' View, the first columns show the season(s) referring to the period selected. Example: if you are looking at the daily prices for December, however, these prices are defined through a season starting in May, the first columns will show the season prices for May.

Automatic Purge of Old Data

We have removed the feature requiring manual deletion of the data for previous periods and changed it to an automatic one. The automatic features keep the old data of seasons and special days for a period of one year back, and then the information is automatically deleted.

Templates

New templates have been added to help you have easier customisation of of letters and screens. You can use these templates to build your own templates.

To use the template, open the respective rich text editor and find the 'Templates' button - 

templates

Select a template and edit it to meet your needs.

  • Confirmation. We have added a Confirmation Template that you can easily use to build your own confirmation letter. To preview it – open the Guest Mailer's templates and click the Templates button of the rich text editor.
  • Booking Email. Now the Guest Mailer also has a Booking Email Template containing integers for guest names and links to the Self Service Portal.
  • Registration Card. A new template on the 'Registration Card Custom Template' screen
  • Folio/Invoice. The rich text editor is now also available on the custom folio/invoice templates screen. There you can find the standard folio template too. You can access it by clicking the 'Templates' button.

API

  • Room Keys. The new API is specially designed to meet the needs of the room key system. The new user screens ensure the full integration with the PMS. Use these screens to initiate the issue of room keys. In other words, now you can use Clock PMS even for the issue of room keys. The new API methods enables the external system to track user's requests (push notifications) for room key issue and implement the physical interface with the respective devices (readers or encoders).
  • New notifications of Confirmation Letters. A new push notification has been added. It appears when the system has to send a confirmation letter. The notification is sent with: booking completion in the WRS; the sending of a confirmation letter from the booking screen; booking confirmation from the Self Service Portal. Through the new notification, it is possible to create your own confirmation letter and set when this confirmation letter to be sent. For that matter, you can disable the confirmation letters sent by the system. To do so, contact our Support Centre.
  • Improved Sending of Event Notifications. This is done after the objects are committed in the database.
  • If an object is not found as a result of a request to the API, now the system returns code 404 instead of 500 for easier error processing.
  • New fields have been added to the bookings endpoint: self_service_key, self_service_pin. They are used for sending a Self Service Portal link to a guest.
  • New rate restrictions have been added to the rates endpoint.
  • Two new endpoints have been added to the Base API: Charge templates and Revenue categories.

Others

  • ParityRate - Deduct Tax % by Channel. The feature that used to enable you to deduct tax from the prices received via the Channel Manager, is now more flexible – now this feature can be set individually for each channel.
  • Self Service Portal – the use of the cancellation feature has been disabled for bookings imported from the Channel Manager. Guests are redirected to cancel their bookings on the Self Service Portal, where these bookings were created.
  • Occupancy and Charges Report now shows the analysis of the occupancy and the rest of the KPIs by day of the week in addition to the existing filters: Date, Week and Month.
  • The Create Payment button for new payments is now disabled after the first clicking, so that duplicated entries can be avoided.
  • Open Folios Report now contains the open correction folios too.
  • The empty intervals in the text and revenue group of a charge are automatically deleted. This way the separation of amounts in different groups due to empty intervals is avoided.
  • The User Disable feature has been changed. It stops user's access, keeping the final user's current status for auditing purposes.

Fixes

  • Payments Report – the summary is also grouped by payment subtype in addition to the payment type.
  • ParityRate – when wrong data was received (a booking without booking data), the user was not notified there was a problem.
  • Voided Folios – the print format couldn't be changed.
  • On the set multiple days screen for rate updating, the currency amount has been removed.
  • In the FIREFOX, the click-and-edit feature didn't work for daily rate prices.
  • Now the compatible products appear in the WRS.
  • The Search field on the navigation bar no longer shows a randomly cashed text.
  • The confirmation letter of multiple bookings now shows the remaining amount due instead of the deposit made
  • Meal Report – the report no longer shows wrongly entered non-standard meals (being outside a booking period) .
  • The In-Hotel screen shows the current room of a guest instead of the arrival room.
  • When bookings are copied, the booking notes are also copied.
  • Rate Editing – the revenue category list didn't get updated with the selection of a group.
  • The graphics of room types in the Occupancy Forecast didn't show all occupied rooms
  • When using an Authorize.Net payment with pre-collected credit card data – the state field data didn't transfer to Authorize.Net, resulting in a payment error.

Clock POS update (8 Dec 2015)

Bookings

Table Blocks.

To the Table Booking Module, we have added a feature for quick table blocking for a certain period. In just a few clicks, the new feature enables you to stop table bookings for a certain date or period.

To block tables for a certain period:

  • Select Blocks from the booking icon on the main screen.
  • Click 'New'.
  • Fill in some text for a name of the block and period.
  • Choose the tables to be blocked or click on the 'Select all' button.
  • Save.

The blocked tables are grey-coloured in the calendar of available tables. Also these tables are stopped for sale in the Web Reservation System.

Table Deletion

Now you can delete a table, even if it is used in given bookings. The bookings are kept, showing that they refer to a deleted table.

Others

  • Print of a three-letter ISO currency code instead of a currency symbol. For the countries whose currency symbols are not supported by the code tables of printers, there is a new setting enabling the print of the full three-letter currency codes (e.g. EUR) instead of its symbol (e.g. €). To enable the new setting:
    • Open each of the printers not supporting the symbol (Management - Printers - Open)
    • In the 'Money Value Format', select 'Currency as text'.
  • When printing Store Requests, the '>' symbol is placed before the modifier. It is clearer, as the old one, '+', sometimes confused users when referring to modifiers, e.g. 'Without cheese'.
  • Changes to User rights:
    • The editing of the Info Account now depends on the 'Settings: Account Info' user right
    • Changes to the 'Auto logout on order/bill close' setting now depend on the 'Settings' user right
    • Changes to the Web Reservation System settings now depend on the 'Settings' user right
    • A new user right has been added - 'Settings: Folios'. It is used for restricting the access to the Document Type and the Document Sequence Generator.

Clock PMS Update (6 Nov 2015)

Rates

We have completely redesigned the rate setup screen. Now it is easier than ever to effectively control and change room prices. The new screen allows greater flexibility when reviewing rates and availability. It also enables you to quickly change single or multiple prices and restrictions.

Here are the main changes:

  • Rate Seasons. You can easily set a season for each individual rate. This way you can skip entering season prices for the rates which are not affected by the respective season, e.g. derived rates.
  • Rate and Availability Combined View. While setting rates, you can use the same screen to see the available rooms. Thus you can easily analyse and change prices, if needed, and all of this is done on one screen.
  • Flat/Calendar View.The new rate table has two view modes:
    • Flat. In the flat view mode, the table has a lesser height and greater width. Use it to conveniently view and edit more rates, as the periods shown are shorter. Through this mode, you can easily see the prices in many rates for a certain period.
    • Calendar View. In this view mode, the table has a greater height and fixed width of 31 days. This way you can see less rates, however the periods shown are longer. Use this mode to easily see prices and availability for the whole year.
  • Super Compact View. Through the View Options, you can hide the availability in the table, as well as minimise the season and day price cells. As a result, the table is more compact and easier to view.
  • Restriction Selection. You can choose which restrictions to be displayed or not. This feature enables you to have the Minimum Stay restriction only shown, for example. In this case, you can easily find the days,for which this restriction does not allow bookings due to no available rooms in the next days.
  • Dragging or Clicking Multiple Days to Edit.Quickly edit prices and restrictions for randomly selected periods among multiple rates. Here are a few examples:
    • To quickly edit a season or day – double click a season cell (a blue one) or click a day cell (an orange one) once
    • With dragging over white cells you can easily select a period in one of the rates.
    • Hold ctrl or cmd and through dragging over or clicking white cells, add more days to the period selected.
    • Repeat these steps for other rates.
    • Edit everything at once.
    • You can select periods and days for all rates of a room type. Just click/drag over the available room cells (only in the flat view mode).
    • Check all options for fast price and restriction access and editing.
  • Inspect Option. We have added a new option to inspect restriction priorities for a given date. Choose the white cell for the respective date and select the 'Inspect' option from the Day button dropdown menu .
  • Calculated Price. Apart from the price set, now you can also see the calculated price. This way for the derived rates you can see both the amounts to be added or subtracted and the resulting derived price. This feature also enables you to see the prices selected an occupancy adaptable rate for each date. And all of this is done on one and the same screen.
  • We have preserved the old Set Multiple Days feature for the cases in which it provides easier options to edit rates than the new rate editor.
  • Expanded season options: Now seasons can refer to one rate only, and not for the whole rate plan.

Rate Calendar

Calendar View.

Self Service Portal

We have added more features to the Self Service Portal to facilitate your contact with clients.

  • Advanced Translations.All labels, texts, buttons and messages on the Self Service Portal are now translatable and editable. Use this option to easily change the standard content of a text, if needed, or to translate the Self Service Portal in a language not supported by the system. To change texts:
    • Go to 'Other' - 'Settings' - 'Languages and Texts'
    • Select 'Advanced Self Service Labels/Translations' next to the desired language
    • Change the content or translate the text in the respective fields and save.
  • Client Requests. Through this new Self Service Portal feature, guests can add special requirements to their bookings. The special requirements are saved and visible in the booking for everyone. Additionally, a To Do is created and a notification email is sent to the hotel. Below you can see more information on the new booking notes.
  • Estimated Arrival/Departure Time and Transfers. Your guests can fill in information regarding their transfer or flight on the Self Service Portal. This option can be enabled or disabled from the Self Service Portal settings. The information entered is saved in the booking Arrival Transfer/Departure Transfer fields. 

    Rate Calendar

  • Log Out. A new Log Out button has been added to the main Self Service Portal screen. This makes using the Self Service Portal on a reception desk tablet easier, as different guests can log in and out of the Self Service Portal. To be able to use the Self Service Portal this way, you need to enable the Public Access to the Self Service Portal (the Portal is accessed with a family name and booking or room number).

Confirmation and Guest Mailer

Booking Confirmation - Full Template Customization.

Now you can have confirmation letter layout to your taste. To do so, use the rich text editor of guest emails or an HTML developed by your web designer. For maximum flexibility, we have added more parameters. These parameters enable adding descriptions and images from the Clock PMS database to your custom confirmations: logo, Google map, translations and descriptions of room types, rates, locations, guarantee policies, etc.

To set up a custom confirmation template:

  • Go to 'Other' - 'Settings' - 'Guest Mailer'
  • Add a new template, as the related Auto Send options must be set to "Off (Manual Send)". Save.
  • Click the 'Templates' button next to the new template
  • For each of the languages, create a confirmation template. If you have a ready HTML from your web designer – click the 'Source' in the upper left corner of the editor and paste the HTML into the editor.
  • Use parameters for the dynamic content (booking data, amounts, descriptions and images from the Clock PMS database). Check out the Parameter Helper below.
  • Important: Save the content before switching to another language.
  • After finishing the template, test it through a test booking sent via the Guest Mailer. Open the booking; Click 'New Email' in the 'Booking Emails' section; Select the new template and send it to your email address for reviewing.

To change the standard layout of a confirmation to one of your choosing:

  • Go to 'Other' - 'Settings' - 'Guest Mailer'
  • Click 'Change' next to 'Custom Booking Confirmation Template'
  • Select your template and save.
  • Note: If you wish to return to the standard layout of the confirmation letter, open the Guest Mailer screen, click the 'Standard' button and save.
  • After selecting your custom confirmation template, it will be used for all emails sent automatically (for new bookings in the WRS or 'Confirm your bookings' on the Self Service Portal) and manually (Confirmation from the booking list screens).

Now you can edit the entire custom confirmation letter before sending it to a guest. Add a specific text or change the existing descriptions of the template only for the specific email sent to the guest. You know this feature from the Guest Mailer, where you can edit a letter before sending it. To do so, send the email through clicking the 'New Mail' button instead of the 'Confirmation' button.

Note: The custom confirmation letters require the "Guest Mailer" Add-On

After Check-In Emails

We have added a new feature to the Guest Mailer Add-On to automatically send emails after check-in. Use the new emails to welcome your guests after checking in at your hotel, send them special offers, as well as give them interesting local information. As with the rest of automatic emails, you can use filters for OTAs, stay periods and guarantee policies to target different group of guests.

Booking Mailer

How to set up an automatic email to be sent after check-in:

  • Go to 'Other' - 'Settings' - 'Guest Mailer'
  • Add a new template, as the related Auto Send option must be set to "On (Auto Send)" and the 'Send on' field must show 'After Arrival'. Save.
  • Enter the texts for all languages used through the 'Templates' button.

Parameter Helper.

For the easy and quick creation of templates for emails containing dynamic data (parameters), we have added a new functionality to the template rich text editor - a dropdown list of all parameters. This is how the menu button looks like: 

Clock PMS parameter helper

  • Move the marker to the place where you would like to add the parameter
  • Click the button and select the parameter from the list.
  • The parameter will be added to the position chosen. Example: You select the 'Arrival' parameter to be added: .

Others

  • After saving a template,you remain on the same screen. This way if you have to edit content in many languages, the editing process becomes faster.
  • We have improved the error processing for emails sent. Now you see the email status, whether it is delivered, and if not, what the error is.
  • Sending Emails to Multiple Recipients. In the 'To' field, you can list several email addresses, separating them with a comma (,).
  • We have improved the automatic emails, set to be sent after departure. Now the sending of these emails complies more precisely with the set period after a guest's specific departure time. The period is set in the "Time Range (hours)" field.
  • Now it is not necessary to use 'Custom SMTP server' for the 'From' field of your emails to show your own email address as it used to be. Our support team only needs confirmation on your part to make the necessary reconfiguration. Note: This option is not available for trial/demo accounts.Here are the steps:
    • From the email address of the account holder, send us an email stating that you would like the 'From' field of your emails to show your email address. Specify this email address, so that we can enter it in the 'From' field.
    • We will send an email with a link to email address specified to confirm your request.
    • After receiving the confirmation, we will configure the system to use your email address.
    • If you wish to change the email address, the procedure must be repeated.
    • If you wish to stop the use of this option, contact us.

Registration Cards

Custom Registration Card Template

Now you can create your own custom registration card form, arranging its fields to your taste. To do so, you can use the rich text editor or a ready HTML from your web designer. Your form will be used in the application and the Self Service Portal (self check-in) instead of the standard registration card form. Setup:

  • Go to 'Other' - 'Settings' - 'Registration Card Templates' in the 'Advanced Settings' section
  • Use the rich text editor and the new 'Parameter Helper' feature to create your own registration card form. Save.
  • When you are ready with the form, tick the 'Use custom registration card print template' check box on the same screen and save. Now your registration card form will be used instead of the standard one.
  • If you wish to return to the use of standard registration card form – untick the 'Use custom registration card print template' and save.

Note: Remember to save the form before switching languages
Note: When using a ready HTML, it must comply with the Bootstrap CSS framеwork classes.

Advanced Translations

We have added all fields of the standard registration card form to the advanced translation section. This way you can also translate the fields of of the registration card form in languages not supported by the system by default. Also you can change field labels in the languages supported – e.g. You can rename the ZIP field to Postcode field, etc.

Here is how to find the registration card advanced translations:

  • 'Other' - 'Settings' - 'Languages and Texts' - 'Registration Card Field Labels' in the section of each language.

Bookings

  • Successive Notes.In order to improve the control and use of notes, we have changed their organisation:
    • We have added a new note: Client Requests. Clients use this note to send their requirements through the Self Service Portal. This note can be used for adding the Channel Manager notes. Apart from the booking, the note is visible in the booking lists, on the room allocation screen and in the Housekeeping Report.
    • User and Time Information. Now notes show the time of creation/deletion and the user. In addition, you can easily see the texts of the deleted notes (on the booking edit screen).
    • Channel Manager import now adds notes. This way you can be sure that no information entered by you in the note will be deleted. This will also diminish the number of bookings which cannot be updated due to external control.
  • Disabled auto mailers – new screen. In order to disable the automatic sending of emails for a booking, now you have to click the 'Disable Auto Send...' button on the booking screen instead of ticking the old check boxes on the booking edit screen.

Others

  • InHotel/Expected Events. We have added a new screen to "Event". There you can find all events currently being held at the hotel and the expected ones too. From this screen you can easily create a new booking. For the new booking, all the event-related fields are automatically filled in – period, event, company and room type. 

    Events InHotel/Expected

  • Channel Manager – we have improved the update concept of bookings and version control. The version control is a mechanism for booking updating that determines whether a booking can be updated automatically or not, depending on whether clients have made any changes to the booking. The new concept is more precise. It compares whether there is a change to each of the attributes and then if this change is made by a user.
  • We have removed notifications from the main screen. Most users didn't find them useful. Additionally, these notifications used to double the new channel status notifications.
  • Folio Notes. You can add a note to each folio regarding specific conditions or descriptions. Open a folio screen and click the "Currency/Name/Notes" button. Enter the note text and save. The note appears in the lower part of the printed folio. Note: If you use custom folio print form, you can decide where this note to appear on the the printed folio through the following liquid parameter:
  • Period Fields in Reports – the 'To' field is automatically set with the setup of the 'From' field. This way you do not need to scroll to the same month in the 'To' field.
  • We have added a Control Event type filter to the Control Events Report.
  • Credit Cards – changes to billing address fields.
    • We have added a new setting whether a billing address is required or not: 'Other' - 'Settings' - 'Credit Card' - 'Address Required'
    • New individual address fields added: ZIP, City, State and Country. This way credit card details are compatible with the requirements of Authorize.net interface. As a result, credit card details gathered via the WRS or the Self Service Portal can directly be used for charging (through Authorize.net), as it is not necessary to be copied or pasted. Unfortunately, this feature is only applicable to the newly gathered credit card details. For the previously gathered credit card details, these fields remain empty.
  • We have hidden the little orange suggestion button (appearing in the middle of the right side of the screen) from the wide screens: Rates, Occupancy Forecast, Room Calendar, etc.

API

Push HTTP/S Notifications.

We have added new events to the Notification API, as well as an option for HTTP/S push. With this, the notification options have become two:

  • HTTP/S Push (New). With each new event (see the list below), we execute POST request on your HTTP or HTTPS URL. The POST contains the subject (message type) and related object ID (folio id, booking id, etc.). With the object ID you can get object details using base/pms API. HTTP/S Push notification also has a retry feature in case your URL is not reachable at the moment.
  • Long Pull (Existing). In case your server is within an internal network and cannot receive HTTP/S requests, you can use this notification method. See the documentation for more info.

The new events added are:

  • booking_new (On Booking creation)
  • booking_update (On any change on Booking attributes. Only first level booking attributes generates update event)
  • booking_expected (On Booking status changed to 'expected')
  • booking_checked_in (On Booking status changed to 'checked_in')
  • booking_checked_out (On Booking status changed to 'checked_out')
  • booking_canceled (On Booking status changed to 'canceled')
  • booking_no_show (On Booking status changed to 'no_show')

More end-points

  • Create Payments. POST method is added to 'credit_items' end point. Parameters are: value, currency, payment_type, payment_sub_type, reference_id, reference_text, text.
  • We have added a new feature ( Capacity Adjustment ) and the respective end point to it (room_type_availability_adjustments). This feature enables you to add or remove amounts from the available rooms for a room type. Thus you can stop the sales of a certain room type or increase the availability and allow overbooking. The Capacity Adjustment itself is visible in the Occupancy Forecast, however there is still no user interface for editing through the application.

Fixes

  • Occupancy Forecast – when choosing a month, 30 days always appeared even with the months of 31 days.
  • ParityRate – the room type names in the settings did not get updated with the screen opening.
  • The TO-DOs for bookings paid online stated these bookings were not paid, though they were.
  • The Payment Report showed entries caused by a payment text change.
  • When editing multiple charges, the tax change was not reflected
  • The availability was not correct for checked-in rooms, whose statuses were then changed to OOS.
  • If in the booking edit mode, relocation was added, without specifying the date, the erro message was not clear.

Clock POS update (6 Nov 2015)

  • The Control Event Report, which you know from the PMS, has been added to the POS. Use this report to quickly receive information on the operations in the scope of the control report: Voided Folios after day closure; Voided or Added Payments after bill closure, etc.
  • Bill Transfer to Room – now you can even choose a given room from a list. This functionality is especially useful for hotels whose rooms have names instead of numbers.

Clock PMS Update (28 Sep 2015)

Guest Mailer - Send Any Email

We have improved the Guest Mailer Add-On, so that you can use it in an even greater variety of situations. In fact, all your emails can now be sent through Clock PMS. The templates let you compose your standard messages in advance. Then you can customize them and use the same branding and layout for all your emails.

Edit Before Sending

Before sending an email template, you can edit its body text.

If the template contains parameters like guest name, booking number, period, room, link to the Self Service Portal, etc., the system substitutes them for the information retrieved from the booking. The content can be edited further by deleting or adding information, or you can send it as it is to the respective recipient.

If you don't need a template, you can choose to use a blank email.

To send an email:

  • Find and open a booking
  • Select 'New Email' in the 'Booking Emails' section
  • Click Template or 'Empty'. Note: You can create a template by going to 'Other' - 'Settings' - 'Guest Mailer'
  • Edit the email content and subject, if necessary.
  • Choose the email recipient (the system suggests a list of email addresses related to the booking) or enter an additional email address in the field.
  • Click 'Send'

Clock PMS transactional emails

Sent

In order to enable you to easily track the emails sent to your guests, we have added a new section. It contains all the booking-related emails to the booking screen. There you can find the following sent emails:

  • Confirmations (both automatically or manually sent)
  • Automated Emails (pre-arrival, post-departure emails or the ones sent after the creation of a booking)
  • Manually sent emails

Sent folder

To check all the emails sent in relation to a booking:

  • Find and open the booking
  • The 'Booking Emails' section shows all the sent emails with information on the user having sent the email, date and time.
  • Click Open to see the content of the email sent.

Note: The archive of the sent emails will start accumulating after this update. The archive will not contain the emails sent prior to the this update. Also you can maintain your own archive through the BCC option of the account.

Bookings

Overbooking Control

  • A new right has been added to select the users who can create or edit the bookings causing overbooking. The new right has been granted to all existing users.
  • New Control Event. With each overbooking (due to a new booking or editing an existing one), a control event is created for that matter. Use the Control Event Report to easily track the booking causing the overbooking, its creation or change date, the related user. In this case, you can also review the change log of this booking. The creation of such control events will start after this update.
  • Booking Message. In case of overbooking, the user is notified of that through a message in the booking.

Optimised Folio Options

  • Departures – quick folio opening. On the Departures screen, a new button has been added next to each booking to open its folios. If a folio is an open one, a folio edit screen opens. And if the folio is a closed one, a folio print screen opens (pending update).

    fast folio link

  • Lists of bookings – multiple folio opening. A new option has been added to the lists of bookings, enabling you to open the folios of the selected bookings (1 or more) in new tabs (each folio opens in a new browser). To use the new feature:

    Open folios at new tab

    • Access any of the following screens: Arrivals, Departures, In Hotel, Search and Advanced Search
    • Click 'Select Multiple'
    • Select one or multiple bookings
    • In the panel above the list, click 'Folios' dropdown menu to select 'Open Folios in New Tab'
  • Charge posting to multiple bookings simultaneously. Now you can post charges to multiple bookings at once. To do so:
    • Access any of the following screens: Arrivals, Departures, In Hotel, Search and Advanced Search
    • Click 'Select Multiple'
    • Select one or multiple bookings
    • In the panel above the list, click the 'Folios' dropdown menu to select 'Charge'
    • On the right side of the screen, you can see the selected folios. Still you can deselect bookings or add new ones to the selection. Then you can post charges to the selected folios (the ones with marked checkboxes).

Other Improvements

  • New Report: Payment Control Report. The report is similar to the Charge Control Report. It presents the history of charges and voided payments. Also this report introduces a new feature related to payments - Folio Value. This is the equivalent value of a payment in the currency of a folio (when operating with payments in multiple currencies). The Folio Value of a payment changes with the change of the exchange rate of the folio currency to the payment currency or with the change of the folio currency itself. In this case, a new line will appear in the report reflecting the folio value of the payment.
  • Summing by meals has been added to the Meal Report. At the end of the report, you can see amounts by meals for the whole examined period.
  • Channel Manager
    • The mapping is now automatically updated with the opening of the screen and it contains more product information.
    • A new concept has been introduced to reduce the overbooking possibilities.
    • An option has been added, so that you can re-send the updated product information for 1 year. The Re-send button is a part of the channel manager settings.
    • A new feature has been added to stop the sending of the data of a certain product. This way you have full manual control over this product (direct channel updates). To do so, use the Disable button next to a product on the Channel Manager Settings screen.
  • Occupancy Forecast – your choice for the Details button is now saved (whether it is on or off)
  • A New API - Custom Payment API. With Clock Payment API, hotels can perform custom payment services for collecting payments from their guests. This way a hotel can have an interface for a payment service provider or bank not supported by the standard Clock PMS payment interfaces. The interface can be used in all customer-faced add-ons as: Web Reservation System (for booking guarantee deposits); Self Service Portal (for booking guarantee deposits or final checkout payments); Gift Voucher Shop (buying gift vouchers). The interface cannot be used in Clock PMS back office.

Fixes

  • The "ParityRate channel rates and availability" link in the "Channels" menu already works.
  • For each new booking, created from the Occupancy Forecast screen, now the arrival date and room type are filled in automatically.
  • The 'Single Row Folio' option could not be used with a custom Folio Print Template
  • For the multiple hotel accounts, the Guest Titles did not work properly.
  • In the Registration Card Editor, there was no Guest Title field
  • The Self Service Portal background used to load with a reduced resolutions.
  • WRS – the deep links, containing specific room number filters, did not work properly
  • Room Calendar - Date Labels' explanations (in the upper part of the screen) were not arranged by date.

Clock POS update (28 Sep 2015)

Source Filter

The 'Closed Folios Report', 'Closed Folios Summary Report' and 'Tax Report (VAT)' contain a new filter - 'Source'. This filter has three possible options: 'All', 'Transferred' 'Not transferred'. Select 'Transferred' or 'Not transferred' to see the folios that have been transferred or not from the POS to the PMS only. The default filter option for the 'Closed Folios Report' and 'Closed Folios Summary Report' is 'All', and for the 'Tax Report (VAT)' - 'Not transferred'. When using the reports for tax purposes, you should choose the 'Not transferred' filter position, so that these reports don't show the folios transferred from the POS to the PMS. The transferred folios will appear in the PMS reports anyway.

Clock PMS Update (4 Aug 2015)

Guest Mailer

An entirely renewed email template module for the automatic or manual sending of emails to booking holders:

  • Multiple templates (new). Now you can set multiple email templates for various purposes.
  • Multiple languages. Each template has different content in the different languages.
  • Auto / Manual Send (new). You can choose to send email templates automatically or manually. The manually sent templates significantly expand the number of tasks to be addressed through this module.
  • Auto Send after booking creation (new), before arrival and after departure. The Auto Send option can be linked to the point of: Booking Creation; Arrival Date and Departure Date.
  • Time Range (new). To have greater precision when using the Auto Send option, you can set the number of hours after booking creation, arrival or departure, after which an email is to be sent. This way emails can be sent and received during the working hours of the recipient, increasing the chance for these emails to be read.
  • Automatic email sending for different booking types (new). Using filters, you can send different emails to:
    • ОТА bookings and Direct bookings. Through the 'ОТА bookings' filter you can set different email templates for ОТА bookings and Direct bookings. This new option is a tool helping you convert ОТА bookers to direct bookers and also retain the loyalty of your direct bookers.
    • Guaranteed and Non-Guaranteed bookings. Use the Guarantee Status to set different email templates concerning bookings that are guaranteed, non-guaranteed, await guarantee or whose period to be guaranteed has expired. Thus you can automate the process of reminding your guests to guarantee their bookings and possible booking cancellation. Use this option in combination with the Guarantee Policies and their 'Guarantee Term (expiration)' setting to fully automate the process.
    • Promotion of Events and Periods. The 'In Hotel from' and 'In Hotel to' filters can be used for the automatic sending of emails to booking holders checking in at your hotel during a certain period. This booking segmentation allows you to promote various upcoming events at your hotel, etc. to your guests. Also you can use the filter for different upsell promotions related to stay extension.
  • A wide range of options for email customization (new). The new 'parameters' enable you to insert any information from bookings into an email to a guest: starting from the customized salutation 'Dear Mr. John Smith' and ending with the booking period and number, guest's room, guarantee payments due, etc.
  • Rich Text and Full Customization (new). Through the easy-to-use rich text editor you can quickly and effortlessly design your emails. Change fonts, sizes, colours, etc. You can also insert your own images (already posted on the Internet) or links to your or other websites. To have complete and professional customization, insert a ready-to-use HTML email template, created by a designer or email template generator.

Note: For those having used the old pre-arival/post-departure email option. The email content has automatically been transferred to the new module, enabling you to continue using this option.

Guest Mailer

Guest Mailer Setup

  • Go to Other - Settings - Guest Mailer.
  • Add a new template through the Add button
  • Name the template depending on its purpose.
  • For automatic email sending:
    • Select 'On' for the Auto Send field after having filled in all the fields, created the contents of the respective email and having sent it for a test booking manually.
    • In the 'Send on' field, select whether the period for sending emails to start from: Date and Time of Booking Creation; Arrival Date (the default arrival time is 12:00h); Departure Date (the default departure time is 12:00h).
    • In the Time range field, fill in the number of hours from the point chosen above, after which an email is to be sent, e.g.:
      • the number of hours after booking creation, after which an email is to be sent. These emails are sent to expected bookings only.
        Note: If you set a period of 120h (5 days), emails will be sent on the fifth day after the creation of the respective bookings, provided that they are still expected .
      • the number of hours before 12:00 on the arrival date. These emails are only sent for expected bookings. Note: If you set a period of 120h. (5 days), all the bookings, having been created in the last 5 days, will not receive an email, because the moment for sending the emails is missed. Also you are advised not to enter very short periods, if you have early check-in, i.e. if you have check-in from 8:00h, you should not enter a value less that 4h (12:00h minus 4 hours makes 8:00h). Otherwise, all the bookings with early check-in will not receive an email, as the guests will have been checked in prior to the email sending.
      • number of hours after departure (fill in 0, if you desire email sending immediately after departure or enter 24, 48, etc. This way emails will be sent after 1, 2 or more days after departure); Emails will be sent for checked out bookings only.
  • If you wish to filter a certain booking type through the auto send option:
    • Use the OTA booking filter. OTA bookings are the ones received through the automatic import of the channel manager. If, for some reason, you have entered an OTA booking manually, you can send the respective emails for it manually.
    • Use the Guarantee status filter. Thus emails will be sent only for bookings having a certain Guarantee status.
    • In the filter, enter the period of stay for the booking.
  • Save

Content

Each email template has different content in the different languages. You can fill in the content of emails after their creation.

  • Click the 'Templates' button in the email template list.
  • The upper part of the list contains the various languages – choose the language
  • Fill in the 'E-mail Subject' field
  • Click on the 'E-mail Boby Template' field and enter the text to be the content of the email. Format the text as per your requirements. Add an image (already posted on the Internet) or links.
    Note: By default, the field contains an example template with set parameters for salutation and guest name, as well as a link to the Self Service Portal.
  • Parameters. You can add parameters to the 'E-mail Boby Template' field. These can be the details of the respective booking, for which the email is sent. The details can be the guest name or any other booking data and amounts.
    • The parameters have special formatting – surrounded by double curly brackets: . The parameters to be used in the Guest Mailer start with booking., e.g. is the booking number, and is the last name of a guest.
    • For a full list of parameters, see: Guest Mailer
  • If you have an HTML email template, created by your web designer or generated through another application, you can edit it through the rich text editor:
    • Click the 'Code' button in the upper left corner of the rich text editor.
    • Paste your code
  • Save.

Guest Mailer

! Warning! When switching between languages, the content of the fields is NOT STORED. Click 'Save' before changing to another language.

Manual Email Sending

To manually send an email template for a given booking:

  • Open a booking
  • Select 'Functions'
  • A list of email templates will appear. The email templates already used for manual or automatic email sending will show the time and date of sending.
  • Choose the email template to be sent and confirm by clicking ОК.

Self Service Portal – Public Access for ОТА bookers and guests

We have added a new option for accessing the Self Service Portal. It enables the guests, for whom you don't have email addresses or to whom you haven't sent confirmation emails, to access the portal. The access link can be placed on your website or to be in the descriptions of your policies, included in the letters from the OTA portals. Thus OTA bookers can also use the features of your Self Service Portal.

Self Service OTA access

There are two ways for these guests to access the Self Service Portal:

  • For expected or checked out bookings, a guest must enter:
    • Their last name
    • Their booking number – it can be the number of the hotel booking or the OTA booking (reference number).
  • For checked in bookings:
    • Guest's last name
    • Room number

Setup:

By default, the public access to the Self Service Portal is prohibited. To allow it:

  • Go to Other - Settings - Self Service Settings
  • Find the 'Enable Self Service Portal Public Access' option in the 'Other settings' and enable it.
  • Save.
  • Below this setting, you can copy and paste the URL, where the new access link is to be found, as well as an example HTML code for a link to it.

Others

  • Rate and Availability - Favourite Rates.Through this new feature you can select your most used rates as 'favourite'. Also you can set the Rate and Availability screen whether to show the Favourite Rates only or all the rates. The new filter can be used in combination with the existing Room Type and Rate Plan filters, i.e. you can see the favourite rates for a room type and rate plan. Setup of the favourite rates for the Rate and Availability screen:
    • Open the Rate and Availability screen
    • Click 'Favourite' in upper right corner

      Favorite Rates

    • Choose your favourite rates
    • Save.
    • Tick the Favourite check box to see only these rates on the Rate and Availability screen.
  • Auto Room Allocation. We have added a new option for auto room allocation for all new room type bookings. Here is how it works: Applicable to each booking created in the WRS, coming from the channel manager, imported from a file or created by the user, if it is a room type booking, the system will automatically allocate a free room at the moment of booking creation. If there is no available room for the booking period or type, it remains a room type booking (without a room number). The new feature can be enabled from: Other - Settings - Rooms. Click 'Enable' next to 'Auto room allocation is DISABLED' in the lower part of the screen.
  • New Tax Mode- 'Tax included in prices, rounding - total'. The new tax calculation mode is for tax-inclusive prices. However, there is a significant difference from the other similar mode (Tax included in prices, rounding – per line). It is about the folio tax amount. Here is comparison of the two tax modes (the old and the new one).
    • In the existing tax mode (Tax included in prices, rounding – per line): The Tax Base is calculated as per the following formula: Total/( 1 + Tax%/100). The resulting amount is rounded to the smallest monetary unit (usually 0.01). For each folio line, the Tax is calculated as PRICE – TAX BASE = TAX. And in the folio total section, the respective amounts are calculated by summing the folio lines. What's specific to this mode is that if you calculate the resulting tax % on the basis of the folio total amount itself, it may differ from the one originally set in the separate lines (e.g., it can become 20.01%). The reason for this is the tax rounding per each line.
    • In the new tax mode (Tax included in prices, rounding - total): The folio Total is calculated by summing the prices of each line. On the basis of the folio's Total, the Tax Base is calculated using the following formula: Total/( 1 + Tax%/100). The resulting amount is rounded to the smallest monetary unit (usually 0.01). The Tax amount is calculated as TOTAL – TAX BASE = TAX AMOUNT. And the Tax Bases of each line are also calculated, as these amounts are rounded in each line. This is the reason for the sum of the net values of the folio lines not to correspond to the folio net amount, calculated on the basis of the folio total amount.
  • Booking Edit Screen – a link to Occupancy Forecast. To be able to quickly check if you have available rooms, when a guest requests a change to a booking, we have added an Occupancy Forecast link on the booking edit screen. Here you can enter the period requested by the guest and click the Occupancy Forecast link to check the availability. If there available rooms, go back to the booking edit screen and save the changes.
  • Transfer of POS Bills - now the tips are also transferred. When transferring a POS bill, containing a tip, it is also transferred. In the folio, the tip is reflected as an additional charge of the 'surcharge_transfer' revenue group.
  • A new document type filter has been added to the Closed Folios Report, the Closed Folios Summary Report, Folio Tax Report (VAT). In addition, these reports can be used as centralised reports, i.e. they can be run for multiple accounts simultaneously.
  • Channel Manager – Use of Room Rates. Up until now, the Channel Manager could operate with room type rates only. We have added an option for room rates for the boutique hotels, using room rates. Thus if you use room rates, you can map them to the products in the Channel Manager. In order to switch between the two types of rates – go to the Channel Manager settings and choose room rates or room type rates in the 'Export Rate Field'.
  • Channel Manager – a screen has been added to help you see product mappings more clearly. The new screen shows information on how each rate in Clock PMS is mapped to a ParityRate Product. This screen also shows the room types/products on OTA portals linked to this rate. The new screen can be accessed from the channel manager settings - 'View All Mappings' button in the 'Rate Map'.
  • Now room names can contain up to 12 characters. Hotels operating with room names instead of room numbers can use this option to set longer room names.
  • PMS API – A new booking attribute has been added - 'Balance'. Use it to quickly find a booking amount due without reviewing its folios.

Fixes

  • TripConnect – the setting editor could not open, when a rate used in the settings has been deleted.

Clock POS update (4 Aug 2015)

New reports added

  • Closed Folios Report, Closed Folios Summary Report, Folio Taxes Report (VAT). They are centralised reports and can summarise information from various accounts or be used for a single account only.
  • New tax mode - 'Tax included in prices, rounding - total'. The new tax calculation mode is for tax-inclusiv prices. However, there is a significant difference from the other similar mode (Tax included in prices, rounding – per line). It is about the folio tax amount. Here is comparison of the two tax modes (the old and the new one).
    • Old tax mode (Tax included in prices, rounding – per line): The folio tax amount is calculated as the sum of the tax in each line, rounded for each line. What's is specific for this mode is that if you calculate the resulting tax % on the folio total itself, it may differ from the one originally set in the separate lines (e.g., it can become 20.01%). The reason for this is the tax rounding per each line.
    • The new mode (Tax included in prices, rounding - total): The folio tax amount is calculated on the basis of the folio total (sum of the prices in each line) using the following formula: Tax = Total - Total/( 1 + Tax%/100). The resulting amount is rounded to the smallest monetary unit (usually 0.01). What's specific for this tax mode is that the sum of the net values of the lines do not correspond to the folio net amount, as the line amounts are rounded in each line, and the total is calculated and rounded on the basis of the total folio amount.
  • Transfer of POS Bills - now the tips are also transferred. When transferring a POS bill, containing a tip, it is also transferred. In the folio, the tip is reflected as an additional charge of the 'surcharge_transfer' revenue group.

Fixes

  • When charging menu items manually, you need to enter a tax rate, if the tax mode requires it.
  • WRS – a new clearer error message, when there is no time selected for a booking

Clock PMS Update (15 Jul 2015)

Channel Manager

We have developed several different instruments to help you effectively manage availability and prices in the channels. As a result, you have perfect balance between avoiding the overbooking risk and achieving maximum occupancy. You can use these instruments separately or in combination, in order to have the best results.

OTA Allotment Management

If your contracts with OTAs include allotment clauses, Clock PMS can effectively help you manage this allotment. Through Clock PMS you can avoid the overbooking risk. It often occurs in the cases of high occupancy combined with OTA allotment remainders. In these situations, OTAs continue selling rooms and you can't stop their sales. The new OTA allotment management option enables you to update your availability by deducting the minimum number of rooms under the allotment contracts with the OTAs. The overbooking risk is eliminated and you are able to fulfil your allotment contracts. And through the additional blocked room option - 'cut off days', you can release blocked rooms for last minute sales.

How does the ОТА Allotment Management work?

  • The ОТА Allotment Management uses the Events and Blocks feature.
  • Create an event for each of the OTA companies and name it 'Allotment' for example. Set the allotment period to coincide with the validity period of the agreement with the respective ОТА.
  • Enter the minimum number of rooms to be allotted under this agreement. In order to set one value for all the dates – click the pencil icon.
  • Thus the blocks set will be deducted from the total availability and will not be sold through the channel manager or the WRS.
  • Go to the settings of the channel manager. Having selected a company, choose the Allotment event in the company mapping next to the respective channel.
  • All the bookings received and still not checked in (having the expected status) need to be updated with the Company Event/Block once.
  • Now you can receive information on the block remainders. The information on the blocks and the related rooms remaining unsold can be found in the Occupancy Forecast report, as well as in the Block Pickups Report.
  • All new arrivals will be referred to the respective room type block (when the event is set in the company mapping). This allows the block remainders and availability to be recalculated.
  • Here is an example of the block functioning :
    • You have 10 rooms
    • You have signed an contract for minimum 2rooms with Booking.com and another one for minimum 2 rooms with Expedia.
    • Create blocks for Booking.com and Expedia, each containing 2 rooms for the duration of the contracts.
    • Now your availability is 6 rooms, which you can freely sell
    • You sell 5 of them through your WRS.
    • Your availability becomes 1 room. The information of 1 free room is submitted to all channels, including Booking.com and Expedia. Both channels continue to have 2 rooms for sale each, as this is their minimum as per the contract.
    • You sell 1 room via Booking.com. This booking is automatically associated with the Booking.com block. As a result, your availability still remains 1 room. The room sold is part of the Booking.com block.
    • You also sell 1 room through Expedia. Once again your availability remains 1 room. And the room sold is deducted from the Expedia block.
    • When you sell 1 room through your WRS, the general availability becomes 0 rooms. The sales via all channels but Booking.com and Expedia stop.
    • Booking.com and Expedia still have 1 room for sale each, part of the initially blocked rooms.

Note: In order to use Events and Blocks, you have to have this addon enabled. If not, please contact the Support Team of Clock Software.

Maximum Rooms Sold Simultaneously

We have added a new setting to the mapping of each rate - Max Rooms. Use it to restrict the quantity of rooms you send to each channel. Please note that this setting does not reflect the maximum rooms as a whole, but the maximum rooms at a given moment.

What does it mean? Here is an example showing the effect of this setting:

  • If you have 5 free rooms, they will be sent as availability to all your channels for all of their products.
  • When one of the sites sells 5 rooms, while another one sells 2 rooms, you will have overbooking of 2 rooms|.
  • Through the new settings you can set the maximum of free rooms to be sent each channel, for example 2. So if you have 5 free rooms, 2 room availability will be sent to all channels. Returning to the above case, even when two channels sell all the rooms sent to them, you still won't have overbooking.
  • When receiving bookings, the availability sent to the channels is recalculated. And in the case of resulting availability of 4 rooms, the channels will once again be reloaded with 2 rooms. However, if your your availability is only 1 or 0 rooms, the availability sent will become 1 or 0.

Find the exact balance depending on the size of your hotel.

Automatically Increased ('sale stopping') prices

Using the existing Adaptable Rates feature, you can set the system to automatically change the price levels depending on the availability of the related room type. Additionally, we have introduced zero and negative levels. This way you can send increased prices to the channels in the cases of zero availability. These increased prices should stop the bookings even from the channels still having allotment remainders. And through the negative levels you can set even higher 'sale stopping' prices for the dates when your hotel is overbooked.

How to apply this feature:

  • Create new adaptable rates and associate them with the respective products, using the rate mappings.
  • For the adaptable rates – set your standard prices to a channel as the baseline.
  • Add a new level for 0 availability. Set the related rate to contain high ('sale stopping') prices.
  • You can add one more level to contain even higher prices for the dates when your hotel is overbooked.

Automatic Overbooking Notifications

The new functionality checks the availability after each new booking received from the channel manager. If in the period of a booking, overbooking is detected, a To-Do is generated and an email is sent to the hotel. This way even if there is overbooking, the hotel is timely notified to take the necessary measures.

Other Changes to the Channel Manager

  • Most of the channels do not support availability data for more than one year. Therefore data of availability and prices for only one year ahead is sent to the channel manager. This also leads to the decrease in mistakes and increases the exchange rate of updated data to the channels. We strongly recommend checking the channels still supporting data for more than 1 year and see whether they offer data only for one year ahead. We have notified the channels for this matter, however, it is still possible for some of them to sell as per the old data. This old data will not be updated automatically by the channel manager.
  • The data sent to the channels is sorted out by products. Thus the errors occurring during update are specifically related to the respective products/channels. The error log is clearer and easier to read.
  • We are gradually changing the error reporting system, so that you have comprehensive information on the state of each message being sent to the channels, including the errors that might occur.
  • The additional services sold by channels are now reflected in the booking note to facilitate the charging process.
  • Log of the changes to the settings of a channel. Click the 'Change Log' button to track all changes to the settings of a channel, rate and company mappings.

Others

  • Printing Multiple Registration Cards. The new feature enables you to print registration cards of expected bookings in advance and save time during the check-in process. From 'Arrivals' (this feature is also available on all booking search screens) choose all bookings through the 'all' link and click the Registration Card button. Print all related registration cards. You can use this functionality to add a new registration card to each booking, if necessary. The newly added registration card is automatically completed with the data of the booking holder.
  • Discounts. The discount calculation functionality has been improved.
    • Discount Base. Now a discount can also be calculated on the basis of the revenue groups selected. This way you can offer discounts applicable to the room charges only or use different discounts for the room charges and meals.
    • Charge. A new option for setting discounts has been introduced: as before, you can have a discount on the revenue group or alternatively you can apply it through a separate line for each revenue group. Doing the latter will decrease the revenue from each revenue group shown in the reports – nights, meals, etc.
  • Languages – Public. A new feature allowing you to choose which languages (and related texts and descriptions) to make public on the WRS. Prior to the introduction of this option, a language would become public with its adding to the WRS. The public status of a language can be changed from the language list through the 'Make public' button.
  • The concept of the OOS room status has been changed. It used to be valid for the whole day when applied. This prevented arrivals or departures for a OOS date. Now this status is similar to the checked-in status for a room. If a room is OOS on 05.07, you have only departures and no arrivals for this room on this date.
  • Advanced Search – it contains two new columns – date and time of booking creation and date and time of booking cancellation.
  • Automatic voiding of empty folios with guest's check-out. Additionally, no right is required for voiding these folios. This optimisation facilitates operations at the reception desk.
  • Sorting. A new screen has been created for sorting out rooms, rates, charge templates, etc. Easier sorting through drag and drop functionality instead of entering values in various fields. To sort out a list, click its Sorting button above it.
  • WRS – arrangement of charge templates. The sorting of the additional services on the WRS has been changed. If you wish to change their arrangement in your own way – use the new sorting option through the drag and drop option.
  • Now guests' names appear in full in pre-arrival, post-departure and confirmation emails, e.g. 'Mr. John Smith', instead of 'Mr. Smith' only.
  • Payment Report – a new filter for folio type added – deposit or no deposit one. This way it is easier to audit payments to and from folios.
  • Charge Control Report – new period filters added: service date and transaction date filters. All filters can be used in combination. You can find charges referring to previous dates (service date), but changed today (revenue date).
  • WRS - Worldpay integration. A new code has been added to guarantee that customers are redirected to the top of the Worldpay page.
  • Change Log – now you can use it to track changes to the account settings such as fees, users and ParityRate settings.
  • Housekeeping Live Monitor – already accessible even without additional rights (similarly to the Housekeeping Report)
  • Export templates can work in a character set selected in advance

Fixes

  • The number of rooms referring to the adaptable rate levels couldn't be updated.
  • WRS – the new Non-Compatible Product Managament option did not work properly, when the min/max adults/children and min/max stay restrictions used .
  • When moving a booking to an OOS status room, the OOS status check was not always accurate
  • The bug with copying a rate plan and the related seasons has been fixed.
  • A user's cashier closure report wrongly included the payments created by this user, but voided by another one. Also closed folios were present in the cashier closure report of the user having created them instead of the user having closed them.
  • WRS - Map. The minimum price shown for each location was based on the prices of the non-compatible products too.
  • Advanced Search – the red buttons for quick deletion of values have been fixed .

Clock POS update (15 Jul 2015)

Fixes

  • On a small screen, all buttons now work properly.
  • The Auto Logout setting has been moved to another screen - POS Settings.
  • On the booking lists, bookings did not always have the correct date due to time zone shifting.
  • A new WBE settings screen has been added

Clock PMS Update (18 Jun 2015)

Self Service

Themes

A new functionality has been added allowing you to use 17 standard themes to customize the appereance of the Self Service Portal.

Self Service Theme

Self Service Theme

Self Service Theme

Self Service Theme

Note: If you are already using a custom CSS file, you must remove it to see the original theme. Make sure you have a backup copy of this custom CSS file.

Background Image.

Set your own background image for the Self Service Portal. In combination with the Themes, you can have your unique style and layout of the Self Service Portal.

Self Service Background

  • Links to the table booking systems of your restaurants have been added. For each hotel, you can choose the table booking systems of which restaurants to appear. Go to 'Other' - 'Settings' - 'Self Service Portal' and select these restaurants in the Table Bookings section.
  • new setting has been added allowing on-line payments. This way you can enable on-line payments without the self checkout option.

Gift Vouchers

The Gift Voucher Module now has greater functionality. The module has been integrated into the Web Resevation System and Folios.

Until now guests had to use a paper copy of the vouchers issued. Now these vouchers can be used as Gift Certificates, i.e. they have electronic balance and can be used online .

  • Unique number. With each voucher bought after 18 Jun 2015, a guest will receive a 20-digit unique number. Through this number the guest can use the voucher partially or in full in the WRS or as a payment method in folios.
  • Use of Gift Vouchers in the WRS
    • You can allow your guests to use gift vouchers in the WRS to guarantee their bookings. Just choose which guarantee policies to provide this option and tick their Gift Voucher check box.
    • On the third page of the WRS, where the payment methods are selected, a new Gift Voucher option will appear.
    • The guest enters the 20-digit number of their gift voucher
    • Then the WRS shows the value of the gift voucher and personal greeting from the person having bought the voucher.
    • Now you can use the gift voucher for bookings whose required deposit is equal or less than the gift voucher's value
    • Upon gust's confirmation, the whole value of the gift voucher is transferred to the guest's folio.
  • Use of Gift Vouchers in Folios
    • A new Gift Voucher button has been added to the folio screen through which receptionists can accept guests' gift vouchers.
    • The number of the gift voucher is entered, as well as the amount to be transferred to the folio.
    • Depending on the system's settings, the voucher is redeemed partially (the remainder can be used another time) or in full (the remainder is also transferred in favour of the hotel)
  • Expiry Days. This new setting determines the number of days within which a voucher is to be used once being bought. With the expiration of this period, the voucher can no longer be used.
  • Partial or Full Redemption. Through this newly introduced option you can set whether a voucher amount remainder, if any,can be used another time, or it is to be automatically transferred in favour of the hotel.
  • The following changeshave been introduced to the folio organization when gift vouchers are used.
    • Two folios are created: an open folio containing the amount of the gift voucher itself, and a closed one for eventual services such as transportation, packaging and shipment.
    • The first folio and the related payments are at the guest's disposal.
    • Now you don't need to post a charge for the gift voucher amount, but only a payment equal to this gift voucher amount.
  • Gift Voucher Search. You can search for gift vouchers by number or contact info. Amount remainders of gift vouchers are also shown in the search results.

Gift Voucher in WRS

Gift Voucher in WRS

Web Reservation System

Non-Compatible Product Management.

Now you have more precise options to manage the rates appearing in the 'See more rates not compatible with your search' section.

  • You can hide the whole section through the new setting in the 'Non-Compatible Product Management' section in 'Settings' - 'WRS Settings'
  • Choosing certain restrictions, some rates will be unavailable and will not appear in the section. Here are some examples:
    • Selecting 'Max Adults' will hide rates for smaller room types as their Max Adults rate restriction is triggered.
    • Selecting 'Max Stay', the rate packages for shorter stays will be omitted, but will display the packages for longer stay.

WRS Not compatible products

Other

  • Product Sort Order Settings.You can choose the criteria for arranging products on the second page of the WRS.
    • By Price - Ascending. The products with the lowest prices are at the top. Respectively, the Room Types and Rooms themselves are arranged from the ones with the lowest prices to the ones with the highest prices.
    • By Price - Descending. The products with the highest prices are at the top. Respectively, the Room Types and Rooms themselves are arranged from the ones with the highest prices to the ones with the lowest prices.
    • By Rate's Sort Order Field. Set a value for the sort order field in each rate and arrange products in the most convenient way for you. Room Types/Rooms will also be arranged, using the lowest value in this field of the related rates.
  • Now the Calendar takes into consideration the room type and rate filters. This way it is much easier to integrate the Calendar into a website or use it through deep links.
  • You can no longer enter negative values in the fields of Stay, Adults + Children using the spinners of these fields.

Folios and Taxes

Customization of Print Templates for Folios and Invoices

It is a new functionality helping you create your own html template for the documents you print. The system supports a few settings for this matter:

  • Folio Template. The Template is used for printing open and closed folios (i.e. folios closed through the 'Close' option)
  • Templates for Each Document Type. The templates will be used for the closed folios, depending on the closing document selected to be issued, e.g. "Close - Invoice".
  • Still you can select to use the system template or a template of your choosing to print a document.

Template Setup:

  • Go to 'Settings' and select 'Folio Print Template' in the 'Advanced Settings' section
  • Add a new template and enter its name.
  • The folio template itself is to have an html format and contain the folio's html code instead of the code of the whole html page – i.e. it should not contain head or body tags.
  • Template Language (replacing the fields with values) to be used is Liquid. For more information on its syntax, go here
  • CSS framework to be used is the standard one for the system - Bootstrap. For more information, go here
  • An example of a folio print template can be found here: Folio Print Templates

Upon finishing the setup of folio templates, you can access them on the folio printing screen by clicking the 'View' button. Here is how you can set these templates to be used by default :

  • For open and closed folios - 'Settings'- 'Tax Settings' and choose the folio print template in the section. This will be the default print template used for open and closed folios.
  • For any other document type - 'Settings' - 'Document Type/s' - 'Edit' - 'Folio print template'. This will be the Template used for the folios closed through the respective type of document.

Revenue Date Modes

Two more Revenue Date Modes have been added

  • Auto Revenue Date. It is based on the present mode and the default one. In this mode, the Revenue Date changes automatically at midnight without any user's intervention. No changes to the past revenue date are possible. Such changes are registered as a correction on the new date.
  • Manual Date. A new mode similar to the above one, however, here the Revenue Date does not change automatically. It is to be changed by the user on a daily basis. Also, the user chooses the time for this change (either before or after midnight). Upon entering the new date, it is no longer possible to register a revenue with the past date, and all changes are registered as corrections on the new date.
  • Manual Period.A new mode, allowing you greater flexibility in terms of past days, but also letting you lock already reported periods. Here is a practical example of the use of the new mode:
    • A company paying taxes based on its revenue reports is to submit the related documentation by the 15th day of the next month.
    • This company needs the corrections to charges to be reflected as precisely as possible, i.e. they have to refer not to the current date, but to the date of rendering the service, even if it is in the past.
    • In the second case, the system will register the correction as referring to the past date revenue, provided that this date is not already closed (the date must be after the 15th day of the previous month). Thus the information of the services rendered is most accurate and up to the last possible moment – the 15th day of the month.
    • The corrections made after closing the reported period are registered as referring to the present date.

If you wish to change the reporting mode for the revenue date, please contact the Support Team of Clock Software.

In the 'Manual Date' and 'Manual Period' modes, the Revenue Date is changed from the Tax Settings screen. To do so, the user needs to have the Change Revenue Date right.

Other

  • Closing folios having payments only. The limitation for closing folios containing payments only and no charges has been removed. As a result, guest checkout operations are made easier.

Room Calendar

The Room Calendar have new options:

Room Calendar

  • View: Normal, Compact, Wide – select the most suitable view for your hotel or the specific situation.
  • A new pop-up when clicking available day cell. The user is prompted with the options for stay duration, making the booking creation process faster.
  • Blocking rooms as OOS. In the new pop-up, there is an option to quickly change the status of a room from OK to OOS, and vice versa.

Room Calendar - popup

Other Improvements and changes

  • Title and Salutation. Now you can choose a title for each guest. The guests can also choose their title in the Web Reservation System.

    WRS title

    Depending on the title selected (e.g. 'Mr.'), the related salutation will be used in the letters (e.g. 'Dear Mr.').

    Salutation

    Title Setup:

    • Select 'Settings' - 'Title'.
    • Add the titles to be used.
  • In order to add and/or translate the related Salutation:

    • 'Settings' - 'Languages and Texts' - 'Title/Translation'
    • Enter the translation of the respective Title and the related Salutation
  • Rates – Sort Order. Rates now have a new Sort Order field. Use this field to arrange the rates in the rate editor the way it suits you most. The new arrangement is also used with the 'Set Multiple Days' editor or as an option for arranging the products in the WRS.
  • Changes to booking notes are also tracked in the change logs of bookings.
  • To the lists of bookings (Arrivals, Departures, In Hotel, Search and Advanced Search), a profile note has been added for each booking. Here you also have the option to quickly change the guarantee status of bookings. 

    Profile Notes

  • Through the Advanced Search you can export data in custom formats, developed at your request. Please, contact the Support Team in relation to such requests .
  • Advanced Search – the columns selected are stored, and you no longer need to select them with each use of the Advanced Search screen.
  • Booking – the re-posting option keeps the manual changes, always when possible. Changing the period of stay for a booking, new charges are posted for the new dates, and the charges for the old dates are removed, but all other charges remain without re-calculation.
  • Meal Report is now sorted out by room number instead of booking number.
  • New links have been added to the folios appearing in the following reports: - Open Folios Report, Payment Report, Payments in Open Folios Report, Account Receivable Report
  • Occupancy Forecast – a new total of available rooms has been added
  • In the segmentation reports (Charge Segmentation Report and Bednights Report), a new segment has been added - Arrival Room Type.
  • The enabling and disabling of add-ons is now performed by the Clock Software specialists. Please, get in touch with us to enable or disable an add-on.

Fixes

  • The problem related to WRS errors, occurring when a service being used in the WRS is deleted, has been solved
  • On a booking screen, the commission note included the other note too.
  • The folio printing screen did not always open in the correct language.
  • WRS – the location map – if any of the locations was linked to multiple apartments, the map did not show all of them when clicking the related marker.
  • The bug leading to incorrect price calculation, when a combination of manual prices and an adaptable rate was used, has been fixed.

Clock PMS Update (19 May 2015)

Web Reservation System

Themes

Now the layout customization of the Web Reservation System is even easier. You don't need special expertise. Just in a click, the new 17 themescan be applied to the WRS. Check out the different themes and select the most suitable one for your WRS.

Web Reservation System Theme

Simplex

Web Reservation System Theme

Superhero

Web Reservation System Theme

Sandstone

Note: If you are already using a custom CSS file, you must remove it to see the original theme. Make sure you have a backup copy of this custom CSS file.

You can see a preview of the themes here: Web Reservation System - Themes

Applying a theme to your WRS:

  • Select 'Other' - 'Settings' - 'Web Reservation System'
  • In 'Optional settings', use the 'Theme' field to select the theme. Save.

Here are the new customization options for the style of the Web Reservation System :

  • Pre-defined theme. Select one of the 17 themes. Don't upload CSS files.
  • Partial customization of a pre-defined theme. Choose one of the 17 pre-defined themes. Add a custom CSS file with your changes to the styles (background colour, font, etc. ). You may need assistance from your web developer.
  • Entirely customized style. Select 'None' for a theme and upload custom CSS files containing a custom version of bootstrap. See in "Web Reservation System - Colours and Fonts customization" how easy it is to generate it.

Rich text in descriptions

The following descriptions in the WRS and Confirmation emails can be formatted through rich text:

  • Room type description
  • Room description
  • Rate description
  • Hotel policy description
  • Guarantee policy description

In all of the above, you can use styles, fonts, sheets, colours, tables, alignment, etc. Just find any of these fields in the Languages and Texts. Click the description's text and use the buttons of the rich text editor to format the text like you do it in Word/Open Office.

Rich Text Editor

Note: When copying/pasting a preformatted text from another editor or page, you may not get the expected result. So, paste an unformatted text and use the functions of the editor to get the best results.

Web Reservation System Rich Text Descriptions

Room type Description

Other Changes to the WRS

  • Clearer Advanced Translations. The customization of labels and texts in the WRS and confirmations is easier. The original English text, as well as hints of its location and use, have been added to each field in the Advanced Translations.
  • The confirmation and other emails from you appear with the name of your hotel in the inboxes of your clients.
  • Extra service page: services have been arranged alphabetically and aligned left.

Housekeeping Live Monitor

The new feature of Clock PMS enables the reception desk to receive all changes to room statuses in real time. Like everything else in Clock PMS, the new Housekeeping Live Monitor is mobile-friendly.

Web Reservation System Rich Text Descriptions

Load it on a tablet at the reception desk and receive sound notifications of each change to a room status, sent by the housekeeping personnel also using such mobile devices.

The changes are colour-coded to help you spot the newest ones easily. The new functionality also enables you to attend to guests faster and improve the communication among the various departments.

To open the Housekeeping Live Monitor:

  • Select ‘Other’ - ‘Reports’ - ‘Housekeeping Live Monitor’
  • Untick the ‘With sound’ check-box for a silent mode and click ‘View’
  • In real time, the monitor will ring with each new update and colour the updated room

Room Calendar

Room Calendar Dates COlours

Holidays and special events

  • Let holidays and special events appear in a different colour in the Room Calendar. Now you can set a colour and text to certain date cells in the Room Calendar, so that holidays and other special events can stand out. The texts set appear as labels above the calendar. How to set this feature:
    • Access the Room Calendar
    • Select 'Labels' from the navigation
    • Add the dates, choosing a colour and text (the text field may be left blank) for each of them.
  • The year appears with each of the months.

Rates

  • A new feature in the rate editor: 'Hide details'. Use it to hide most of the details and have a more compact view of the editor.
  • In the section of each rate, a new button has been added. It allows you to use the Set Multiple Days option for the respective rate only. This way you no longer need to search for a rate in the long list of rates on the Set Multiple Days screen.
  • On the Set Multiple Days screen, the rates have been arranged alphabetically.

Clock PMS Rates

Rates - compact view

Other

  • Credit card payments (Authorize.net) in back-office. When using Authorize.net, credit card payments can be made from the folio screen. Here are two possible ways of using the new feature:

    Just collect the credit card data of your clients through the WRS or over the phone. You can use this data to effect a payment later on. Thus the employee doesn't see this sensitive information and is still able to finish the payment process, even not having the 'Credit Card: View data' right.

    If you have the credit card data in front of you, you can enter the credit card data manually and effect the payment.

    For credit card payments via Authorize.net:

    • Open the guest's booking and folio
    • Click 'Credit Card Payment' in the 'Payments' section.
  • Note: The button is only visible when Authorize.net is set up.

    • If a booking contains credit card data, you will see the Existing Card tab. Enter the amount. Untick the 'Clear the Credit Card Data' check-box, if the credit card data will be needed for further payments.
    • Alternatively, click the New Card tab and enter the data of a new credit card, the amount and pay. The credit card data is not stored in the system and cannot be used another time.
    • To finish the payment, click 'Save'.
  • Note: Keeping credit card data, when it is no longer needed, violates the PCI DSS requirements.

  • Channel managers – more up-to-date occupancy data. Channel managers' algorithm of updating occupancy data has been changed. As a result, the time needed for updating the occupancy data is significantly shortened and overbooking is reduced to its minimum.
  • Advanced translations – clearer folio labels. Now it is even easier to find and translate texts appearing in folios.
  • Now users with administrative access can only provide access to the accounts they themselves have access to.
  • Taxes – greater value precision. You can enter the following tax value: 7.5025%
  • For links/buttons which cannot be opened in a new tab, there is a new clearer error message replacing the current one "The change you wanted was rejected."

Fixes

  • Self Service – the self checkout now appear on other payment interfaces too.
  • Fixed transfer charge from the 'all folios' company screen
  • Automatic room allocation – in some cases, it did not include rooms being released on the current date.
  • The period of the Credit Card Log Report did not reflect the user's time zone correctly.

Clock POS update (19 May 2015)

Table Bookings

  • booking note has been added
  • WTBS (Web Table Booking System) – the validity of clients' emails is checked, so that the related mistakes can be reduced .
  • When choosing 'Calendar' and 'Bookings' from the main screen, there is a clear error message when the setup of table types, tables themselves and meals is incomplete.
  • Help texts have been added to the setup screens
  • Other bugs have also been fixed.

Clock PMS Update (27 Apr 2015)

Web Reservation System

Layout Proportions

Now it is possible to select the proportion between the left and right column on the production page in the WRS.

Depending on the length of the description of room types/rooms and the number of rates, it might be useful to use one or another proportion. Test the different proportions and select the most suitable one for your website. Don't forget to test the new proportions on different platforms: a desktop computer, tablet and smartphone.

The new setting can be found in: 'Other' - 'WRS Settings' - 'Product page: Left/Right Column Proportion" in the 'Optional settings' section.

Clock PMS WRS Proportions

"6 / 6" proportion

Clock PMS WRS Proportions

"8 / 4" proportion

Clock PMS WRS Proportions

"Full width" proportion

Extra Services for the Whole Stay.

As a part of the settings of the extra services, used in the WRS, now you can choose which services to refer to the whole stay of a guest.

Similar services will automatically be charged on the basis of the chosen quantity multiplied by the days of a guest's stay.

For greater clarity's sake, you can change the default title of a quantity field to a clearer and more suitable one for a specific service.

Then clients will easily know what they need to enter in this quantity field, e.g. the number of their cars for the parking lot service or the number of adults for the breakfast: adults service.

Clock PMS WRS Parking service

"Cars" as a quantity label

The new field title can be edited in 'Languages and Texts' - 'Charge Template Description/Translation' – 'Quantity' field.

PayPal – Allow Guest Checkout

For the PayPal payments in your system, you can choose whether a client to be redirected either to a page with their username and password displayed by default, or to a page where their details and the ones of their credit card are prompted.

We would like ro remind you that actually PayPal offers this option only to first-time users of their service (depending on the region of rendering the service). And when an email address is used for a second time, the user is required by PayPal to log in to their account.

If you prefer a credit card payment not requiring account creation and logging in, you can add the Authorize.net services to your subscription.

The new setting can be edited in 'Settings' - 'PayPal Express' - 'Allow guest checkout'. You need to re-enter your PayPal credentials.

Other

  • A new small icon has been added beneath the images of room types, suggesting that these images can be enlarged.

Folios

  • Two more layouts have been added to the folio printing ones:

    Hotel Folio by Dates

    By date.

    The information is grouped by date and print text. If the elements of a package have the same print text, for each date only one line with the total value of these services will be printed.

    Hotel Folio by Text and Price

    By Text and Price.

    A more compact printing layout not containing information by dates, but the services having different prices are shown in separate lines.

  • Payment Transfer.A new feature has been added, through which you can easily transfer payments or parts of them from one folio to another. You can find this functionality:
    • In the payment section of the folio screen
    • On the screen for group bills: "Arrivals/In hotel/Departures" - "Select Multiple" – "Transfer" option in the dropdown menu of the Folio button. A new 'All payments here' button has been added to the screen.
  • Transfer of Charges and Payments related to Expected Bookings. Option for searching the expected bookings when choosing a folio to transfer payments or charges to.
  • Discount. A new button has been added for quick calculation of a discount on the whole folio amount.
  • A new right to the use of the Manual Charge option has been added. It has been automatically granted to all the users having access to hotel accounts. On the User editing screen, you can find the right in the new 'Grant Rights – Folios' section.

Other

  • Custom Text in Booking Confirmations.Apart from the standard information, now booking confirmations can also contain custom text, e.g. important notes or simply to pay special attention to your clients. The custom text is in a rich text format. Use the font, font sizes, etc. that best suit the booking confirmation style.

    In order to enter a custom text:

    • On a booking confirmation screen, click the 'Custom Text' button.
    • Fill in the text, format it as per your preferences and save it.
    • The custom text saved will appear in the confirmations of this booking. If you do not want this text to be included, access the field and delete the text.
  • You can also use this feature when sending confirmations of multiple bookings. These confirmations will contain all custom texts related to the bookings included. Enter the custom text desired in one of the bookings and it will be included in the group booking confirmation. In order to send a group confirmation containing a custom text:

    • Select the respective bookings from any of the booking search screens
    • Click the Confirmation button
    • Select 'Custom Text'. A screen opens on which you can edit the custom texts included in all the bookings selected
    • Enter the desired text in any of the bookings and save it
  • Housekeeping Report. Now it contains data of arrivals and the number of nights related to the checked-in bookings. This way you can plan the housekeeping department operations in greater detail.
  • For the hotels accepting bookings for years ahead – the calendars enable you to select periods of time which are up to6 years ahead.
  • Booking Advanced Search – the bookings' and profiles' notes have been added. The filters on the screen have been re-arranged in a more logical and compact way. 

    Booking Search - notes

Fixes

  • The transfers report issue related to the fact that the report did not work, if data of adults and children was missing, has been fixed.
  • The editing issue with the expired blocks has been fixed.
  • The registration cards did not get marked as completed upon their signing.
  • Upon transfer to a new company folio, the name of the new folio was not taken into consideration.
  • The old invoices are migrated to the new types of documents.
  • Upon deletion of a rate, associated with a company, it was impossible to access the company itself
  • The amounts pertaining to payments in JPY contained two extra digits
  • The Tax Report also contained the voided folios.
  • On the Room Calendar screen, the orange suggestion button is hidden, as it interfered with the work process
  • The links in the Charge Summary Report to the Charge Control Report did not work, when a company was used in the segmentation.
  • When adding a new registration card to a booking, the screen moved up.
  • The problem related to the possibility of duplicating bookings from the WRS, when guaranteed by credit card, has been fixed.
  • Booking – the company creation button did not work in certain cases
  • The users only having the "Cashier Closure: Close anybody" right can now generate the Cashier Closure report pertaining to their operations in the system too.

Clock POS update (27 Apr 2015)

Table Bookings

This new Clock POS module allows booking restaurant tables.

Apart from telephone bookings, Clock POS also provides a Web Booking module. Booking a table online is intuitive and easy. The user interface is responsive and operates conveniently on smartphones and tablets, too. Booking via the web booking engine is as follows:

  • Clients select date, meal (Breakfast, Lunch, Dinner, etc.) and the number of guests.
  • The system offers the available times for booking a table.
  • Clients select time, fill in their contact details and create the booking.
  • The system registers the booking, selects a specific available table automatically and sends a confirmation letter to the client.
  • Done!

Clock POS Web Table Booking Page 1

Page 1

Clock POS Web Table Booking Page 2

Page 2

Table Types and Tables

To set up the module start with the table types and the tables themselves from 'Management' – section 'Bookings' - 'Table Types' and 'Tables'.

The Table Types are defned by two main parameters: 'Min seats' and 'Max seats'. They determine what table type is offered to guests booking online. When booking a table, clients specify the number of guests. The system offers a table type whose 'Min seats' and 'Max seats' parameters contain the specified number of guests.

For example: you have tables for 4 and tables for 6.

  • For the tables for 4, you set 'Min seats' as 2, and 'Max seats' as 4. Then these tables will be offered to clients booking for at least 2, but for no more than 4 people. They will not be offered to clients making a booking for 1 person.
  • For the tables for 6, you set 'Min seats' as 2, and 'Max seats' as 6. Then, these tables will be offered for bookings for 2-4 people, if that there are no free tables for 4 available, and for bookings for 5-6 people. If there are no free tables for 6 available for a certain time period, this period will not be offered for selection.

After the table types, set the tables themselves: for each table fill in its name (or number) and its respective type. The number of tables defines the capacity of your restaurant.

Meals

The meals, or the times of day for which bookings can be made, must also be set in the web booking engine. For example, 'Breakfast', 'Lunch', '5 O'Clock Tea', 'Dinner', etc. To do this, go to 'Management' – section 'Bookings' - 'Meals'.

Start time/ End Time

Each meal has a start and an end time. All bookings for a specific meal fall in the interval between the start and the end time set for it.

For example, for 'Dinner' set a period from 18:00 to 23:00. Then the first Dinner booking can be for 18:00, and the guests from the last one must leave by 23:00.

Scale (minutes)

Select the interval between the available times offered.

For example, if you choose 15 minutes, your clients will be offered the following times: 18:00, 18:15, 18:30, 18:45, etc. If you select 30 minutes, the times offered will be 18:00, 18:30, 19:00, 19:30 etc. The table calendar will use this scale.

Default Duration (minutes)

Fill in the expected average duration of the meals. This will be the duration the Web Booking Engine uses when table bookings are created.

For example, for Dinner set 120 minutes (2 hours). So, in the interval from 18:00 to 23:00 (5 hours), there can be two bookings per table maximum. Also, guests will be offered the available times from 18:00 to 21:00, so the last booking can leave at 23:00 at the latest.

Activation of the Web Booking Engine

To activate the Web Booking Engine:

  1. Create a new user:
  • go to 'Management' – 'Users', specify user name e.g. POS WBE
  • go to 'Management' – 'Account Info' and select the newly created user in the User field.
  • Create a language:
  • go to 'Management' – 'Languages and Text'
  • click 'New'
  • select a language
  • click 'Create'
  • Set the language
  • go to 'Management' – 'Account Info'
  • select the new language in field 'Wbe default language'
  • click 'Save'

Bookings, List and Calendar

You can use the List or the Calendar to create, edit and review bookings. To open the list or the calendar from the main screen, click the 'book' menu and the respective option from its dropdown menu.

Calendar

Clock POS Table Booking Calendar

Table Calendar

In the Calendar you can see all the valid bookings, except the voided and the pending ones.

Clicking a booking opens it in Edit mode.

Clicking an available time opens the new-booking screen. When creating a booking from the back office, you can set any duration, even if it is beyond the end time of the meal.

List

In the 'Bookings' list you can see all the bookings for a certain date, grouped by meals.

The voided bookings and the pending ones are also included.

Use the 'New' button to create a new booking.

Web Booking Engine

To see your own Web Booking Engine, select 'Web Booking Engine' from the menu.

You can integrate the web booking engine into your website by creating an iframe with the URL of the web booking engine. The URL can be found in the meal setup screen: 'Management' – section 'Bookings' - 'Meals'.

Other

  • Menu items – colour and sort order.

    You can set different colours for different menu items and/or arrange the items in the order which best suits your needs. Both colour and order can be edited for each item separately, or for multiple items at once.

    Clock POS Menu Items

    Clock POS Menu Items

Clock PMS Update (30 Mar 2015)

New Types of Rates: Occupancy Adaptable Rates

For the purposes of yield management, we have added a new type of rates to the Advanced Rates add-on.

The new type of rates enables the automatic change of room prices for each day. Thus a room price follows the occupancy level of the respective room type on this day.

Additionally, you can use the manual price option. It is very useful for the dates, when you know in advance there will be high demand and you would not like the automatic levels to be activated.

The rate setup is done through adding occupancy levels and corresponding rates. The rate for each occupancy level can be of any type:

  • Basic rate
  • Rate derived through the addition or subtraction of an amount or percentage to a standard rate
  • Derived rate on the basis of another derived rate, etc.

In a similar way, the new type of occupancy adaptable rates can be used as a basis for derived rates or as a part of another adaptable rate.

The new type of rates works both for PMS and WBE, as well as for the OTA channels.

Setup

  • On the Rate Plan Screen, click 'Add Rate' and select 'Occupancy Adaptable Rate'
  • Fill in the standard fields of the rate
  • Set different occupancy levels (these levels correlate to the number of free rooms of a given room type) :
    • The lowest level (empty hotel) has automatically been added. Select a rate for it.
    • Add the next levels, as, for each level, determine the corresponding number of free rooms and the rate to be used.
  • Save the rate

Changes to the Basic Rate Amounts

The rate amounts building up an adaptable rate can be changed at any time. The adaptable rate amount will correspond to the current state of the related rate.

Manual Prices

If you fill in an amount for the adaptable rate itself (for a season or special day), the amount entered by you (a manually set price) takes priority and the adaptable rate do not apply. Thus you can define the price desired by you for dates and seasons when you expect high occupancy and stop the use of the occupancy adaptable rate in these cases.

Restrictions

Restrictions operate in a similar way to derived rates: The adaptable rates themselves can contain restrictions. The restrictions set up in the rates building up the adaptable rate are not taken into consideration.

Clock PMS Occupancy Adaptable Rate

New Occupancy Adaptable Rate with 4 occupancy levels named 'Yeld'.

Clock PMS Occupancy Adaptable Rate

Traditionally, there is high demand on 31 March. The price is overridden with 110 EUR.

Clock PMS Occupancy Adaptable Rate

Rate Availability screen: 'Yeld' rate - prices adapt to occupancy. The price for 31 March is an overridden one.

Users – New Unified Screens

The user screens in PMS, POS and GOLF have been redesigned, in order to be more convenient for larger organizations with more users.

The screens are the same, so that it is equally convenient to edit a user, regardless of the system used. All of the three systems have the following improvements:

Clock PMS Users index

Search for users by name. Filter by property. Fast deactivation.

  • Search for users by name or full name
  • Search for users with access to a certain account
  • The inactive users are hidden and in grey. In order to see them, select the 'All' filter.
  • For any user listed as a search result, a deactivation option has been added to the Edit button dropdown menu.
  • In the Edit mode for a user, you can simultaneously grant (and see) the access rights to all systems.
  • Now users can change their passwords on their own, without being granted the User: Create and Edit right.

Web Reservation System

Location Map

A new feature has been added to the WRS, enabling your guests to see all of your free units/apartments on a single interactive map. The map is to be found at the second step and it provides information on any unit (an image and description), as well as its price (minimum price). Choosing a certain unit, all of its rates (products) are visible and can be booked.

Setup:

  • In 'Settings' – 'Locations', add the different locations, in which you have units.
  • Depending on whether you use the WRS in the Room Type Mode or in the Room Mode, set the location for any room type or room (Room Type Edit Screen or Room Edit Screen).
  • Add one more location map (e.g. 'Main Map'), which is to be used as a map of the markers of all units. Use a proper zoom, so that the map can comprise all locations and do not add a marker. Note: if added, you can remove this marker through a special button for that matter.
  • In the 'Optional settings' - 'Location Map' section of the WRS, select this location (e.g. 'Main Map').
  • 'Save'

Clock PMS WRS Location Map

All your properties on one interactive map.

Setup of Descriptions:

  • In order to set the Name, Short and Long Description for any location, select 'Languages and Texts' - 'Location/Translation'
  • Name and Short Description will be visible for any location.
  • The Long Description is used in booking confirmations and can be used for the purposes of giving directions.

Clock PMS WRS Show property location

Show property location.

Use:

  • The map is to be found on the second page and reflects the free units
  • The filters for a room type or room in the deep links are taken into consideration when the map is generated and it only shows the units complying with the filters set.
  • Any marker shows an image (of the unit type or unit), location name, short description of the location, as well as the minimum price of the rates in this location.

Calendar

  • The calendar of the WRS has been redesigned and now it has an entirely responsive design. Thus it is much more convenient to use on mobile devices and integrate into the property website.
  • For guests' convenience, a new option to view 12 or 24 days has been added.

Clock PMS WRS Mobile frendly calendar

Responsive Calendar.

Rates - Badge

If you wish to have a red badge shown next to a rate in the WRS such as: 'Best price', 'Hot', 'Discount', etc., you can use this new field.

Clock PMS WRS promo rate

Promotion Rate.

  • Choose 'Settings' - 'Web Reservation System'.
  • Select 'Choose rates' from 'Required settings' - 'Web Reservation System Rates' section.
  • Fill in the 'Badge' next to the rates of your choosing. 'Save'.

Booking several rooms/beds at a time

As before, the Clock WRS enables a single client to book multiple beds. Up to now, however, you had to add each room individually. Such an approach is not very convenient for hotels where often several beds are sold at a time. For these cases, we have added a new feature through which you can add several rooms/beds at a time clicking only once. In order to use this feature: 'Settings' - 'Web Reservation System' – fill in the 'Max Rooms/Units with one click' field.


Note: This functionality is not compatible with the the option for selection of extra services in the WRS. If you use this feature, the extra service screen will be omitted.

Clock PMS book multiple beds

Choose rooms/beds.

The free rooms shown now reflect the rooms currently selected by a guest.

The list of products (second step) now shows much clearer information on the booking options when booking multiple rooms/apartments/beds. The free rooms are decreased by the number of the rooms selected by a guest during the ongoing session. This way, if the guest chooses a certain apartment, it will not be listed for secondary selection. The number of the free rooms of this room type will also be decreased. This feature does not affect the rest of the users – they still can see the free rooms for which there is no actual booking and the ones selected during their session.

Channel Manager

Version Control During the Update

The update of the bookings received from the channels used to be automatically and unconditionally performed. However, this behaviour led to losses of data entered by the user. The new feature for Version Control allows the automatic update only when there is no prior editing of the booking by a user.

If a booking has been edited by a user, the update will not take place and a special To-Do is generated to notify the user of the conflict. Upon viewing the change log of the booking, as well as the booking received, the user can decide to force the update by clicking the Import button or to manually change the booking and ignore the notification received by clicking the Ignore button.

In order for this functionality to operate properly, the user selected in the settings of the channel manager has to be individual, not to be used for other operations and not to be changed.

Other

  • A new screen has been added, on which the rate and availability data sent to the channel manager can be viewed. Note: This is not the last notification received, but the general picture of the rates and availability created on the basis of the notifications received regarding each new change to rate and availability data.
  • The user selected in the channel manager now has to have the 'Charges: Edit, Transfer and Void' right, so that updates can automatically change the price, if necessary. The new right has automatically been added to all channel manager users.

Locations

  • Booking Confirmation – a unit location map . The booking confirmation contains location maps of the units covered by the booking. Now there is an additional description to each map which can contain directions how guests can find your property. In order to fill in these directions, go to: 'Settings' - 'Languages and Texts' - 'Location/Translation' - 'Description' for the respective location.
  • In order to set up different maps for your various units/apartments/villas: enter all locations first, then select each of them in the edit mode for the respective room type or room.
  • For the units having only one location (hotels), the setup of the map to be shown in booking confirmations has been changed:
    • The map can be set up by going to 'Settings' - 'Locations'.
    • Then this map is necessary to be selected to be the main map in 'Settings' - 'Hotel Map'

Clock PMS confirmation map

Location Description or Directions.

Other Improvements

  • Multiple To-Dos. Now it is possible to add multiple To-Dos for any booking or company. This way you will be able to manage the following tasks more effectively: wake-up calls; transfers; ticket purchase; deposit tracking; document issue, etc.
  • Automatic closing of the folios of a booking with its checkout. Upon the checkout of a booking, you are prompted to allow the automatic closing of the folios of this booking. The user can choose whether to close or leave them open.
  • Occupancy and Charges Report – a total section has been added
  • Profile – on the profile screen, you can see the reviews (feedback) sent by the respective guest from the self service portal. The screen can be opened both from profile search results and the eye icon in the booking preview mode.
  • Disabling Pre-Arrival/ Post-Departure Emails for a certain booking. On the booking registration screen, a check box has been added through which you can disable the automatic sending of emails. Still you have the option to manually send emails for this booking at a later stage: Booking Screen - 'Functions' - 'Pre-Arrival Email' or 'Post-Departure Email'
  • Authorize.net - Verified Merchant Seal.

    Clock PMS Authorize.net verified merchant seal

    The users operating with credit card payments through Authorize.net, can add the Verified Merchat Seal to their website and on the credit card data collection webpage. Such a practice increases the conversion rate and builds greater guests' trust in the payment system. In order to add Verified Merchant Seal:

    • The property has to perform certain settings of their Authorize.net account. It is necessary to add the Clock PMS domain to your Authorize.net settings. The domain, at which the account is registered is of the following type: sky-eu1.clock-software.com, sky-us1.clock-software.com, sky-ap1.clock-software.com, etc. For more information on the settings, go to: Authorize.net site
    • Upon making the necessary settings to the Authorize.net account, it is necessary to send the generated script to the support team of Clock Software to upload it.
  • A new translation field has been added: 'Hotel Policy Description' for the purposes of Registration Cards. This way the policy and the description in registration cards can differ from the ones in booking confirmations.
  • Import bookings from CSV file and Import guest profiles from CSV file - a new field 'State' has been added.
  • Deposits – the calculation of deposits based on the number of nights has been improved, so that the rounding differences related to deposit schemes for 2 or more nights can be avoided.
  • Room Calendar – buttons have been added for the previous and the next 7 days, as well as a Today button for the fast setting of the Room Calendar to show the data for the current date.
  • First Day of Week. In the setup of each user, a new setting has been added enabling you to determine the first day of the week in the calendars: Saturday, Sunday or Monday.
  • Bookings Created Today. A new menu item has been added to the 'Booking' menu for the quick searching for bookings created on the current date and their listing as results on the Advanced Search Screen

API

A new module to the Clock API - PMS API. The new API methods include:

Base API

  • Service charges
  • On-line channel for notifications related to bill settlement ( for example, it can be used for fiscalisation or on-line export to the accounting department).

PMS API

  • Bookings: Search, Create and Update
  • Booking – Default Folio (an easy way to find a folio and post the necessary charges to this folio)
  • Bookings – All Folios
  • Bookings related to a room – for quickly finding the bookings related to a room for a certain date
  • Rate and Availability Request – this method is used by the WRS calendar, the Rate and Availability Screen of the PMS (with the calendar option) and for the export to channel managers.
  • Product Request – this method is used for the WRS product page (the second page) and for the Rate and Availability Screen (without the calendar option).
  • Related Nomenclature: Rooms, Room Types, Rates

Scenarios

With the newly added features of the API, apart from the export to the accounting department, now you it can be used for the following purposes :

  • Fiscalisation
  • Connection to PBX (for charging telephone calls made from hotel rooms)
  • Connection to POS (charges to rooms)
  • Connection to Building Management Sytems
  • External WRS
  • External Channel Manager
  • External ITV system bills
  • External Marketing Mailing
  • Export of Documents in Real Time, etc.

You can find the full documentation here: Clock Base/PMS API


Please note that the access to Clock Base/PMS API is a paid option. For up-to-date price information, contact a Clock Software representative.

Fixes

  • ParityRate и RezGain – in the export of availability data, now 1-day minimum stay is sent by default, so that the pre-set value, if any, can be resaved.
  • The Meal Report already shows the room correctly, if there are re-allocations of bookings to other rooms
  • New Booking – registration cards – the calendars did not work properly
  • Custom SMTP – the test email screen used to close on its own
  • Booking Advanced Search – the Created and the Cancelled filters did not reflect the hotel time zone correctly .
  • Rates - Set multiple days – the currency field next to the derived rates has been removed

Clock POS update (30 Mar 2015)

  • The payment registration button has been improved, so that duplicate payments of bills can be avoided. Now you can't use this button for already paid bills.
  • A new report regarding menu item modifiers.
  • Menu Item Selection Screen – a link has been added through which all items selected with previous orders can be seen.

Clock PMS Update (12 Mar 2015)

ParityRate

  • A new feature for automatic update of the bookings already imported has been added. A To-Do is created to notify the user of the change occurred. The change can be seen in the booking change log.
  • Now you can exclude tax percentage included in the room rates (final prices) of the received bookings. Thus clients using the 'Tax not included in prices' mode, can have the net room rates.

Other

  • The 'Room Calendar'screen has been improved.
    • The colours are changed and used in gradation to help you easily identity the booking guarantee level:
      • Red – bookings awaiting guarantee, whose period to be guaranteed has expired
      • Orange – bookings awaiting guarantee, whose period to be guaranteed has not expired yet
      • Yellow – non-guaranteed bookings
      • Green – guaranteed bookings
      • Black – checked in
      • Grey – checked out
    • Two icons have been added: in case of unbalanced bookings and for bookings locked not to be moved (a new feature, see below)
    • A pop-up has been added, which provides basic information about a booking, without being necessary for this booking to be opened. The pop-up appears when holding the mouse cursor over a booking (PC), with the first touch (iOS, as the second one opens the booking), or pressing and holding (Android)
  • Blocks – new options for automatic expiration of blocks : Cut-off days and Expiry date
    • Cut-off days. Through this option you can set how many days earlier blocked rooms to be automatically released. For example, if this period for a certain block is set to be 7 days, the blocked rooms will be released for sale for a period of 7 days as of today.
    • Expiry date. Through this option you can set the date on which blocked rooms to be released for sale. In contrast to Cut-off days, where only a part of the block is released, through Expiry date the whole block (the whole block period) is released.
    • The Block Pickup Report has a new parameter through which you can explore availability (the above parameters are not taken into account ) or pickup % (the above parameters are not taken into account).
  • Room Number Rates.Now it is possible to set a rate for a specific room number. This organisation of rates is convenient for smaller properties having fewer rooms.
    • Through the room number rates, it is possible to use rates and rate restrictions at a room level. For example, you can create an individual rate for apartment #6 in order to stop its sale for certain dates or to change the minimum stay restrictions only for this apartment.
    • If the WRS works in the Rooms mode, room rates will be visible for all all rooms. The rates for room types will continue to appear and be visible. Thus you can combine room type rates with room number rates, allowing you to have promotions for certain room numbers only .
    • Room number rates can be derived from a room type rate. This way rate management is facilitated, for example, you can have one rate for a room type, and use the derived rates only for restriction purposes.
    • Room number rates can be used in channel managers too.
    • In order to create a room number rate: Click the Add Rate button for the respective room type. In the dialogue window, select the respective room number instead of a room type.
  • Document Types and Number Generators.A new option has been added enabling you to define additional document types apart from the Folio and Invoice types of documents, currently existing. Number generators are individually defined and can be connected to one or several document types, depending on property's needs.
    • There is no difference for new accounts – they support the same document types as before – Folio and Invoice. Afterwards you can edit them or add new document types.
    • Number generators have the same functionality as before – number length, prefix and suffix.
    • For each document type, you can set four names as you would like them to appear on printouts: Positive Document, Negative Document, Positive Correction Document and Negative Correction Document. The names can be the same.
    • For each document type, you can specify two number generators: one for positive documents and one for negative documents. You can use the same number generator for both types of documents or different ones. No number generator can also be used – this way documents will keep their original folio number.
    • The new settings can be found in the Advanced section on the Settings screen in its lower right part.
  • New Report - Occupancy and Charges DMY Report. The new managerial report provides summarised information listed on one sheet of paper only and shows hotel performance for a date, the current month and year, as well as in comparison to the previous year.
  • Booking – 'Disable Room Change'. A new check box has been added to bookings, through which you can prohibit the moving of a guest from the initially allocated room. A new icon has been added to the Room Calendar for such bookings.
  • BCC (blind carbon copy) e-mail address for all e-mails sent to guests. Through it, a hotel can create an archive of all e-mails sent to guests, as these e-mails can also be received at an e-mail address specified by the hotel.
  • Sales Analysis by Users.For clients analysing their sales by users:
    • In the Bednights Report, a new feature has been added enabling the participation of the user having created a booking in the information segmentation. This way information can be retrieved regarding the nights sold by users or as a combination of a user and another segment such as a marketing channel, company, nationality, etc..
    • In the Charge Segmentation Report, the user having created a booking has been added. The report provides a flexible breakdown of revenues by weeks, months and in total for a selected combination of segments.
    • We have added a column 'User created' to the Advanced Search for bookings. The data can be exported in Excel and processed depending on the needs.
  • Rate Availability Monitor – when creating a new booking from the monitor, now the Guarantee Policy, set in the rate, is also to be filled in.
  • Guarantee Policy - Deposit. If a hotel uses the Tax not included in prices mode, now the tax will be included in the deposit.
  • Link Generator - now a link to multiple room types can be generated.
  • The State field has been added to the contact info (Booking, Registration Card, Company)
  • Payments Report – now on-line payments contain a transaction reference, so that transactions can easily be tracked in the system of the payment gateway.
  • Folio Edit - there are new buttons for selecting all or none of the charges. The 'View' button menu contains more positions for the easier filtering of charges. Through these functions, it is easier to edit, transfer or void certain groups of charges.
  • WRS – Tracking Code. Now it is easier to set a static tracking code for Google Analytics or another web tracking system. The setting can be found in lower part of the WRS settings screen.

Fixes

  • Confirmation - save as pdf – the file had no '.pdf' extension
  • Blocks – cancelled bookings were deducted from the blocked rooms
  • ParityRate – the bug with the export of availability and prices, when a mapped rate is deleted, has been fixed
  • WBE – the confirmation did not always appear in the selected language
  • Folio Preview – the selected level of detail did not always remain
  • Confirmation/Registration Card – the text of the guarantee policy did not comply with the paragraphs set
  • WBE – the credit card data screens were not responsive

Clock POS update (12 Mar 2015)

Invoices

  • Invoices.Now it is possible to issue invoices (or other document types) from the POS. In order to issue an invoice:
    • On the Settle screen, select 'Billing to / Invoice to" button
    • Enter client's details
    • Select the radio button next to the desired document type
    • Select the 'Invoice' button
    • Specify the payment type
    • The document can be printed out on the thermal printer or in a A4 format through the print buttons.
  • Tip.We have added a feature for the tips received
    • You can print out bills leaving the tip fields empty, which then clients themselves can fill in (for print settings, see below)
    • From the Settle screen, however before settling the bill, select the Tip button
    • Enter either the tip amount, or the total including the tip in the respective fields.
    • When adding a payment (Cash, Card, etc.), the tip amount will be added to the amount due.
    • Specifics: Tips are processed by the system as a negative payment. This way the bill balance is increased as is the amount to be paid. On the printouts for clients, this payment is a positive one, so that it is clearer to restaurant clients; however everywhere else in the system and in the reports, tips have a negative value. Thus payments reports remain the same and show the net amount of payments, which also corresponds to the sum of bill amounts (the cash is increased, and tips are negative).

Additional Print Settings for Bill Footers

  • Now there are two settings for bill footers – one field for open bills and another for closed bills. Through the field for open bills you can set a footer, in which clients can fill in the tip amount and eventually sign it. The field for closed bills can contain a greeting or another marketing text.
  • Cash Payments: Change. When paying cash, the whole amount tendered by a client can be filled in. For user's convenience, the system will calculate the change and show it on the screen. The change is not present on printouts and the bill does not contain any information of it.
  • The use of Order Groups has been facilitated. Up to now, an order group had to be chosen when selecting items. This option has been preserved, however, now a default order group can be set for each menu item. This way when a menu item is selected, the change of an order group will be necessary only in the cases when it is different from the default one. For example, when selecting entrée, you will not need to select an order group, unless these entrées are served as main courses.
  • new right pertaining to drawer opening has been added. The right is granted to all existing users having access to the POS. Revoke the right of users who should not have this access right.
  • On the printout of the closure report in the format for printing on the thermal printer, the payments total has been added
  • The price policy of the POS has been changed. In case of a new POS account, you are prompted to select a price plan.
  • A new Hotel Room Transfer add-on has been added. It is activated by Clock Software specialists at the client's request. On the Settle screen, there is a banner advertising the add-on, which can be closed, so that it does not interfere with your work.

Clock PMS Update (12 Feb 2015)

Self Service Portal

A new feature has been added to the Self Service Portal, allowing guests to guarantee their bookings through an online payment or credit card data collection in a similar way to the web reservation system. The guarantee methods depend on the guarantee policy selected in the guest's booking.

Here are some cases solved through the new feature:

Online Guarantee for Offline Bookings

If a client of yours makes a booking over the phone or by email, upon receiving the booking confirmation email, the same can access the Self Service Portal and select the Guarantee your booking link.
Depending on the guarantee methods selected by you, the guest can either pay a deposit online or provide their credit card data. Similarly to the Web Reservation System, on the Self Service Portal, the guest can familiarize themselves with the hotel policy and the terms of the guarantee method.
When the booking is successfully guaranteed, a new booking confirmation email is received.
In order to explain the necessary steps of the guarantee method, you can use the custom text of the confirmation email, describing how a guest can guarantee their booking.

Two-Step Guarantee

The cases referring to guarantee methods requiring two payments, can also be solved through the new functionality. For example, if when making a booking, 30% of the amount is required, and the remaining 70% - 15 days before arrival, here is the following solution:

  • The first 30% is collected through a WRS deposit payment or following the steps of the above case.
  • Upon receiving the first guarantee, you should change the guarantee policy in the booking for another one requiring the payment of the remaining 70%. To-Dos can help you perform this task easily and efficiently.
  • Through a pre-arrival email you can remind the guest that the same needs to pay the remaining amount through the Self Service Portal 15 days before arrival, as you can also describe the steps.
  • The client accesses the Self Service Portal, where a payment of 70% of the booking amount is required.

Bookings Guaranteed Shortly Before Arrival

In the cases when you accept bookings which are not guaranteed at first, however, you would like these bookings to be guaranteed at least 3 days before arrival, the steps of the above case can be used again:

  • On the WRS, you have a policy not requiring a guarantee at first
  • Upon receiving the booking, you change the guarantee policy
  • Through a pre-arrival email you remind the guest of the necessary guarantee 3 days before arrival
  • The client guarantees through a payment or credit card.

You can also see the new feature for bookings whose period to be guaranteed has expired, which will assist you with the guarantee process management.

PMS

  • Information on bookings whose period to be guaranteed has expired.
    • In the Bookings Awaiting Guarantee Report, a new 'Only expired' filter has been added.
    • Through this filter, you can see only the bookings whose period to be guaranteed has expired.
    • In order to receive this information, you should set up a number of days in each guarantee policy, showing the period after the creation of a booking or the period before arrival within which the booking is to be guaranteed.
    • The bookings not guaranteed within the specified period are treated as expired and are included in the report.
  • Marketing Channel and Marketing Segment. Now you can specify how these fields are to be automatically filled in on a booking, when receiving bookings from the WRS, the Channel Manager or TripAdvisor.
    • The necessary settings of these fields for the WRS can be done from the following screen - 'Web' - 'Settings - Web Reservation System'
    • For ParityRate bookings – you can choose different Channel and Segment for each of the tourist portals you work with. The settings are done in the 'Company map' section when going to 'Channels' - 'Parity Rate channel settings'
    • For TripAdvisor bookings – from the setting screen - 'Web' - 'Trip Connect by Trip Advisor'
  • New Report - Charge Summary D-M-Y Report. The report is similar to the Charge Summary Report, however, it provides information by Day, Month to day, Year to day. It also lists this data from the previous year, as well as percent difference for each of the columns.
  • New Report - Bookings Day-By-Day Report. For the period selected, this report provides multiple details regarding each of the hotel bookings. Through the use of an additional parameter, this report can be set to show the departures for a certain date. It is also possible to use this detailed report for the creation of your own custom report in Excel showing the number of nights and guests by dates and other filters.
  • Derived Rates – Now a derived rate can be used as a basis for the creation of another derived rate. Thus you can have more flexible and dynamic pricing and apply a greater range of yield management practices.
  • More Compact Folio Printout Layout. The new 'Compact' printout replaces the old 'Group' printout and gives a folio printout even more compact layout.
  • Package Elements can now be presented in one line on folio printouts.
    • Package Elements and all other charges now have a new field: 'Print Text', as it is used for the purposes of folio printouts. If this charge field is filled in, it appears on folio printouts, and if not, the old field is used.
    • The new field is to be filled in when posting or editing a charge and it can be set in rates (room charges), package elements, city tax and charge templates.
    • The 'Compact' folio printout groups all the charges having the same description into one line, thus the packages can be gathered in the Hotel Services line, and the rest of the charges can appear with their respective descriptions.
  • Registration Cards– Improved Registration Card Search
    • The "Add registration card" button on the booking screen has new options
    • You can directly choose among the registration cards linked to the last booking belonging to a profile
    • You can also search for registration cards by name, address, telephone or email
    • You can add a registration card containing the data from the booking itself
    • You can add an empty registration card
  • Rate and Availability Screen – Improved Rate Selection. The list of rates, which is usually very long and inconvenient to work with, has been removed. And now you can choose a room type or rate plans. Thus the results appear along the whole width of the screen.
  • On the Booking Advanced Search screen, a new 'Status' column has been added.
  • The 'Import bookings from CSV file” feature can now import manual prices (one or multiple ones), as well as multiple meals. See the example file for more information.
  • Google Analytics – new information – clients can use their own tracking code. Clients can send their own tracking code (from their own Google Analytics account or another web tracking product), which we will place in their WRS. As usual, the service is charged as a service case.
  • Advanced Tracking Code. This new feature enables the use of a tracking code in the WRS which provides information on a booking itself. Such codes are the ecommerce tracking codes, which, apart from the information on the visited pages, also provide information on the booking amount or the number of nights. The setting of the new advanced tracking code is done by the development department of Clock Software upon the provision of the script source on the client side, along with a list of the WRS pages, where this code is to be placed. This service is charged on the basis of the development time used, as it usually takes about an hour.

Fixes

  • The import of bookings from ParityRate led to the booking doubling in some cases
  • On the booking edit screen, the stay was not calculated correctly when there was switching between Daylight Saving Time and Standard Time, in which case the days are not 24 hours long.
  • When sending a folio by email, the PDF file had no extension.

Clock POS Update (12 Feb 2015)

  • New 'Cross Account Transfer' Right, controlling a bill transfer to a Room or Company. The right IS NOT GRANTED to anyone automatically, except for the user owning the account.
  • Transfer of a bill to a company folio in the PMS. The feature is very similar to the transfer of a bill to a room, however, this transfer enables a restaurant bill to be transferred to an existing company group folio in the PMS or new company folio. It significantly facilitates the work with groups, company bills with a deferred payment, owner's bills, etc.
    • In order to make a transfer of a bill to a company, charge transfers to this company must be allowed. On the company edit screen, mark the 'Accept charge transfers' check box.
    • Now you can first select a company to be associated with a table's bill and make the transfer later. On the main screen, there is a blue label of the company selected.
    • In the list of closed bills, you can see the company to which a transfer was made.
    • The reversal of a transfer to a company is as easy as the reversal of a transfer to a room.
  • Internal transfer to a company. The charges for menu items from a normal table's bill can be transferred to a company bill in the POS. This provides more opportunities for keeping group or company bills in the POS itself, without being necessary for these bills to be transferred to the PMS.
    • This operation, which is practically similar to a table change, does not require any additional rights.
    • In order to perform a transfer to a company, charge transfers to this company must be allowed. On the company edit screen, mark the 'Accept charge transfers' check box.
    • The bills transferred this way are also visualized as the rest of the bills of the company in the POS , i.e. through blue buttons below the list of tables.
    • As with all of the rest of the bills, the bills of companies in the POS must be closed before performing the daily closure.
    • You can leave bills to be paid later (a deferred payment), if you close them using Other as a payment type, which you void afterwards (this requires a right).

Clock PMS Update (26 Jan 2015)

Room Service (Self Service Portal)

The newest module to the Self Service Portal – Room Service gives your guests the unique chance to place Room Service orders to the restaurant or other catering establishments of yours and they can do it straight from their rooms using their mobile devices.

Guests view and select from the respective restaurant's or bar's eMenu, where meals and beverages are displayed through high quality photographs, descriptions and the current prices. If you have happy hours or other promotions, they will be reflected automatically.

No extra charge is required for the Room Service module. In order to use it, it is only necessary to have the Self Service Portal enabled, as well as an eMenu for the respective catering establishments.

How Does It Work?

  • With each booking confirmation, your guests receive a link to the Self Service Portal. On it, apart from all other interesting features, there is a Room Service Section.
  • As soon as guests check in, in this section, they can find the restaurants selected by you to handle Room Service orders.
  • With the guest's selection of a restaurant or bar, the eMenu of the respective catering establishment opens. On the eMenu, the menu groups selected by you are displayed, as each menu item can be presented through high quality photographs, an additional commercial description and the item's ingredients and price.
  • Clients can view the eMenu and add menu items of their choosing to their basket.
  • Upon finishing with their selection, clients can place their orders.
  • The placed order appears instantly on the kitchen monitors related to these menu items, as a sound signal reminds the kitchen personnel of the new order received.
  • Note: Due to the fact that a guest's mobile device can be on another LAN, their order is not printed on the kitchen printers, but appears straight on the kitchen monitor.
  • The order received is visualized on the map of tables on the POS like any other order and in order to be recognised as a Room Service order, the name of the table contains the room number and the booking number in the following way: "Room: 101 / #5678". The bill is also automatically connected to the room (a blue label appears above it with the booking data), thus the bill is ready for transfer to the client's account with just one click.
  • When the order is ready, a room service waiter delivers it to the guest's room, bringing along a tablet with Clock POS.
  • The guest receives the order, as the bill can be closed in all possible ways:
    • It can be transferred to the hotel account of the guest – only the guest's signature on the tablet is required and the bill is transferred with a click. Later on, using the Check your bill feature, the guest can check one's hotel account, where all the details of a Room Service bill are present.
    • It can be paid by credit card through a portable POS terminal.
    • It can be paid cash, etc.

How Is It Set Up?

  • The Room Service module requires the setup of the eMenus of the catering establishments from which guests will order.
  • The hotel has to have the Self Service Portal add-on enabled.
  • Access the respective hotel for which you would like to enable the Room Service feature.
  • Select 'Other' - 'Settings' - 'Self service settings'
  • In the section of 'Welcome to our hotel' - 'Room Service ( eMenu )', select the establishments to handle the Room Service orders of your hotel.
  • On the Self Service Portal of each guest, a new Room Service (eMenu) section will appear to be used by the guest to place one's orders.

Rates

  • New restrictions have been added to the 'Advanced rates management' add-on concerning early-bird, last-minute and limited-time-offer cases. The new restrictions are:
    • Min days before arrival / Max days before arrival. These two restrictions determine a future period in which bookings can be accepted. The days being outside this period are stopped for sale. For example, if it is set that the min days before arrival are 60, and the max days before arrival are 90, only the bookings with nights falling in this period will be accepted. All the other nights (before the minimum of 60 days and after the maximum 90 days) will be stopped for sale. Please note that the restriction only concerns the nights, but not the arrival itself.
    • Active from date / Active to date. These restrictions concern the current date. If the current date complies with the conditions set for a rate, sales at this rate are made. If the current date does not comply with these conditions, the sales at this rate are stopped. Thus you can determine the date of the automatic activation of a certain rate and on which date this rate is to be stopped.
    • The restrictions are also valid for the channel manager, thus rates are automatically stopped or activated in it.
  • Deletion of Rates. Now it is possible to delete old rates, which are no longer in use, even when there are related bookings. With their deletion, the rates are removed from the related bookings, without affecting the charges.
  • The problem, not allowing rates to have only weekend prices, has been fixed.

Authorize.net

  • A new payment interface to Authorize.net. The new credit card payment interface allows credit card details to be collected on a screen of the booking engine itself. This way a client does not need to leave the website of a hotel and the payment process is much easier and faster.
  • The payment interface can also be used on the Self Service Portal – for the features of 'Self Checkout' and 'Check your bill'
  • Settings:
    • The settings of the interface can be done from 'Other' - 'Settings' - 'Authorize.net (AIM)'.
    • The 'API login' and 'Transaction Key' are the same as the ones which a client has in their Authorize.net account.
    • Through the 'Gateway' field, you can select whether transactions to be test (sandbox account) or real ones (production account).
    • Through 'CVC required ', 'Email required', 'Address required', a client can choose what data to be collected from guests. It depends on the payment processor used and the electronic checks activated in the Authorize.net account of the client.

ParityRate

  • The use of the reference number in bookings has been improved. Rooms being a part of a booking from the channels now have the same reference number and are presented as a small group. Also, the additional segments (digits) have been removed from the reference number and now it exactly corresponds to the booking number from the channel itself.
  • The booking import concept has been changed and it no longer leads to doubled bookings due to incorrect messages (New instead Update) received from the channel manager.

Folios and Invoices

  • The print screen has been improved, as all the related features are now accessible on it: language change, level of detail, one line print feature, etc.
  • An option has been added making it possible to print two copies of one and the same document, positioned next to one another. Thus two copies of an invoice can be printed using the A4 Landscape format.
  • The settings selected on the print screen are stored, so that it is not necessary to select them each time.
  • The layout of folios and invoices to be printed out is now more compact. The empty space sometimes causing the printing of a blank page has also been removed.
  • The quantity of goods having such one set now appears on the printouts of folios.
  • Printing on headed paper. Now it is possible to set the blank space above (and beneath) the contents of a folio, so that it can be printed on the headed paper of a hotel.
  • Also it is possible to hide sections or lines on a folio (e.g.: "This is not the final invoice"). The settings are done by our development department for each individual account.

Bookings

  • Deposits – a new deposit calculation scheme: 'Number of Nights or Percent of Room Charges'. A number of nights and percentage is to be set for this scheme. The deposit amount to be paid is the higher one of these two amounts.
  • Registration Cards – custom fields. This new feature enables the specialists of Clock to define additional fields of the registration cards for a certain account. The fields defined can be 'input' ones (to fill in a text) or 'select' ones (to select a value from a predefined list). The new custom fields are included in the register, and on their basis, new custom exports in a text format can be created for the police. The setup of custom fields is charged as per the current support price list.
  • Registration Cards – header and footer. Now the registration card printouts can be customised to contain a text in the header and footer. The setting is in: 'Settings' - 'Languages and Texts' - 'Registration Card Header/Footer/Translations'
  • Sorting of Booking Lists - the lists of Arrivals, Departures, In Hotel, Search Booking and Advanced Search can now be sorted out by various criteria: guest's name, room, booking number, company/event, arrival date, departure date.
  • Arrivals – room housekeeping status icons have been added.
  • Booking Confirmations – their subject now contains the booking number and last name of a guest (and in the case of multiple bookings – only the number). This way it is clearer to the guest and the hotel reviewing the copies of confirmations in their email.
  • Now there can be special fields for the number of adults and children to be specifically used for the City Tax calculation purposes, as the City Tax and hotel policies can differ in their age criteria in determining guests as adults and children. The new fields are hidden by default and are activated by the development department at the request of a client for each individual account. It is charged as per the support price list.

Other

  • Rate and Availability – by rooms. Now the screen has the option to show results by room number. This guarantees not only that there are available rooms, but also that it will not be necessary to move guests to another room during their stay. There is an additional reason for stopping room numbers for sale, if there are no available rooms of a type (there are unassigned bookings).
  • Rate and Availability – only available. A new option has been added through which you can hide all the prices (products), which are not available due to restrictions, a lack of price or availability.
  • Import of guest profiles from a csv file. You can find this function in 'Settings' - 'Import guest profiles from CSV file'. There you can also find a sample file.
  • New Report - Meal Summary Report. It provides summary information on meals for a certain period of time.
  • Non-Standard Meals – now it it is easier to define non-standard meals for a booking – when the number of adults and children is not specified, their number from the booking is used.
  • To the Arrivals /Departures Summary Report, a new label with the weekday has been added.
  • A new button for deleting a logo has been added.

Fixes

  • Advanced Search for Bookings – the Created and Cancelled filters already work correctly in relation to the time zone of an account.
  • Folio Email – new lines used in custom texts were not kept.
  • The manual charges posted to the folios of a booking appeared in a group bearing the name of the hotel instead of the booking
  • The WBE numbers of rooms did not arrange themselves by price and the sort order set.

Clock POS update (26 Jan 2015)

Bill Transfer to Booking

  • Bill Transfer to Booking - now Clock POS asks you to which folio to make the transfer, if the folios are multiple.
  • eMenu – a new setting has been added in relation to determining which menu groups to be shown in the eMenu (a check box in the group settings)
  • Buzzer – if there is a buzzer enabled to a printer, its sound signal can be set. The setting is for each printer – in the settings of printers.
  • To the bills you can add client information which to be printed out on the bill. The button is on the Settle screen.
  • To the main screen of the POS, a new '?' menu has been added. You can use it to send questions and assistance requests.
  • The voided open bills no longer appear on the map of tables.

Clock PMS Update (16 Dec 2014)

Profiles

  • Now it is possible to enter profiles before the creation of bookings. Thus you can make a regular client profile database in advance.
  • You can create a profile note to be visible in the bookings referring to this profile.
  • You can search bookings for profiles not only by e-mail, but also by name and telephone.

Bookings

  • Manual price – different prices for different days.
    • Now you can enter different prices for each day of a guest's stay.
    • If the price is one and the same for the whole stay – the feature works as before, the room price posted for each day of a stay is the same.
    • If several manual prices are entered, the room charges are posted in the order of the manual prices. If the number of manual prices is less than the one of the days of a stay, the room rate selected for a booking is used for the days with no manual price set, and if there is no rate chosen, you cannot proceed with the creation of a booking.
  • In order to enter a manual price:
    • Open the booking
    • Click the 'Manual price' button
    • Fill in the value of the price. To have multiple manual prices, enter each of them in a separate line (clicking 'Enter' after each manual price value).
    • Select a currency

      Note: If there is a room rate selected – its package elements, value and tax code, as well as its city tax mode, will be used.
  • A new more visible red alert message has been added to the Expired bookings on the 'Departures' and 'In Hotel' lists. This alert contains a reference to the list of these bookings
  • In a separate section, the expected bookings have been added to the 'In Hotel' list. This way the list comprises all guests to be handled at the reception desk.
  • Advanced search – the following columns have been added: Nationality, Marketing Segment, Marketing Source. Thus the information is more useful for analyses in Excel or another spreadsheet application.
  • The WBE and the Booking Confirmation now show information (and label) of children, only if there are such in the booking. As a result, the Booking Confirmation is clearer in terms of hotels, not accommodating children.
  • The advanced search for a booking can be used for periods, which are not fixed, i.e. only having the 'From' or 'To' field filled in.
  • Booking number – its format can now be customised through the new numbering feature. This way a booking number can have the following format: B00034/14. This feature also enables bookings to have numbers with different prefixes or suffixes for each year, so that they do not become too long.

Folios, Charges, Payments

  • Numbers of documents. The numbering functionality has been improved:
    • In addition to the option for the numbers of documents to be preceded by zeros, a possibility for number prefixes or suffixes has been added. As a result, numbers of the following types can be generated: 14-0000001-INV or C0034500234/BH, etc.
    • Now credit invoices can have their own numbering with an individual format. Still credit invoices can have the same numbering mode as the one of the invoices as before.
  • On the folios/invoices, the address of guests is included by default.
  • The BILLING TO section info can be entered in advance (prior to the creation of an invoice).  
    • This also enables the issue of invoices to companies, which are not necessarily registered in Clock PMS.
    • This information can now be entered in the folios/invoices of non-residents. 
  • Quantities in Charges
    • In a charge or charge template you can now set a quantity to be charged, when it is important for the charges posted. Such charges are: the ones for minibar articles or newspapers.
    • Through the Charge Summary Report, you can receive information on the quantities sold. And this information can be used for the purposes of planning future periods.
    • A quantity can also be predefined in charge templates.
    • The charge screen also has a quick field to enter a quantity.   
  • Surcharge
    • Now you can set a surcharge fee for folios in Clock PMS. The surcharge is defined as a percent and is automatically calculated on the basis of the folio value. With the change of the folio value – the surcharge is also recalculated automatically.
    • The basis for the calculation of a surcharge is the value of the charges posted. Depending on the tax mode selected and the respective surcharge basis (the value of the charges), it may or may not include tax.
    • Set-up: open 'others' - 'settings' - 'tax settings'. In the 'Surcharge' section, fill in: Surcharge text (as you want it to appear on the folio), Surcharge percent and the Surcharge tax percent (tax percent to be levied on the surcharge).
    • In order to change a surcharge percent for a given folio or to remove it altogether : Open the folio; Click the 'Currency/Name' button and fill in the new value of the surcharge.
    • In the charge reports, the surcharge turnovers are listed in the surcharge revenue group.   
  • Payment Report – a new parameter has been added to the report layout: 'Details + Summary', 'Details', 'Summary'. As a result, the report may be far more compact, when details are not necessary.

Channel Manager

  • 'Marketing Channel' and 'Marketing Source' have been added to the company mapping. This way it is possible to automatically filter bookings by the exact channel and source in order to have more detailed reports.
  • Packages, taxes, tax codes and city tax. The logic of charging has been changed and now the bookings being imported get a rate and manual price (which can be different for each day of a stay). This way:
    • The breakdown of package elements is made on the basis of the package elements set in the rate itself. We would like to remind you that individual tax and respective tax code may be set for each of the package elements.
    • The city tax mode ('No City Tax', 'Extra, separate charge, 'Included') is now determined on the basis of the rate settings.
    • With the change of the period of a booking, the room charges are now maintained automatically: if a period is shortened, the unnecessary room charges are voided, and if a period is extended, the respective additional room charges are posted on the basis of the applicable prices of the rate.   
  • Bookings can now be marked as 'Guaranteed'.

Other improvements

  • On the Room Calendar, Forecast Occupancy and Rate and Availability screens, the date shows the day of the week too.
  • Folio Mass Printing – it no longer includes deposit folios, as they are not necessary for the departures.
  • The size of the folio logo has been changed, so that the rest of the contents of a folio is more clearly visible.
  • Cashier Closure has been optimised.
  • Commissions – on the list of commissions, a note has been added to each commission showing the booking it refers to.
  • WBE – rooms/room types are sorted out by price similarly to the rates themselves.

Fixes

  • The export to ParityRate, when there is no mapping, has been fixed.
  • WBE Calendar – the language no more changes when entering the calendar.
  • Gift Voucher Shop – when deleting a charge template still in use, errors occurred.
  • Gift Voucher Shop – to-dos for new vouchers now appear on the desktop.
  • Marketing segments – on the lists, there were problems with the segments with titles containing more than one word and an interval.
  • WBE – no reference number is generated for single bookings. It is only done for multiple bookings

Clock POS update (16 Dec 2014)

eMenu

The eMenu is a new module to Clock POS through which every tablet can be turned into an electronic menu to be handed to the clients of a restaurant.

Functionality

  • High Quality Photos of Meals. For each meal, a high quality photo can be loaded to present it to a restaurant client. When a high resolution tablet is used, a client can see a brighter, high contrast and more attractive photo of a meal in comparison to any standard printed menu. It is a fact that the presentation of meals through the use of professional and high quality photos increases sales and turnovers.
  • Own Branding. Make your own first page (cover page) of the menu, welcoming your clients. The easy change of images on the first page enables you to use them for promotion and advertising purposes.
  • Use of Your Existing Menu. It is not necessary to enter your menu all over again. The eMenu uses an already created menu and prices, preventing any mistakes due to duplicated information.
  • Description and Commercial Name of Each Meal. Provide a description for any meal – combine a meal's commercial description with its ingredients. For greater convenience, you can use the abbreviated names of your menu items in your POS and set their full commercial names to appear on the eMenu only.
  • Happy Hours. As the eMenu uses the same POS menu, each change to the price will also be reflected on the eMenu immediately. Depending on the active promotions, prices change in real time and are always kept up-to-date.
  • Choice of Menu Items and Order. Clients themselves can place their orders and instantly send them to the kitchen. This increases the speed of service, as it is no longer necessary for clients to wait for a waiter to take their order.
  • Printing and Kitchen Monitor. The orders placed through the eMenu are printed on the kitchen printers and appear on the kitchen monitor immediately.
  • Perfect Integration with POS. All orders placed through the eMenu are visible in the POS, as it is even possible for a waiter (from the POS) and a client (from the eMenu) to simultaneously operate in a bill. From the POS, you can also perform more specific operations: voiding, bill splitting, table change, etc..
  • Charge Transfer to Hotel or Payment. In the closing of bills done by a waiter (POS), all functions related to charge transfers and payments can be used.

Settings

  • Add-On. In order to use the eMenu, its add-on is to be updated. You need to get in touch with Clock to activate the add-on.
  • Menu Items and Menu Groups. The eMenu uses already set menu items, as well as their prices and menu groups.
  • Commercial Names of Menu Items and Menu Groups. If you wish to change the names of certain menu items and groups, so that they are clearer to your clients:
    • Go to 'Management' - 'Languages and Texts'.
    • Note: The eMenu uses the language set to be the default one.
    • Find the default language (if there are no languages – create a new one).
    • In order to change the names of menu items sold, as well as their descriptions, choose 'Charge Template Description/Translation'
    • In order to change the names of menu groups, select 'Menu Group Description/Translation'
  • Cover Page Image. In order to load an image for the cover page: Go to 'Management' - 'Account info' - 'Self Service Image'
  • In order to load an image for each menu item: 'Management' - 'Menu Items' - Find an Item - 'Open' - 'Add image'

Use

Before handing a tablet to your clients, you need to specify the table at which it will be used:

  • On the tablet: Open the POS and log in with your username and password.
  • On the opening screen with tables, press the 'eMenu' button under the respective table.
  • Now the tablet has been activated for this table and you can hand it to the clients.
  • Note: The current user is logged out automatically, so that a client is unable to get access to the POS (through the back button, for example).

Preparation of the tablet for next clients at the same table

  • Upon closing a guest bill, click the small Exit link in the lower left part of the page.

Table Change on the Tablet. If the tablet is activated for a given table, however, you wish to hand it to clients at another table :

  • In the eMenu, go to the lower part of the page page and select the small Exit link (below – on the left side).
  • Then choose 'Logout' from the opening screen (below – on the left side).
  • Note: Remember that this operation will deactivate all the tablets linked to this table.
  • Repeat the above activation steps to activate the tablet for another table

Deactivating tablets for a certain table from the POS. If you wish to deactivate the eMenu for tablets at a certain table:

  • In the POS, open the screen with tables.
  • For tables having eMenu activated, the eMenu button is orange, and it is grey for the rest of tables.
  • Click the eMenu button and choose 'Logout' from the eMenu – this will deactivate all tablets linked to this table.

Menu Browsing

  • After the tablet is linked to a certain table, the client should choose:
  • 'Open menu' – the button appears if nothing has been ordered at this table yet. OR:
  • 'Select your bill' – if an order has already been placed at this table or there are multiple bills at the table.
  • The next page contains a list of menu groups (index). A client can directly select from a group of their choosing.
  • Next are the pages of each menu group. There are quick buttons for the next and the previous menu group, so that a client can browse the menu. The Menu button is used for returning to the index page.

Selection of Menu Items and Order

  • After choosing a menu item, the client can add it to their order through the 'Add to order' button and continue choosing menu items.
  • With the selection of menu items, a button appears in the upper left corner for sending or changing the the order.
  • Upon the order's sending (it is printed out and appears on the kitchen monitor), the client sees the bill so far. From this screen, the same can enter the menu to place new orders by clicking the Menu button.

Other Improvements

  • It is possible for a logo or another image to be printed out on clients' bills . This provides more opportunities for the customisation and branding of your printouts.
    • The Epson printer should have this feature. Check in the provider's specification, whether it is possible.
    • The logo can be present on both printouts concerning a client: order and bill. Different images can appear on these two printouts (for example, a more compact image for an order printout).
  • In order to set up a printer:

    • Images are to be stored in the printer's memory through the Epson software (TM-T88V Utility)
    • Select 'Storing Logos' - 'Add'.
    • Select a picture file and confirm.
    • Set up the various parameters of the image to your liking. Confirm.
    • Remember the two numbers in the Decimal Number fields, because you will need them for the next steps. They are 32 and 32 by default.
    • If you wish different images to appear on orders and bills, load two images.
  • In order to set up the POS:

    • Open 'Management' - 'Printers'
    • Open the respective printer.
    • If you wish to have an picture printed out in the fields of 'Order logo key1' and 'Order logo key2' of an order, fill in the first and the second number from above for the respective image (they are 32 and 32 by default).
    • If you wish to have an image printed out in the fields of 'Bill logo key1' and 'Bill logo key2' of a bill, fill in the first and the second number from above for the respective image (they are 32 and 32 by default).
  • A new right to access to reports. The new right is automatically given to all users having had access to the POS and the Settings right.
  • Menu Items – Deletion of Multiple Items. The new feature is available in the list of menu items ('Management' - 'Menu Items')
  • The Cashier Closure operation has been optimised and now you can perform it faster.

Clock PMS Update (25 Nov 2014)

Package elements

The new functionality in rates (requires Advanced Rates add-on) enables you to define package elements to each rate to be automatically charged and deducted from the package price.

Each package element has the usual charge attributes: text, revenue group, revenue category, tax %, tax code (a new field – see below) and value.

The new elements help solve cases such as a different tax for the food included (France) or presentation of a breakdown of package element values for accounting or management purposes.

How does it work: Upon choosing a rate with defined package elements, these elements are posted as normal charges, and the room charge is the remaining amount of the defined rate after the deduction of the values of the package elements.

Specifics:

  • It is possible for a room charge to be posted with a negative value, if the sum of the package elements is higher than the rate itself.
  • The package elements can be in a currency different from the one of the rate. In this case, they are posted in the currency chosen for them and their rate currency converted values are deducted from the rate amount.
  • The package elements can be used even with manual prices – see below.
  • The package elements are charged/voided automatically with the change to the booking period.
  • The 'Re-Post' functionality also charges/voids the package elements in accordance with the current contents of the rate.
  • Derived rates – the package elements defined in the derived rate itself are taken into consideration.

Manual Price

The feature for setting a manual price in a booking has been improved in terms of the following aspects:

  • The entered manual price is recorded in the booking. So for the purposes of control, it is clear that the booking has such a price set.
  • With the change to the stay, the manual price is now automatically maintained: it is voided or the necessary charges are added.
  • It may be broken down to package elements, if the booking has a rate selected.
  • City tax is more flexibly defined: A city tax mode can be expressly set. If no mode is chosen, the mode of the rate itself, if any, is used.
  • The 'Re-Post' functionality works for bookings with a manual price, as it complies with the manual price.

Reports

  • A new report - 'Arrivals/Departures Summary'. The new report provides information by days, weeks or months on the flow of tourists: Arrivals, Departures, Stayover – Rooms and Guests (Adults and Children). The report is in the housekeeping section.
  • The printing layout of the Housekeeping Report has been improved.
  • The Charge Summary Report has been improved. Now there is a greater choice of grouping: There are maximum three levels of grouping, as you can choose a parameter for each level. A new grouping parameter is also added: Company. This makes it possible for charges to be grouped, for example, only by Revenue category or by Company and Revenue Category, etc.
  • In the Meal Report, a new special note for each room has been added, containing meal requirements or guest allergies. The new note is filled in on the booking edit screen - 'Meal notes'.

Taxes - 'Tax Code'

Case: In Belgium, the reduced VAT rate is 6%, however, it is required that the invoice reflects the various articles of the law on the basis of which the reduced rate is applied. Due to this requirement, there may be two or more 6% tax groups, as for each of them there is an additional tax code, denoting this tax group.

Solution: A new optional Tax Code field has been added, which is filled in every time tax percent is required: charge, charge template, rate, package elements, city tax. Taxes in folios and reports are grouped by '%' and 'code', instead of only by '%', as it has been so far.

! Rounding – in the mode of calculating the tax on the total amount, the tax is calculated (and rounded) for the basis of each group - i.e. the bases are now grouped by '%' and 'code', instead of only by '%'.

Other

  • In the rates, a new room charge text field has been added. So, if a hotel does not want the rate name to be seen in the room charge text line, it can enter a special text for this purpose.
  • Rates - 'Set Multiple' functionality, used for updating prices and restrictions on many rates simultaneously, now can be applied to any part of all rates. So far you could have used this feature for the rates within a single rate plan. The button is located on the rate plan list. Upon clicking it, you can choose the rates to be updated.
  • Rates – when filling in amounts for seasons or individual days, now, there is a clearer error message, if the amount format is incorrect.
  • WBE – more 'Advanced translations' options have been added, so that it is possible for almost all text resources in the WBE, booking confirmations and folios to be translated or customised.
  • The folio charge screen has been improved, so that it is clearer what has been charged.
  • The account selection screen has been improved – accounts are grouped by types and are in alphabetical order. There is a dropdown menu for the quick features created, as the room plan is also added to this menu.
  • The account organization has been made easier for those preferring the use of multiple subscribers (there is an absolute division among the accounts of the client), instead of many Accounts into one Subscriber (there is a financial division among the accounts, however, it suggests data consolidation, as well as sharing of companies, profiles, settings). In order to share multiple subscriptions: now, the serial numbers of the different subscriptions can be stored and selected from a list. The users, having logged in each individual subscription, are also stored.
  • New setting: "Require Revenue Category", for clients preferring to use the revenue category in relation to their accounting system. The new setting reduces users' errors, requiring its mandatory filling in when posting manual charges. The setting is located in 'Settings' - 'Revenue Category' – in the lower part of the screen.

Fixes

  • 'Charges Segmentation Report' – the error, occurring in the data grouping, when the period includes the previous or next year, has been fixed
  • The restriction, referring to the number of rates, calculated on the Rate and Availability screen, has been removed
  • Room Monitor – now it does not require Settings Update right
  • Meal Report – meals could not have been rearranged, if no first meal had been selected

Clock POS Update (25 Nov 2014)

Promotions / Happy hour

The new feature of Clock POS makes it possible for promotional prices of selected menu items to be activated. Prices can be automatically changed, not requiring an operator's intervention.

In order to create a new promotion / happy hour:

  • Select 'Management' - 'Promotions' - 'New'
  • Type in the name of the promotion – e.g. 'Happy hour'
  • Set when this promotion/happy hour to be activated through the fields of: From date, To date, Start time, End time, Weekdays. The filters defined work together (the operator among them is 'AND'), as you can use a custom combination of parameters – i.e. :
    • If you fill in only 'Start time', 'End time“ - this will activate the promotion for any day within the time range set
    • If you add Monday too – this will activate the promotion only on Mondays within the time range set.
    • If you also add 'From date', 'To date' – this will activate the promotion for the time range selected on the Mondays within the period selected .
    • Note: If you don't fill in any of these fields, the promotion will be active all the time.
  • Create
  • In order to add menu items to the promotion – use the 'Add' button. Choose an item (search for it by name) and set its promotional price.

You can create multiple promotions to be active in different time ranges or, if you wish, they can overlap (be simultaneously active).

In the event of overlapping promotions and if they have common menu items (the menu items are part of both promotions) – the lower price for them will be used.

Apart from promotions (price reductions), you can also use this functionality for increasing prices or for seasonal prices. Similarly, set prices for a certain time period.

Other

  • Charge templates and modifiers have been sorted out in alphabetical order.
  • Start-up help tips added.
  • The free quantity field ( "#" button on the posting screen ) now appears empty, so that it is not necessary to delete the old value first before entering the new one.
  • The reports now have a 'Copy' button for export to Excel, OpenOffice, etc.

Fixed problems

  • Payment sub-types were not related to their payment types and appeared in a disorderly manner.

Clock PMS Update (27 Oct 2014)

Gift Vouchers Web Shop

This is an entirely new module in Clock PMS which allows selling gift vouchers through the hotel website.

What is a Gift Voucher?

A few words about gift vouchers. Gift Voucher, Gift Certificate, Gift Card are terms with no clear distinction in their meaning and are often used interchangeably.

The idea: Instead of buying a present, which may or may not be liked, clients often prefer 'gifts of choice' (a gift vouchers).

The same applies to hotels: a holiday or a spa procedure is best presented with a gift voucher, so that the person receiving it can choose the time and date to use it.

>Gift vouchers are usually glossy cards or blank forms in fancy wrapping, which bear the value and/or the name of the service or package on them. In a way, they are the material expression of a non-material present.

A gift voucher can come in other forms, too: a code sent by e-mail or a debit smart card. However, these cases are not yet covered here.

Monetary gift vouchers are usually accepted at reception or at a till. If they are not used in full, no change is given for the remaining value. The same applies to vouchers for specific services, e.g. Spa package.

It is important to know that gift vouchers are subject to different accounting regulations. These vary between legislations, but several rules can be generally outlined:

  • A gift voucher is considered 'money in cash'.
  • The sale of a gift voucher does not require an invoice.
  • Gift voucher sales are not revenue and are not taxable.
  • Gift vouchers are recorded as revenue upon their use when they are treated like any other cash transaction. The only difference is that they are recorded as a different payment type ('voucher'). On day end vouchers are treated as cash: if the daily closure report says there are € 500 in vouchers, there must be cards/forms for the same amount present.
  • The value of unused gift vouchers is 100% profit for the hotel.

What does the new module include

  • Gift Voucher Web Shop
    • Different gift vouchers sorted in groups. Each group can be given a name, a description and a gallery of pictures.
    • Delivery options. Different delivery options can be offered: standard, express, at the hotel, etc., each of them with its own price, name and price (or free).
    • Delivery restrictions for different countries. The country list in the delivery address can be set to show only countries, where delivery is offered. Note: Delivery prices are not calculated depending on country. If different prices are needed, e.g. for EU and non-EU countries, two separate positions should be entered. They should be named and described clearly, so that clients can choose the one that applies for them.
    • Customization – headers, footers, policies, etc.
    • Buyer name and address and an optional delivery address.
    • A special field for personal messages
    • Online payment using the options available in the system. Note: Currently ONLY online payments are supported.
    • Purchase confirmation e-mail.
    • To open the web shop go to the navigation strip – Web – Your Gift Voucher Web Shop. The web shop must be set up in advance.
  • Accounting

    For each sale:

    • The hotel is sent an e-mail notification
    • A new To-Do task is created on the desktop
    • A gift voucher is created with its folio. In the folio the voucher itself and the selected payment method are posted. The payment is also added.
    • All sold gift vouchers can be seen in the navigation strip – Web – Gift Vouchers. The charges, folios and payments are included in all reports.
  • Set up

    The set up of the Gift Voucher Web Shop is fast and easy:

    • Select a WRS user. Note: You do not have to use the web reservation system. The system needs a WRS user to be selected (Settings – WRS).
    • Create charge templates for each gift voucher and for each delivery method. In the editing screen of the template you can upload a picture and translate the names and descriptions (Languages and Texts). On the web site the voucher charge templates are grouped in template groups.Template are not translatable yet.
    • Indicate which charge templates should be shown as vouchers and which as deliveries (Settings – Gift vouchers).
    • Set up at least one online payment interface.
  • Additionally:
    • Upload a picture for the shop header (Settings – Gift vouchers)
    • The custom CSS in the WRS apply to the gift shop, too. Both are set in the same way (Settings – WRS).
    • Customize texts (Settings – Languages and Texts – Gift Vouchers Translations):
    • Title: Positioned at the head of every page. Suitable for branding.
    • Footer: Positioned at the bottom of every page. Suitable for slogans and contact details.
    • Voucher list – Title and Text: Positioned directly above the vouchers. Suitable for address to clients and general instructions.
    • Delivery services list – Title and Text: Suitable for general instructions.
    • Terms & Conditions – Title and Text: Shown on the last page before finalizing the purchase.
    • Confirmation e-mail – Subject and Body.

Data Access API

We have developed an API which gives access to the financial information in our accounts (PMS, POS, Golf, etc.)

The data which can be accessed is as follows:

  • Folios (all: open, closed, client, deposit, correction)
  • Folio: charges (including modifiers)
  • Folio: payments
  • Folio: taxes
  • Charges change log (revenue)
  • Payments change log
  • Companies
  • Currencies and exchange rates
  • Users
  • Daily closures

The API is REST-based and returns three formats: XML, JSON or YAML.

It supports data filtering requests.

The access is granted by users themselves through the standard authentication system of users and rights. For this purpose there is a special new access right, as well as a special API access key.

The complete API documentation is still being compiled. A preliminary copy can be prepared on request.

Central management and reporting

  • Common (centralized) settings of: Revenue categories, Payment Sub-types, Market segments. These settings can now be shared between account of the same type (PMS, POS, Golf) and can be defined from a single account per type (once for PMS, once for POS, once Golf). This change will help the unified reporting in chains and groups.
  • The Payment report and the Open Payments report can now be run for more than one account at a time and summarize the information using the accounts filter.

Reports

  • New report, Open Folios, showing all open folios. The folios are grouped topically and each group can be drilled down.
  • More columns added to the Bed nights report: number of guests (adults and children), and number of bookings. This exhausts all possible accommodation options: bookings, nights, bed nights (a/c), and guests (a/c). As before, the report can be segmented by nationalities and a number of other parameters.

Other

  • Drag and drop in the Room calendar. The Room calendar has been optimized for more and faster operations:
    • Drag and drop: To avoid accidental moves on touch-screen devices, the operation is disabled on opening the screen. The navigation button in the upper part of the screen allows movement up/down (change of room), left/right (change of arrival date), and everyway (both).
    • Opening bookings: just click on the desired booking.
    • New booking: click on a free date.
    • Change of housekeeping status: click on the room name (the leftmost column).
    • The heading of rows Free rooms and Not assigned are now links to the Advanced search. This way it is easy to check which bookings exactly do not have rooms assigned to them or to see all bookings for a specific date.
  • Batch printing: you can now print out all folios of bookings selected in a booking list. This can save time on check out if the folios of all leaving bookings are printed out in advance.
  • Totals in booking lists: Screens Arrivals, Departures, In hotel, Search and Advanced search now show the total a mounts for each group and for all groups together.
  • ParityRate: a new setting for ToDo tasks for new bookings. To allow for a better organization of the tasks linked to bookings received from online channels, a new ToDo task can now be created automatically for each new booking.
  • WRS: optimized the visualization logic for adult and children fields. The 'children' field will not be shown if it is not used in the rate restrictions. The optimization is helpful for adults-only hotels.
  • Commissions screen: Added button 'Select All/None' in the multi-select mode.
  • Custom SMTP. When using own SMTP server, the e-mails to clients are now sent from the hotel e-mail address (Settings – Account Info – Hotel E-mail), instead of from noreply@clock-software.com .
  • Time zone is now required for each new account.

Fixed bugs

  • Charge template editor: the revenue category is not a combo-box, so that deleted values are also shown.
  • Clear error message on login attempt at the wrong host.
  • Extra services in WRS: all extra services enabled for WRS can now be disabled.
  • WRS: Extra services are now charged for the arrival date.
  • The Closed Folios report, when run with filter 'Not paid', does not include correction folios anymore.

Clock POS Update (27 Oct 2014)

Kitchen monitor

The kitchen monitor can replace the kitchen printer at order-completion sites. It is a screen in POS and can be opened on any device, a tablet or a designated PC, and has been optimized for portrait view on tablets.

The kitchen monitor comes free with POS and can be used parallel to, or without, kitchen printers. It is started from the main POS screen, from the monitor-icon button.

  • Functions:
    • No installations needed.
    • Requires internet connection, but not static IP or any other network settings.
    • Unlike printers, it does not need to be in the same network as POS. This allows its use together with the Self Room Service module (under development), where clients will be able to order from their own devices and even without being connected to the hotel local network.
    • Shows one or more kitchens simultaneously.
    • Works in real time. Orders sent from POS are seen on the monitor in real time, without any delay whatsoever.
    • Sound notification for new orders.
    • New orders are shown in different colour, so they are easily identifiable.
    • Order timers show the time elapsed from the taking of each order.
    • Shows all: items and modifiers in order groups, as well as instructions to the order.
    • Receipts can be marked as completed, so it is clear what is left to be done in the kitchen or at the bar.
  • Other:
    • Notification in the upper part of the screen for adding or deleting menu items. Up to now it was not clear whether the operation has been performed or not.

Central management and reporting

  • Common (centralized) settings of: Revenue categories and Payment Sub-types. These settings can now be shared between account of the same type (PMS, POS, Golf) and can be defined from a single account per type (once for PMS, once for POS, once Golf). This change will help the unified reporting in chains and groups.
  • The Payment report can now be run for more than one account at a time and summarize the information using the accounts filter.

Reports

  • New report, Open Folios, showing all open bills. The bills are grouped topically and each group can be drilled down.

Clock PMS Update (25 Sep 2014)

TripConnect by TripAdvisor

The new interface to TripAdvisor lets hotels get direct bookings from the biggest and most popular tourist website. Clock provides the new interface completely free of charge to all its clients using its web reservation system (WRS). The business model applied by TripAdvisor is similar to that of Google ads, i.e. pay per click. Detailed information about TripAdvisor prices can be found on their website. TripConnect is not a typical OTA interface. Rather, it is a direct link to the web booking engine of the hotel.

  • Here is how the interface works:
    • Clients looking for information about hotel X in TripAdvisor see its prices in large booking portals (Booking.com, Expedia.com, etc.)
    • If the hotel uses TripConnect, clients will also see the prices listed in the hotel website (in its web reservation system).
    • To do this, TripAdvisor asks the hotel WRS in real time for prices and availability for the period defined by the client.
    • The hotel WRS sends back accommodation availability.
    • Clients select a product (room type/rate)
    • TripAdvisor redirects clients to the hotel WRS and sends the parameters defined by them (period, room type, rate, etc.).
    • Clients see the same product they have selected in TripAdvisor and can complete their booing in the hotel WRS.
    • Such bookings use the same guarantee and confirmation letters as standard WRS bookings.
  • Required settings:
    The settings required are very few and very simple.
    • In main menu Web select TripConnect by TripAdvisor.
    • Fill in the details of your hotel as they are in TripAdvisor. TripAdvisor will use them to link its hotel listing with the hotel WRS.
    • Save.
    • To give more details about your rates (those used in your WRS), fill in the additional information form for each of them.
    • Click 'Add rate' and fill in the form as required by TripAdvisor.
      !!! The form does not define which rates are shown in TripAdvisor! TripAdvisor shows all rates used in your WRS. The form just gives more information about them!
    • When all steps have been have completed, click 'Activate'. To stop sending data to TripAdvisor, click 'Deactivate'.
  • Information about TripConnect :

PMS

  • Setting price manually (Fast Rate) The manual setting of prices (without using fixed rates) has been optimized in several aspects:
    • Price can be set manually on booking creation. Click button Fast Rate (below Rate) and fill in the fields.
    • The function can also be used in the following cases: creating bookings for more than one room, editing bookings, mass editing of more than one booking (multi-select) in all search screens (Arrivals, Departures, In hotel, etc.).
    • Beside setting a price, you can now set automated charging of city tax. Specify if city tax should be charged and whether it is included in the price or must be added to it. The value of the city tax is calculated automatically depending on setting 'City tax' in Settings.
  • Rate restrictions.Two new rate restrictions have been added: min adults and min children. They can be used in the WRS so that only rates that match exactly the adults/children combination are shown. Also, they can be used as a yield management tool. In busy seasons the required min occupancy can be raised to increase the revenue.
  • ParityRate: city tax. The import from ParityRate can now charge city tax, too. The amount of the tax is defined by the Clock PMS rate to which the import refers.
  • Registration cards: history search. Registration cards of booking holder profiles can now be copied from the booking preview screen.
  • Electronic signature: full screen.
  • For easier signing of registration cards or restaurant bills (in Clock POS) the e-signature is now shown in full screen. This is also convenient for graphic tablets (as periphery) when used for signing registration cards.
  • Room Calendar. Two new additions to make the data in the calendar more detailed and useful:
    • information about the number of bookings without assigned rooms for each date;
    • the total number of free rooms, considering all bookings and blocks.
  • Advanced search. Added filter for searching bookings without assigned room. OTA bookings are imported with a room type only and this is a problem for hotels preferring to work with assigned rooms. The new filter makes it easy to find booking for future periods which have no rooms assigned to them.
  • Export folio to file. The new function allows custom exports of folios/invoices so they can be printed out on forms on dot matrix printers, for example.
  • Confirmation letters: removed .pdf option. Clients reported confusing the .pdf file with a second confirmation. The problem was most apparent on iOS devices, where the .pdf was shown directly after the e-mail body.
  • Default language. The automated e-mails (before arrival and after departure) use the language of the booking. If there is no special language set for it, they use the new default language setting. To set the default language, go to Settings – Languages and Texts and tick your preferred default language.
  • Fixed bugs:
    • Fixed bug in the localization of the hour vs. the account time zone. The problem affected some reports, among which the Payment Report, which used UTF time zone instead of the account one.
    • Fixed bug in the WRS confirmations of bookings paid via WorldPay. If users closed the payment window in their browser too soon, they did not receive confirmation letters even though their payments were registered and their bookings were created.
    • City tax (percentage) included in the price. The formula for calculating the city tax included in the price has been corrected.
    • WRS: the rates in the rate selection screen in WRS are now sorted alphabetically.
    • Registration cards: some of the fields could not be disabled for printing.
    • Bookings: button Confirmation looked wrong if there were no languages defined.
    • Available rooms list and auto assignment: in certain cases free rooms were not offered for assignment if the new arrival coincided with a departure from them.

Clock POS update (25 Sep 2014)

  • Print-log. The items in the receipts are sorted according to the selected Order Groups.
  • Added screen 'Account Info' in Management. It contains the details of the property and the billing details for Clock invoices.
  • More details will be shown for conflicts on double closing of the same bill in multi-user mode.
  • POS Demo. Added POS demo account to the Demo.

Clock PMS+ Update (4 Sep 2014)

PMS

  • Export of all reports to MS Excel, OpenOffice, GoogleDrive, etc.
    All reports can now be exported spreadsheet applications like Microsoft Excel, OpenOffice Calc, Google Drive spreadsheet, etc..
    • run the desired report.
    • click 'Copy' in the upper right corner
    • open the desired application, e.g. Excel and paste (Ctrl+V / Command+V).
  • Pre-arrival and post-departure e-mails
    The function allows manual or automated sending of two types of standard e-mails, before they arrive and after they leave the hotel. The pre-arrival e-mail can be used to reduce the number of no-show bookings by reminding guests of their booking and and the functions of the Self service portal they can use (cancellation, period change). Post-departure e-mails can encourage guests to use the Self service portal to leave feedback or share their experience in social networks.
    To send an e-mail manually:
    • open the desired booking
    • in Functions select 'Pre-arrival e-mail' or 'Post-departure e-mail'. If the e-mails have already been sent, the system shows their text with the date and time of sending.
  • To set automatic e-mails:
    • go to Other – Settings – Auto e-mail sending
    • Indicate the how long before arrival the e-mail should be sent in 'Days before arrival'. Remember that e-mails are only sent to 'Expected' bookings.
    • Indicate the how long after departure the e-mail should be sent in 'Days after departure'. Remember that e-mails are only sent to 'Checked-Out' bookings.
    • ! Before activating the auto sending send both e-mails manually to verify their content and format.
  • Initial automated sending:
    • Arrivals: When the function is first activated, all bookings expected within the indicated number of days are sent pre-arrival e-mails. For example, if you have filled in 'Days before arrival'=5, all bookings arriving in the next 5 days will receive messages.
    • Departures: When the function is first activated, all bookings checked out within the indicated number of days, but not later than 10 days after that, are sent post-departure e-mails. For example, if you have filled in 'Days after departure'=2, all bookings that have left the hotel 2 to 12 days ago will receive post-departure e-mails.
  • To customize the subject and body of the e-mails:
    • go to Other – Settings – Languages and Texts
    • for each language you use select 'Auto e-mail sending/Translation'
    • Fill in Subject and Body of the two e-mails. The address 'Dear Mr./Ms. Smith,' and the link to the Self service portal at the end of the messages will be preserved. Your text will be inserted between them.
  • Commission processing
    The new add-on for processing commissions helps calculating commissions, checking the calculated amounts and tracking paid and payable commissions to your partners. The add-on is integrated in the bookings and has access to all the data it needs to calculate the commissions. No export to external systems or double entries are needed.
    To indicate that a company has a commission contract, specify the standard commission rate it uses. Enter the rate percentage in the company editing screen. If a company uses different commission rates for different cases, enter the one that applies most often.
    To open the commission processing module:
    • in the main navigation strip click Company – Commissions. Make sure you have access right 'Commission processing: Edit".
    • Use the filters to find the bookings you will be processing or need information about.
    • The list includes all bookings with defined commissions, as well as those for which it has to be calculated based on the % commission defined in their company profile.
  • To calculate the commission of bookings:
    • Click Select Multiple
    • Select the desired bookings
    • Click 'Calculate Commission'
  • To change the commission rate of a booking or remove it altogether:
    • Select 'Edit Commission' for the desired booking or fill in the commission amount.
    • ! Please note that you fill in the amount of the commission, not percentage rate
    • ! The same operation can be performed in the booking editing screen.
  • Use the note to as a reminder for possible exceptions (different commission rates, no commission, etc.).
    Use function 'Mark 'Checked' / 'Mark 'Not checked' to mark commissions that are already checked and ready to be paid out.
    Fill in the payment dates of paid out commissions so that they are easily set apart from those payable.
  • Import of bookings from a file (csv).
    The new function allows lists of bookings following a certain format in a .csv file to be quickly imported into Clock PMS.
    To open the screen, go to 'Other' - 'Settings' - 'Import bookings from CSV file'. There you can also download a sample .csv file (opened by MS Excel, OpenOffice, etc.).
    To import bookings successfully, their details must correspond exactly to nomenclature in the system.
    The nomenclature concerned here is: Room type, Room, Meal, Rate, Company. The details in these fields must be identical to those in the system. For example, if a room type in the system is set 'DBL', the corresponding room type in the import file must be 'DBL', too. The nomenclature is case sensitive.
    Allowed values for field 'Status': 'expected', 'checked_in', 'checked_out', 'canceled', 'no_show'.
    Field 'Country' uses the two-letter encoding of ISO 3166-1 alpha-2.
    ! Before importing the file run function 'Test' to verify all data is correctly entered.

Self Service portal

  • PDF Download of invoices
    Guests can now download their invoices in PDF. Reminding them of this option in a post-departure e-mail can save a lot of manual sending of invoices over fax or e-mail.
  • Notifications for new feedback
    Each new feedback left in the Self service portal sends an e-mail to the hotel and creates a ToDo task on the desktop. This allows the hotel to act swiftly in case of negative feedback and solve any serious problems as quickly as posible.

Other optimizations and modifications

  • The mass update of rates has been optimized.
    It now allows updating more than one period at a time, as well as specifying more than one price. For easier successive updates, the screen does not close after each operation. To access the function, open a rate plan and click 'Set multiple days'.
  • E-signature for registration cards
    The function is now also accessible from PMS, not only the Self service portal.
    • Open a booking.
    • Click 'Print Preview' opposite the registration card
    • Click 'Signature'
    • Hand the tablet or the touchpad to the client to sign.
  • City Tax included in the price as a separate charge
    A new setting allows posting city tax as a separate charge. The night price should be reduced so that the tax is actually included in the end night price. To set this:
    • open a rate plan
    • click on the name of the desired rate
    • for 'City Tax' select 'Included, Separate charge'.
  • Charges Summary Report – chart and various level of details
    The report offers three different levels of detail: Revenue Group; Revenue Group/Revenue Category; Revenue Group/Revenue Category/Charge Text.
    There is also a chart showing the amounts per revenue group.
  • Occupancy Forecast – graphic presentation.
    Click button 'Chart' to see a chart of occupied rooms as a whole and by room types.
  • iCalendar
    The iCalendar feed is now included as a separate add-on. To use the feed, the add-on must be activated.
  • Invoice numbers can now be set to have a fixed length (e.g. '0000010523).
    To set the length:
    • go to 'Other' - 'Settings' - 'Tax Settings'
    • Set the desired number of symbols in field 'Invoice number length' (e.g. 10).
    • The invoice numbers will start with as many zeros as needed to observe the requirement.
  • WRS – removed captcha.
    Since the previous update of the system bookings are only created after successful payment. In this respect the captcha is not necessary.

Fixed bugs

  • Cancelled bookings are no longer included in the hotel registry
  • The sorting in Payment Report has been fixed
  • ParityRate – the last upload error message disappears if there are no more errors after it.
  • WRS – Credit Card and Bank guarantee: since these guarantee methods do not generate actual payments, no successful payment e-mails are sent for them.
  • WRS – if the custom text entered for 'Total' was longer, it was displayed only partially.

Clock POS update (4 Sep 2014)

Splitting orders

  • Splitting orders into starters, main dishes, etc.

    The new function allows sorting dishes in an order so that in the kitchen they are printed in the order they must be prepared. The group a dish goes to is indicated as it is ordered, depending on the preferences of the client.

    To set the groups for orders:

    • Go to Management – Order Groups
    • In the field specify the groups separating them with the 'Enter' key
    • Since groups are sorted alphabetically, number them in the order you want them to be printed on kitchen printers, e.g. '1.Starters', '2.Main course', '3.Dessert'
  • To use the groups:

    • Open a new bill
    • Order the items to go into it.
    • You can select different groups, as the need may be. You can add a starter after the main courses have been posted.
    • If necessary, use the hash (#) button to change the group of an item. This can only be done before the order has been sent to the kitchen.
  • New user right for posting custom item/modifier

    Posting custom items and custom modifiers is now only allowed to users who have right - Custom charge or modifier posting' granted. By default the right is granted to all users.

Clock PMS update (21 Aug 2014)

Web Reservation System

  • Bookings created after successful payment onlyThe internal organization of the WRS has been optimized to create bookings only after they have been successfully paid. The bookings made through the WRS are included in the total occupancy of the hotel and shown in booking lists after their successful payment through the respective payment service. This eliminates the necessity to manually cancel bookings whose payments have not gone through. There are also no duplications that used to appear in such cases.
  • Google Analytics

    Subscribers can now have a Google Analytics account activated and get information about the activities of the visitors to the hotel WRS.

    Subscribers who wish to use the feature must send Clock the details of a Google account (a gmail account or another e-mail address linked to a Google account), where they will be sent access credentials to Google Analytics. The activation and setup are performed by Clock.

Self Service Portal

  • Guest Feedback

    This new function of the Self Service portal allows the hotel to get feedback from its guests, identify its strong and its weak sides and improve its product and service to match customer demand.

    The feedback can be seen in detail in the special new report, which also presents the rating graphically.

    The scope of the function will be expanded with the automated after-departure e-mailing option which will be included in one of the next updates.

    Guest feedback is part of the Self Service add-on. It can be deactivated from the settings of the portal.

Channel Management

iCalendar feed - BETA

This new functionality allows synchronizing the availability of the property between numerous portals and Clock PMS automatically.

The portals supporting this option (iCalendar/iCal synchronization) specialise in the sale individual units (rooms, apartments, villas, etc.). They use separate availability calendars for each unit. These calendars can be automatically synchronized with the availability in the system at given intervals. To do this, a URL for each unit must be copied from the system into the respective calendar in the portal.

The function is extremely helpful in the day-to-day management of channels and will also allow the use of more channels and increase the number of bookings.

The URL-s are copied from field 'ical url' in the editing screen of each room.

Presently the functionality is in its test phase and is free of charge. The final release will be charged separately.

Below is a non-exhaustive list of the channels supporting such synchronization:

airbnb.combedandbreakfast.nlflipkey.com
gay-ville.comhousetrip.comroomorama.com
wimdu.com9flats.comerfgoedlogies.nl
weekendhotel.nlamsterdamstay.comamsterdam-bed-and-breakfasts.com
amsterdamapartmentrental.comapartments-unlimited.combe-my-guest.com
thehagueapartmentrental.comhouseboat-rental-amsterdam.comlovingapartments.com
only-apartments.comrotterdamapartmentrental.comcitiesreference.com
holiday-velvet.comholidaylettings.co.ukhomeaway.com
homelidays.comownersdirect.co.uktoprural.co.uk
vrbo.comwaytostay.comvaway.com

Bookings

  • Optimised the operations with Small groups (Families and Friends)

    The handling of bookings for small groups through the WRS or the PMS has been optimized with the use of field Reference number.

    When a small group booking for several rooms is created (Family or Friends), all bookings in the group are given the reference number of the first booking (e.g. #123). In result:

    • Bookings belonging to a small group can easily be identified in booking lists by their reference number (#123).
    • The preview of each booking contains a link, which opens all other bookings in the group and allows editing or cancellation.
    • The reference number can be used as a search filter to find all bookings from a small group and re-send confirmation letters if necessary.
    • Adding a booking to a small group at a later stage is easy. Simply enter the same reference number as for the other bookings.
  • Finding all bookings in a small group is also useful for the fast merging of folios introduced in the previous update (search – multi select – folios – transfer). With these two functions it is easy to join all charges of a group in one folio.
  • Cancelling the folios of more than one booking

    If an entire group cancels, this new function allows cancelling the folios of all its bookings at once:

    • Open a list of bookings (arrivals, expected, advanced search, etc.), find the bookings you need by Company/Event/Reference number or any other criteria you find useful.
    • Click 'Select Multiple' and select the desired bookings. If appropriate, use Select all.
    • From button 'Cancel' select 'Void booking charges'
    • The charges in all open folios which have no payments registered in them will be voided.
  • Housekeeping information in the booking preview

    On checking in a booking a quick check of the housekeeping status of the room is usually in order. For this purpose the booking preview now also shows if the room is ready or not, as well as notes on possible problems with it.

    With this addition, the booking preview gives all the information needed for fast check-in:

    • Charges for nights and city taxes;
    • Required information for the registration cards;
    • Credit card details;
    • Special requirements declared by guests;
    • Housekeeping status.
  • New field in registration cards and registries: Gender

    Go to 'Settings' - 'Registration Card fields' to indicate whether you want the field to be included in your registration cards and registries.

  • Transfer control

    Each booking and company now has a checkbox to allow/restrict transfers from other folios. This applies both to transfers between bookings and companies and between Clock PMS and Clock POS/Golf.

Taxes and Fees

  • City tax included in the price.

    This new option is designed for countries whose legislation requires the amounts of city tax to be included in the invoices issued to guests.

    So far the city tax could be added as a charge separate from the rate prices. Now it can be defined as part of the rate price and not be included as a separate charge and add to the night price. A special section in the folio shows the sum total of the city tax for all nights. The folio printout (both the summary and the detailed one) still shows clearly the city tax amount added to the price of each night.

    The single-row invoice does not show show the amount of city tax separately.

    To define city tax included in the night price:

    • find the rate plan you need
    • select the desired rate
    • in field 'City Tax' select 'included in the price' and Save.
  • Default tax

    The default tax percentage that you specify will be suggested automatically for manual charges, new rates and new charge templates.

    To set a default tax value:

    • go to the main menu – Other – Settings
    • select 'Tax Settings'
    • In field 'Default tax percent' enter the most common tax percentage value. Save.

Reports

  • New report: Booking Pace

    The new report shows statistical data about when bookings are created or cancelled with reference to their arrival dates. The data is shown both numerically and graphically.

    Additionally, the filters for marketing channel and source allow the analysis of various marketing segments.

  • Charges Segmentation Report – by days/weeks/months.

    The information in the report can now be set to show sorted by days, weeks or months. This allows identifying trends in the data.

    Data can also be segmented by booking status so the revenue from expected and checked in bookings can also be analysed.

    The current summary of data as a total amount for the specified period is also preserved.

Clock POS update (21 Aug 2014)

Service (surcharge)

  • Service (surcharge)

    This new function has been designed for establishments that have an obligatory service surcharge. While the service percentage is charged automatically on each bill, it can be removed or modified. This is especially useful for events, where the surcharge may be different from that charged on individual customers.

    To set the service surcharge:

    • go to Management – Tax settings;
    • In field 'Surcharge text' enter the name of the surcharge as you want it to be shown to your clients;
    • In 'Surcharge percent' enter the percentage value of the surcharge;
    • if the service is taxable (VAT, GST, etc.), enter the tax value in field 'Surcharge tax percent';
    • Save
  • To modify the surcharge for a bill:
    • Open the bill and go to the Settle screen.
    • Click '%surcharge' and change or remove the service altogether.
  • Corporate bills

    Clock POS now caters specially for the organization of bills of companies and events, which are usually paid later.

    The new function gives:

    • Clear information about the actual payer of a credit bill
    • Quick access to all bills of a given company
    • Easy control over corporate credit
    • Clear Accounts receivable report
  • Options for transfer and merging all bills into a single monthly (or other) bill are coming soon.

    Clock POS uses the same company database as Clock PMS. This allows the drawing of unified reports and joint credit monitoring across all accounts in a subscription.

    To create a corporate bill:

    • Go to 'Management' – 'Companies'
    • Create a new company or use the search options to find an existing one
    • Create a new folio with 'Add Folio'
    • The folio can be opened immediately (button Open) and charges can be posted. The open bill will appear in a new section ('Company Bills') in the lower part of the tables screen.
  • Menu group colours

    For faster identification of menu groups, each of them can now be set to show in a different colour. This, together with the existing options for assigning icons and various button size, will make the screen even more user friendly.

  • Auto logout

    For devices shared between users, the system can now be set to log out automatically after each order or closing of a bill. The setting only applies to the device where it has been enabled.

    To set auto logout:

    • Go to 'Management' - 'Users'
    • Find the setting in the lower part of the screen and enable or disable it.
  • Restricted transfer to selected bookings

    If the transfer to a certain booking in Clock PMS has been restricted, no restaurant bills would be accepted into its folios. When the room is selected in Clock POS, the booking will be shown together with a message informing of the restriction.

  • New report: 'Inventory Items' for period and export

    The new report shows the items sold in a specified period. It has been designed for the purposes of the back office and the information in it is arranged accordingly. Additionally, it can be exported in a .csv file and imported and used in MS Excel.

Clock PMS update (29 Jul 2014)

Self Service Portal

  • Self service portal:
  1. Guests fill in their own registration cards (existing option);
  2. Guests review their registration cards together with the hotel policy and prices (the existing registration card content);
  3. Guests sign their registration cards.
  • Reception (guests fill in their own details):
  1. Guests arrive at the hotel;
  2. The receptionist finds their booking on a tablet set for this purpose especially;
  3. The receptionist selects 'Functions' - 'Self Service Portal'. The portal open without requesting PIN;
  4. Guests fill in their own registration cards and sign them (as in the first case). With this guests are again shown and recommended the functions of the Self service portal.
  • Reception (details filled by receptionist):
  1. Guests arrive at the hotel;
  2. Receptionists fill in their registration cards in the system;
  3. Guests check their registration cards, hotel policy and prices on a tablet on the spot.
  4. Guests sign their registration cards. This case is a bit slower, since the booking has to be called up both on the reception computer and on the guest tablet.
  • Just signature:
  1. Guests arrive at the hotel;
  2. Receptionists fill in their registration cards in the system;
  3. Guests are offered just the touch pad to sign. (Touch pads are cheap periphery devices that are used instead of a mouse. Often they are also wireless.)

Derived rates

  • Derived rates calculate their prices by adding or subtracting fixed amounts or percentages to/from the prices of a standard rate. They save time and effort and facilitate rate management significantly. Additionally, when used together with rate restrictions, they open more possibilities for building flexible yield management strategies.
  • They require an active Advanced rate management add-on.
  • Find more on derived rates here: //www.clock-software.com/support-center/clock-pms/derived-rates.

Fast bill handling for more than one room at a time

  • The option for merging bills several rooms or a small group can be invoiced fast on check in, check out or at any other moment.
  • Select the desired bookings in any of the search screens (arrivals, in hotel, departures, etc.), select function Folios – Transfer, select the destination folio, specify which postings to transfer (all services or certain revenue groups only), and confirm the merger.

Optimizes registration cards management

  • The changes show users clearly if all the desired fields in the registration cards have been filled, which shortens check-in time at reception.
  • In all booking search screens (arrivals, etc.) this is indicated by an icon.
  • The booking preview also shows clearly whether its registration card has all required attributes.
  • The required fields also work differently. So far a registration card could not be saved before all required fields had been filled. This did not allow partial completion. Now a registration card can be saved without all the required details, but the missing information is clearly indicated.
  • New fields have been added to the registration card options: name, address, phone number, country.

Improved integration with Clock POS

From PMS you can now easily preview the POS bill that has brought specific charges, including the e-signature from POS (see below). In the folio, click the link of the POS bill under which the charges are grouped.

Stricter check for possible duplications of rooms

Room assignment has been optimized to avoid duplication of rooms, which could happen in multi-user mode. Sharing rooms can now only be done manually in the booking edit screen. A booking in a shared room can only be saved after explicit user confirmation.

Minor changes

  • Creating multiple bookings: removed the consecutive number from the guest name. The number is now found in field reference number.
  • Added link for quick opening of all WRS rates in the Rate Availability screen (WEB - WRS - Rate and Availability).
  • Added new setting for default tax value. Currently it is only used for creating charges in ParityRate. Soon it will be introduced in other places.
  • Added filter Source for sorting transferred charges to Charges Summary Report, Charges segmentation report, Closed Folios Summary Report.

Clock POS update (29 Jul 2014)

Editing more than one menu item at a time

You can now bulk edit menu items, which makes it easier to change their menu group, tax value, price, etc. Go to setting Menu items, select the items you want to edit and click Edit multiple. If a field cannot be modified, it will not be updated.

Added a new currency setting

Different restaurants can now set their system correctly. The setting is subject to a new user right for editing currencies and exchange rates.

Stand-alone restaurants

For greater clarity and ease of use in stand-alone restaurants, if there are no hotels linked, the button for selecting rooms and hotel transfer is hidden.

Credit bills

  • Added report Accounts Receivable, which ensures easier tracking of payable bills. The closure report also includes a special section for such bills.
  • The closed bills list also includes a special column for unpaid bills.
  • Currently credit bills are closed in a two-step procedure. First a bill is closed with any payment type (e.g. Other) and then the payment is voided. This ensures that credit bills can only be handled by users authorized to void payments.
  • Added a list of Companies so their credit accounts can be organized. This functionality will be developed further.

Clock PMS update (07 Jul 2014)

Auto Assignment of Rooms

  • New method for auto assignment of rooms.
  • Added new setting, which gives two auto assignment options: one that follows the room sort order and another that assigns rooms randomly.
  • The random room assignment aims to ensure equal wear of rooms in the long run. The setting is located at the bottom of screen Settings – Rooms.

Centralised reports

  • The Charge Summary Report can be run to give information about all accounts in the subscription.
    • The report filters let you select the accounts that you want the report to include. You can select any account that you have access to.
    • You can select accounts of different types: Hotel, POS, Golf, etc. The data will be presented in one common report.
    • The data can be sorted by accounts (Hotel 1 – data, Hotel 2 – data, Restaurant – data, etc.) or it can be summarised for the entire division/region/chain/etc.
    • The new options add to the better integration between Clock POS and Clock PMS. Managers can get the total revenue information without transferring data between different systems.

User rights

  • Special access option for housekeeping staff.
    • Added new right: 'Access: basic', which allows access to all basic functions that are not governed by other rights.
    • Users that are not granted the new right, can only access the desktop and the Housekeeping report. By default 'Access: basic' is granted to all users!
  • Access to reports: new right 'Reports: Statistics reports'
    • The new right governs the access to all reports that contain statistical or financial information about the hotel.
    • The old right, 'Reports: Control reports', governs the access to all control rights, as before.
    • The operative reports are controlled by 'Access: basic' only. By default the right is not granted to any user!
  • Any changes in the online reservation system and the Self Service portal now require access right 'Settings: Update'.

Self Service Portal

  • Guests who pay their bills through the Self service portal can now do so using the WorldPay interface for credit card payments.

WRS

  • The rates that do not match the search criteria are now listed in a hidden section
    • So far the rates that did not match the search criteria (minimum guests, period, or some other restriction) were not shown at all.
    • Now those rates can be shown with link 'See more rates not compatible with your search' for each room type.
    • This gives clients information for possible better offers for longer stays (e.g. 7-day packages). Seeing all the options makes the booking process clearer.
  • The internal logic of the calendar and the room/rate combinations list has been changed so the possibility of discrepancies is avoided and clients get clear accurate information.

Other

  • In response to subscriber requests, the to-do tasks for new bookings and cancellations have been restored.
    • As it turns out, to-do tasks serve the purpose better than plain notifications.
  • Registration cards – the contact details of the booking are auto filled in the first registration card added.
    • Since this is the usual case, the registration cards will be faster to complete.
  • Modified the 'select folio' screen for transfers.
    • The suggestions now include the company selected in the booking.
  • Restored payment sub-type sorting in the Payments report.

Clock POS update (07 Jul 2014)

Charge Summary Report

  • Added new report: Charge Summary Report. It is similar to the one in Clock PMS and can also be run for more than one account.
  • Not paid bills are added to the closure, in a separate section.
    • Voided payments can leave bills unpaid. For full operations control, beside the control events for such cases, we have added a special section for such bills in the closure report.
    • The unpaid bills screen also has a new column for unpaid amounts, so such bills can be identified there fast.
    • More instruments for managing unpaid bills (credit bills) in Clock POS coming soon.

Clock PMS update (23 Jun 2014)

  • Added length of stay, room, price and balance to the printout of the registration card.
  • Optimized the housekeeping screen. Now it allows easy change of room status. Also added a new housekeeping message and warning.
  • The confirmation letter text can now be arranged in paragraphs.
  • ParityRate – the automated transfer checks for overdue payments to confirm that the subscription is active.
  • Notifications instead of To-do tasks. A certain number of operations which generated To-do tasks, which did not require any action by the user, now generate notifications. They are shown on the desktop and are displayed for two days.
  • Fixed the fast booking search. All months are now selectable in the combo box.

Clock POS update (23 Jun 2014)

Bill Transfer

  • Sometimes guests change their mind and decide to pay their bill in cash, although they have initially intended to have it put on their hotel folio. Traditionally this leads to voiding bills and payments in the restaurant and cancellations in the hotel. The function helps avoid such confusion: the room selected at the start is printed in the intermediate bill total, before it is closed, together with booking details and a signature field. If the guests still want to have the bill transferred to their hotel folio, they just sign the receipt. If not, they pay their bill and the waiter closes the bill with the correct payment method. This procedure reduces the possibility of errors significantly and guarantees that all bill transfers are authorized with a client signature.
  • Selecting the room at the start also gives waiters the clients' names, so they can address them personally.
  • The room service works in a similar way: select the room, print an intermediate bill total with booking details, take the receipt to the guest to be signed, close the bill later with the actual payment method the guest has selected.
  • To select a room at the start, use button 'Select Room'. If a room has already been selected, it is replaced by button 'Transfer'. Clicking 'Transfer' opens a special screen for confirming the operation (button 'Transfer') or cancelling it (button 'Detach').
  • The rooms linked to bills are shown in the main screen, in the upper part of the table, together with the name of the booking holder.
  • Function 'Undo' for transfers to the hotel or wrong payment types
  • Sometimes hotel transfers can be errors for a variety of reasons: wrong room number, guest changed their mind, etc. Such errors are usually complicated to correct and may lead to even more errors. The 'Undo' function solves the problem: the charges and the payment created in PMS are automatically voided with a single click.
  • After the 'undo' operation, the bill can be transferred to the correct room or paid in some other way (cash, credit card, etc.)
  • Bills that should have been transferred to the hotel. Similar to the previous case, the payment can be voided and then transferred to the desired folio.
  • The system even allows correcting payments after day end has been run.
  • The charges in PMS are voided regardless of their location at the moment. Even if they have been transferred to another folio, they are tracked and voided.
  • 'Undo' cannot be applied over charges in closed folios. Such cases are resolved in two steps: voiding the charges in the PMS folio and voiding the payment in POS. After these two procedures, the correct transfer or payment can be executed.
  • The function is located in Management – Closed bills – Open bill.
  • 'Undo' requires user rights for voiding charges and payments in open bills and in bills archived by day end. Each voided charge and payment generates a control event, so the operation can be tracked easily.
  • Up-to-date transfer information
  • Clock POS provides accurate information about the location of the transferred charges, even if they have been transferred to different folios. The information includes folio number, booking, booking holder or corporate account.
  • The closed bills list shows a summary, the bill itself shows detailed information.

User rights and Control

By default the new user rights are granted to all active users, which have access to Clock POS!

  • New access right for settings and reports: 'Settings'. Gives access to all options in the right part of the Management screen, including reports.
  • New right for day end and closing other users: 'Closures'. Self closure does not require a special right.
  • New rights and control events for: voiding charges – before and after day end separately; voiding payments – before and after day end separately; adding new payment to bills after day end.
  • Voided charges are included in day end report, so they can be tracked easily.
  • Control events are included in day end reports.
  • Unpaid bills are also included in day end reports. Unpaid bill is a bill whose payment has been voided after the bill itself has been closed. This requires the rights listed above and generates the related control events.
  • Added new report providing detailed information about payments received in a specified period. The report is located in the bottom right part of the management screen. It can be accessed by users with right 'Settings' granted.

Fixed issues

  • For tables with more than one bills opened, the split of quantity only worked for the bill that was currently manipulated.

Clock PMS update (10 Jun 2014)

Printing registration cards

  • The design of the registration card printout has been improved: added logo, guarantee policy and hotel policy.
  • The registration card fields are set in Settings – Registration card – Print form !!! The stay and total amount fields will be added in the next patch.

ParityRate

  • The export now takes into account the restriction for minimum/maximum free rooms.
    • This way the export can be set to automatically start or stop the sale of a rate online when a certain ratio of occupancy of a given room type has been reached.

Users

  • Since deleting a user compromises the integrity of the database, the operation has been forbidden. Instead, users can be deactivated by taking away their access and user rights.

Required payment subtype

  • The Required payment sub-type is a new setting that has been added to make payment sub-types required or optional.
    • This lets clients who rely on payment subtypes ensure their staff complies with the requirement.
    • The setting is located in the payment sub-type setting screen.

Clock POS update (10 Jun 2014)

  • Manual opening of cashier drawer. There are new buttons on the main screen, which waiters can use to force open the linked cashier drawers.
  • There is a new setting which regulates the automatic opening of the cashier drawer when a bill is closed.
  • If waiters use POS on mobile devices, they can close a bill when they are physically away from the cashier. Opening the drawer in such cases could be problematic.
  • A link for swift change of the local printer from the main screen.
  • Different halls / sectors (e.g. main restaurant and terrace) in an establishment, which are located at a distance from one another should also use separate printers. Since mobile devices can easily be used at both sectors, the printer they use should also be changed easily.
  • A new setting for disabling the printing of orders.
  • The setting is intended for establishments where clients are not given a receipt for each order they make. Instead, they can print the entire order (with the new 'Print' button) when necessary.
  • Receipts now print the running total, including the total of previous orders.
  • Modification of payments after closing the bill.
  • For easier correction of errors made on closing bills or on selection of payment type, payments can now be voided and new ones added even after a bill has been closed.
  • The function can be found in the closed bills list: select a payment, void, add a new payment.
  • The bill and the correct payment can be printed out with button 'Print'.
  • Custom modifier added: customer preferences or requirements for the preparation of a dish that have not been included in the standard list of modifiers.
  • Various minor tweaks

Clock PMS update (28 May 2014)

  • Added external links to bookings, companies and events.
  • Added new setting, which can make the sub-payment type required for payments.
  • New upload setting for ParityRate and various minor issues fixed.
  • Various changes in the reports.

Clock POS update (28 May 2014)

  • POS can now be run on 6''-screen devices.
  • Added option for splitting the item quantities in a charge and for printing the running total of a bill.
  • Optimized data sorting.
  • New export of sold items.
  • Various issues fixed.

Introducing Clock POS (15 May 2014)

Clock POS

Introducing Clock POS, designed for restaurants and based on open bills for tables. Clock POS accounts are created within the same subscription as Clock PMS. They share users and access to accounts is managed with special access rights.

  • The tables in Clock POS are organized in sectors and can host more than one bill.
  • The items in Clock POS are sorted in stores and groups and are selected from a menu. When ordered, they can be modified with modifiers and special instructions to the kitchen.
  • Menu items can be ordered in whole numbers or in fractions and paid in one or more payment methods (split payments). Bills can also be transferred to folios in Clock PMS.
  • Discounts are also supported.
  • Items on a bill can be voided and moved between bills. Bills can be split and moved between tables. Closed bills can be voided.
  • Receipts can be printed and reprinted. The system uses Epson TM-i printers.
  • Two types of closures are supported – user and day end.

Clock PMS update (24 Apr 2014)

  • Added more rate restrictions: min/max stay, min/max guests, stop sale, stop for arrival
  • Bookings: added confirmation letter to multiple bookings; added user-defined night price
  • Reports: added report 'Payments in open folios'
  • Various minor tweaks

Clock PMS update (11 Apr 2014)

  • Web Reservation system and Self Service portal: added support of special requests and pictures of rooms as well as room types.
  • Reports: added new filters and optimized the organization of data.
  • Various other minor issues addressed.

Clock PMS update (17 Mar 2014)

  • Folios: allowed modification of data in closed folios.
  • WRS: Optimized the inline integration; added corporate details.
  • Reports: added report Remaining deposits.
  • In conformity with PCI DSS, added option to delete credit card details after receiving payment.
  • Minor issues optimized.

Clock PMS update (10 Mar 2014)

  • Added new languages: French, Hungarian, Macedonian.
  • Introducing Channel Manager (ParityRate) for connection to 100+ online tour agents.
  • Introducing Advanced rate management – rate restrictions, bonus code, guarantee policy, etc.
  • WRS: Added Link Builder for building integration links to hotel website; added advanced rate management for online rates.
  • Self Service portal: Added customization options for blending the portal into the Self Service - customize

Clock PMS update (27 Feb 2014)

  • Introducing inline integration of the web reservation system, which allows it to blend with the hotel website instead of opening in a new window. It offers various new possibilities, deep links, forms, widgets, etc.
  • Reorganized guarantee policies and payment methods.
  • Added access rights for multi-hotel organizations.
  • Added export functions to reports.
  • Added reports Charges Segmentation Report, Credit Card maintenance, Bookings awaiting guarantee.
  • Various other tweaks and fixes.

Clock PMS update (10 Feb 2014)

  • Added search filters for rates in the web reservation system
  • Various fixes

Clock PMS update (31 Jan 2014)

  • Added Check Availability calendar to the web reservation system.
  • Restricted access to the Self Service portal with a required PIN code.
  • Various minor issues addressed.

Clock PMS update (23 Jan 2014)

Introducing guest profiles

  • Identified by email;
  • Collecting information from booking details;
  • Suggested on creation of new bookings;
  • Available in WRS, too.

WRS

  • Added PayPal payments.
  • Accepted credit card types can now be specified.
  • Rates can now be stopped for sale online even if there are free rooms left.
  • Auto fill of regular guest details.

Self Service portal

  • Added settings for activating services in the portal
  • Added hints for rooms used previously by regular guests
  • Add picture upload for rooms
  • Added Rate and Availability monitor for quick search of free rooms and prices.
  • Added TTOO Contracting/Vouchers Add-on for managing TO contracts and vouchers.
  • Optimized the new booking screen
  • Added new filters to reports
  • Extended the trial period

Clock PMS Update (6 Jan 2014)

Self Service Portal

Introducing the Self Service Portal. Functions: Select your room, request period change, request room type change, cancel your booking, fill in your registration card, check your bill, self check in and check out, pay your bill online, etc.

Web Reservation System

Optimization and new functions: interface adapted to mobile devices; booking pre-defined lengths of stay; set required arrival day; changes in rooms gallery

Reports

The newest addition to our Clock PMS family of reports is the Tax report

Other Improvements

  • Integrated POS functions which allow issuing invoices to clients without bookings.
  • Optimized the layout of the group folio

Clock PMS update (13 Dec 2013)

WRS/Self Service Portal

  • Added tasks for procedures linked to the WRS and the Self Service portal
  • Added Captcha to reduce the number of invalid bookings
  • Credit card details for online bookings
  • Upload of pictures of rooms and room types
  • Added function 'Show and book room numbers' to accept bookings for specific rooms
  • Improved compatibility with Internet Explorer and various mobile devices
  • Added advanced booking search with more filters
  • Optimized the registration of new devices
  • Optimized procedures for room blocks and creating and searching events
  • Optimized navigation

Reports

  • Optimized the reports screen
  • Occupancy reports now take into account shared rooms
  • Added report for occupancy analysis
  • Added report for analysis of occupancy and the revenue
  • Added report on transfers
  • Improved reliability of e-mail delivery by using secure Amazon Cloud service

Clock PMS update (8 Nov 2013)

  • Added Demo version with sample data base
  • Added Russian language 
  • Added report Account Receivables
  • Restricted the access to the system settings with a special access right
  • Added single line invoices
  • Added history links to each charge in a booking folio
  • Added advanced translation options to translate the web reservation system, booking confirmation letters, and folio printouts
  • Optimized the Charge Control Report
  • Various minor issues addressed

Clock PMS update (23 Oct 2013)

Web Reservation System

  • Introducing the Web Reservation System: a reservation system that is integrated into the hotel website and lets customers book their rooms online.
  • Added Spanish and Italian 
  • Added a Payments Report
  • Added a live chat option for providing online support to clients
  • Various system optimizations

Introducing Clock PMS (9 Sep 2013)

Introducing Clock PMS

A no-nonsense cloud-based hotel management software, aiming to provide hoteliers with a comprehensive tool for management and day-to-day operations in a property. Main features (to be extended):

  • Bookings
  • Registration cards
  • Folios and invoices 
  • Rates
  • City taxes
  • Corporate clients
  • Events and room blocks
  • 'To do' tasks
  • Other operative functions
  • Control reports
  • Data security
“Easy to use” “Fast, intuitive, and reliable” “Saves a lot of time” “New staff learn it quickly” “Accessible from any device” “Less manual work” “Fewer booking mistakes” “Responsive and helpful support”